
How To: Unravel like lace stitch when knitting
The like lace stitch is such and easy stitch and easy to work with. See how to unravel like lace stitch when knitting, with this easy, up close demonstration by Judy Graham, Knitter to the Stars.

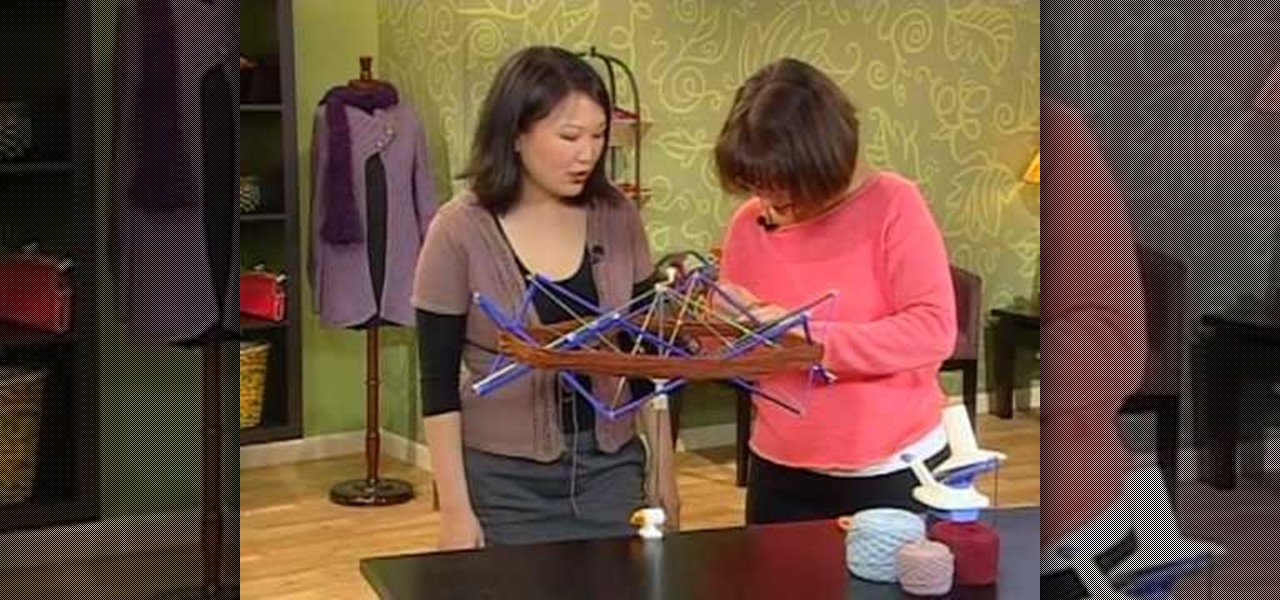
The like lace stitch is such and easy stitch and easy to work with. See how to unravel like lace stitch when knitting, with this easy, up close demonstration by Judy Graham, Knitter to the Stars.
This is an easy, up close, demonstration of one way to unravel your knitting when you make a mistake. By Judy Graham, Knitter to the Stars, who's knits have appeared in movies, TV, and concerts for over 30 years and who has been hand knitting for over 50 years. Watch this video knitting tutorial and learn a simple way to unravel the yarn from a project to undo a mistake in your knitting.
As Desmond travels into the past, he discovers some strange layered memories hidden within Ezio's consciousness. And then as Ezio, you must journey to Roma and confront the forces of the Borgia Pope, who has brought your family under attack.

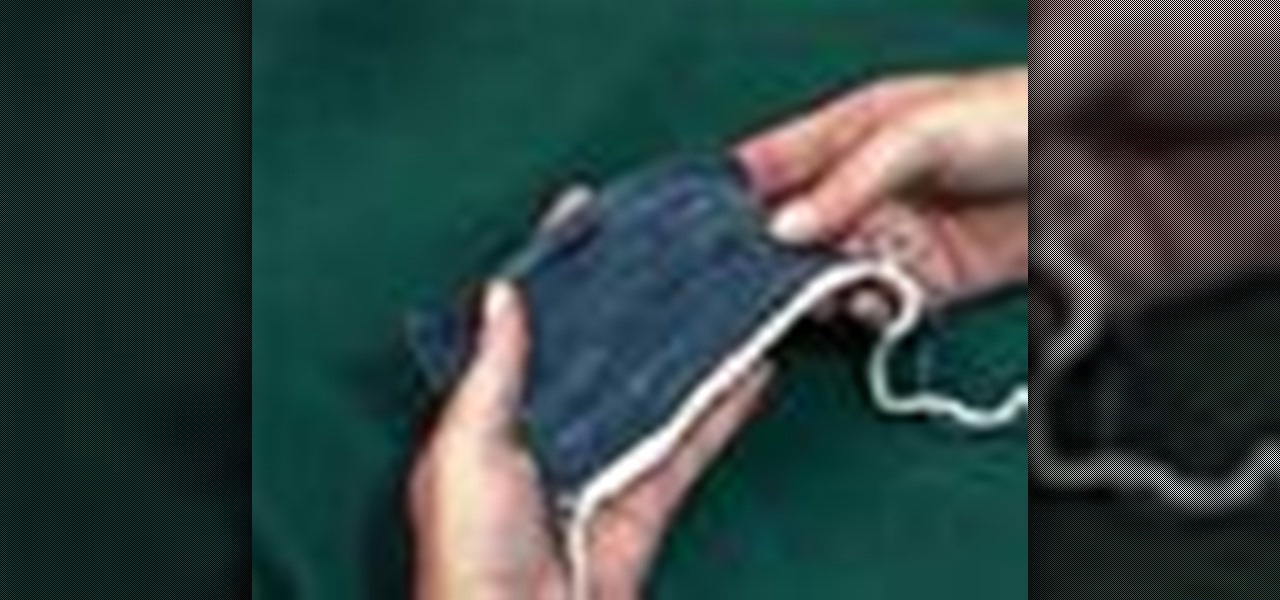
You've finished your very first crochet project! Congratulations! But now how do you tie off the yarn in such a way as to keep the whole thing from unraveling? This video demonstrates a simple and easy technique to finish your project and keep it together.

Check out this anatomy video tutorial series that covers the thoracic limb of an equine. If you're a veterinarian, or want to be one, then you have to watch this educational video on the equine thoracic limb anatomy: bones and deeper structures. Take a dissecting limb and compare it to the cleaned bones for anatomical comparison. This is a great way to learn more about the science of a horse.
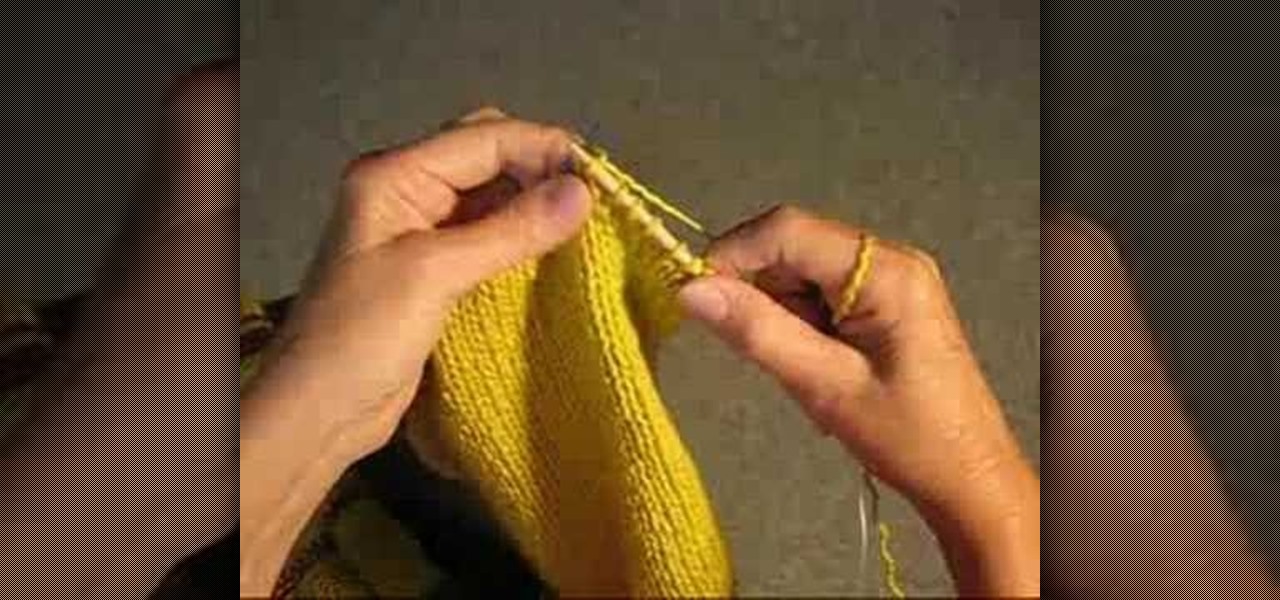
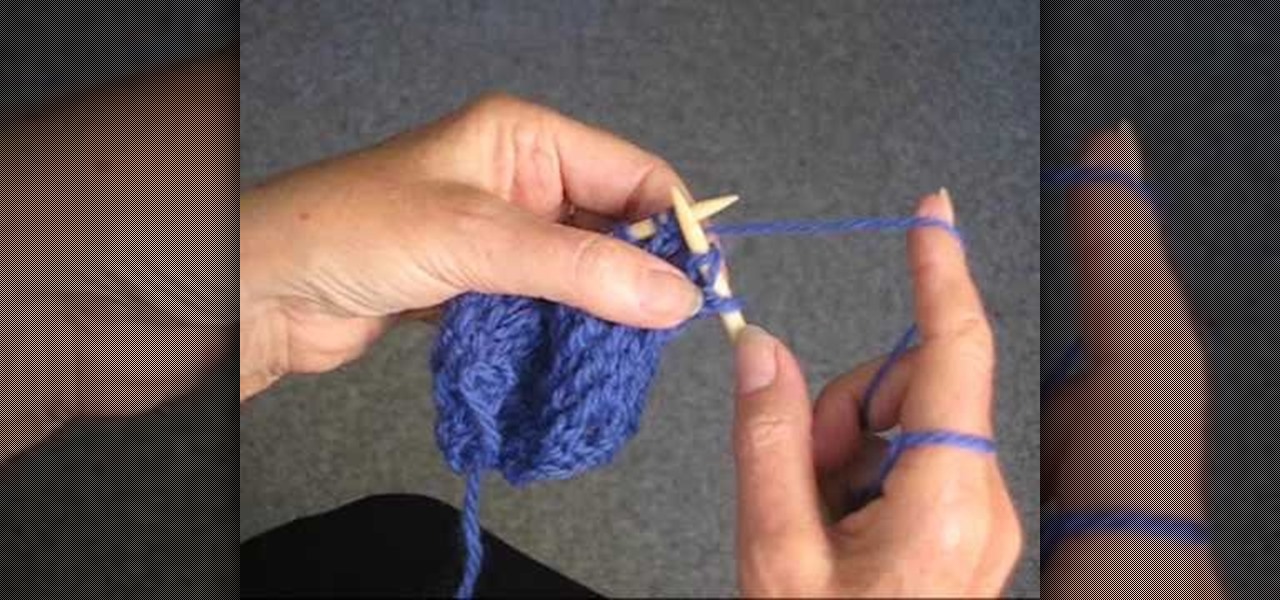
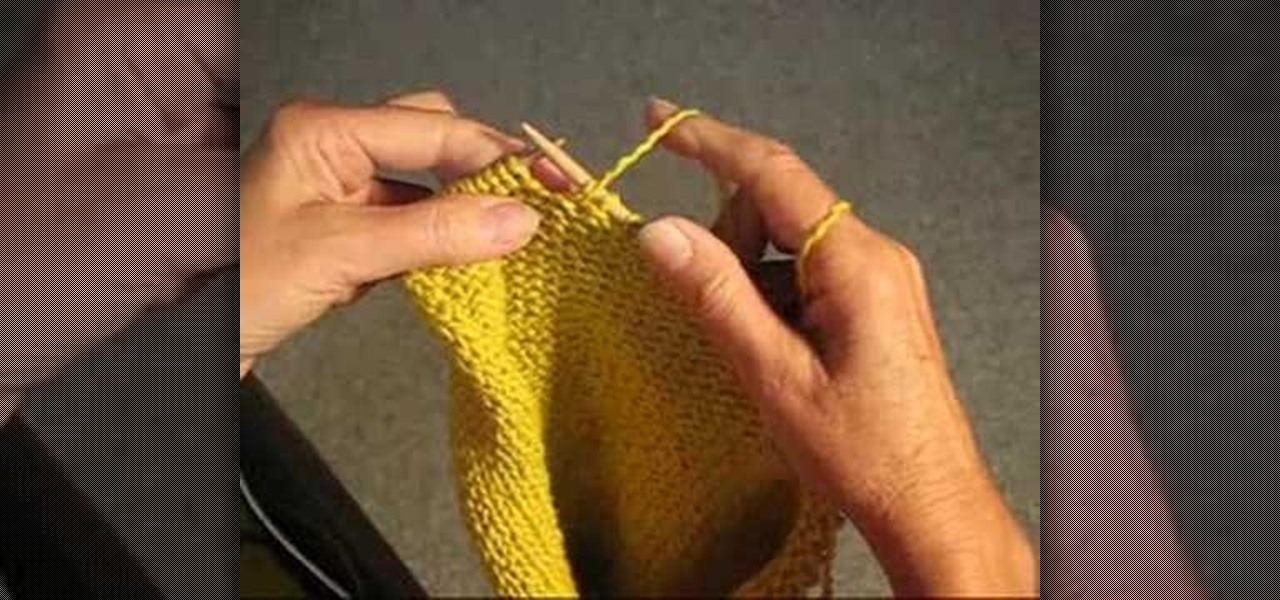
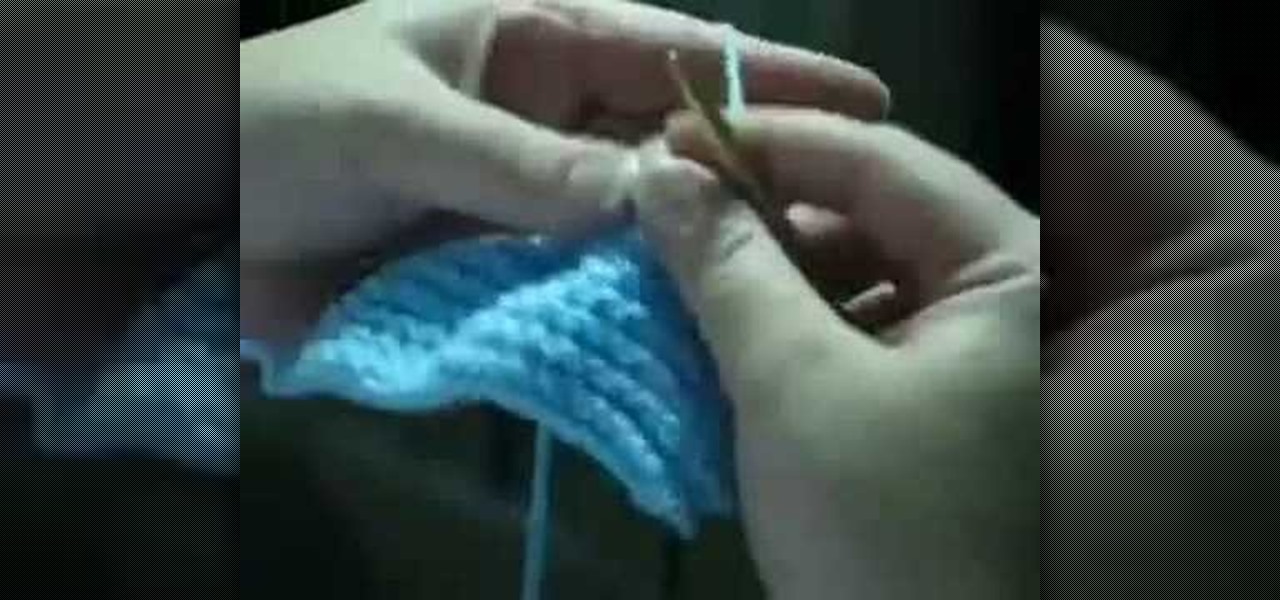
This is an easy, up close, demonstration of yet another way to unravel your knitting when you make a mistake. By Judy Graham, Knitter to the Stars, who's knits have appeared in movies, TV, and concerts for over 30 years and who has been hand knitting for over 50 years. Watch this video knitting tutorial and pick up another simple way to unravel yarn to fix a knitting mistake.

Are you a veterinarian? Want to know more about the hoof of a horse? Well, check out this educational video on the equine thoracic limb: the hoof. After dissecting the horse, take a deep look at the hoof to understand and know the inner science of its anatomy. This is a great tutorial for all veterinary practices, for equines that is.

There will be times when you've finished a project, such as a scarf, that you've already bound off, when you will realize it's not quite as long as you want it to be. You will have to unravel the bound off row, add more yarn, and then start knitting again.
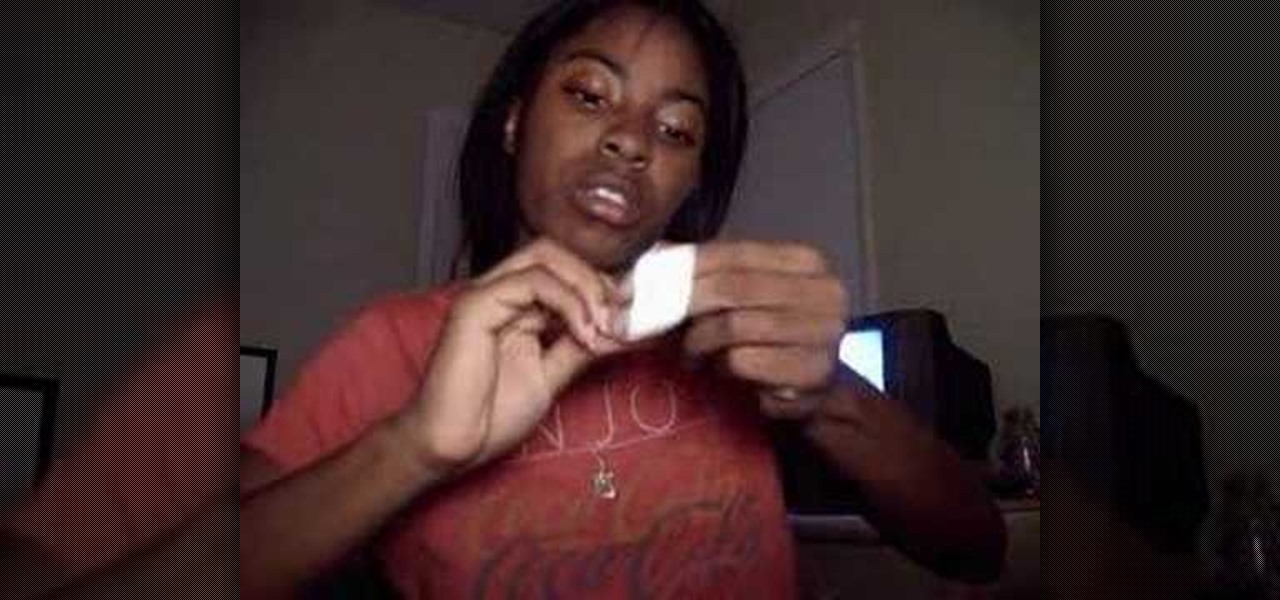
IIDearDiaryII gives instructions on how to make a hair bow out of a feminine pad wrapper in this video. Start with an empty wrapper, making sure everything is pulled out even and straight. Fold the top horizontally, about one inch fold. Then the next fold will be in the opposite direction, also about a one inch fold. Keep repeating the fold until you reach the end of the wrapper. Once done, you will need to make sure all the folds are together and then tie a knot in the middle. Do not unravel...
Mechanical locks have been around since ancient Egypt, with the oldest known artifact found in the ruins of Nineveh, an ancient city in Assyria, Mesopotamia, which is just across the Tigris River from what is now Mosul, Iraq.
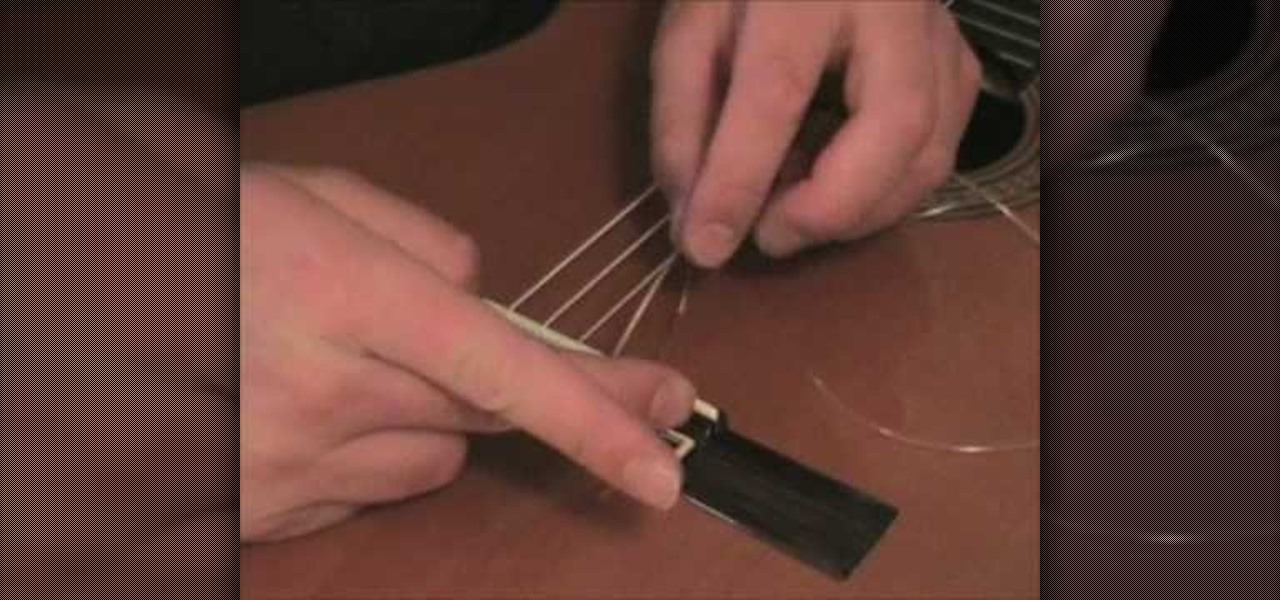
In this Music & Instruments video tutorial you will learn how to change the nylon strings on a classical guitar. Take the peg winder and unwind all the old strings. Then unravel all the strings from the bridge. Make sure the bridge doesn’t fall off. Take a new string and insert the finished end in to the sixth hole passing it from the hole of the guitar towards the end of the body. Then tie a knot and pull the string tight over the bridge as shown in the video. Now pass the unfinished end o...

Use geometry to make an adorable and fun heel klickin' friend using McCormick vertex elements! You will need:
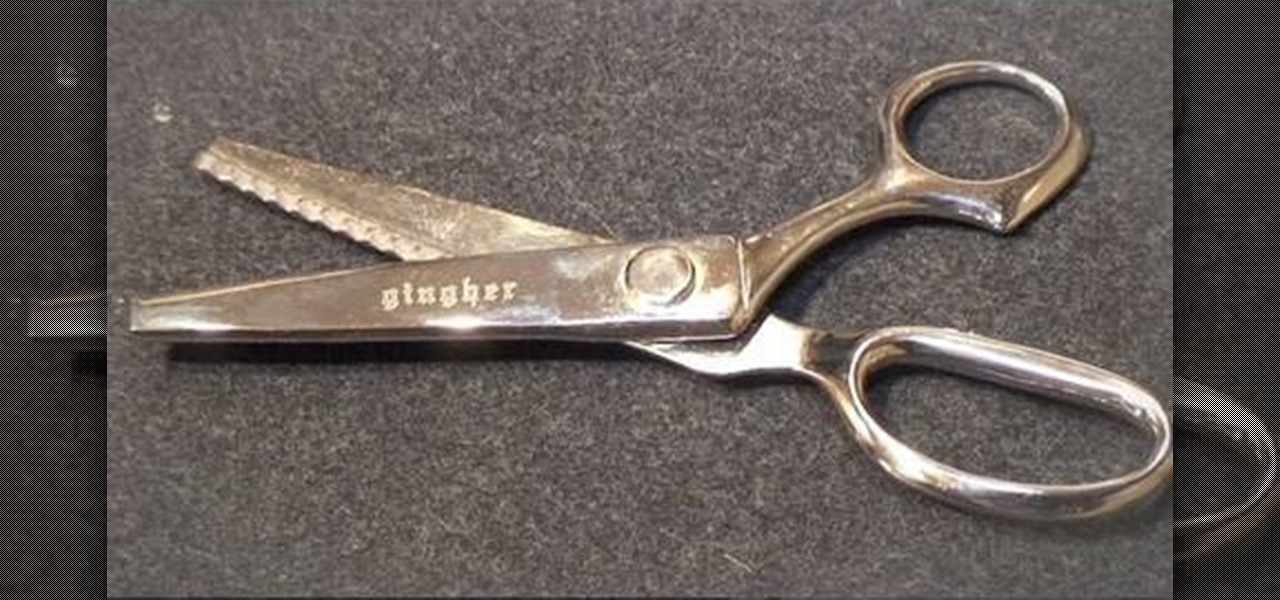
Pinking shears are scissors with an blade that is spiked instead of straight across like a regular pair. Pinking sheers are used to finish off fabric that does not necessarily need a strong hem. They can be used for any type of material that will not unravel - such as silk or charmeuse. This tutorial from Threadbanger will show you how to finish off your fabric by pinking, which is actually incredibly simple to do.
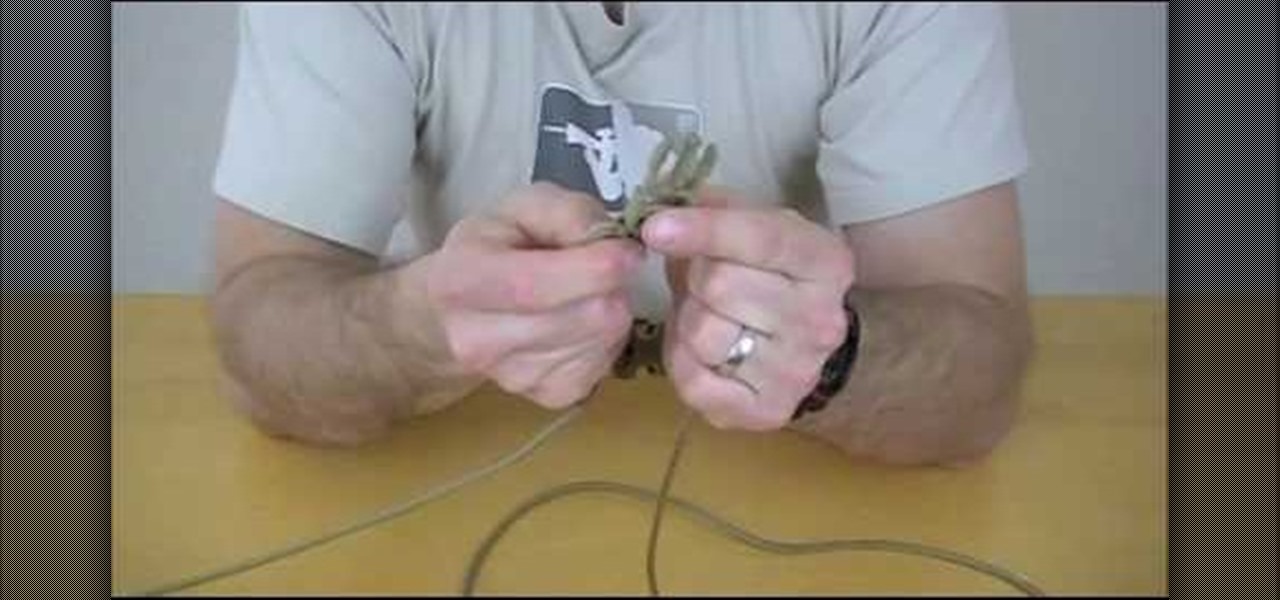
This video will show you how to make a very useful bracelet with 550 paracord. Once you watch this video, you'll have no excuse not to have any paracord on you. You'll always be prepared; after all, you never know what you could use this for! Just follow these steps:
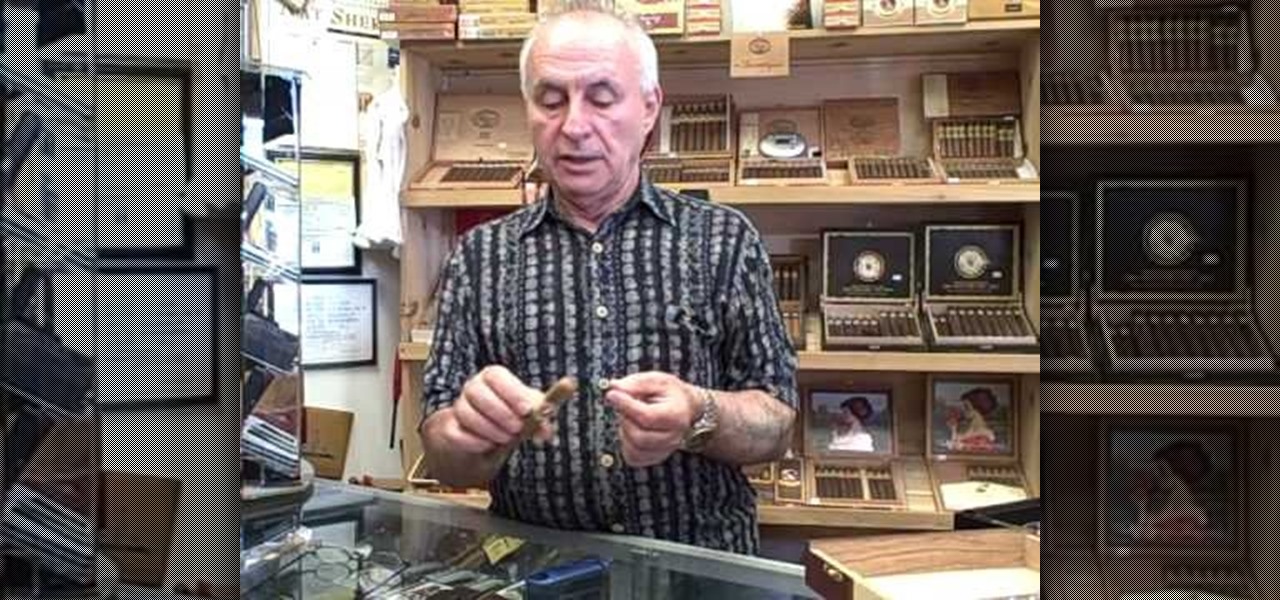
In this Hobbies & Toys video tutorial you will learn how to properly cut and smoke a cigar. Remove the cigar from the wrapper and get a nice whiff of the aroma. Different people use different methods to cut the cigar, like sniffing it or using a guillotine cutter or various other types of cutters. Be careful while doing this so that you don’t cut the whole cap off otherwise it may unravel. Also never take the band off the cigar, especially if you are smoking outside and it is very cold. If ...
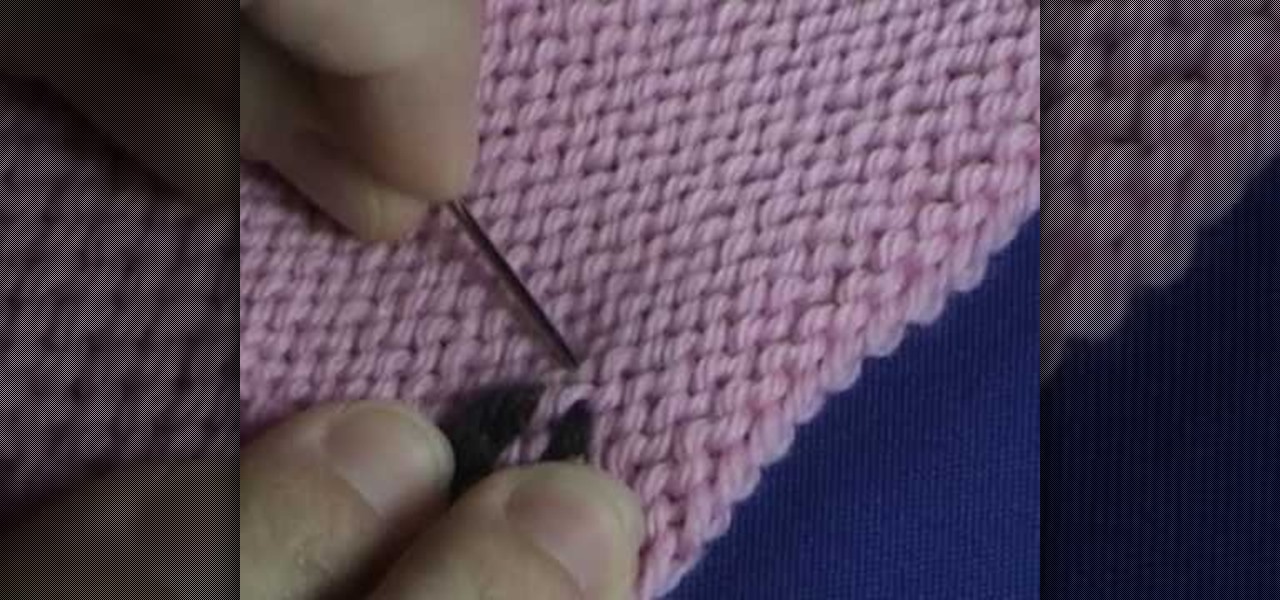
Let the Knit Witch show you how to weave the ends on your stockinette stitch project with this video tutorial. She takes a simple swatch of knitted pink fabric and shows you how to accomplish this simple but useful trick with black yarn so that it can be easily seen. Don't let your yarn unravel or ruin a project by skipping this easy to learn step! She explains it so clearly and demonstrates the technique so thoroughly that you'll be sure to have mastered it in just a few short minutes!

This video by KnitWitch.com demonstrates how to bind off with patterns or in other words shows how to end off two different types of knitting stitches. You want to bind off by working the stitches the same way as if you were still working the pattern. Not only does this video show you how to bind off using multiple stitches, it also shows you how to finish off the last stitch in the row so that all of your finished work doesn't unravel.
How do I stop knitting? This instructional knitting video demonstrates how to do a basic knit bind off. Binding off is the process of taking the stitches off of your needle and securing them so that they don't unravel. The basic bind-off using knit stitches most popular with beginners. This version of the knit bind of is typically used with the stockinette stitch.

This video illustrates to Make Mincemeat Croissants. The ready made croissants are sold in the super markets. Buy one and remove the wrapper around the croissants. Unroll the croissant and cut the pastry into triangles. Pizza wheel can work better than a knife. Cut lengthways to make smaller triangles, spoon some readymade mincemeat onto the pastry. Carefully roll the pastry up from the wide end, rest them on a baking sheet lined with the baking parchment. Try mixing in 1 or 2 tablespoons of ...
Watch this knitting instructional video to learn how to do a knitting provisional cast-on. A provisional cast-on is usually worked in a contrasting waste yarn so the cast-on stitches can be easily removed later. The live stitches are then recovered so you can knit down from that point without the joining line you'd have if you picked up stitches along the edge. There are several provisional cast-ons; this is the one I like the best, because I find it to be the easiest to work. You'll need a c...
Like getting your watercolor papers and paints ready before you unravel a Monet-worthy masterpiece for the ages, knitting takes some prepwork that many beginning knitters may forget about. While it may seem that alll you need are two knitting needles and a ball of yarn, skeins of yarn often need to be unwound and then wound back up into a ball of yarn to make them usable.

In this how-to video, you will learn how to tie a slipknot on micro braids. First, braid the hair to the desired length. It is good to braid it close to the end, unless the hair is permed. Now, hold the braid and fix it so that it can be nice and neat. Take a few strands of hair and tie it around the rest of the hair. Now loop it around the finger holding it and put your thumb inside. Make sure to tie it up. Do the same thing about three or four times. Once this is done, take part of the same...
Take a look at this instructional video and learn how to wrap your bicycle handlebars. The direction you take in rolling the tape is extremely important. You'll want to start on the bottom of the drop, work your way up around the brake shift lever, and all the way to the top. By going through bottom to top, you'll get a smooth transition as your hand slides down the bars. If you roll it in the opposite direction, your hand sliding down the bar will unravel the tape and wear it out prematurely.
This is an instructive guide to making a trigger operated paper gun. You will need an A4 sheet of paper. Start by rolling the sheet of paper horizontally (breadthways) and as tightly as possible, . Once the roll is completed, attach 3 lengths of sticky tape at each end and the middle, so it doesn't unravel. Then proceed to wrap another sheet of A4 paper around your existing roll, making sure that is as tight as can be so it is strong and sturdy. Again, attach sticky tape at each end and the m...

Whether you're a celebrity or someone with something to hide, Facebook allows you to keep your "friends list" private so you can protect the identities of your Facebook friends. But it only kind of protects them.
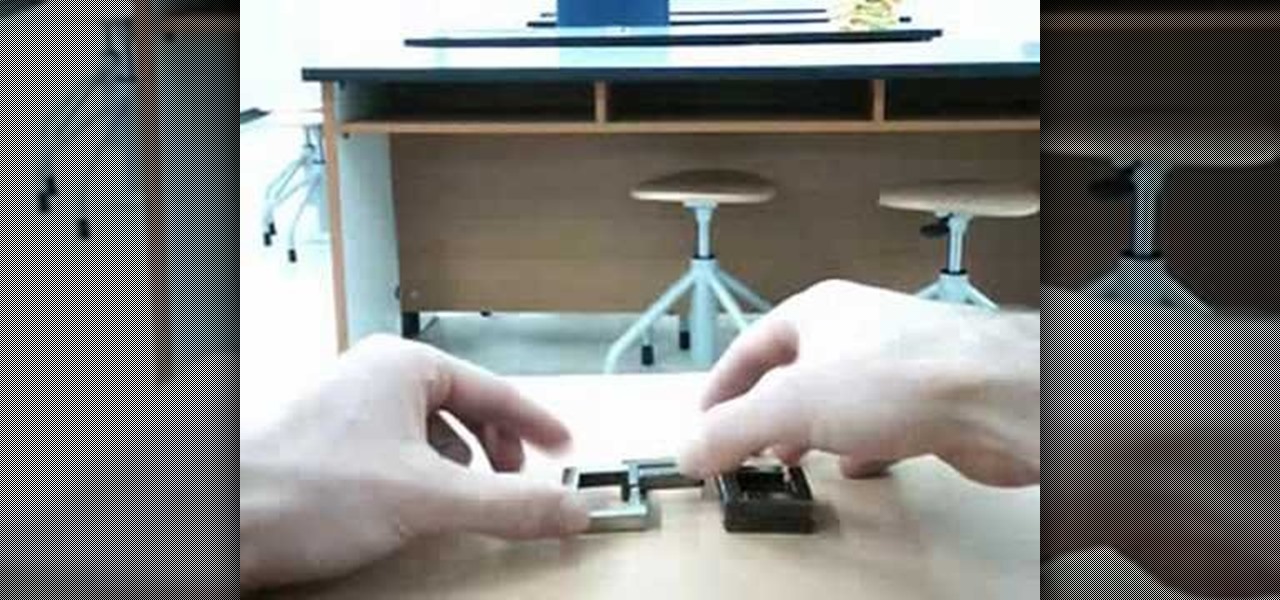
Learn how to solve the Hanayama Cast Quartet metal puzzle. Hanayama cast iron puzzles are the perfect solution to being bored. This video tutorial will show you exactly how to solve this mind boggling Cast Quartet puzzle, which is rated a 6 out of 6 in difficulty by Hanayama.
Yo-yo's are not just for kids anymore. Check out this funky tutorial and learn how to yo-yo like a pro. You can do way more than just pull your yo-yo up and down, with a little practice you will soon be performing tricks and spinning your yo-yo all over the place!
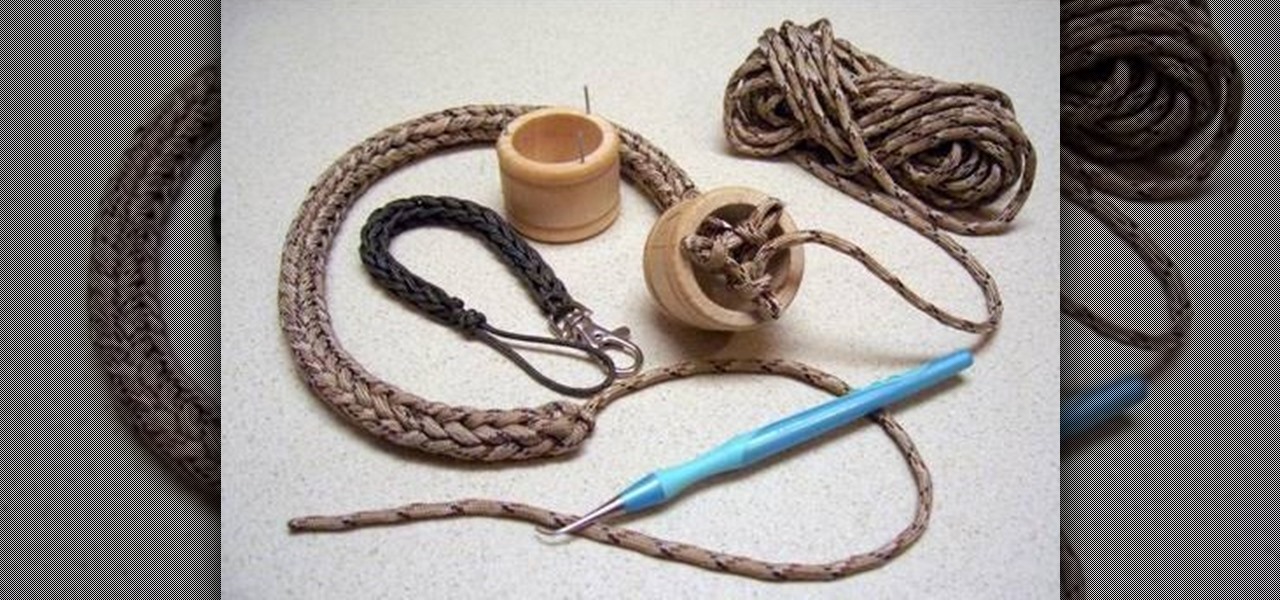
This short video shows how to get started with 550 paracord and a 3 peg/nail knitting spool made from a wooden napkin ring and 3 nails. This just show you how to start. Follow these steps: After the initial wrapping of the nails with the paracord at the bottom of the nail, you take the working end to the next nail above the cord that's wrapped around it, use a hook of some type to lift the lower cord up and over the top cord and the nail. Continue from one nail to the next, up and over with t...
Puzzle games are great at giving your brain a workout while keeping things fun and killing time. They stimulate your noggin as you strategize and plan your next move, whether it's to keep your character from getting killed, or to get that special item to finally complete your collection and unlock a new feature within the game.
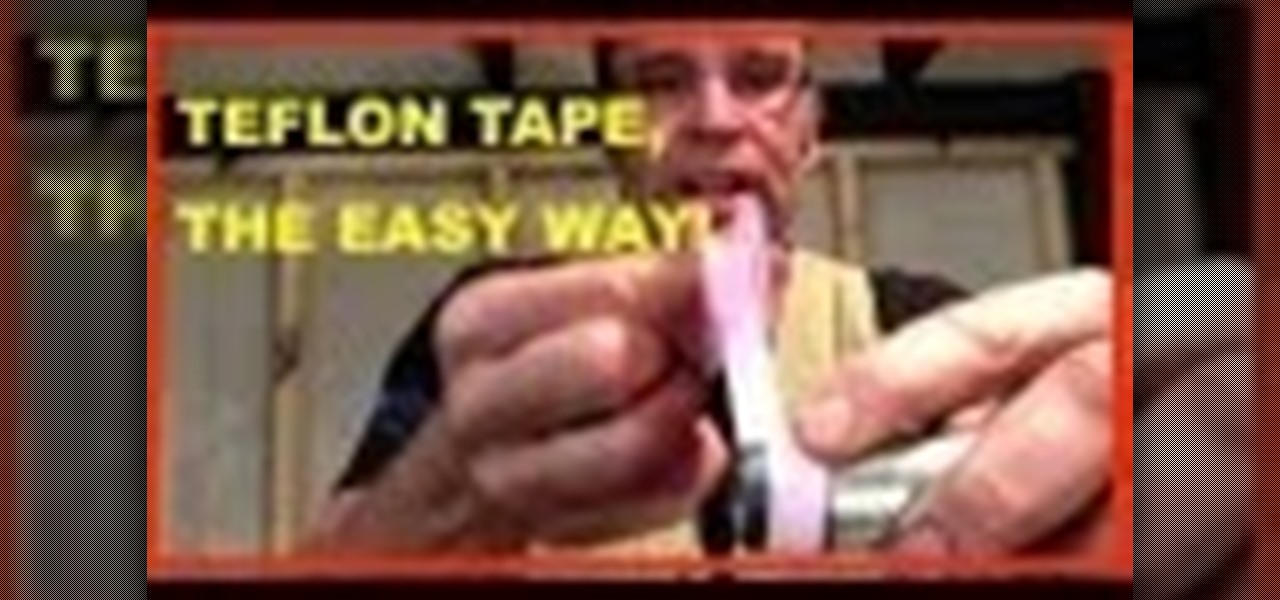
How to use Teflon tape for plumbing applications. I know it sounds simple but there are a few tricks to applying the Teflon tape. Teflon tape is also known as PTFE Tape.
Paper towels are really cool. I like having them around for quickly cleaning up messes and what not. However, I do not have a stand or something similar for my paper towels, so it can sometimes get a bit taxing to pick up the roll and unravel it every time I need a towel.

Salad spinners are one of the more divisive kitchen tools out there. On one hand, they're incredibly easy, efficient, and useful. On the other hand, they're a single-use tool that takes up a lot of space.

Assuming that you're not going to knit a sweater and celebrate New Year's Eve with Ryan Seacrest and Jenny McCarthy on ABC's “New Year's Rockin' Eve," it's a pretty safe bet to say that you're probably going to consume alcohol—a considerable amount of alcohol.

Maternal infection with genital herpes, or other pathogens, during early pregnancy could increase risk of autism, or other neurodevelopmental disorders, says a new study.
Sometimes the best way to hide things is in plain sight. Whether you're trying to sneak some medication past security at a concert with a zero-tolerance policy, or you're just worried that maybe Omar comin', YouTuber MrGear has a clever way to put your mind at ease.

Sushi rolls, known as makizushi in Japanese, are only limited by your imagination—and your ability to roll them neatly, of course. While it may seem like a lot of effort, rolling sushi is a snap if you have the right tools.
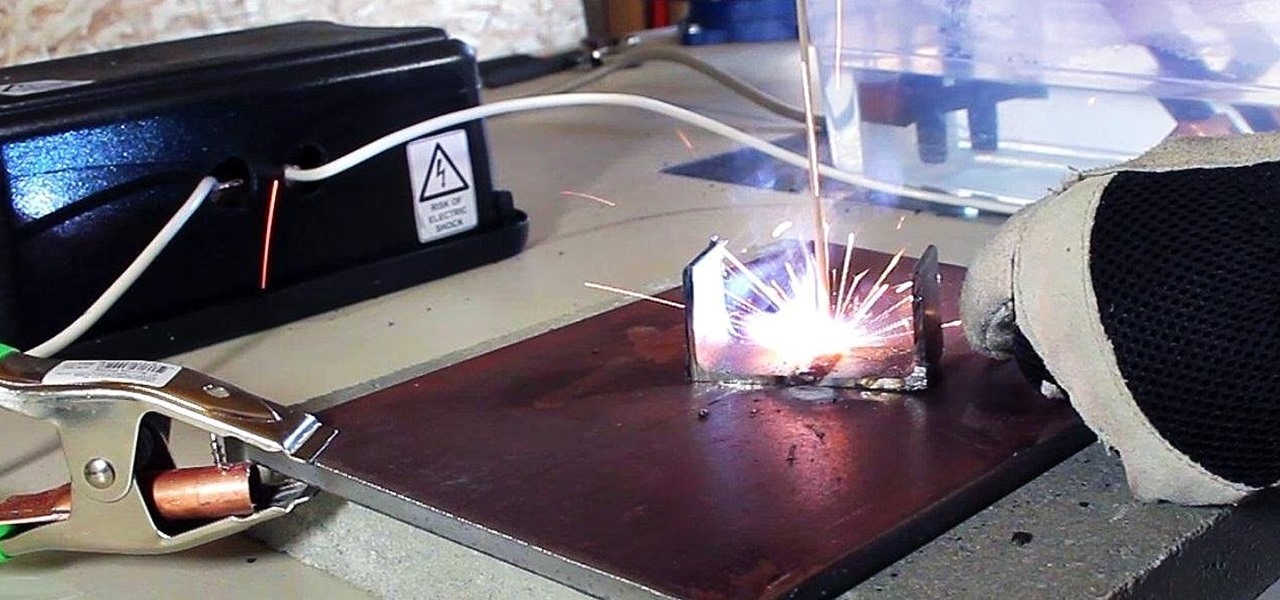
In a previous article, I demonstrated an Arc Welder made using parts from old microwave ovens. Video: .

Whether or not a microbe is successful at establishing an infection depends both on the microbe and the host. Scientists from Duke found that a single DNA change can allow Salmonella typhi, the bacteria that causes typhoid fever, to invade cells. That single genetic variation increased the amount of cholesterol on cell membranes that Salmonella and other bacteria use as a docking station to attach to a cell to invade it. They also found that common cholesterol-lowering drugs protected zebrafi...
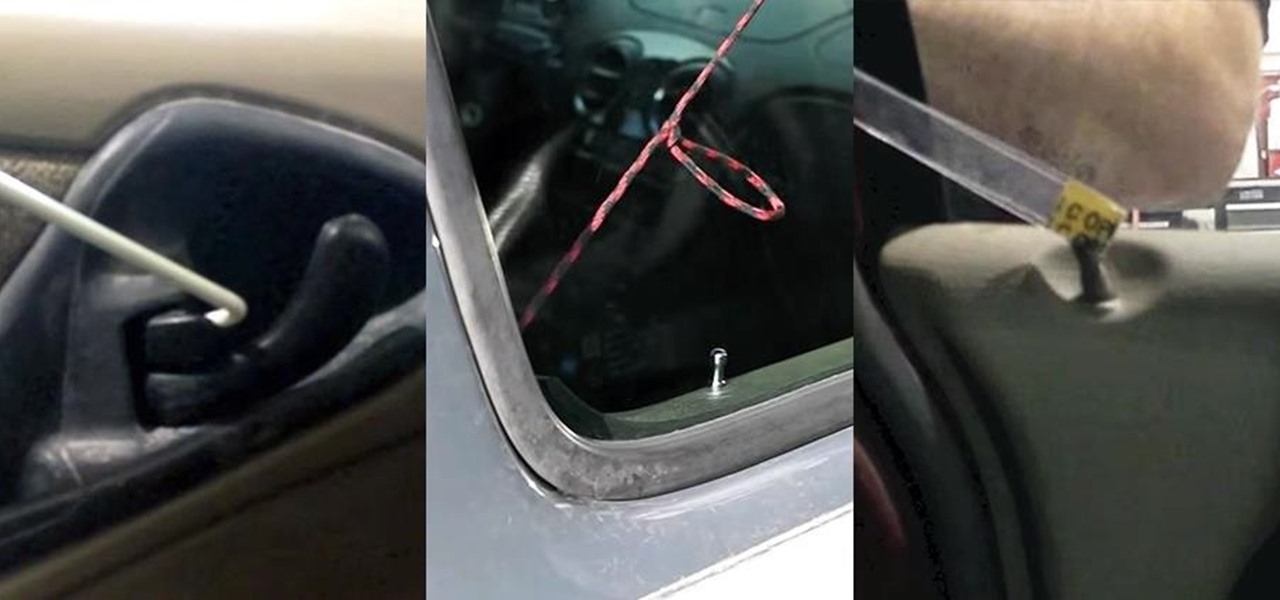
Locking your keys inside of your car is frustrating, to say the least, especially if you're in a hurry to get somewhere. You can always call AAA roadside assistance or a locksmith, but you'll probably have to fork over some money, as well as wait for them to get to you. You might even get towed.
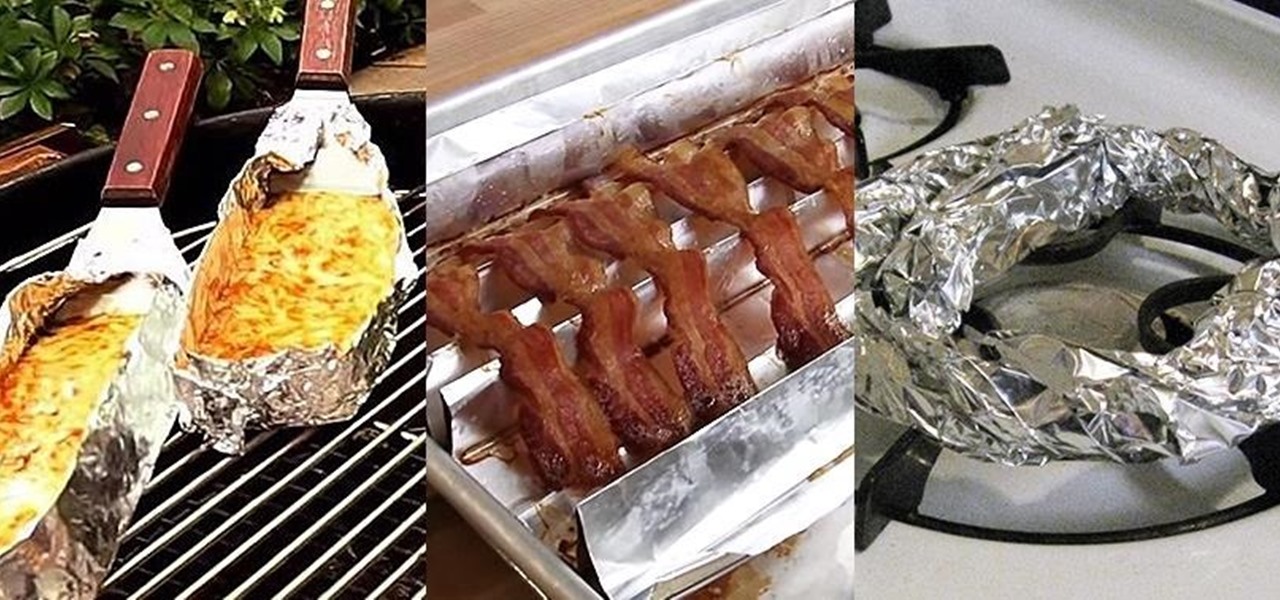
Aluminum foil is one of those things that every cook, experienced or just starting out, has in their kitchen. And while we may think we know how useful this handy material can be, there are hundreds of ways we could be utilizing tinfoil to make our lives a whole lot easier.