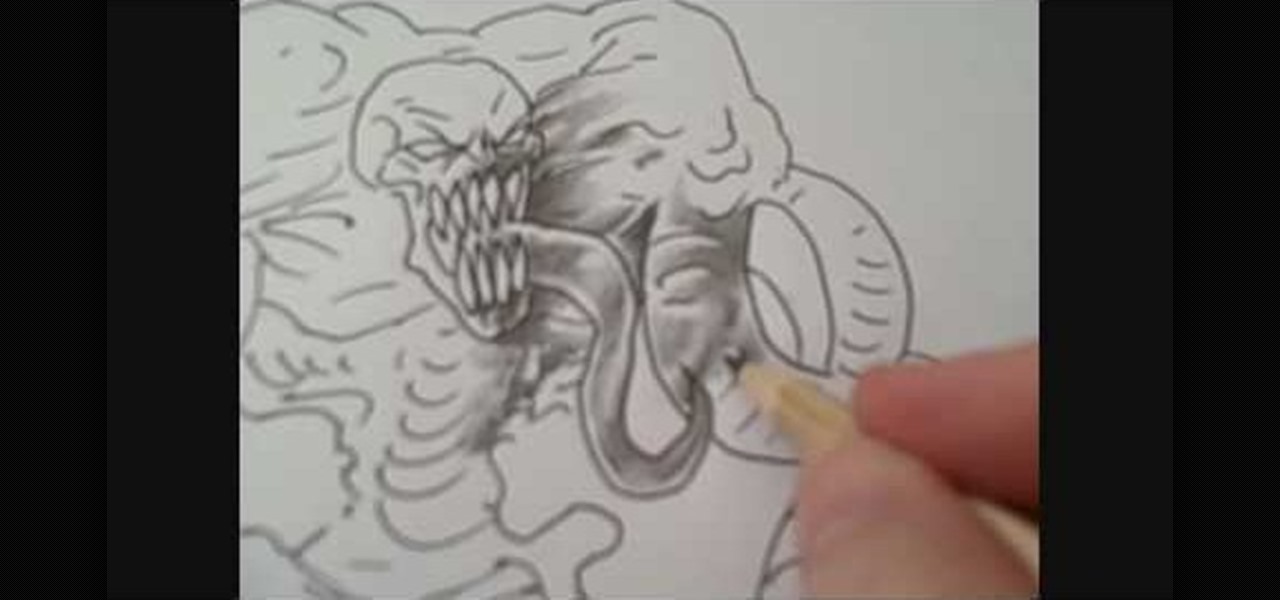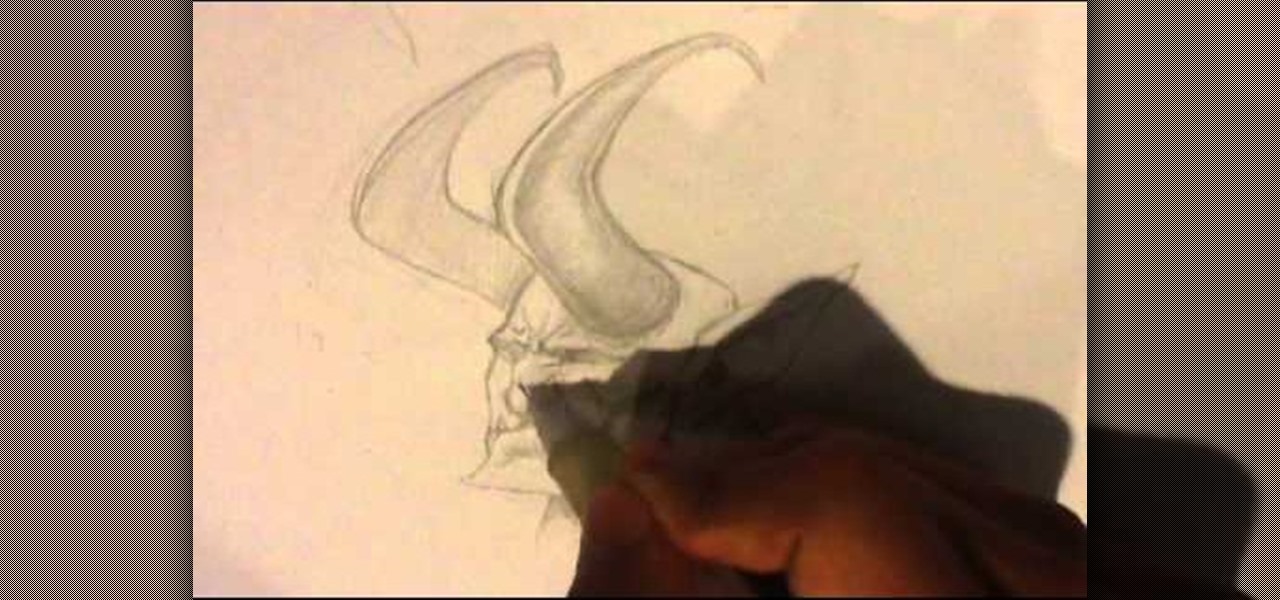
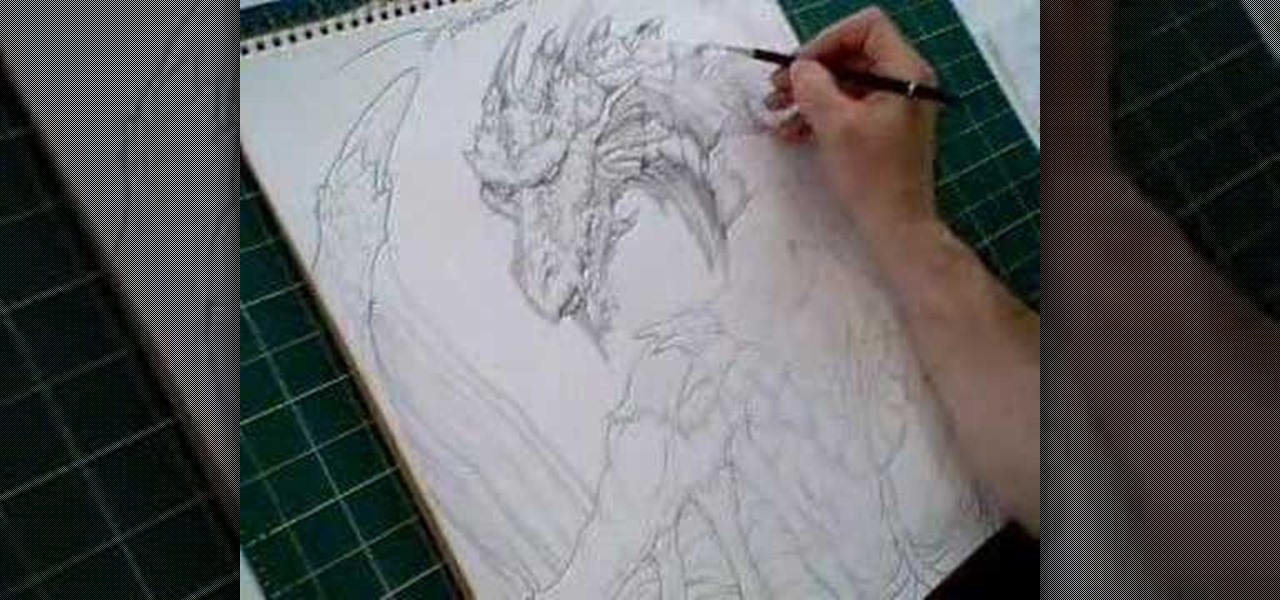
How to Draw the Devil. This is the second video in a series. I draw the devil in the first video. in this video I'm going over shading techniques that i use. Easy things to draw are sometimes complicated. Drawing sites teach a lot. I talk all the way though this.

When you think of martial arts, only one name comes to mind, and no… we're not talking about Steven Seagal or Chuck Norris. We're talking about Bruce Lee, the epitome of martial arts. Not only was he the best martial artist known to man, he was also an accomplished actor, instructor, director, producer, screenwriter, and philosopher. But there was one thing he wasn't. An artist. Okay, he was a "martial artist", but he wasn't a visual artist, master of the pencil, kind of the drawing world… bu...
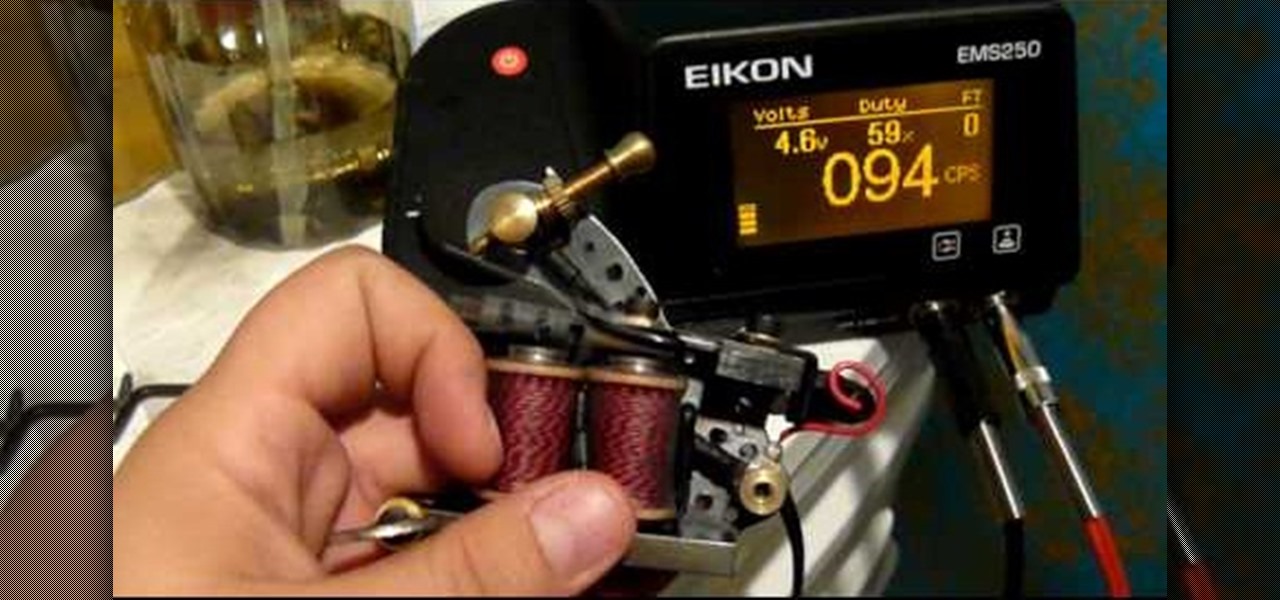
This video shows you how to setup a tattoo machine to do lining and shading. Make sure the armature bar and front spring has about a 4mm gap. Once that is on, set it to about a 30-degree angle. Next with the contact spring you need to set the armature bar and the tool should be set to about 2mm. A good way to check this is with a dime. Now as long as the tattooing machine runs and sounds correctly you are all set to go. For shading, the throw on the armature bar should be 3-4mm--just a little...
Need a little help on your shading technique? This tutorial on shading and shadowing techniques is hosted by Ed Beard, an internationally reknown fantasy artist known for his published works in Magic the Gathering and Tolkien. This video demonstrates how to choose a light source when shading, the values of dark to light, and how to ultilize shadows to embelish the three-dimensional depth to your drawing.

This instructional video demonstrates how to add shading to your Warhammer miniatures. With a small paintbrush, add thin washes of shading over the basic fill coats. In this video, the painter adds passes of paint on top of the manufacturer's Scab Red. Media extenders can keep paint from drying. When painting Warhammer characters, careful coats of shading color illuminate the details of the original figurine.
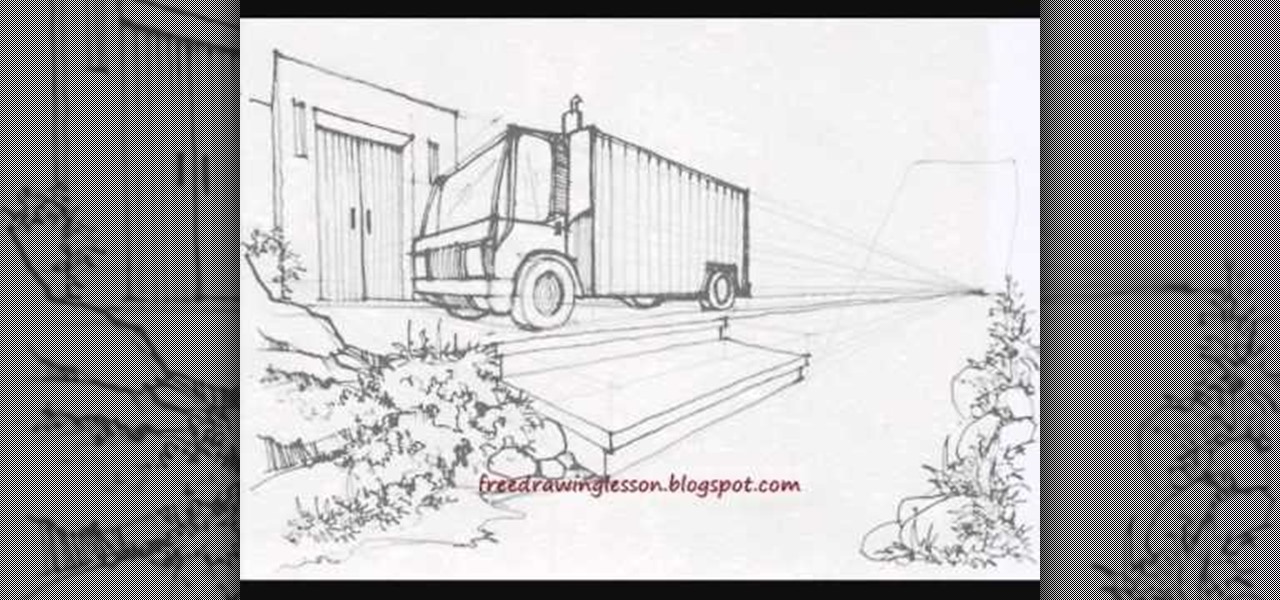
Sometimes the most common, everyday subjects are also the best for practicing basic drawing methods like drafting and shading and contouring. Just take the truck, people, bridge, and garden in this drawing tutorial, for instance.

See how to use the contour shading feature in Mental Ray to create basic inking or schematic rendering and how you can mix it with standard shaders, ambient occlusion or ink&paint shader to achieve better results. Whether you're new to Autodesk's popular modeling software or a seasoned 3D artist just looking to better acquaint yourself with the application, you're sure to be well served by this video tutorial. For more information, and to get started using Mental Ray countour shading in your ...
In this tutorial, we learn how to add 3D effects and shading to graffiti letters. To start, you will draw a simple letter with a pencil. Then, take one point under the letter in the middle and draw a darker outline. Next, you will draw an outline around the first outline to make it look 3D. Next, you will shade in the area in the middle of the letter and anything that is in between the first letter and the second. After this, you will add in lines and additional detailing to make the letters ...
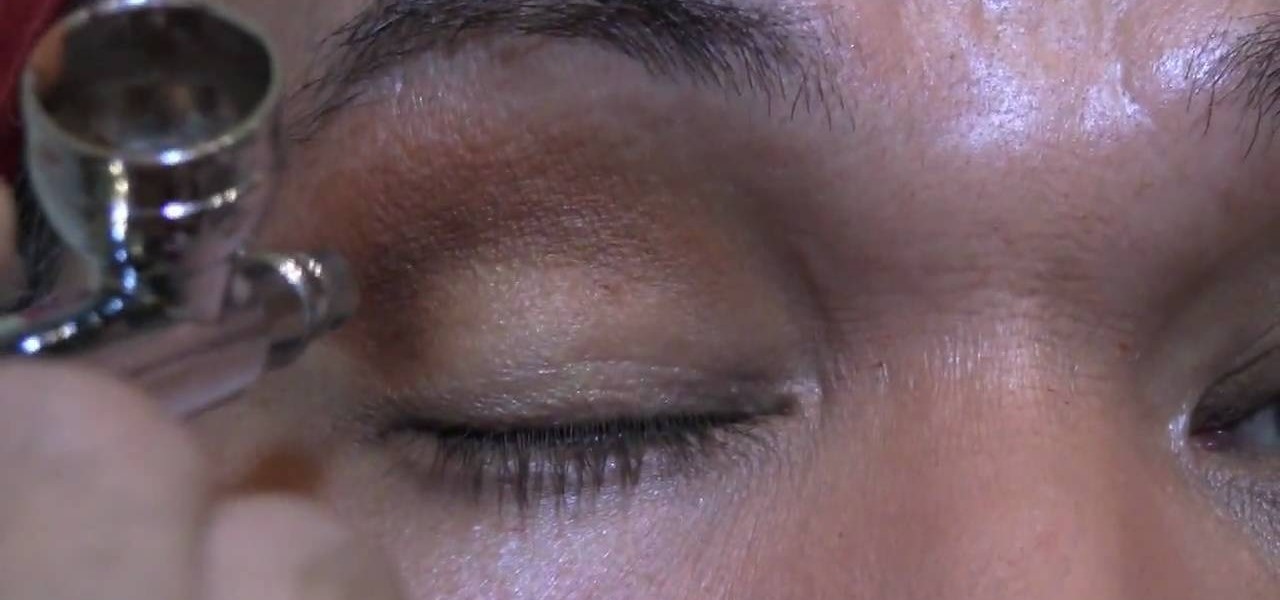
Learn how to do eye shading using an airbrush machine! This skill is for the more advanced airbrushers. Beginners, be sure to check out Koren's other videos on airbrushing basics before you start this process. Those looking to try your hand at this, practice makes perfect!
"Miki Falls" manga creator Mark Crilley demonstrates his drawing techniques by filming as he shades part of an actual final page from the 3rd book in his manga series, "Miki Falls: Autumn"
Borders and shading add aesthetic presentation to your spreadsheet data. See how to create borders and shading in Excel.
This tutorial covers using the gradient mesh to achieve some simple shading in Illustrator. Use the gradient mesh tool in Illustrator for shading.
In this clip, you'll see how to use sub-surface scattering inside modo, learning how to create a simple skin shader for a goblin creature using diffuse color and a custom procedural map to control skin roughness and bump effect. You'll also see how to create a simple but efficient lighting setup using two point lights and one area light source. Whether you're new to Luxology's popular 3D computer graphics application or are a seasoned digital artist merely on the lookout for new tips and tric...
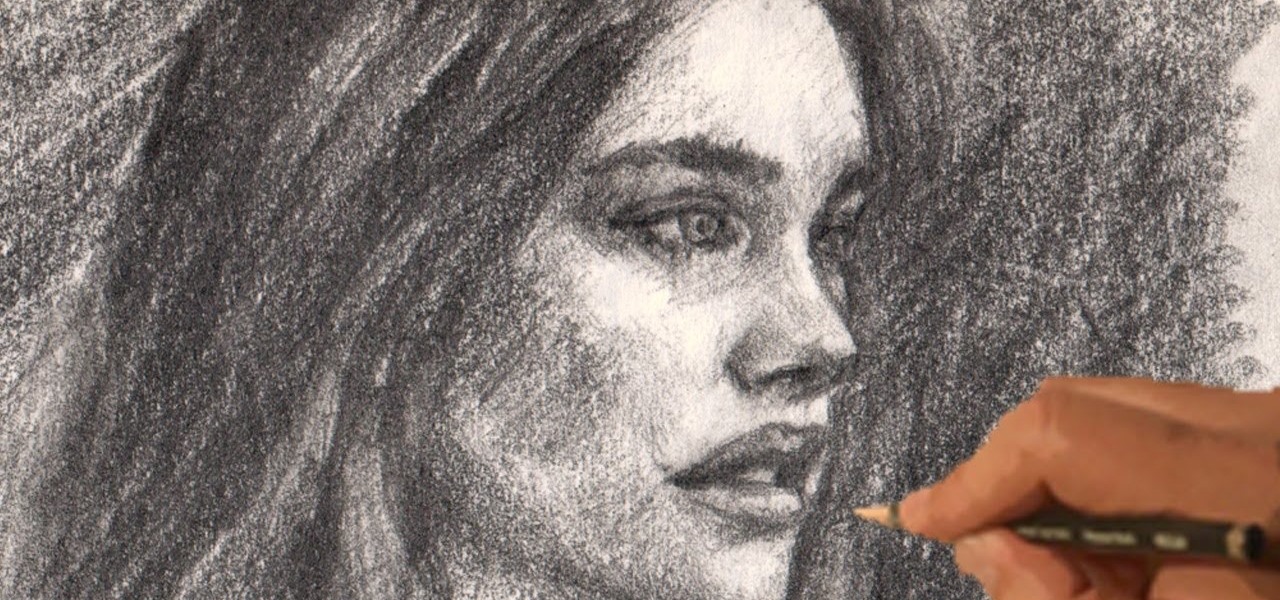
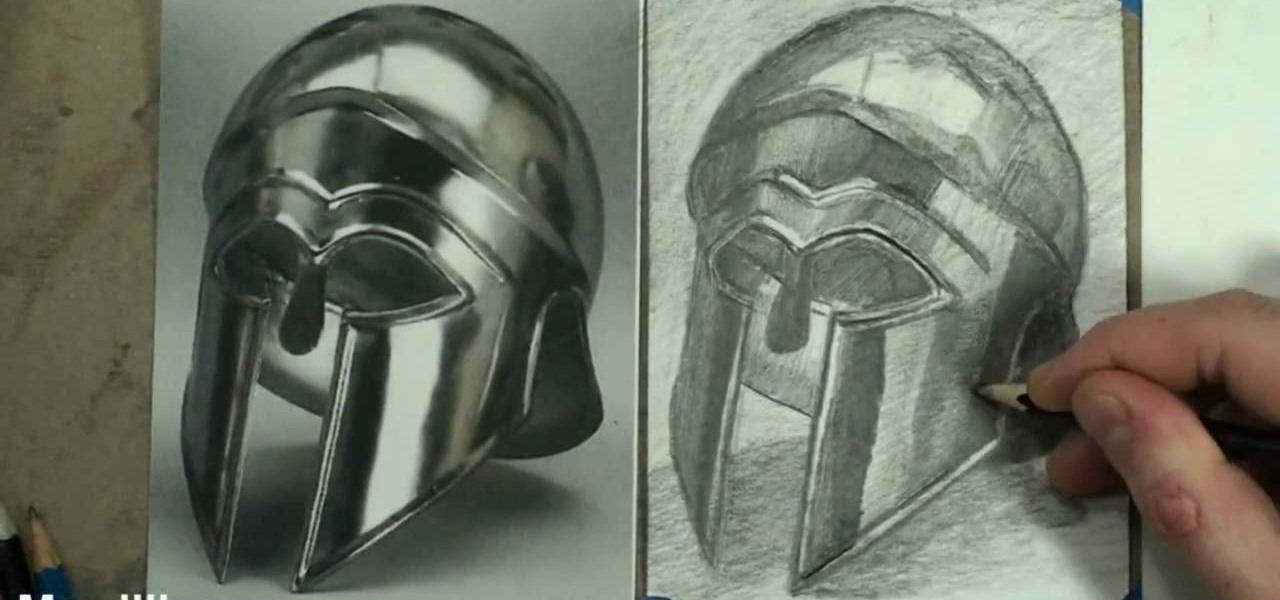
This drawing demonstration of intermediate difficulty features the sketching, shading, and rendering of a portrait of a human face. With copious instructions on creating effective light sources and other technical aspects, this video is indispensable for the intermediate artist.
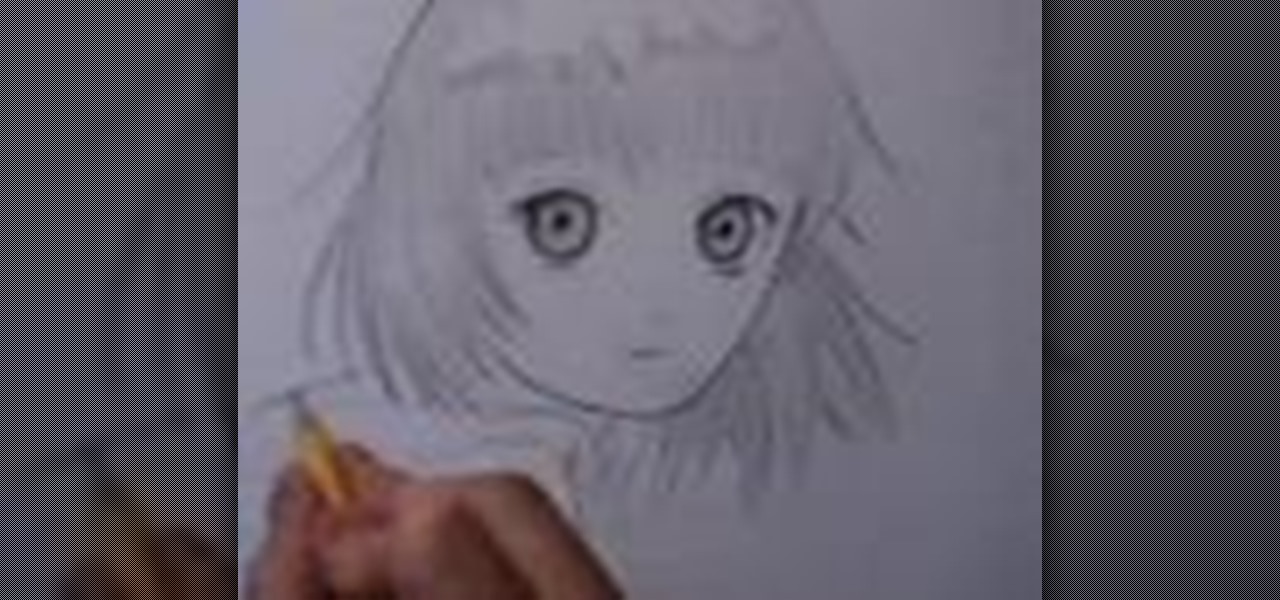
"Miki Falls" manga creator Mark Crilley presents a tutorial on drawing a girl in the manga or anime style, this time focusing on shading techniques. Watch this video to learn how to shade a drawing of an anime or manga girl.
Go beyond the traditional 3D workflow to an immersive creative experience with the software Modo, created by Luxology. Modo is the next evolution of 3D modeling, painting and rendering for Mac and PC. Modo includes 3D sculpting tools, animation and network rendering, and advanced features such as n-gons and edge weighting.
Go beyond the traditional 3D workflow to an immersive creative experience with the software Modo, created by Luxology. Modo is the next evolution of 3D modeling, painting and rendering for Mac and PC. Modo includes 3D sculpting tools, animation and network rendering, and advanced features such as n-gons and edge weighting.
Shading, whether it's for eyeshadow, blush, or bronzer, is one of the indispensible makeup skills you'll be using for the rest of your makeup doing career.
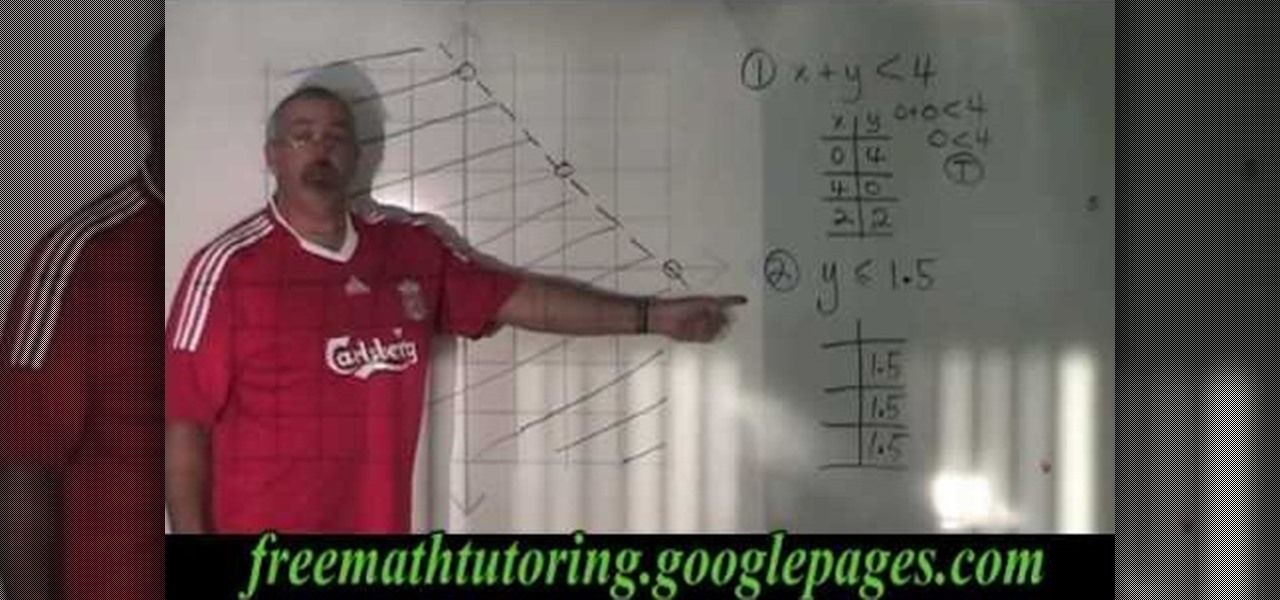
In this video the instructor shows how to shade a system of inequalities. He says that shading a system of inequalities is similar to shading a single inequality but in the former case you tend to shade more than one inequality in the same graph. He shows how to do that using an example set of inequalities and plots the lines on the graph. He uses dotted lines for lesser than or greater than inequalities and uses straight lines for inequalities which contains the equal to symbol. Now he shade...
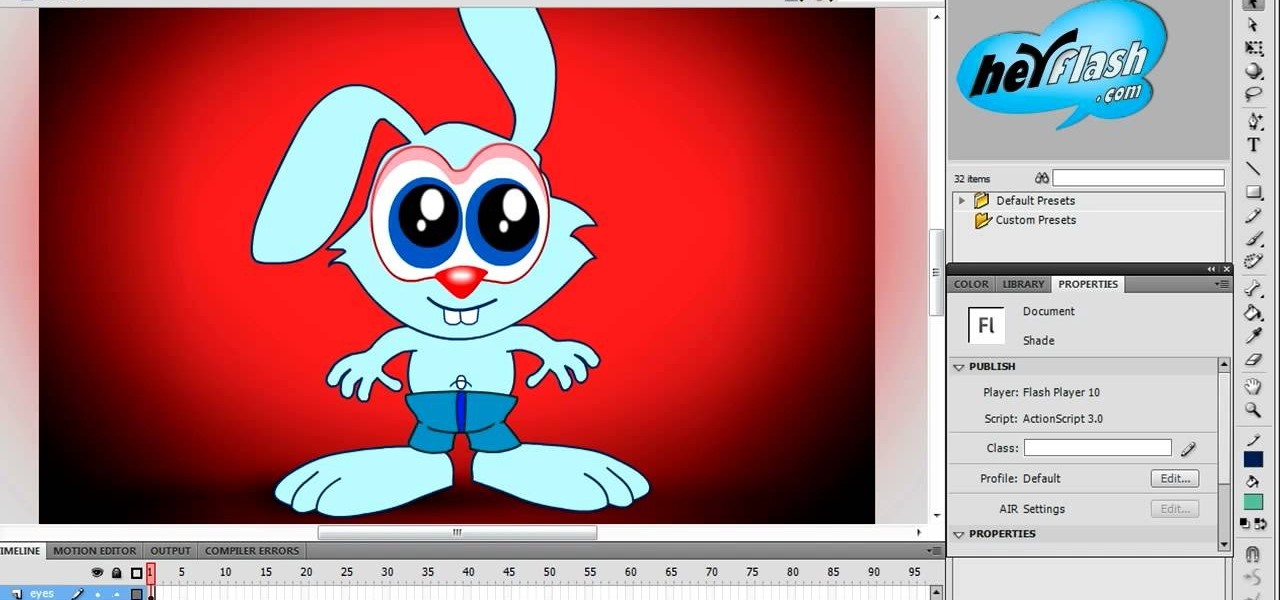
Creating really cool animated characters in Flash is an art form that can take years to master. This video tutorial will teach you how to use shading to make your characters looks more dynamic and interesting. The more effects you know, the more that you can do in Flash, so watch this and get back to animating!
Smooth shading and make all the difference in the quality of your graphics - this is especially true with the increasingly popular HD video and computer formats. If you would like to know how to use Maya to smooth and shade your objects, follow along with this video. You will get a step by step walkthrough.
Like the cell shading look? Learn how to make cell-shaded objects in Second Life.
You know how in kindergarten you loved nothing more on a hot summer afternoon than to sip your Juicy Juice while scribbling wildly onto your favorite coloring book? Well, this tutorial stems from the same idea. While outlines, as provided in coloring books and yourself later as an artist, are a great place to start a picture, they certainly don't count as a finished product.
From Prime It Up and for the beginning painter, an end to end tutorial about painting a 40K Ork. This sequence covers the skin basecoat and shading of the Ork.
This tutorial offers a look at using point clouds in shading, and the pcopen, pciterate, and pcimport nodes in VOPs. It also gives a further example of a POP network. Whether you're new to Side Effects Software's popular 3D production program or a seasoned graphic artist just interested in better acquainting yourself with the application, you're sure to be well served by this free video tutorial. For more information, including detailed instructions, take a look.
An introduction to building a surface shader in VOPs that combines an image texture with procedural shading. This is a rather longer set of videos than normal as it is a complete walk through of creating a shader. The videos are in total are roughly an hour long. Whether you're new to Side Effects Software's popular 3D production program or a seasoned graphic artist just interested in better acquainting yourself with the application, you're sure to be well served by this free video tutorial. ...
Setting up shadows takes just as much time and attention as setting up lights. You can think of all of your illumination as one half of your lighting design, and shadows as the other, equally important half. Shadows can add richness to the tones and shading of your image, tie elements together, and improve your composition. Besides their artistic importance, rendering shadows is a key technical area to master. This chapter will explore both the visual and the technical sides of shadows and oc...
The new Pyro FX in Houdini 10 are very impressive with improved workflow. The Pyro FX are great for creating 3D fire and smoke effects. And in this video tutorial series, you will learn the Pyro FX workflow in-depth and the parameters used to create fire and smoke effects. You will also see how volumetric data is created and recorded, and how to visualize it.
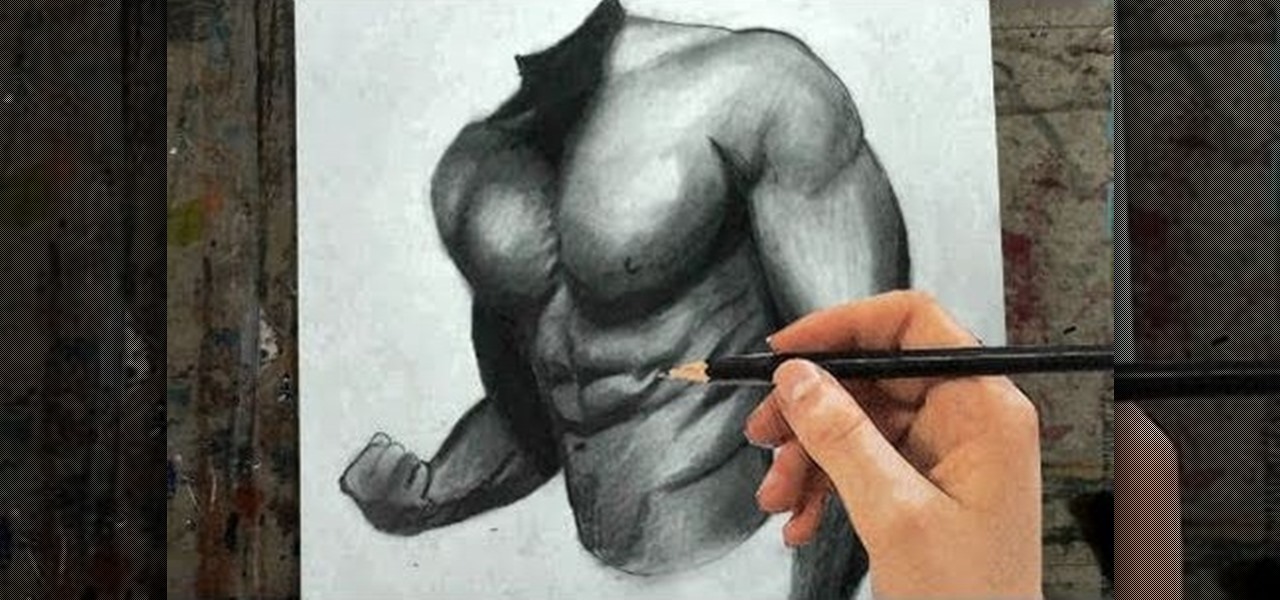
Drawing human subjects can be tough if you're not an experienced artist. getting every detail just right it quite a task, because of the intricateness of the human body. But Merrill is going to show you how it's done.
Learn nose drawing! Specifically, a woman's nose. Watch this tutorial to learn how to draw the female nose (step-by-step). Make sure to pause the video after each step and look at the screen every few seconds while you are drawing.
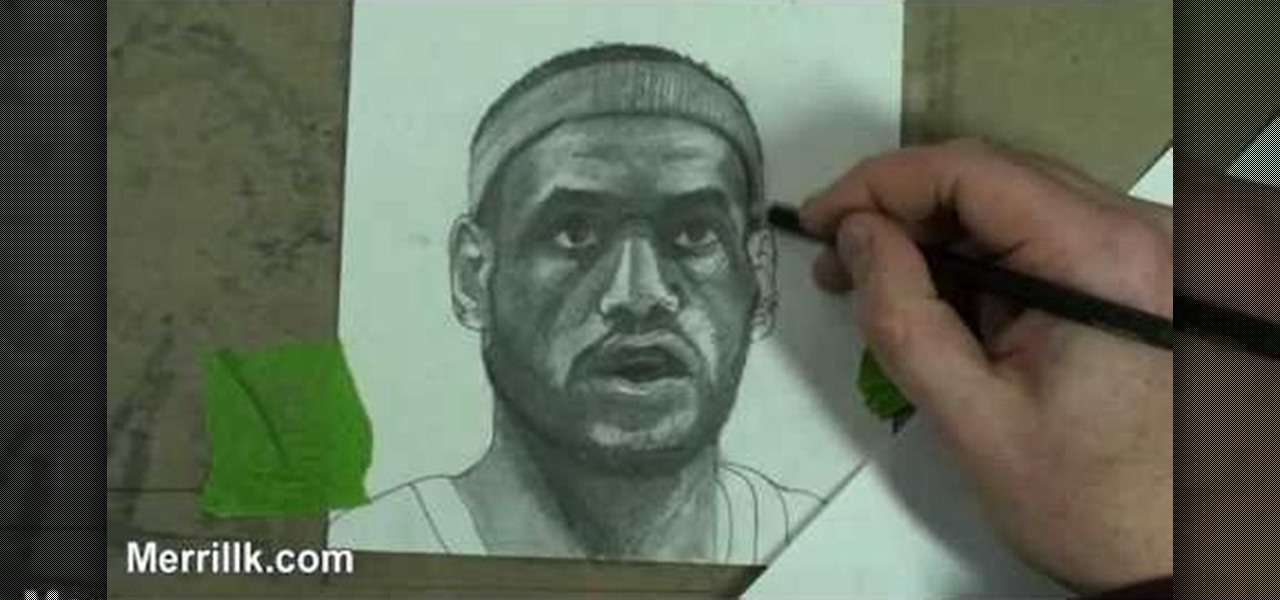
Make your own art masterpiece of a professional basketball player: Watch this tutorial to learn how to draw Lebron James. Make sure to pause the video after each step and look at the screen every few seconds while you are drawing.
Drawing Roses that look great isn't difficult, but it will take a little attention to detail. Apart from that it's as simple as putting your pencil to the page.
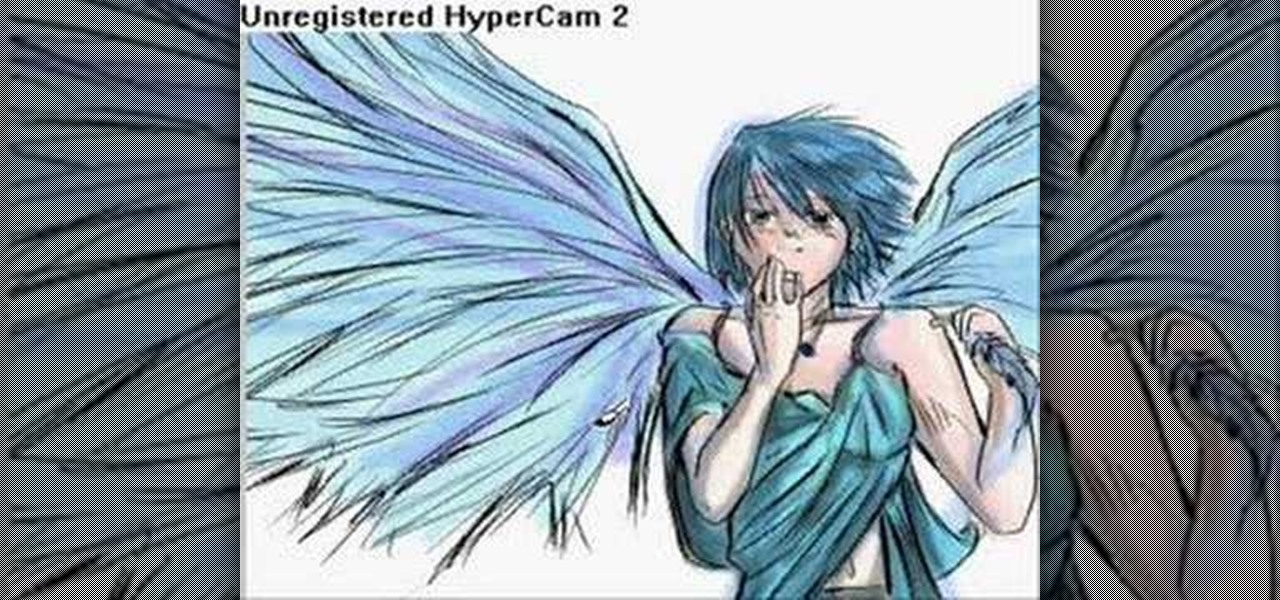
In this how to video, you will learn how to draw an angel. First, start out with the basic sketch of the drawing. Remember, eyes go in the middle of the head. Drawing the head first will help proportion the rest of the body. Use long strokes with the wrist to draw the hair. Try to make the hands the size of the face and try to make the fingers look like fish sticks. It is easier to draw if you study anatomy books. Next, erase the sketch and start going in with further detail. Exaggerate the w...
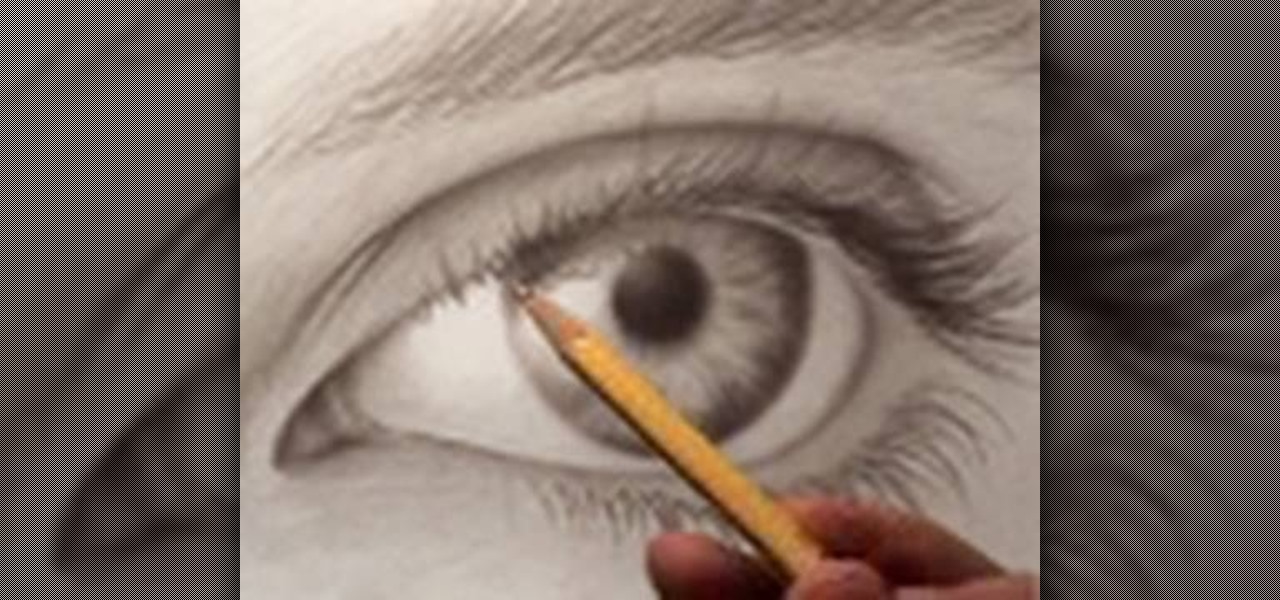
This excellent, extensive video truly takes you step by step on how to achieve the most realistic possible eye when drawing. With instructions on proper shading, pencil placement artist Mark Criley shows you everything you need to know.
Everyone wants to be thinner, BUT, what if you'd like to put on a little weight? Or, how about a LOT of weight? Even in a photo? Well this video shows how to use Photoshop and its liquify tool to expand someone from their svelt self to a bigger, beautiful person.
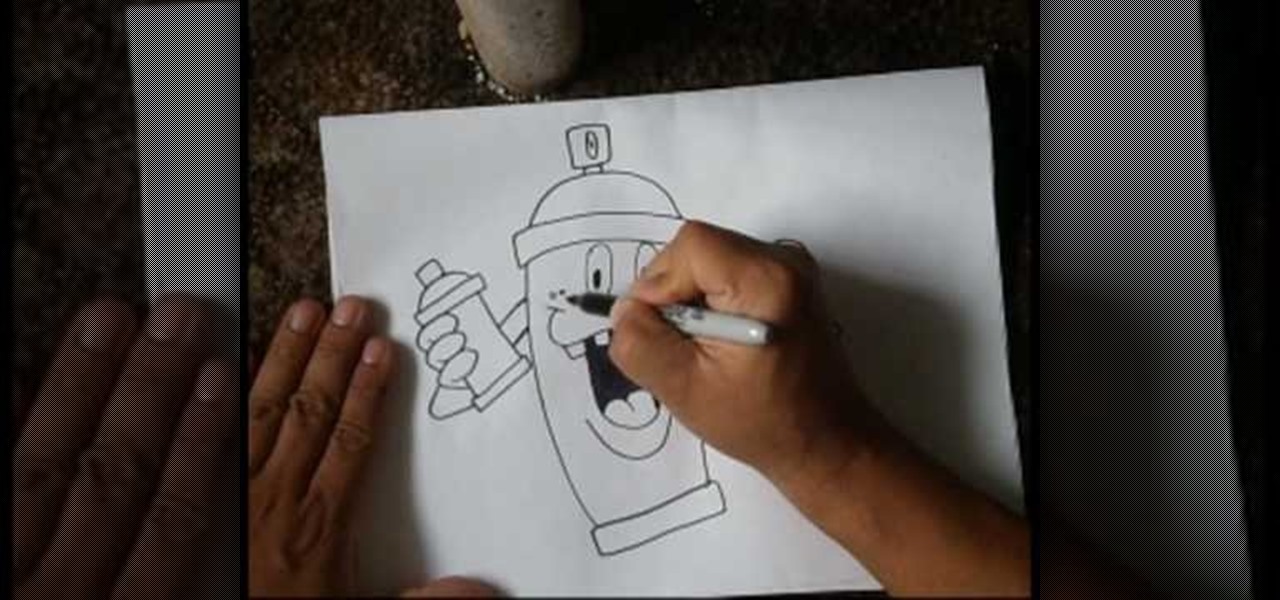
Cholowiz13 demonstrates how to draw an anamorphic spray can character, which can inspire your own cartoon characters for any artistic purpose. Without using any words, Cholowiz13 demonstrates the creation of a cartoon spray can character by starting with the eyes and mouth. He keeps the face simple and adjusts the body of the spray can to show action while fitting the face. A few simple curves form the hands and fingers. But for the best expression, add shading (especially inside the mouth, a...
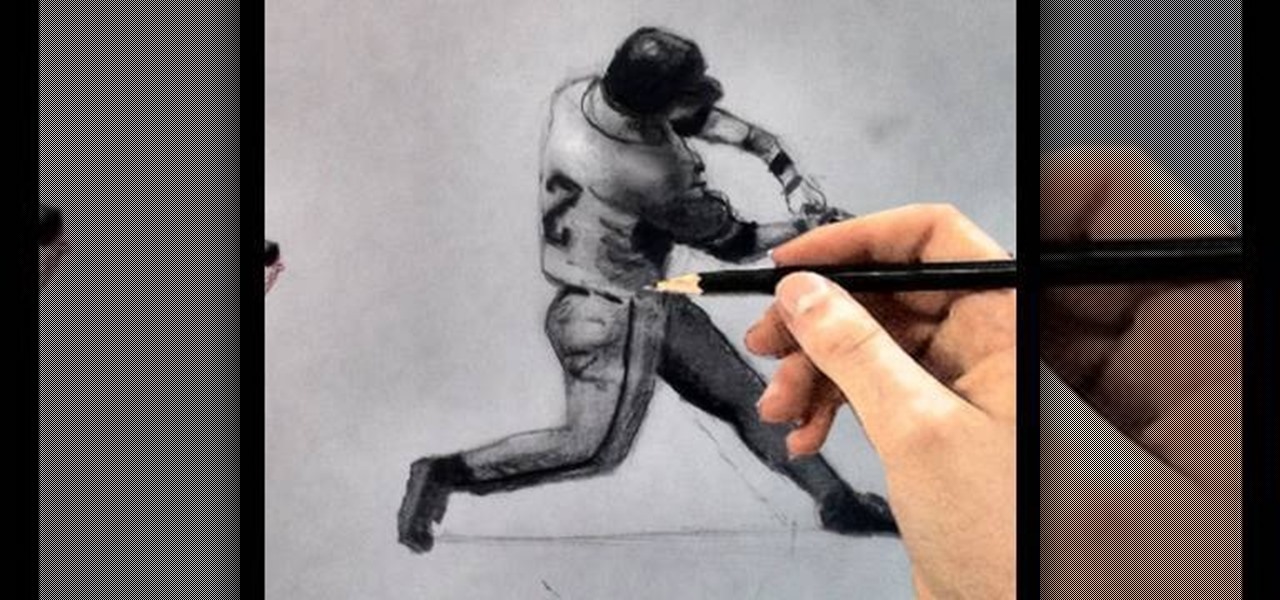
Can't figure out what you love best? Baseball or art? Well, combine your two favorite pastimes and draw a baseball player. You can even create your own baseball cards if you want to go the extra step. But in this video, you'll specifically learn how to draw a baseball player hitting the ball (batter's stance).
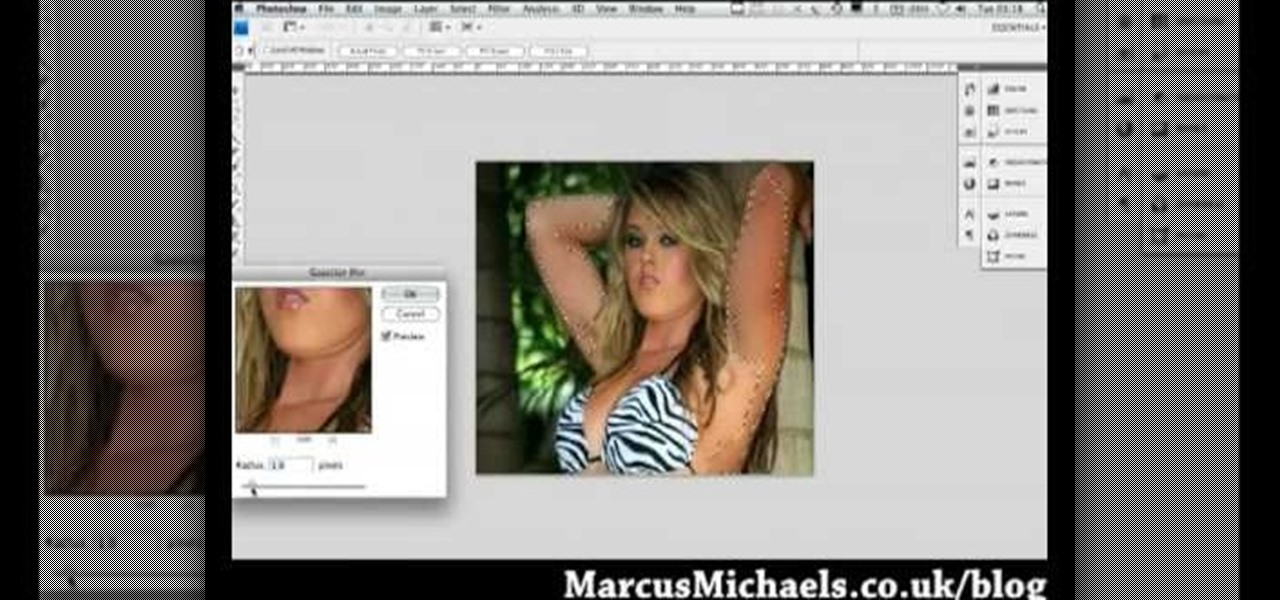
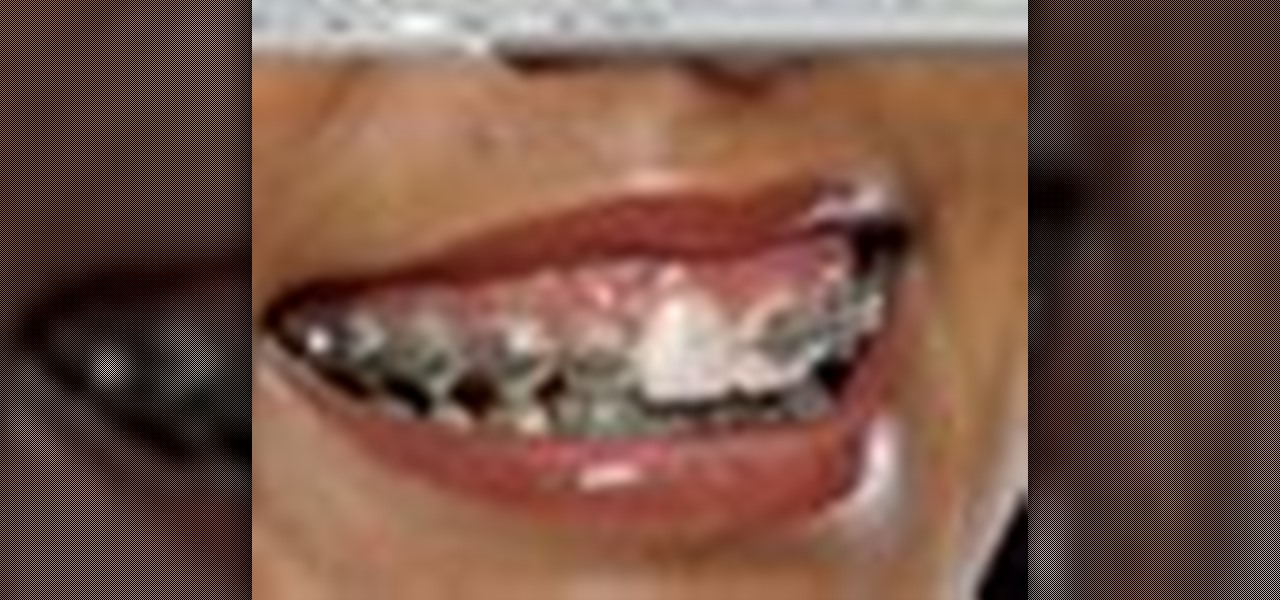
Learn how to remove braces with Photoshop. First find a photo with some visible teeth; you don’t want a picture with no visible teeth because you would need to redraw an entire set of teeth. Now select the first layer and duplicate it (command control J). Grab the patch tool from the toolbar and set it to "source". Zoom in on the teeth and make sure you are working on the new layer. Select around one part of the braces and drag it to a skin area. Now grab the clone tool and begin cloning the ...
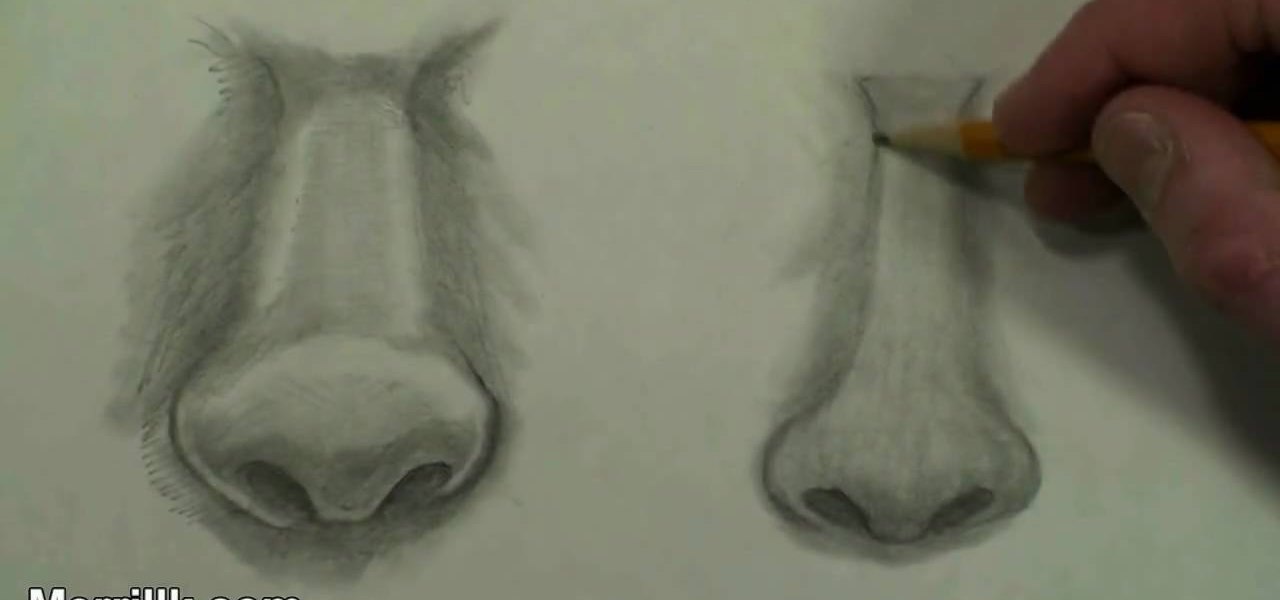
Want to learn nose drawing? Watch this tutorial to learn how to draw the male nose (step-by-step). Make sure to pause the video after each step and look at the screen every few seconds while you are drawing.
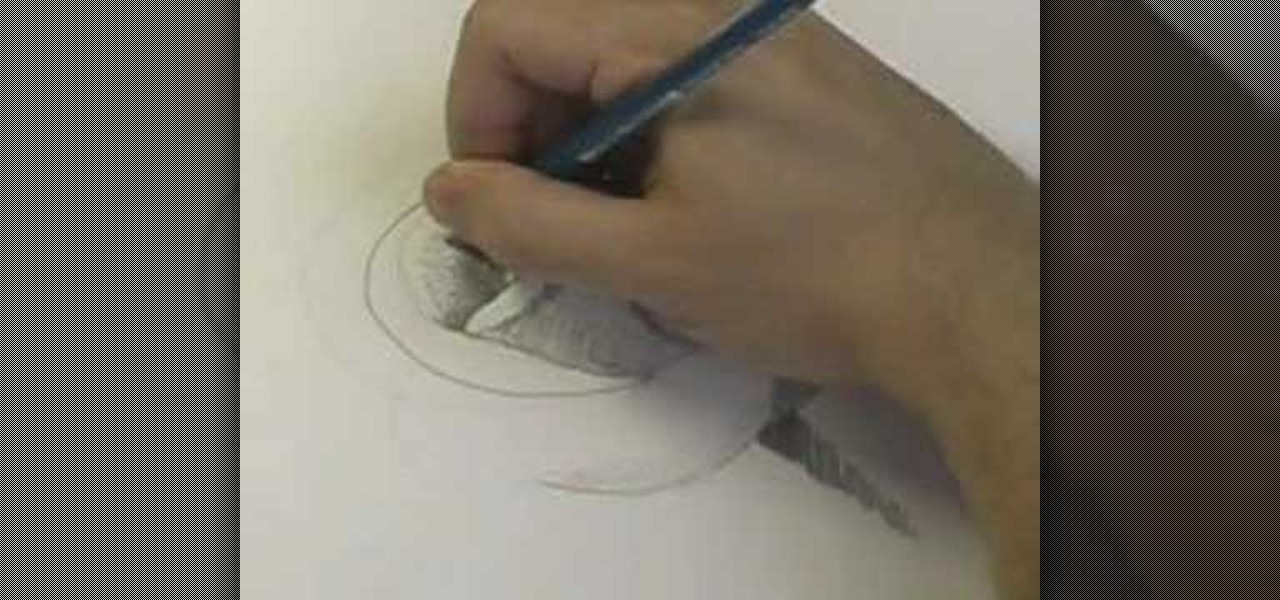
Watch this tutorial to learn how to build up tones with cross hatching when drawing. Make sure to pause the video after each step and look at the screen every few seconds while you are drawing.