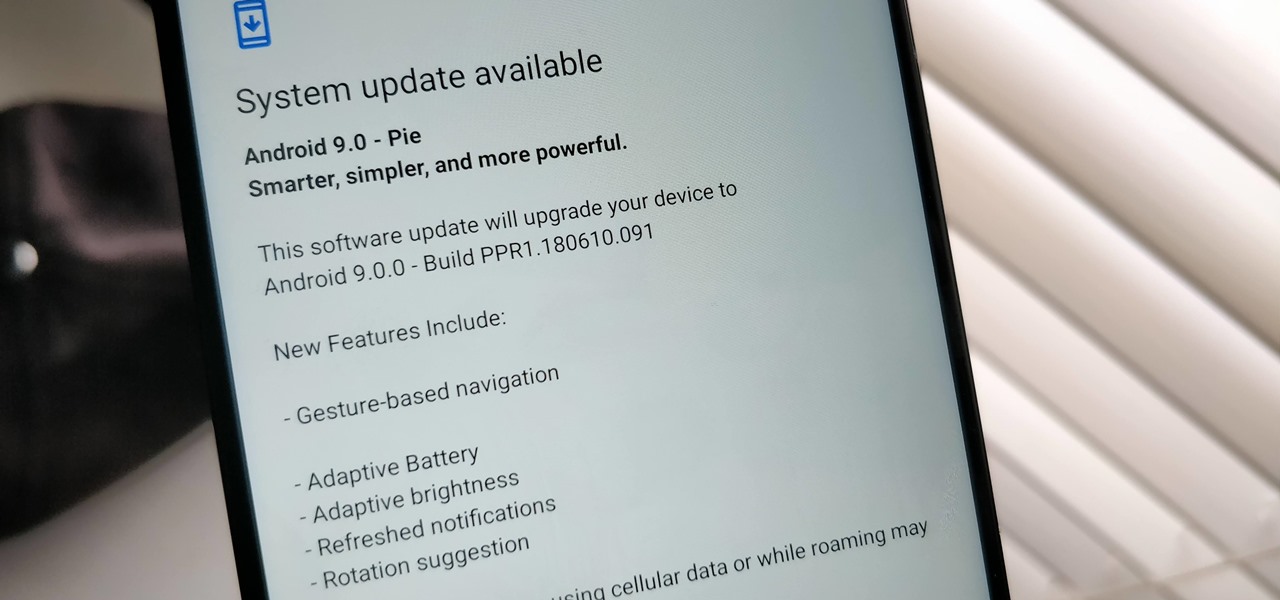
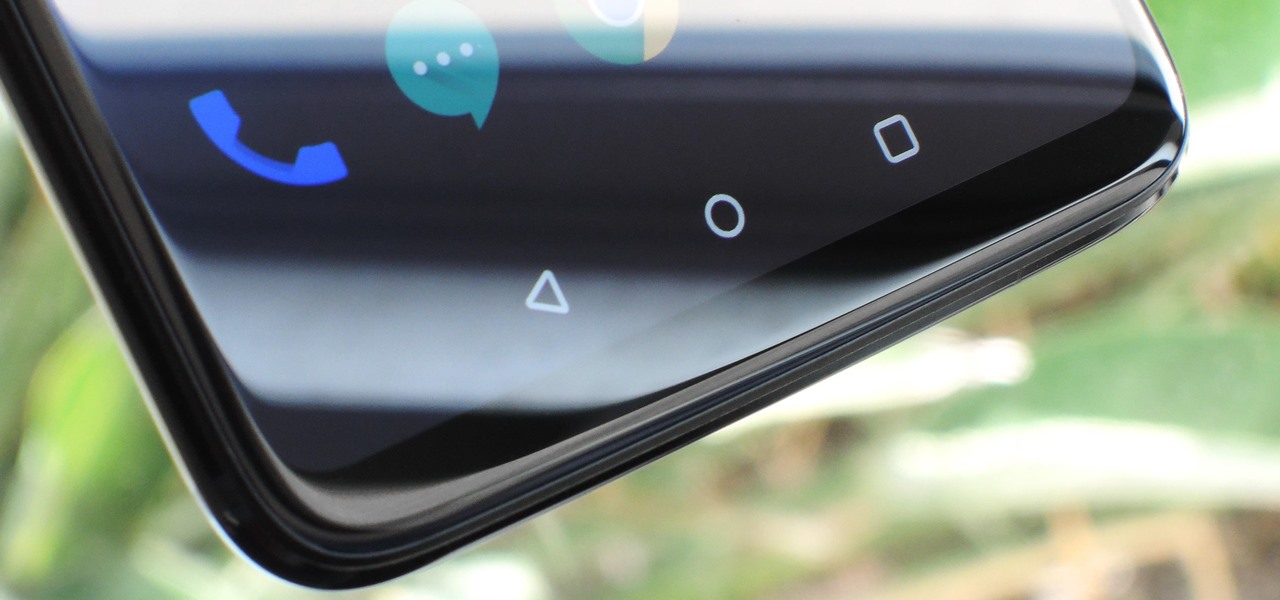
Most Android phones don't even have an Oreo beta yet, but that's not stopping Google from releasing the preview to their next big update. Android Pie is here for developers to test, and with it, one of the more controversial additions in the Android world today — the notch.
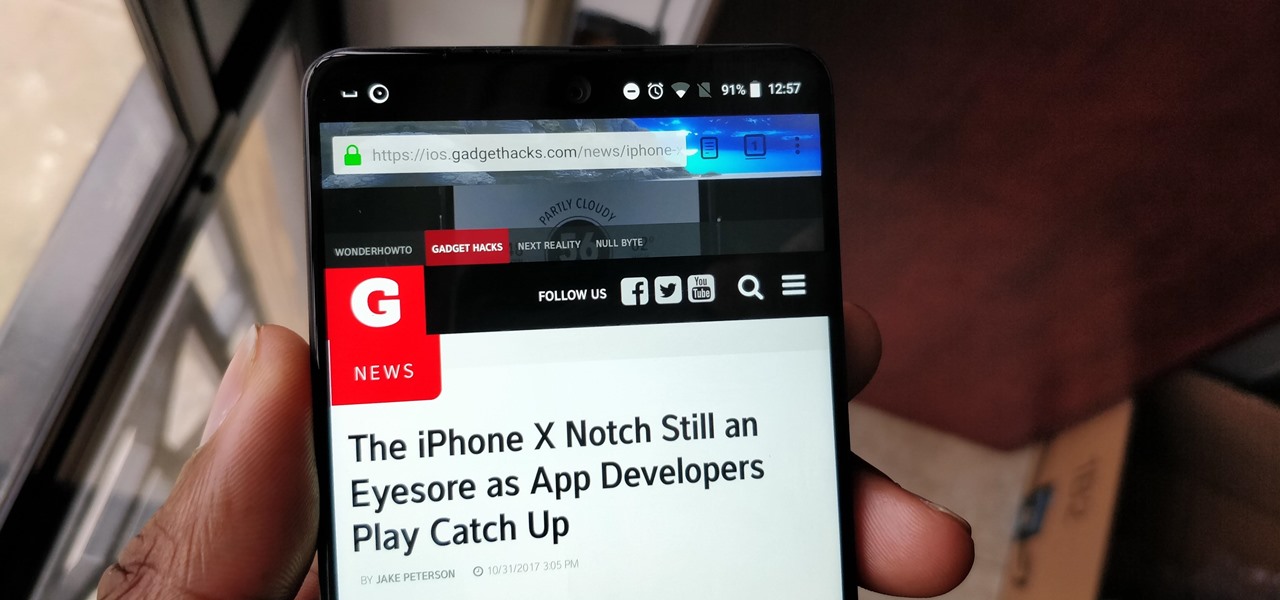
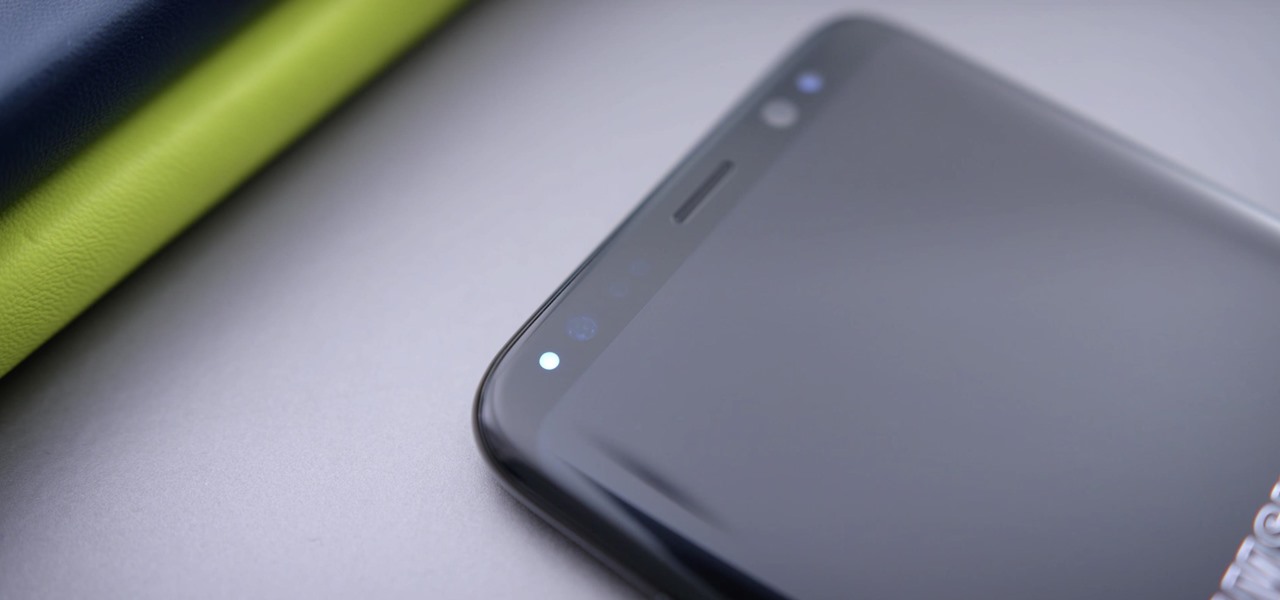
In 2018, notches are the hot trend with smartphones. Essential was first to release a phone with a notch in mid-2017, but Apple kicked off the fad in earnest with the iPhone X. Unfortunately, unlike the iPhone X, every Android phone with a notch has a noticeable bottom chin. Let's take a deep dive to find out why.

Less than four months after Snapchat introduced its Snappables platform, Facebook has met the challenge with its own AR gaming feature that surpasses the originator.

This video describes the process of split and cutting concrete blocks. For splitting concrete blocks, a hammer as well as a chisel are required. For cutting concrete blocks, you can either use a skill saw with a masonry blade or a masonry saw. Next, proper safety guidelines and equipment are discussed. For splitting masonry blocks, two types of blocks that are manufactured with splitting notches are shown. To split these blocks, they must be scored with the chisel along the entire length of t...

When you were small, dressing up like a lizard for Halloween probably meant an oversized, cheap costume with a long cloth tail and a green headpiece. While such costumes are cute for little ones, if you want to truly creep some people out this Halloween (all while inspiring "Wow! How did you do that?"comments all night long) then check out this reptile makeup look.
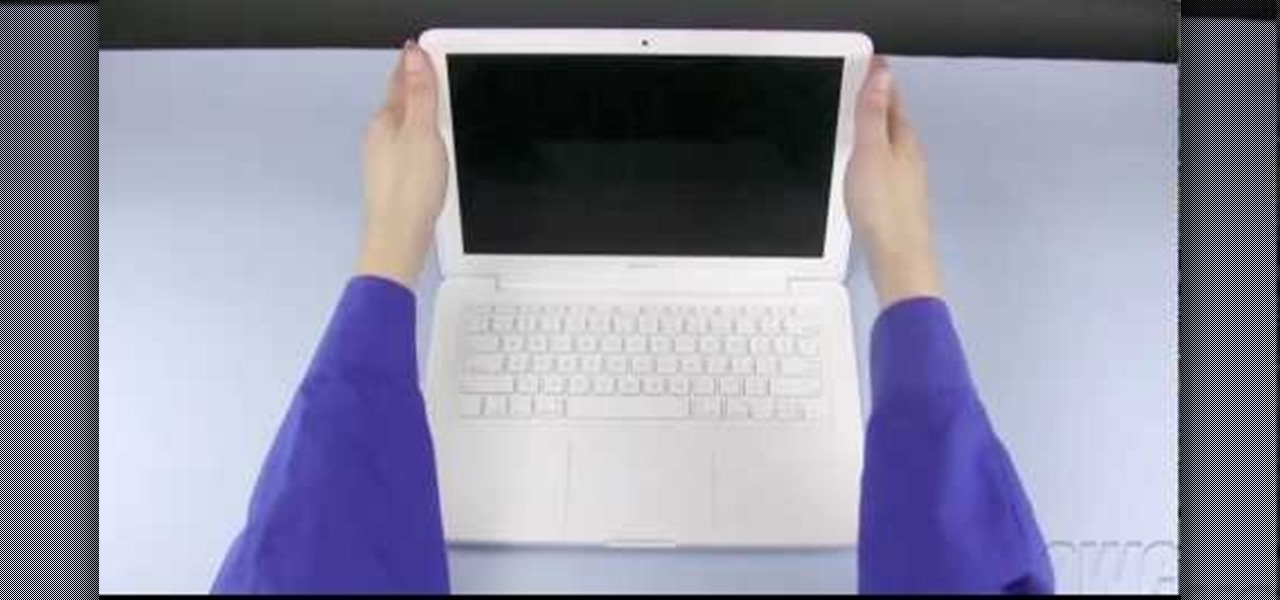
OWC, Other World Computing, demonstrates how to install RAM or upgrade and replace the memory in a 13-inch Macbook unibody. Installing RAM will take approximately 10 minutes to complete and is a relatively easy task. It will require the use of a Philips head screwdriver. First, discharge static electricity before performing the upgrade and make sure the computer is turned off. Close the lid, flip the Macbook over and remove the eight screws on the underside of the computer. Then, lift up the ...

Ron Hazelton describes how to replace a screen in a door or window. The screen is held in the frame by a vinyl cord that can be removed with a knife. Lift the old screen out of the frame. With the new screen on a flat surface, using the frame as a template, cut the new screen a half-inch larger than the frame all around. Cut 45-degree notches in the screen at each corner. Place the screen evenly on the frame. Press the cord back into the groove on the sides first, then the top and bottom. Fin...
What happens when you need to build a fire, but you forgot your matches and lighter? What if you don't know the fire-plow method, the bow and drill method, or even the flint and steel method (not that you would have flint, because you forgot your lighter)?
Hanging a door evenly isn't easy, and if you screw it up, you'll probably have to start over with a brand new door. Master this skill, however, and save a bundle in installation fees.
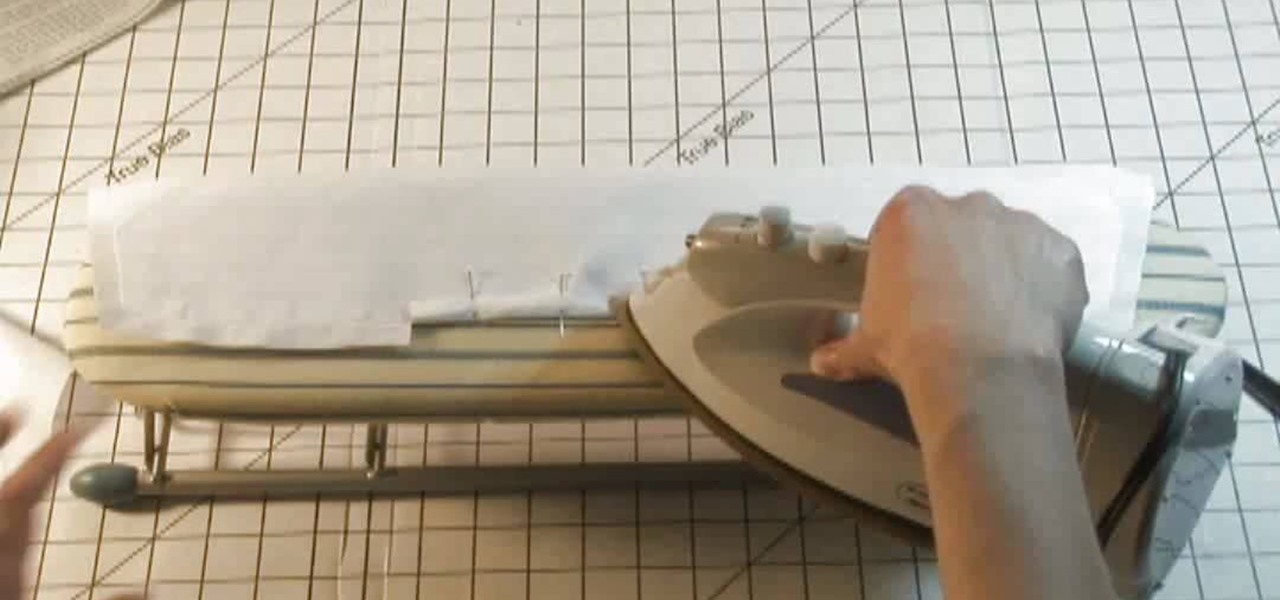
By using sewing pattern Simplicity 4670, the author of this tutorial video takes you through the steps needed to produce a great shirt collar. First you should attach interfacing to one piece of the shirt collar. Here you will be using fusible interfacing and taking the facing to the shirt collar iron the interfacing to the wrong side of the fabric. Sew a guide line that is 5/8ths of an inch wide along the notched edge of the shirt collar's facing piece. At the dot markings of the collar clip...
In this video, we learn how to install a violin bridge with Mike. First, loosen the tension of the strings, then take out the bridge from the violin. After this, pull the strings around so they are running straight. Tighten them, but not too much. You want a pinky worth of height in between the strings and the base. Now grab the bridge. The flat side will face the tail of the violin and the other side will face the opposite. The bridge should be place directly in between notches on the base o...
In this tutorial, we learn how to make a Japanese screen. First, cut your wood out and sand it down. Then, use a corner clamp to drill a hole in and screw the different sides together. Also use wood glue to help stick the pieces of wood together. Once your frame is assembled, sand the corners of it. Next, you will stain the wood with black Japan wood stain. You will only have to put one or two coats of this on, because the color is so dark. Now score notches onto the wood to allow your screen...
On Valentine's Day you should look nothing short of drop dead gorgeous - turned up a few notches. Stray from the everyday ponytail and chapstick by donning this gorgeous, princess-inspired curly hairstyle.
School's out, and if you're single and ready to mingle, watch this episode of The Wing Girls for ten tips for meeting women this summer. Whether it's making sure not to commit to anything serious (hey, you have to play the field and be thorough to find the One, right?), getting a ripe tan that enhances your bulging muscles, or attending every single party you can find, there are lots of things you can do to throw some notches on that belt before school starts again in fall.
Attention jewelry makers! When making your own unique jewelry designs, one must learn how to secure the end crimp beads with crimping or chain-nose pliers. Crimp beads can be used for finishing off your strung jewelry or as "stoppers". In this tutorial, learn how to hone your jewelry-making skills!
The Victoria's Secret Fashion Show airs tonight, and we're pretty damn sure that by the end of the sparkling, lingerie-filled affair you'll be in ripe mood for some sexy bombshell hair and makeup looks.
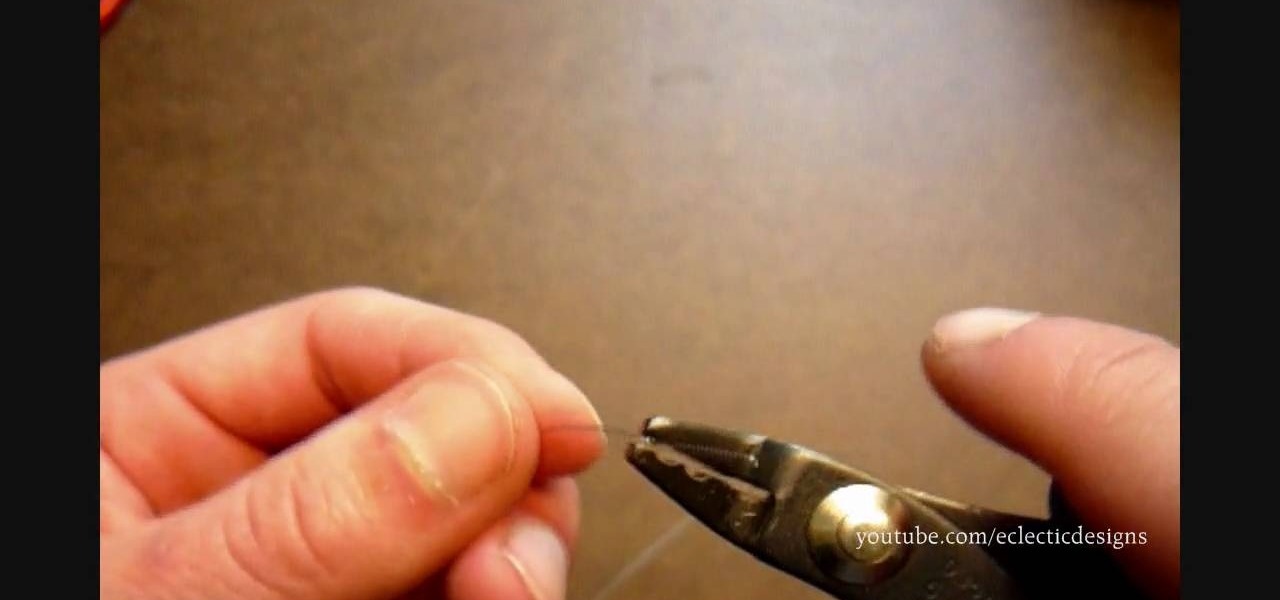
In order to make an adjustable cable necklace, you will need the following: 20 inch adjustable cable chain, a slide bead frame, 2 head pins, 8 mm bi-cone, 8 mm crystal, 2 6-mm round rondells, 2 7-mm jump rings, a pair of nipper tools, a pair of round nose pliers, and a pair of chain nose pliers.
This video from "Whitney sews on a budget" shows how to make a Valentine's Day purse or gift bag using a bandana. Begin by folding the bandana in half on the diagonal with the right sides together. Cut it into the shape you would like your bag to be. Pin the pieces together and sew along three sides and turn right side out. Clip out notches from each side so that there will be openings on each side of the casing that you are about to make. Fold the top down about an inch and iron, then fold d...
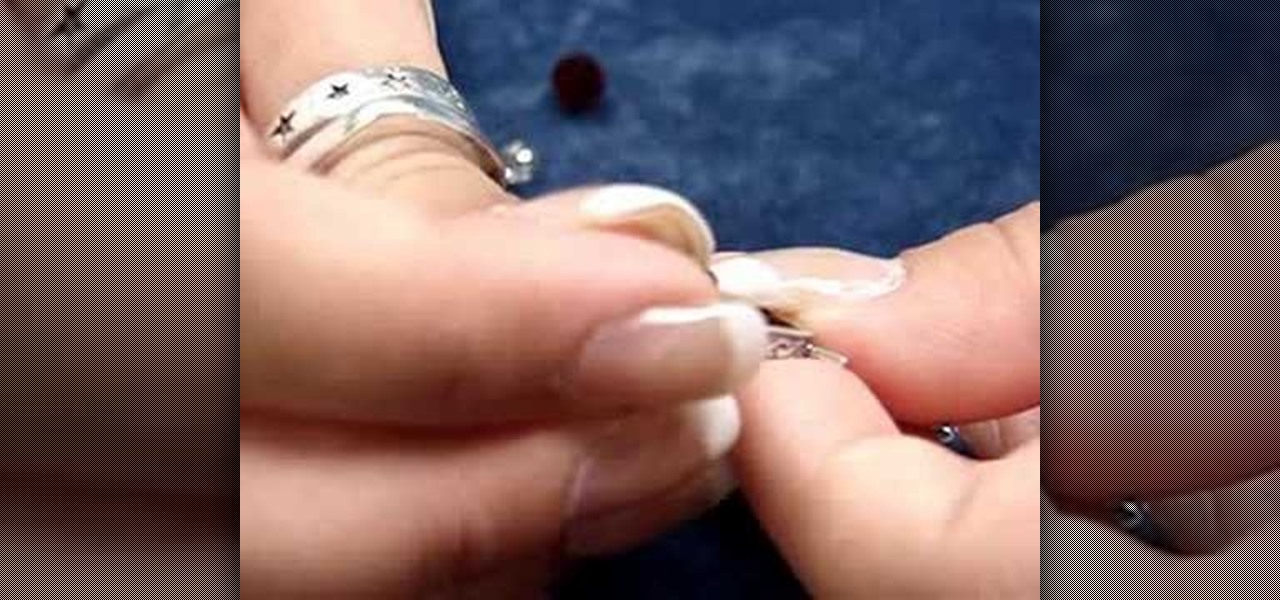
This video shows the viewer how to secure crimp beads using both crimping pliers and chain-nose pliers for the purpose of jewelry making. The video uses two millimeter crimp beads, beading wire, and both sets of pliers to demonstrate the technique. To crimp using the crimping pliers, the viewer will utilize both notches of the pliers to crimp the bead onto the wire. In order to crimp using the chain-nose pliers, one must simply flatten the bead onto the wire. Crimping is a good method to secu...
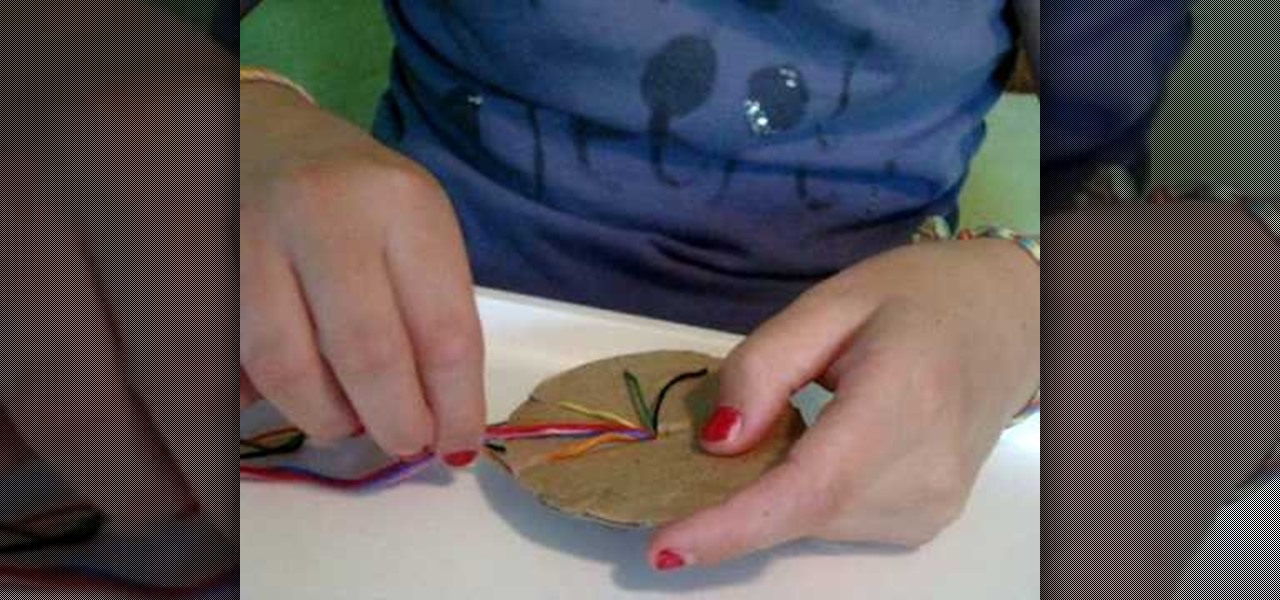
A little girl from Live Love Embroidery explains, in this video, how to make a circle woven friendship bracelet. The process involves seven strands of embroidery thread tied at the end with a simple half-hitch knot. The knot is fed through a small hole in the center of a circle of cardboard. The strings are then individually latched through seven of eight notches located at the end of the cardboard. After that, rotating in a circle pattern around the cardboard, the strings are exchanged aroun...
In order to build a backyard swing arbor, you will need the following: 2x4s, 1x6s, a bench swing, 4x8' sheet, a drill, carriage bolts, galvanized nails, and screws.
First you must take inventory of all items in order to be able to create your bag. Make sure all labels are in the correct order. Lining should be ready before attempting to begin construction. The stay should be 10in long and 4in wide. Pocket the stays and glue the stays to the outside fabric. Use the notches to line everything up. Take the magnetic snap and attach it to the front and back. Take a knife and cut holes for the magnetic snap. The magnetic snap comes with a washer. Use cardboard...
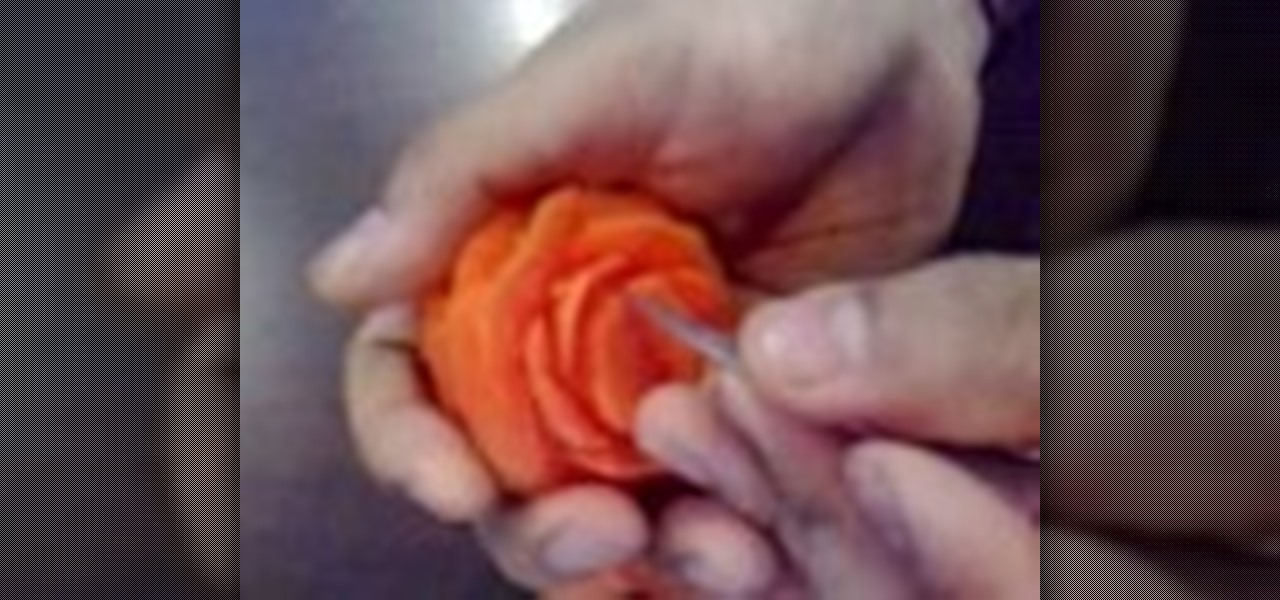
You will need: a sharp knife, a steady hand, and patience. First carve 5 equally sized 1/4 spheres out of carrot.
You can learn to confidently and accurately sew a straight seam. You Will Need
After several Android phones started incorporating the iPhone X's notch, the online community was vocal, with many expressing hatred for the trend. Well, thanks to XDA Forum Moderator Zacharee1, we already have an app to undo the incoming wave of notches.
Let's face it—if you care about anyone around you, then you brush your teeth. Brushing is an excellent way to not only prevent tooth decay, but to keep people from running away from you with their noses pinched.
In this video arsbeadsvideos instructs you on the use of crimping pliers, crimp tubes and how to use crimp covers. Make sure you use jewelry wire that is fine enough to fit through the holes in your jewelry. On your crimping pliers you'll notice there are two notches, also called stations. The first notch is furthest from tip of the pliers and has a raised bump or dimple in the middle. This helps to created figure-eight crimps. The second notch is used to form the crimp into a tube shape. To ...
You don't need to be an expert designer to make your own clothes, only the patience to work step by step. This video will show you how to follow a sewing pattern.
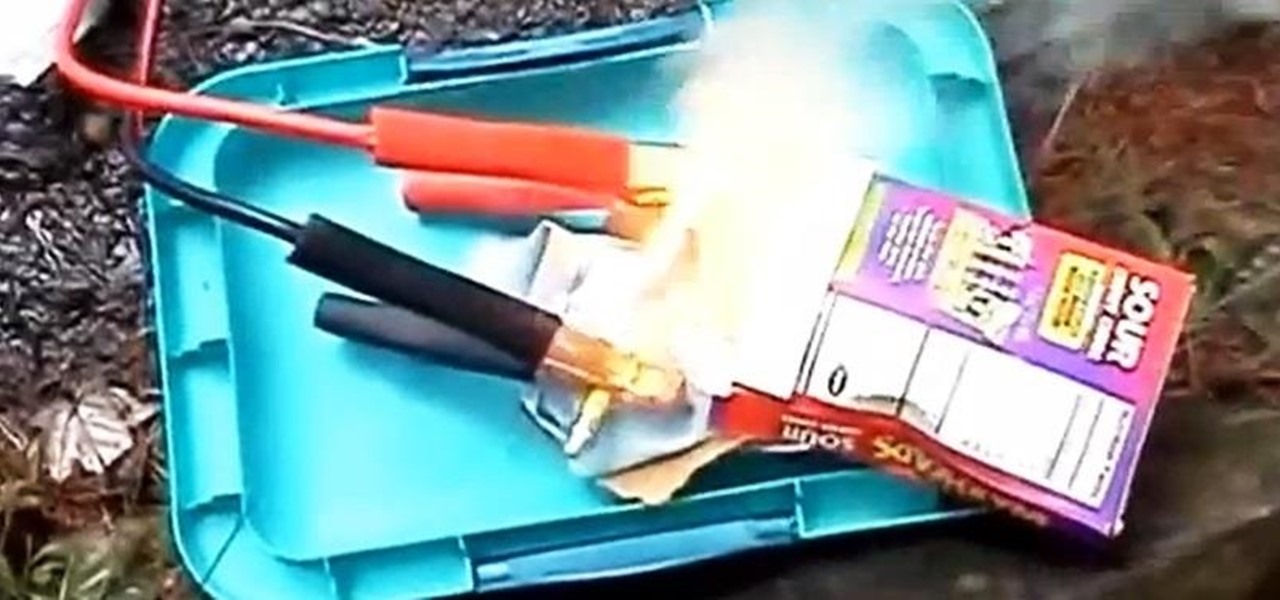
In order to build a trip wire, you will need the following: a knife, fishing line, a rope/string, sticks, and a large stone.
If bezel-less was the goal of OEMs in 2017, 2018 seems to be the year of the notch. Thanks in no small part to Apple's iPhone X, more and more smartphone manufacturers are designing their displays with this polarizing cutout. While many are frustrated with the trend, it's worth taking the time to consider what each phone gains with the unique design.
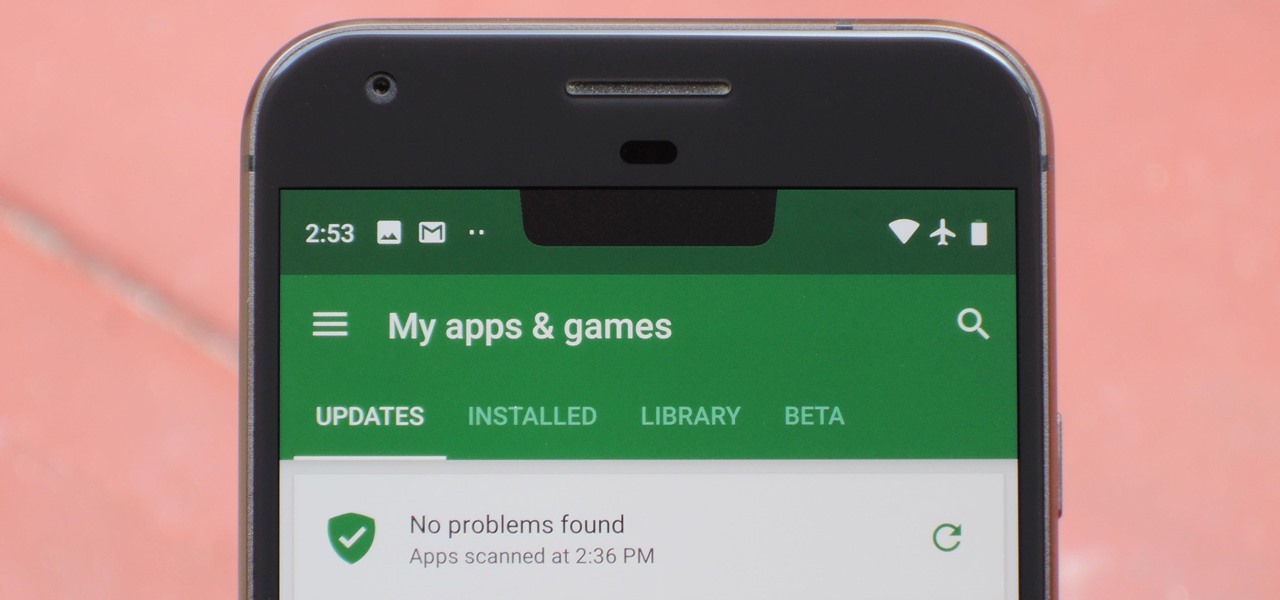
On August 1, Google Play started requiring new app submissions to target at least Android 8.0 Oreo's API. Then, as of November 1, all updates to existing apps were required target the same API. While at first glance, this change may mean little to you, it will have a profound impact on Android. Now, your favorite apps will be getting better.
Even though most phones don't have Oreo yet, Google has released Android 9.0 Pie. It's available on Google's own Pixel devices, and updates should soon be available to partnered devices from Essential, Nokia, Oppo, Sony, Vivo, and Xiaomi. We're already digging into it to highlight all of the features and changes.
In this tutorial, we learn how to make a bow and arrow from a ball point pen. First, you will take the top and bottom off of the pen. Then, use a knife to poke a hole in one side of the case until you reach the other side. Now, make small notches in the top of it so you can stick a rubber band on it. Do this on both sides and try to make it equal. Now, take the top of the pen and stick it in the little hole you made in the middle. Then, take the rubber band and stick it on. Then, shoot this a...
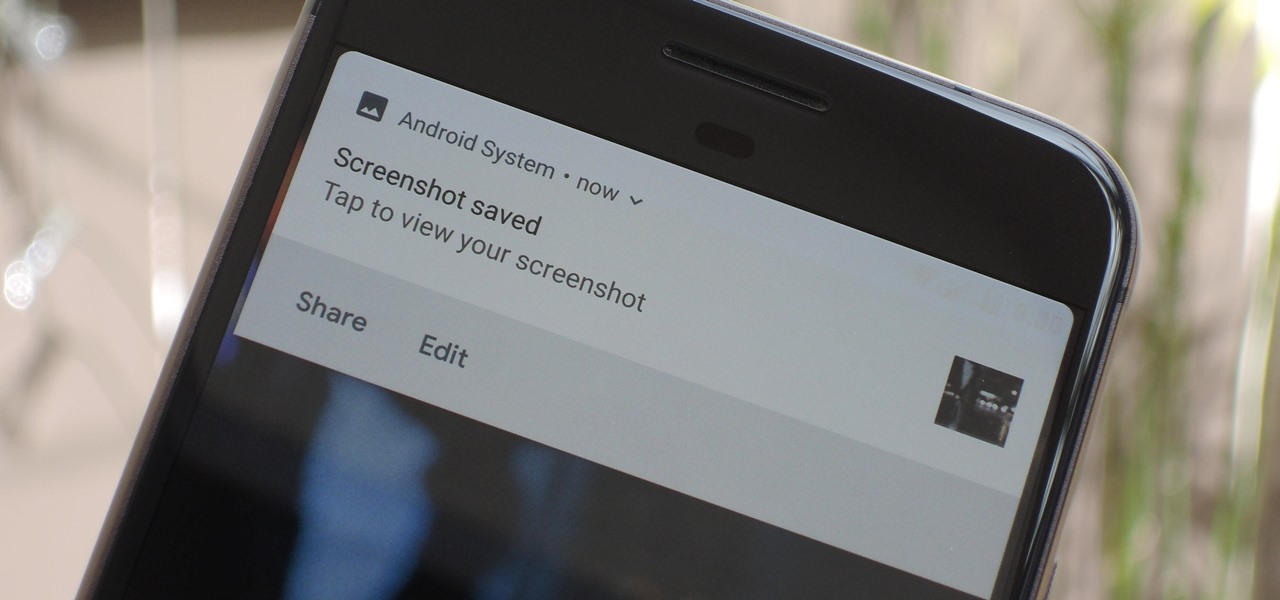
Samsung has had a rich screenshot editor in TouchWiz for years, and Apple even added a similar feature to iOS 11. Until now, stock Android has lagged behind in this area, but that's finally fixed in Android 9.0 Pie.
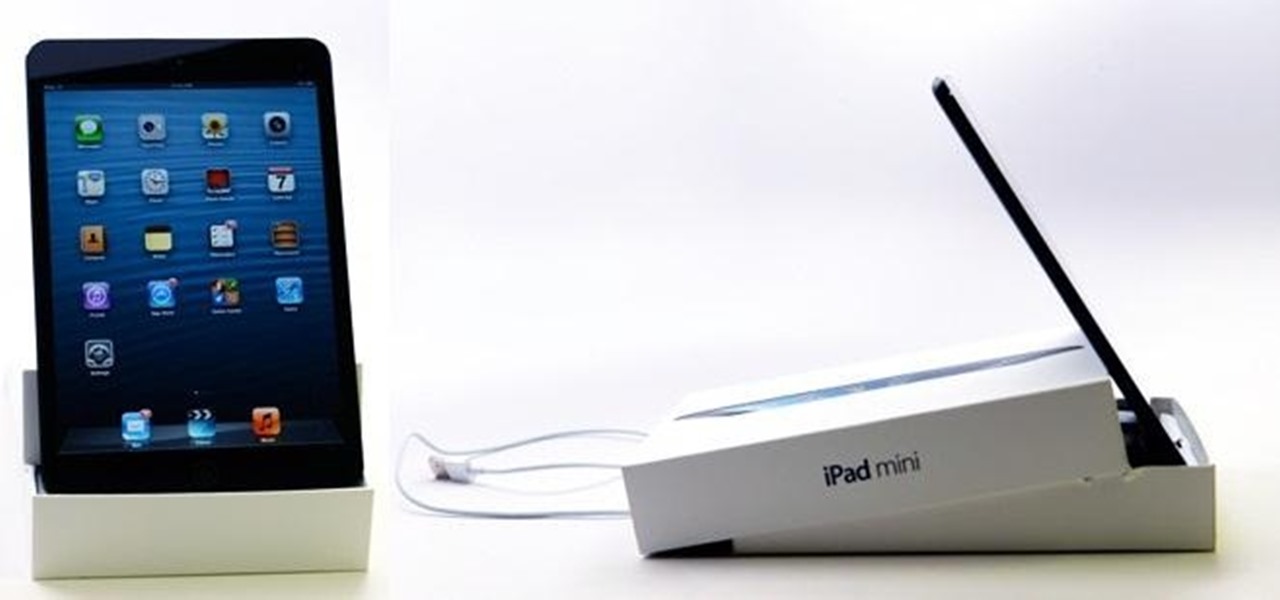
You can make a dock for an Apple device out of almost anything, even the box it comes in. People have been turning Apple's product packaging into DIY docks for a few years now, including the iPod nano, iPod touch, and iPhone 4. So, it's no surprise that the newly released iPad mini already has one, too. Obviously, if you ever anticipate selling yours, modifying the box probably isn't a good idea since you get more money for used devices with original packaging. But, if you plan on keeping it ...
Dippin' Dots are a fun way to enjoy ice cream, but the price tag is not so fun. Plus, the company filed for bankruptcy last year, so they may not be around much longer. The good news is that you don't need them—you can make your own at home with some ice cream and liquid nitrogen. Redditor hypoid77 posted instructions on how to make your own DIY Dippin' Dots Maker out of a Styrofoam cooler, a couple two-liter bottles, a thumbtack, and some liquid nitrogen. Use the thumbtack to poke a 3-inch p...
Not much about 2020 is what you'd call normal, but if one thing remains the same, it's that Apple will still release new iPhone models. This year, the company is offering four new options: two "Pro" models and two "consumer" devices. If you want to know more about the latter two, the iPhone 12 and iPhone 12 mini, keep reading.
Since its release back in 1988, Microsoft Office has been the top client and server software suite for businesses around the world. Office's domination is thanks to both Microsoft's extraordinary foresight and their continual updates and innovations to ensure that companies always get what they need.
Less than a month after launching its augmented reality Swim Goggles, wearables startup Form is preparing to add a major new feature for aquatic athletes.
Update: The new Galaxy phones are now official! Check out all the details on the Galaxy S10 and S10+ or the Galaxy S10e.