
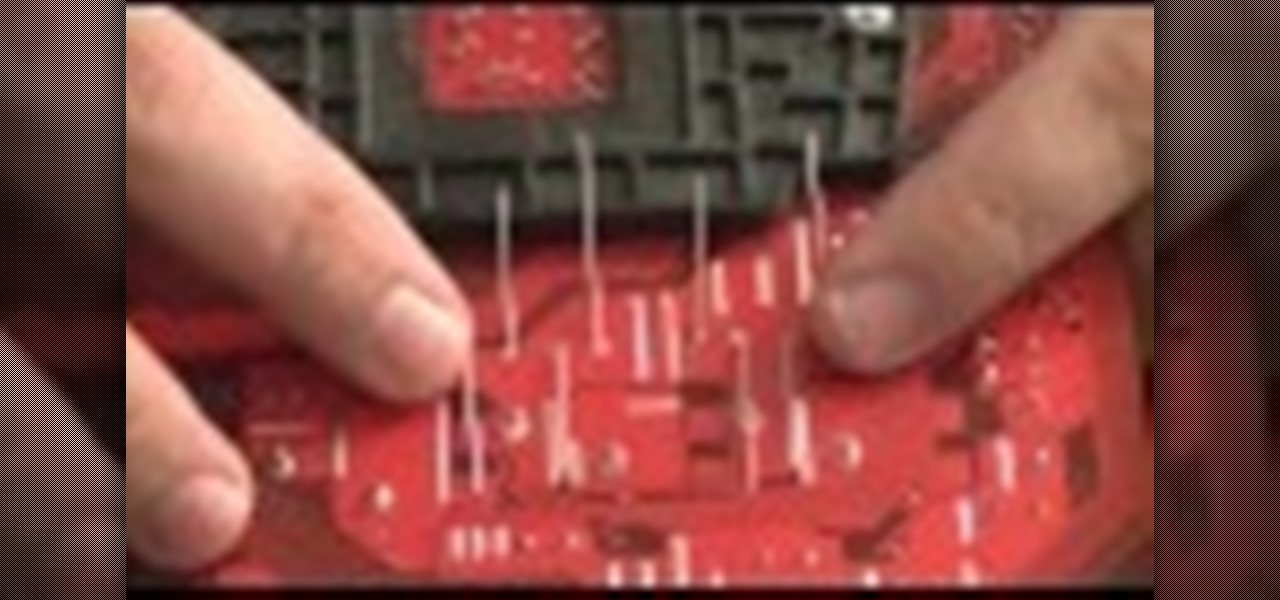
How To: Replace Bad Capacitors on Your Motherboard
Got a motherboard with blown capacitors? Here's how to fix it!

Got a motherboard with blown capacitors? Here's how to fix it!
How to mount a motherboard into a PC case whether you're building your own computer or just replacing the motherboard.
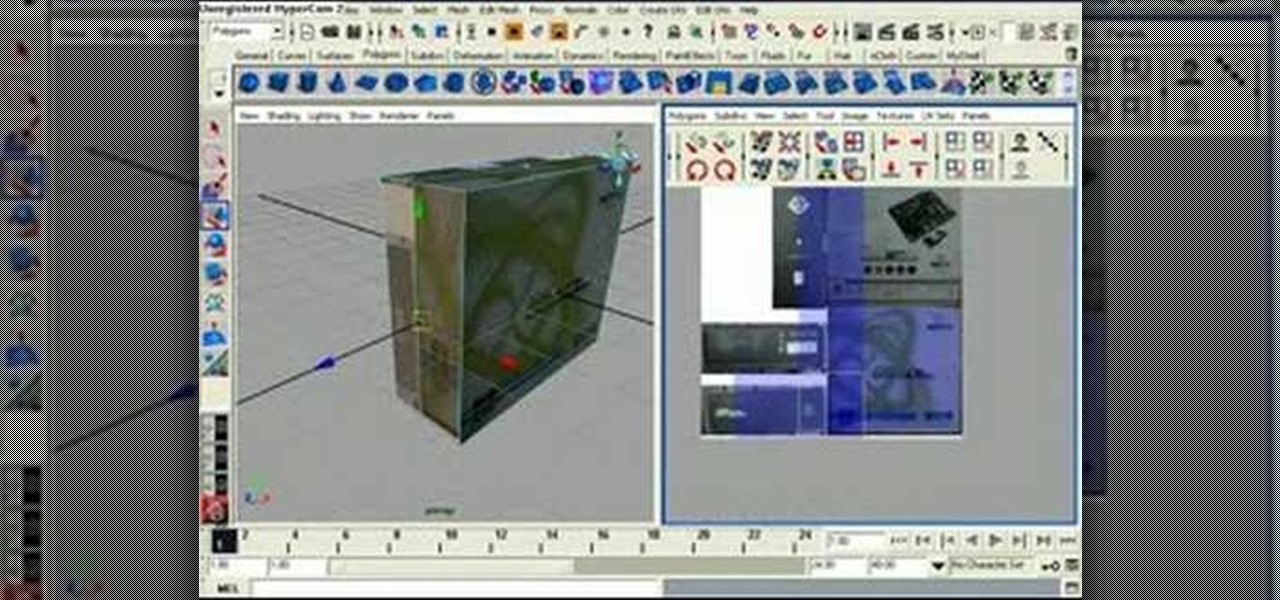
In this tutorial you will learn how to UV map a motherboard box in Maya. This Maya software tutorial covers basic UV mapping procedures and using UV's to place textures on an object like a motherboard box.
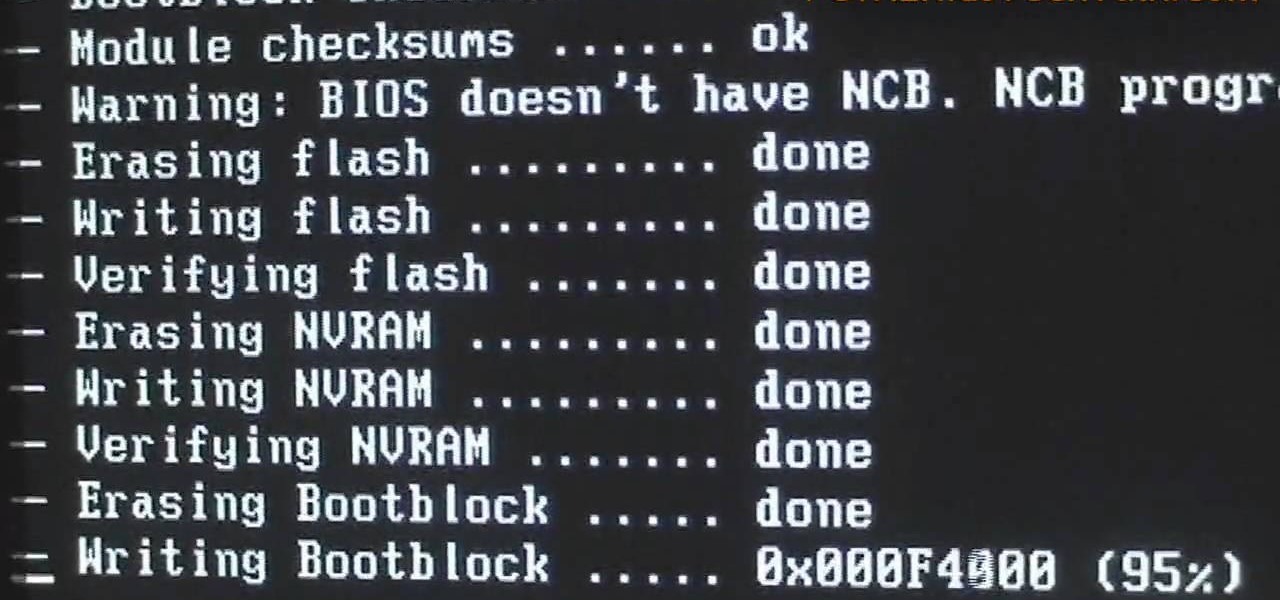
Looking for a quick guide on how to flash your PC's BIOS? It's easy! So easy, in fact, that this home-computing how-to can present a complete overview of the process in just over five minutes. For more information, including detailed, step-by-step instructions, and to get started using this trick yourself, watch this video guide.
When your motherboard breaks your computer does too. Learn how to replace your computer's motherboard by yourself so you'll be able to continue on after a problem as quickly as possible.

In this computer builder's guide, we learn how to go about installing an ATX motherboard. It's easy! So easy, in fact, that this video tutorial can present a complete overview of the process in about four minutes. For more information, including detailed instructions, watch the clip.
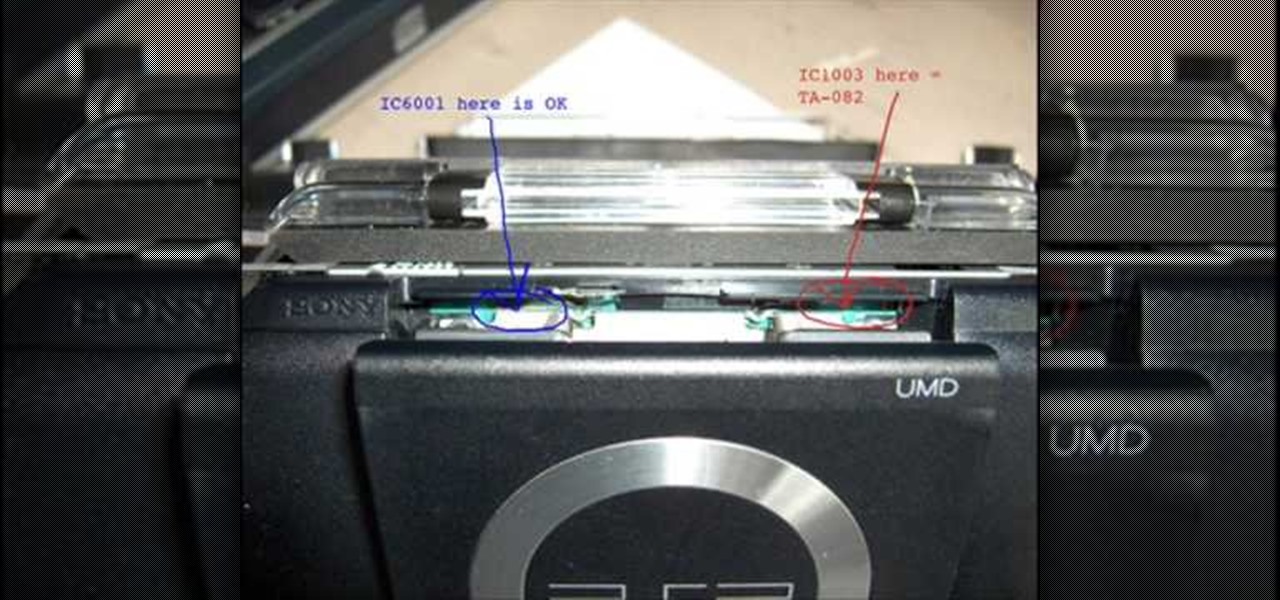
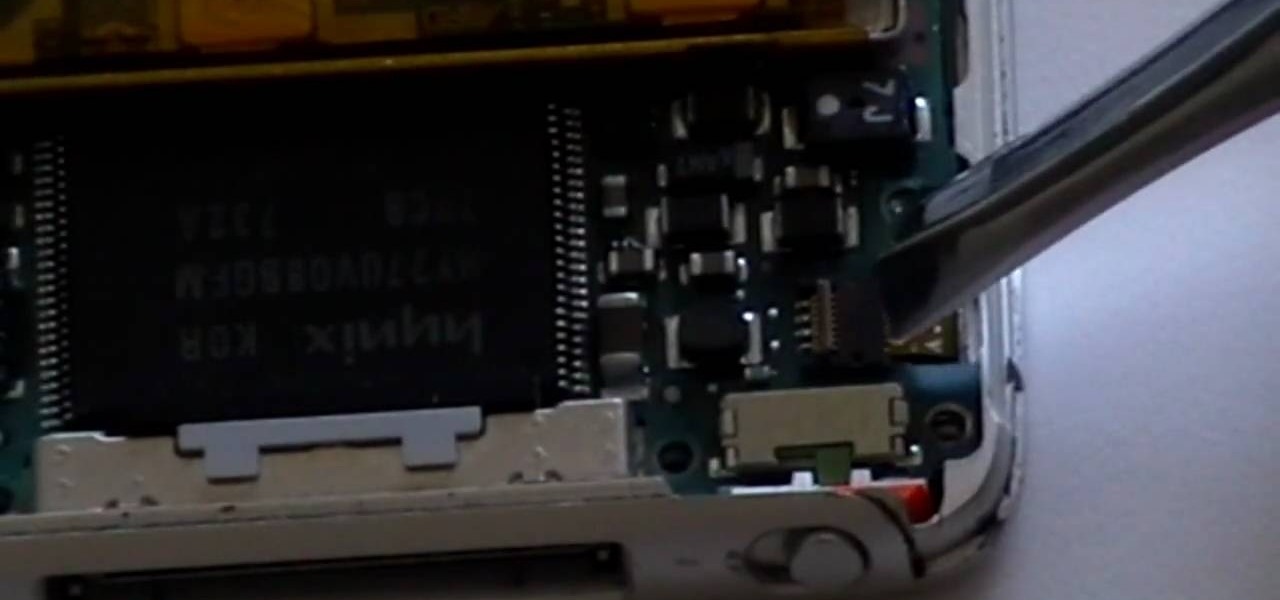
Watch this how to video to find what type of motherboard your PSP is. This tutorial is important if you want to downgrade your PSP firmware to play homebrew games.
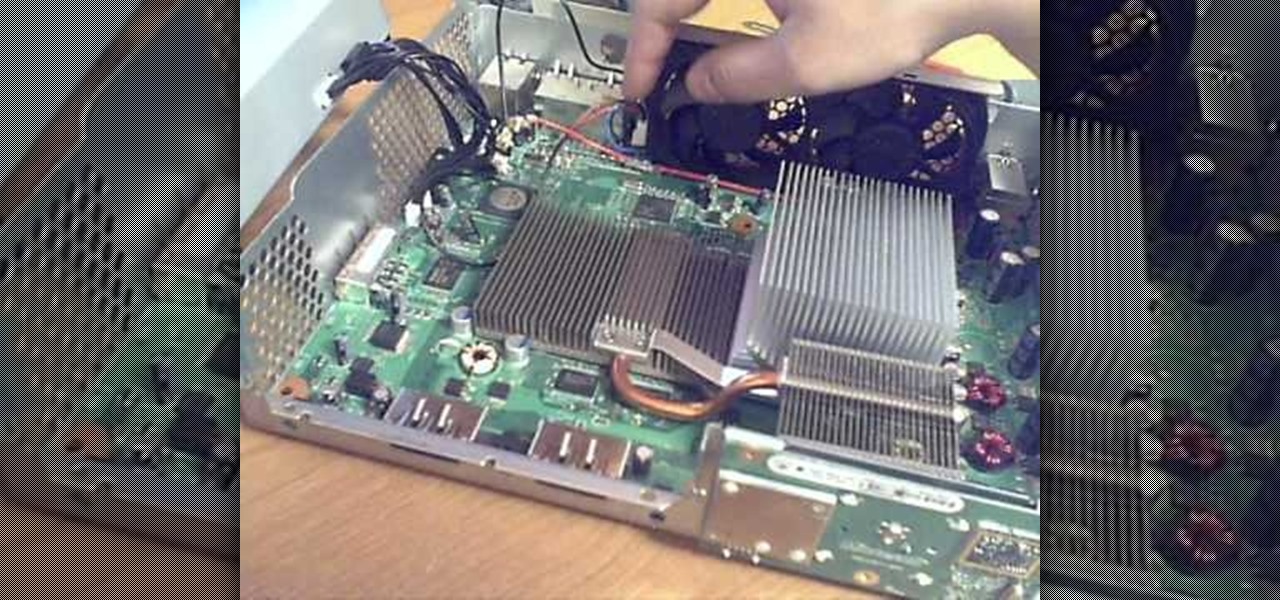
The XBox 360 does not cool itself very well. If you're going to take it apart and mod it, you probably want to increase your fan speed by connecting it to the 12v part of the motherboard so it will spin faster and cool better. But you don't need 12v all the time right? It's very loud. Maybe you want to be able to choose between the stock 5v and 12v speeds depending on what you're doing? That's the best way. This video will show you how to make a switch attached to you fan that will allow you ...
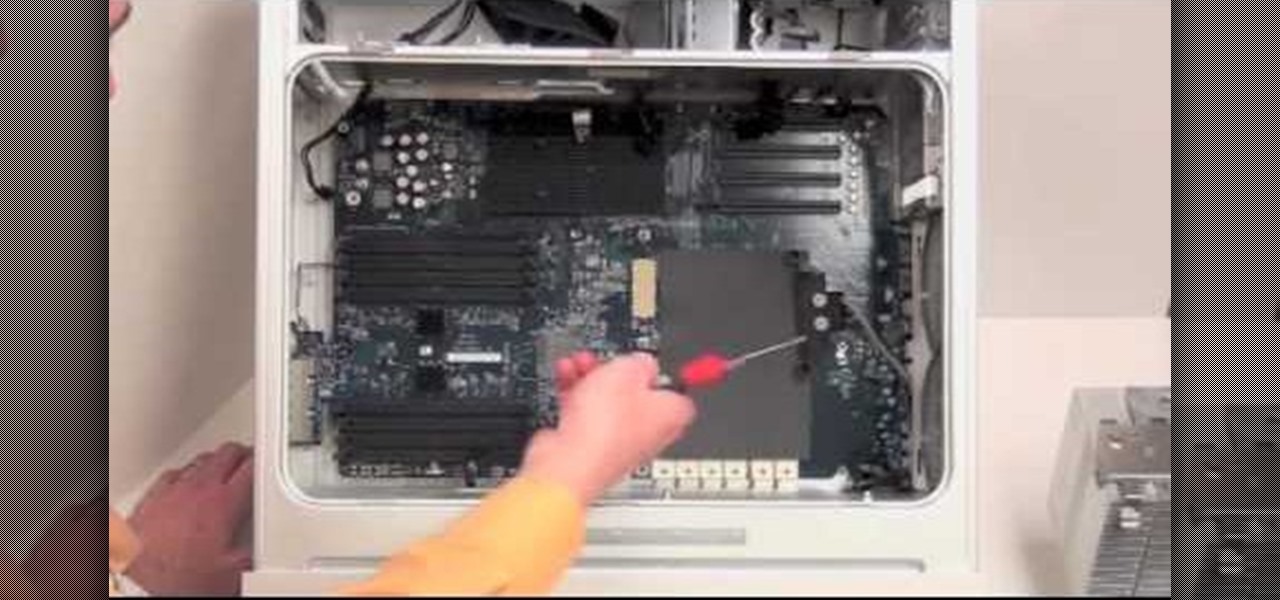
Is your motherboard toast? If your logic board has burned out, it's a sad thing, but you're going to have to replace it. See how to remove the logic board from the Power Mac desktop computer.

Build a mineral oil computer aquarium. It cools the system while giving you something to look at.
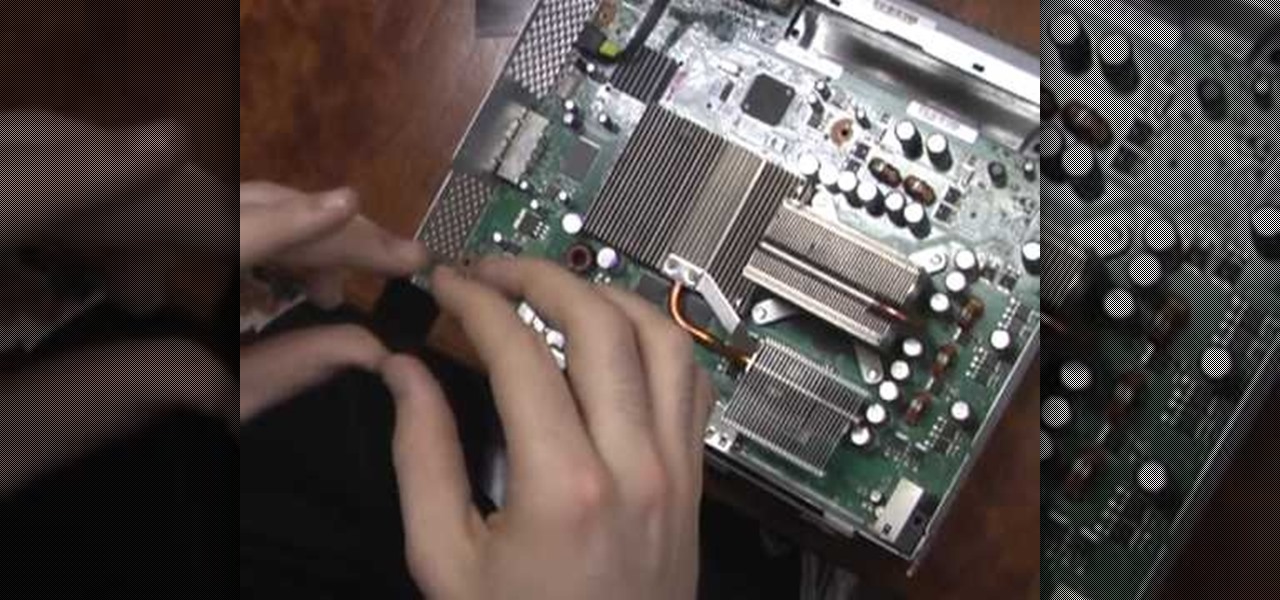
The XBox 360 has mammoth cooling problems, and people have devised all manner of products and mods that address that. This video will show you how to install one of those products: heat sinks that will cool your motherboard directly. This will keep you XBox a lot cooler without making a lot of noise like a 12 volt fan mod.
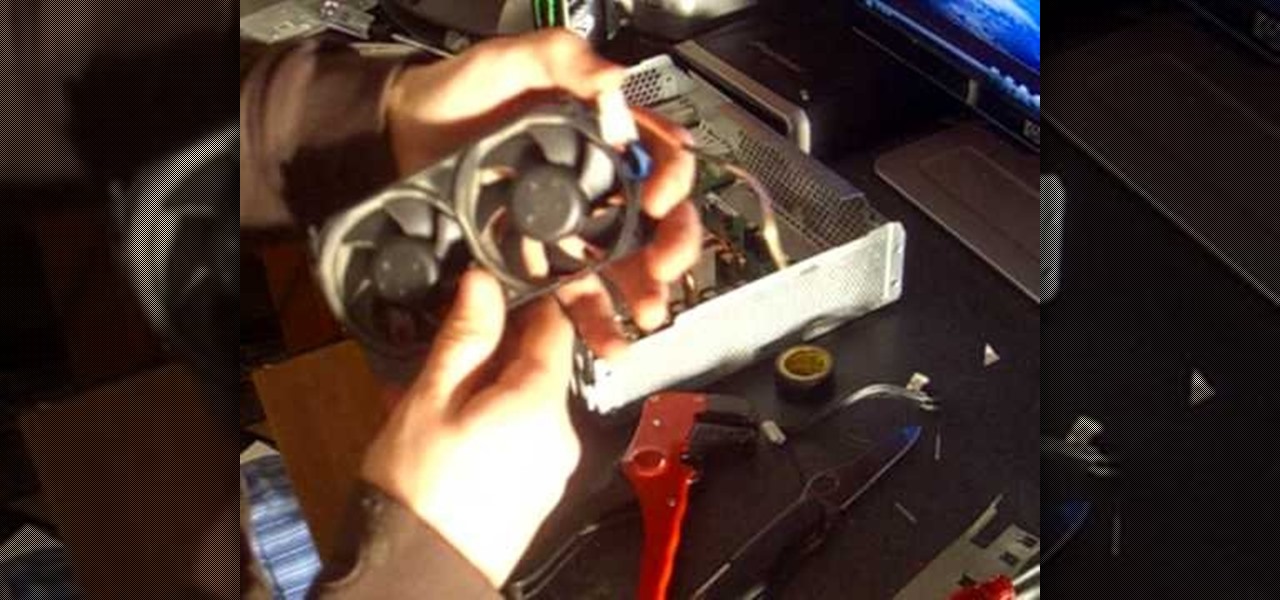
The XBox 360 runs hot. Really hot. And that is never a good thing for a computer. In fact, it is responsible for the infamous Red Ring of Death that has become synonymous with the XBox 360's poor build quality. This video is here to help solve the problem. It will teach you how to make the fan in your XBox 360 run at 12 volts instead of 5, which means that it will spin much faster and cool your console more efficiently.

Check out this step-by-step video tutorial on how to take the back off and take apart the new iPhone 3G (2nd generation). The directions here also include how to replace the LCD, touchscreen, battery, and motherboard in Apple's iPhone 3G. It also includes any information that might be needed to hack the internal workings of the iPhone.

HTPC. It stands for Home Theater PC. Some refer to it as simply a Media Center. But no matter what you call it, you're going to learn how to build one today. Why would you want to do that? Because one of the main advantages of creating your own home theater system is that you are control, not only of the cost, but the features and functions, as well.
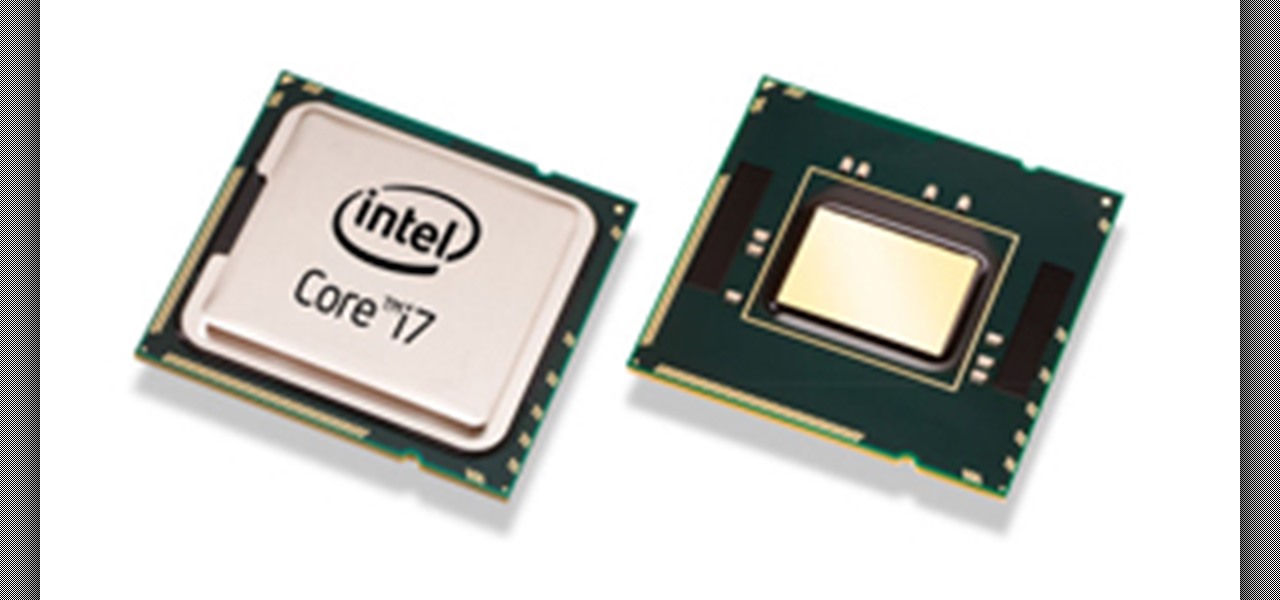
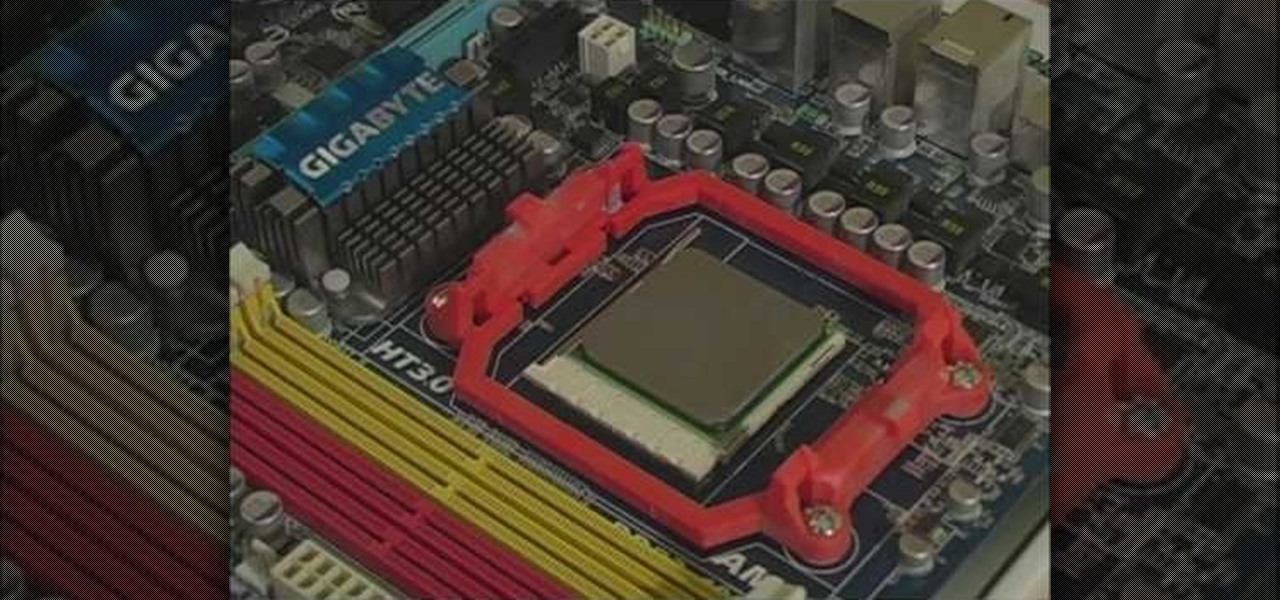
Check out this overclocking tutorial from HotHardware.com! Intel's Core i7 processor offers a significant performance increase over previous generation Core 2 processors. In addition, like the legacy Core 2 architecture, the new Core i7 also has a bunch more headroom for wringing upside performance out of the chip, maximizing value, power and return on your investment with overclocking. In fact, Intel actually built-in a predefined overclocking feature called "Turbo Mode". We explain how not ...

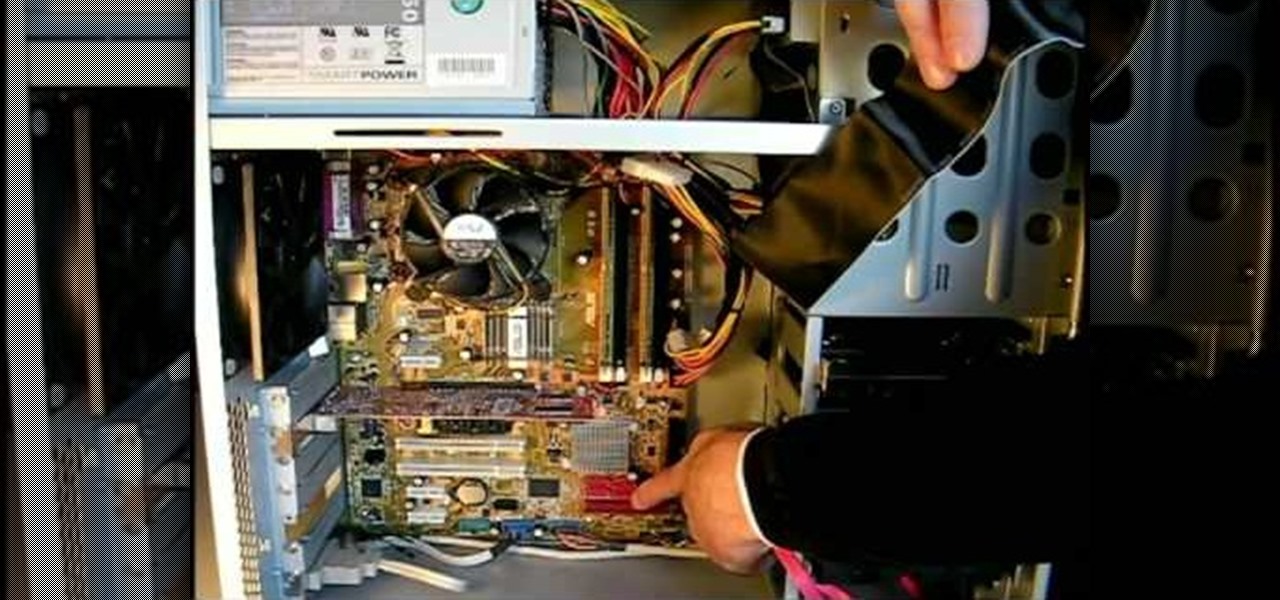
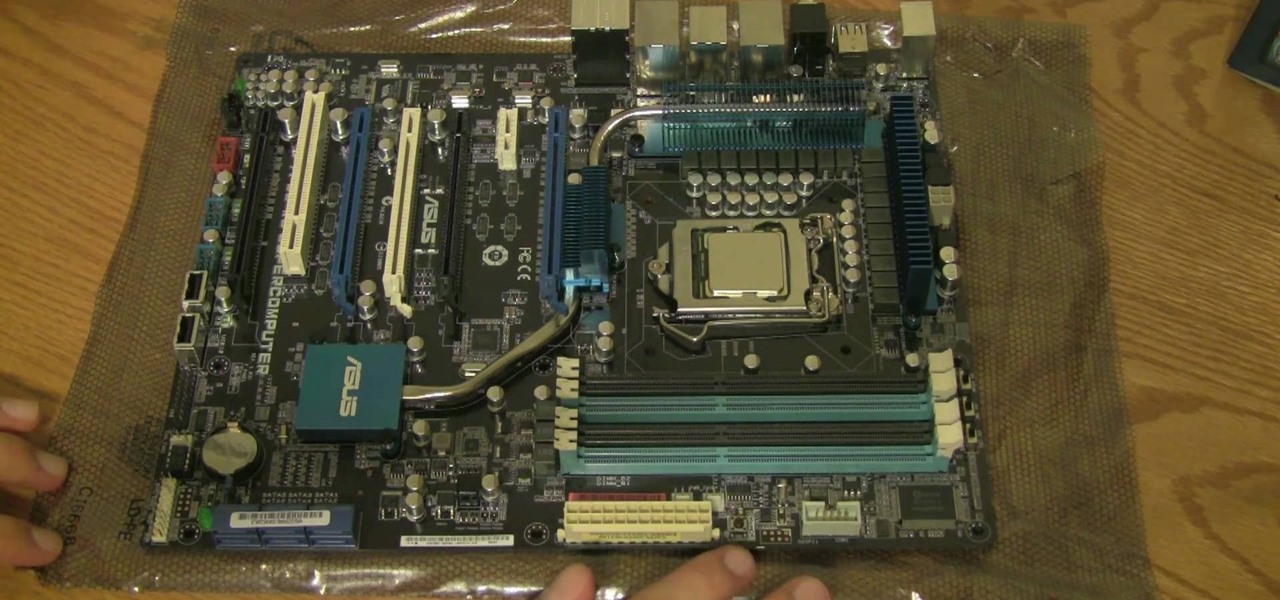
In this tutorial, we learn how to assemble a computer from parts. First, you will need to take the motherboard, video card, RAM, hard drive, power supply, CD-rom drive, and the case and make sure you have them all laying out. From here, you will take out the motherboard and plug the RAM in to the appropriate spot for it. This will be located next to the fan on the upper right hand corner of the motherboard. After this, place the motherboard inside of the computer case and then insert in the v...

How to fix and repair the LCD screen on the HTC Touch
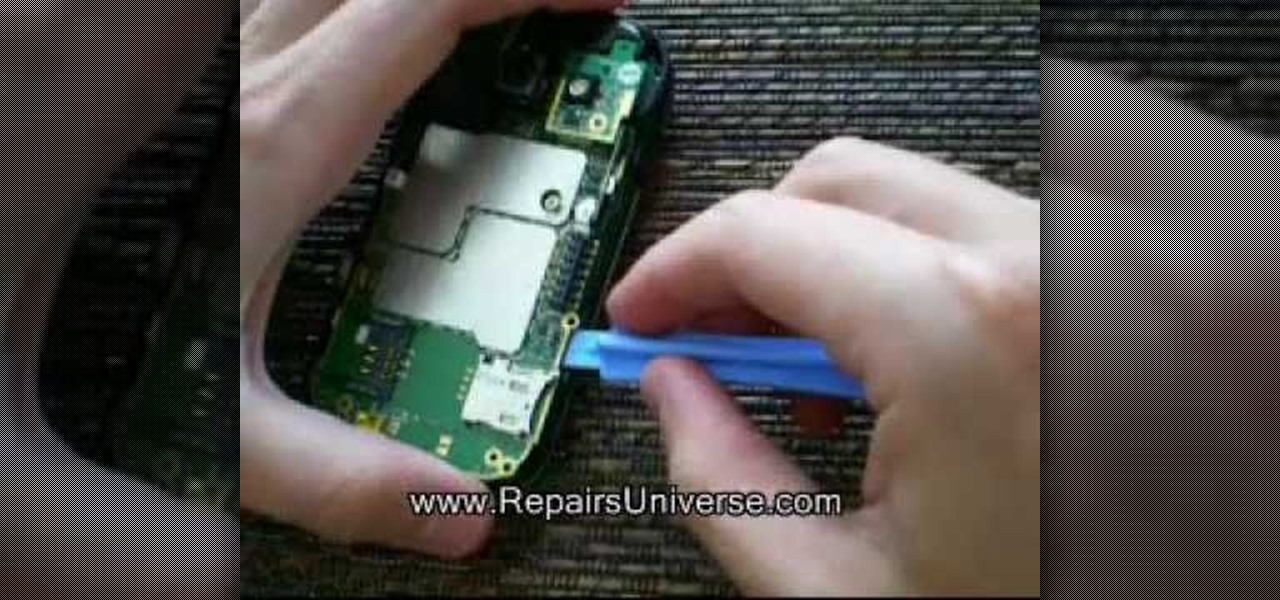
This video shows you how to replace the LCD screen on a third generation iPod nano. Using a plastic safe pry tool, run it along the edges of the iPod, releasing the clips. Once the clips have been released, you should be able to remove the back cover. There are six exposed screws on the bottom of the inside back cover, remove all of them. Next remove the click wheel ribbon cable from the jaw connector. To do this, use the pry tool to lift the connector. Use a pair of tweezers to gently remove...
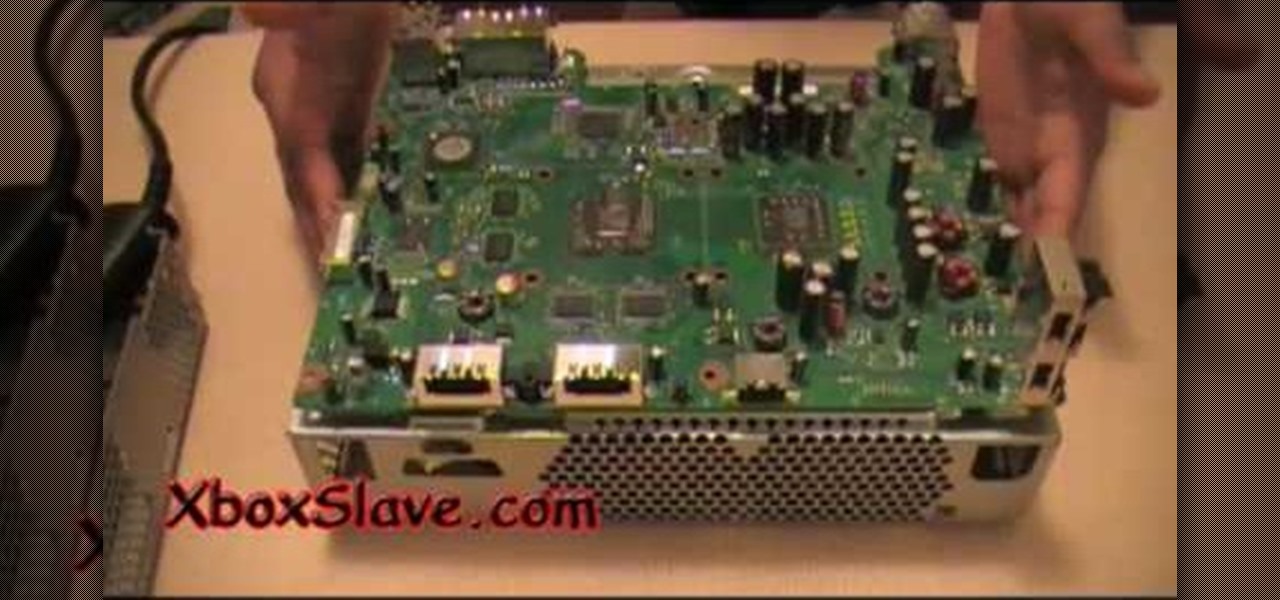
In this video tutorial, viewers learn how to fix the XBox 360 "red ring of death" using a heat gun. To begin, users must disassemble their XBox 360 console. Users will be doing this procedure on the motherboard-heat each side for 4 minutes. Then let the motherboard cool down for about 6 hours. Finally, add some thermal paste on the GPU and CPU of the motherboard. Once finished, reassemble the XBox 360 console. This video will benefit those viewers who have an XBox 360 and want to fix the "red...
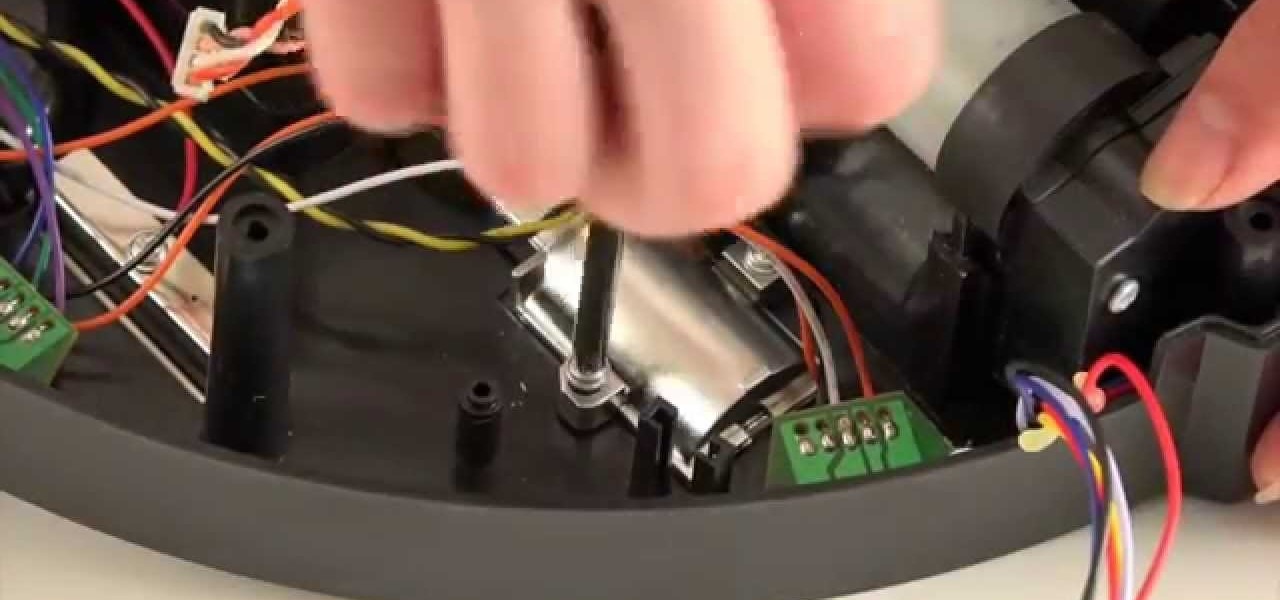
These instructions are applicable to both bObsweep models. Follow the video or text descriptions to replace the disinfecting UV lamp on your automatic vacuum.
See how to build your very own computer! Just watch this video tutorial, in 22 parts, on how to make a homemade computer from scratch! This is a very detailed how-to on creating your own computer tower.
The guide will walk you through a power switch replacement on a bObsweep Standard or Pethair. It includes:
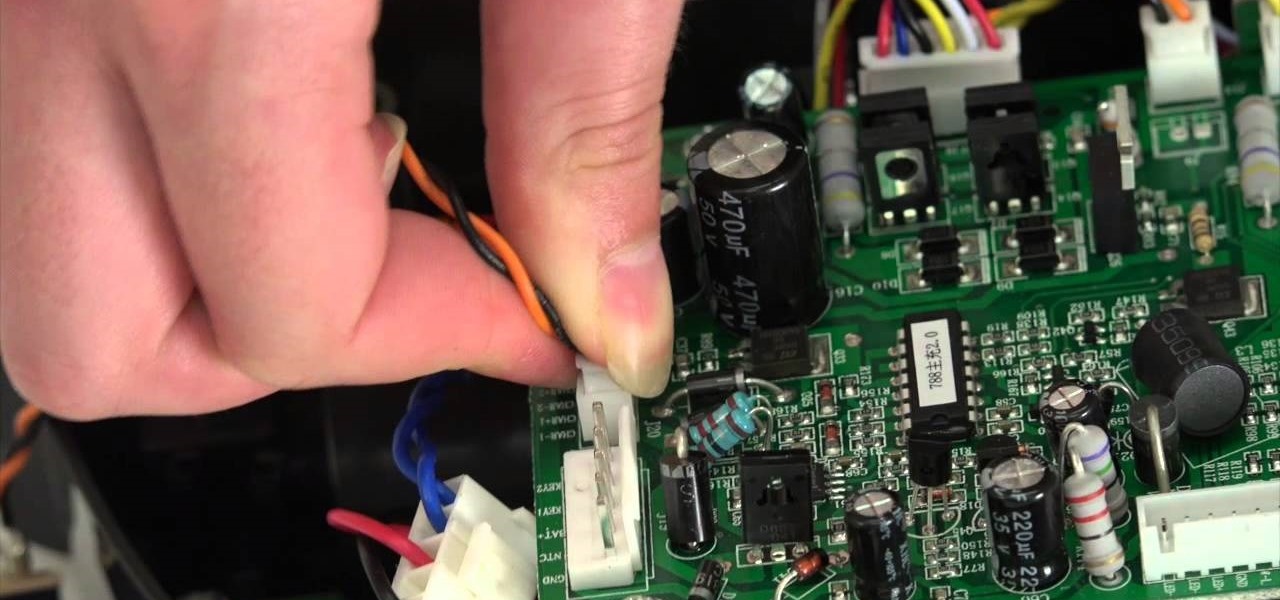
This how to video shows you how to take apart an HTC 8525 and replace the LCD screen. First, remove the SIM card and the battery. Next, remove the screws in the back. Using a pry tool, slide it along the edge of the phone at the bottom to release the clips. Once they are released, remove the back piece. To remove the motherboard, release the ribbon connector with the pry tool. Carefully lift the motherboard from the case. Remember that it is still connected to a ribbon that must be released. ...

Repairs Universe demonstrates how to replace the LCD screen on the LG Xenon GR500 cell phone. First, remove the battery and the SIM card from the phone. Then, use a small phillips head screwdriver remove six screws from the back of the phone. Next, use a safe pry tool to release the clips by running it along side of the phone. Remove the back layer. Remove the two screws on the inside of the phone. Also remove the volume key, the hold button and the camera button. Slide the phone to the side ...

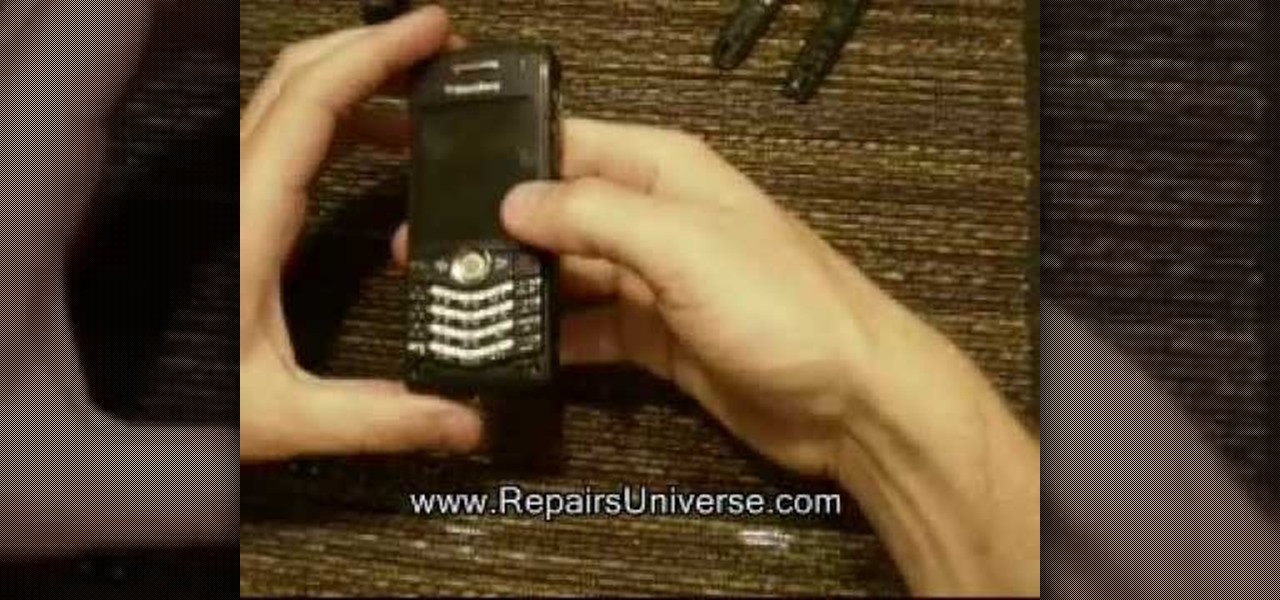
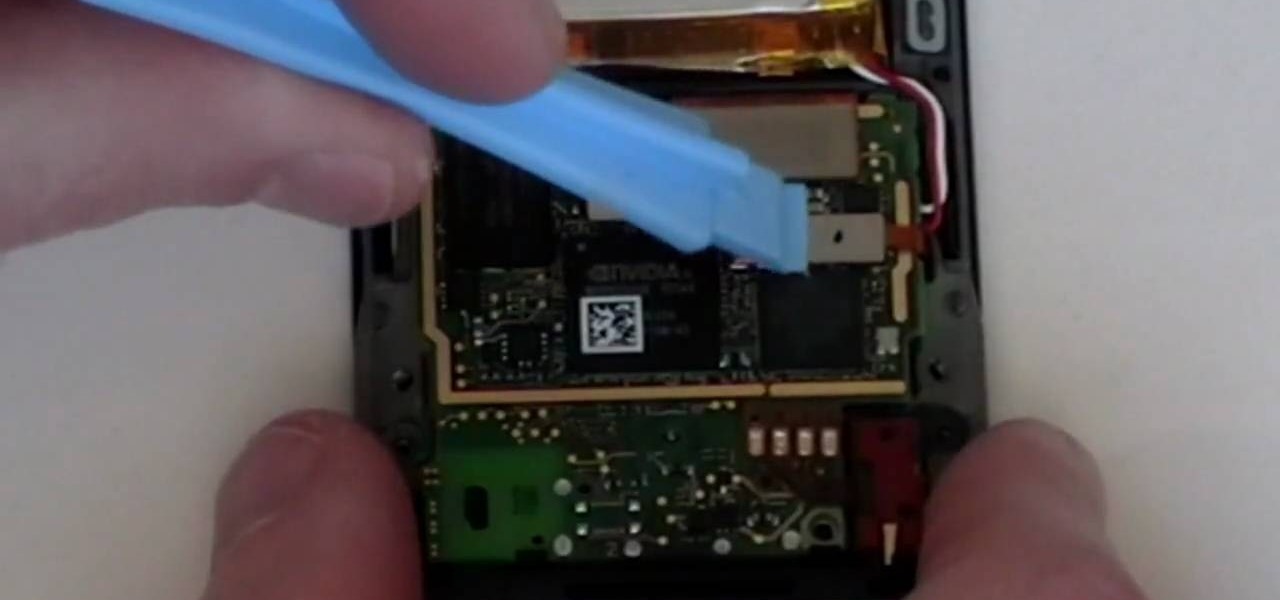
Repairs Universe demonstrates how to replace the LCD screen on the BlackBerry Curve 8900 phone. First, remove the SIM card, the battery and the back cover of the phone. Run a safe pry tool between the gap in the phone and the small back cover to remove the cover. Use a T-6 screwdriver, remove the six screws from the back of the phone. Then, pull up to remove the back layer from the phone. Flip the phone over and remove the front layer. Release the four clips with a safe pry tool and release t...
In this tutorial, we learn how to build a gaming PC at home. First, grab your processor and place it into the socket of the motherboard. Lock it into place, then apply compound on top, rubbing it in evenly. Next, install the heat sensor, which will keep the processor cool. after this, install the RAM into the correct slots. After this, insert the motherboard inside the case, matching it to the slots in the case. Use a screwdriver to screw it in, then install the cases. Install the hard drive,...
This video tutorial helps you identify the various components within a desktop computer. The CPU, a circular windmill-looking piece, consists of a fan that keeps the CPU cool. The CPU chip is located underneath this fan. There are four RAM slots in this particular motherboard featured in the video. The video card connects toward the middle and clicks into a PCI Express slot, which provides video. On the bottom there are expansion slots, which audio or network cards can be connected into. The ...
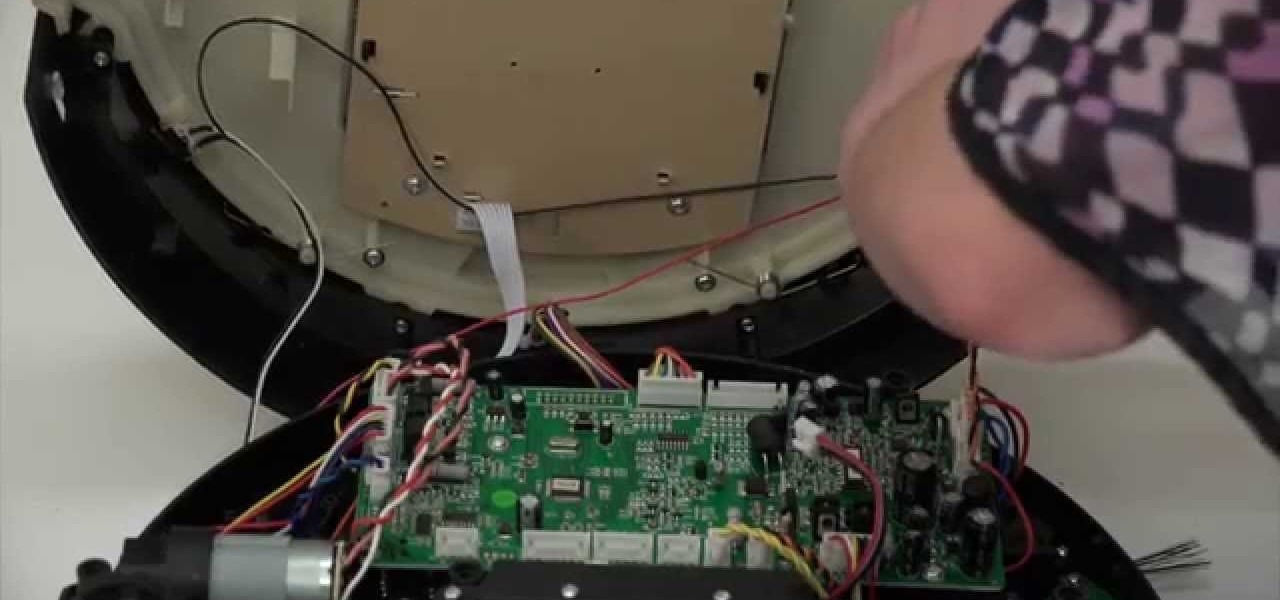
A step-by-step guide to replacing the side brush motor on bObsweep Standard or Pethair. Follow the video or multimedia directions in order to open up bObsweep, remove the main board, replace the side brush motor, then close your vacuum for future use.

New statements from Apple make it clear that they do not believe a hacker, or group of hackers, breached any of their systems. This comes after a recent report from Motherboard that a hacker gang called the "Turkish Crime Family" is threatening to remotely wipe up to 559 million iPhones by April 7.

In this Electronics video tutorial you will learn how to repair the LCD screen on the HTC Tilt. Remove the stylus pen, back cover and the battery. With a T6 torque screwdriver, remove the three screws. Using a safe pry tool, pry off the top part of the cover. Take out the small piece of rubber as shown in the video and remove the screw below it with a Phillips screwdriver. Then remove one screw on top left corner with the T6. Using the safe pry tool, release the clips and lift off the next la...
AHHHHH!!! The Red Ring of Death! Fortunately there's a solution. This straightforward and incredibly helpful how to video will breathe some life into your XBox 360.

In this video, we learn how to understand circuit bending. Circuit bending is noodling around with circuitry to see how it sounds and get different noises out of it. When you go into a motherboard and see the circuits that are inside of it, these can make noise if you re-circuit them. This can help you be creative and turn the electronic circuit board into a canvas. This can let someone immediately create something out of this and use it as an art form. It takes trial and error to find someth...
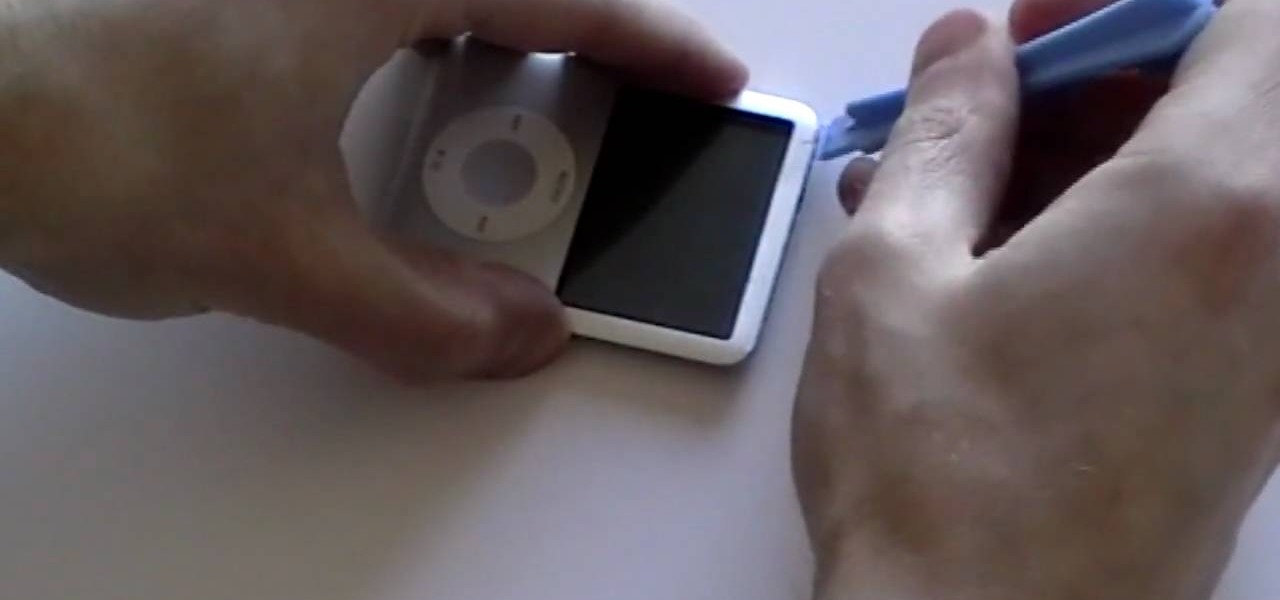
In this how-to video, you will learn now to dismantle an iPod Nano 3rd Generation. First, run a plastic tool on both sides of the device. Once this is done, remove the back cover with your fingers. Next, unscrew the six screws on the circuit board. Store them in a place where they will not be lost. Next, remove the click wheel ribbon cable from the jaw connector. Lift the jaw connector with the tool and use a pair of tweezers to gently remove the cable from the jaw. Next, remove the small met...
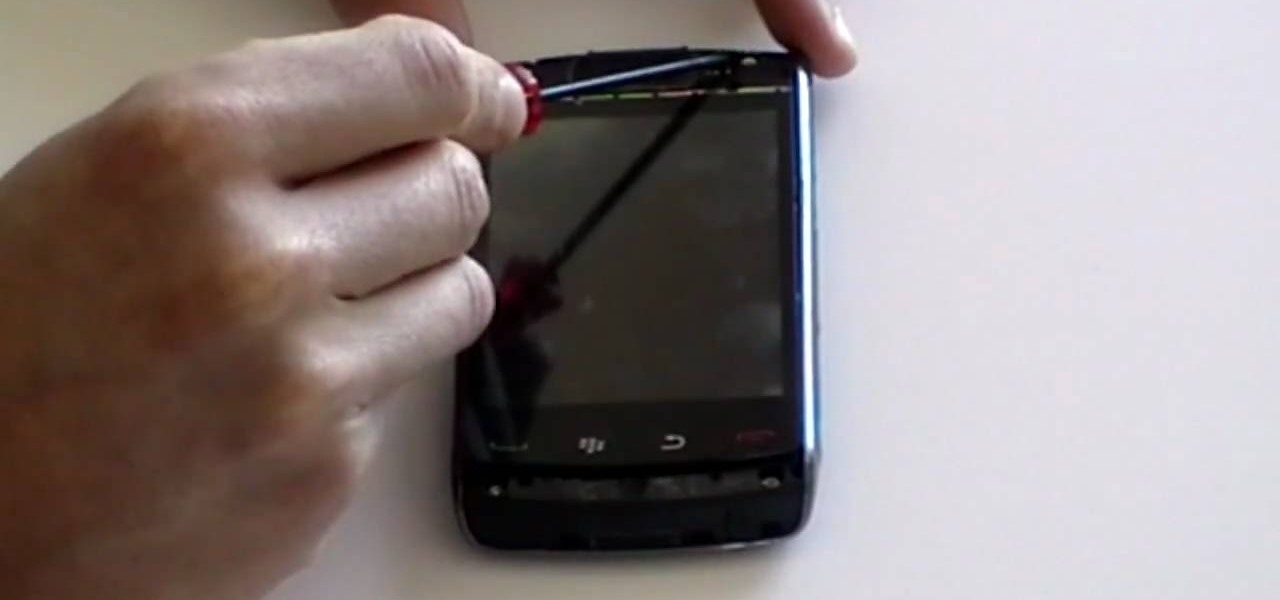
Repairs Universe demonstrates how to take apart the BlackBerry Storm 2 to replace the LCD. First, flip the phone over and take out the battery, SIM card and memory card. Then, use a safe pry tool to pry off the top and bottom covers which are held on by adhesive and clips. Next, use a T-6 screwdriver, remove the size screws on the front of the device. Flip the phone over and remove two more screws. Use the pry tool to release the clips and remove the outer casing. Flip the phone over and usin...
In this tutorial, we learn how to install a replacement LCD screen on a Blackberry Pearl. First remove the cover and battery from the phone. Then, you will take a tool and remove the clips from the left and right side of the back to remove the bottom. You will now find two more screws that need to be removed from the phone that are on the top. Once done, you will nee to pry open the top and bottom of the phone and take it apart. You can now remove the motherboard from the casing which is wher...
Repairs Universe demonstrates how to replace the battery on a Microsoft Zune HD. First, use a tri-ring screwdriver to remove the four screws on the back of the Zune. Then, remove the back cover. Next, remove the bottom cover by using your fingers to gently push it off. Then, use a T-5 screwdriver to remove the four screws on the back of the Zune. Release three ribbon cables from their pop connections with a safe pry tool. Use the pry tool to also release the battery from the Zune. Lift the mo...
In this computer builder's guide, we learn how to go about installing an Intel i7 quad-ore CPU on your system's motherboard. It's easy! So easy, in fact, that this video tutorial can present a complete overview of the process in about four minutes. For more information, including detailed instructions, watch the clip.
If you haven't been inside a computer before then when you open the side panel, that massive forest of wires might be slightly intimidating for the first time. But it is necessary to eventually begin upgrading your hardware to keep up the todays technology. In this video you will learn how to identify the proper AGP slot on your motherboard where your graphics card is housed and how to remove it properly.
Add speed and power to your computer by adding more memory. You Will Need