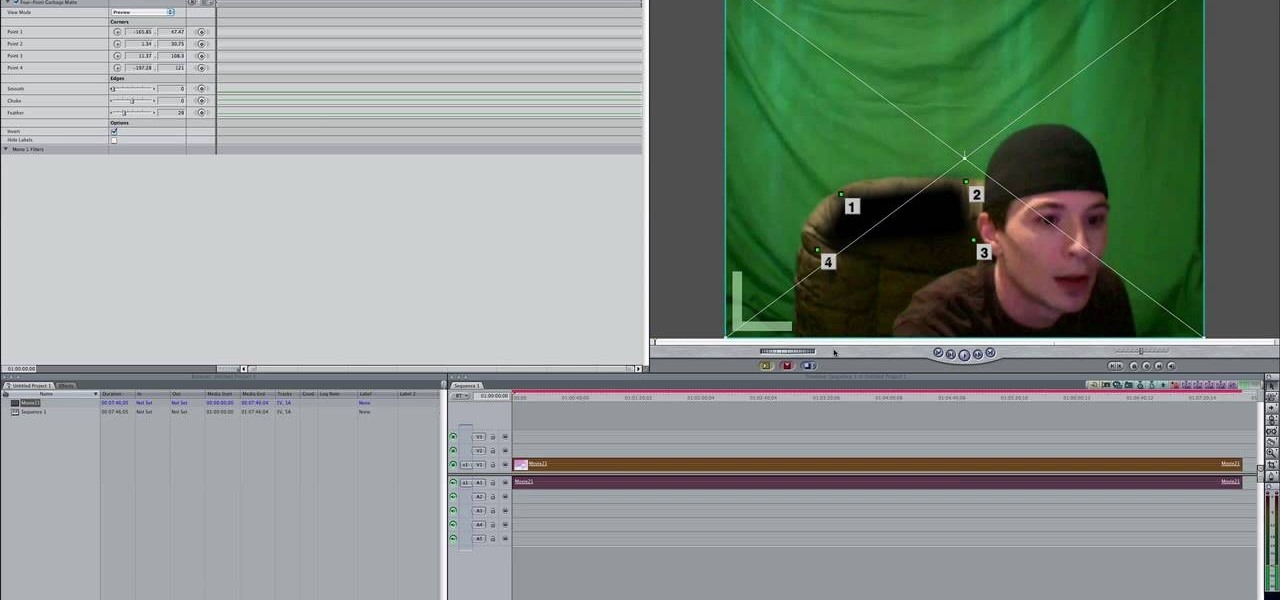
In this video clip, you'll learn how to create and use four- and eight-point garbage mattes in Final Cut Pro. Whether you're new to Apple's Final Cut Pro non-linear video editor or just want to better acquaint yourself with the popular video editing program, you're sure to benefit from this video tutorial. For more information, including detailed, step-by-step instructions, watch this tutorial.

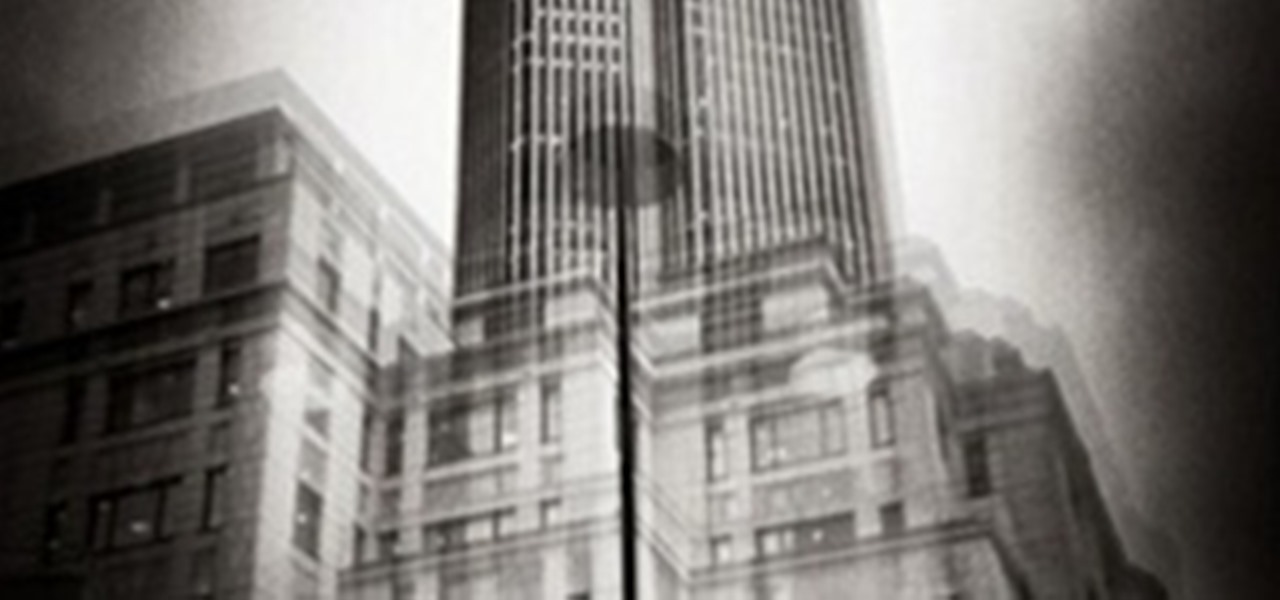
In photography, creating a double or multiple exposure photo involves combining two different images to make one single image. This technique has been used in film photography by exposing a piece of film twice to two different images. The second image becomes superimposed onto the first image, creating various effects that may mirror one another or seem ghostly.
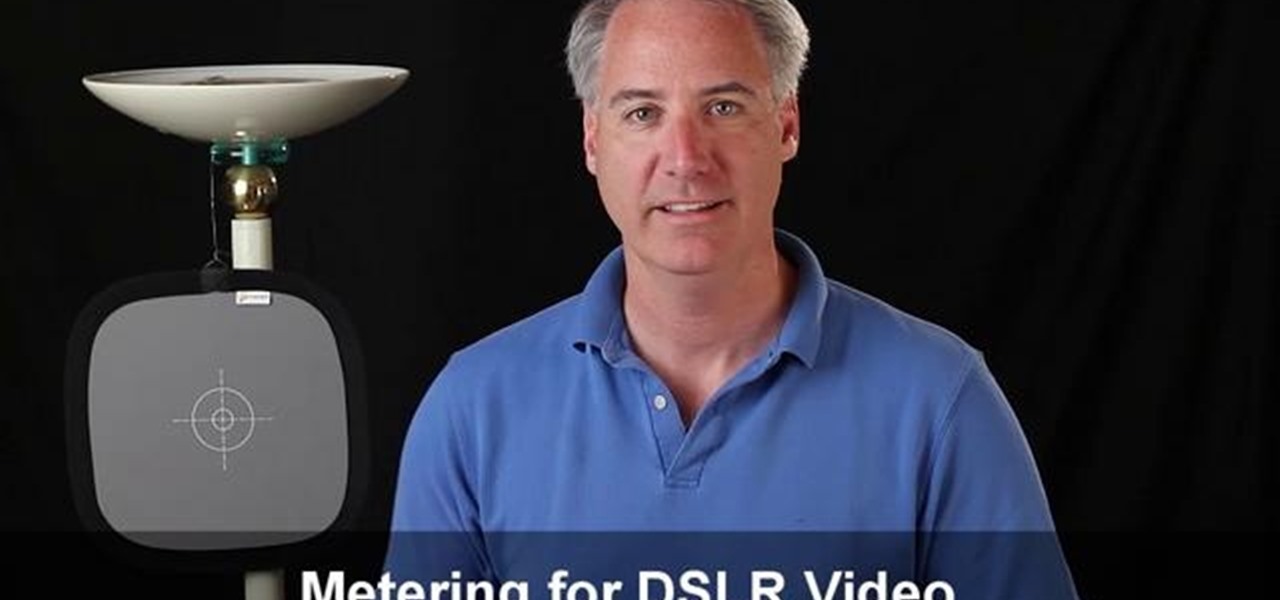
If the exposure for your camera is just a tiny bit off, the skin tone for your shots will be terribly off. You can use an 18% grey card to determine correct exposure, which is useful for setups when you are doing self-portraits or similar projects.
Time exposure photos are easy with a Nikon digital SLR, creating great special effects, night scenes, and cityscapes. Watch this photography tutorial video to learn how to use creative time exposures on your Nikon D80 camera to make your pictures more interesting.
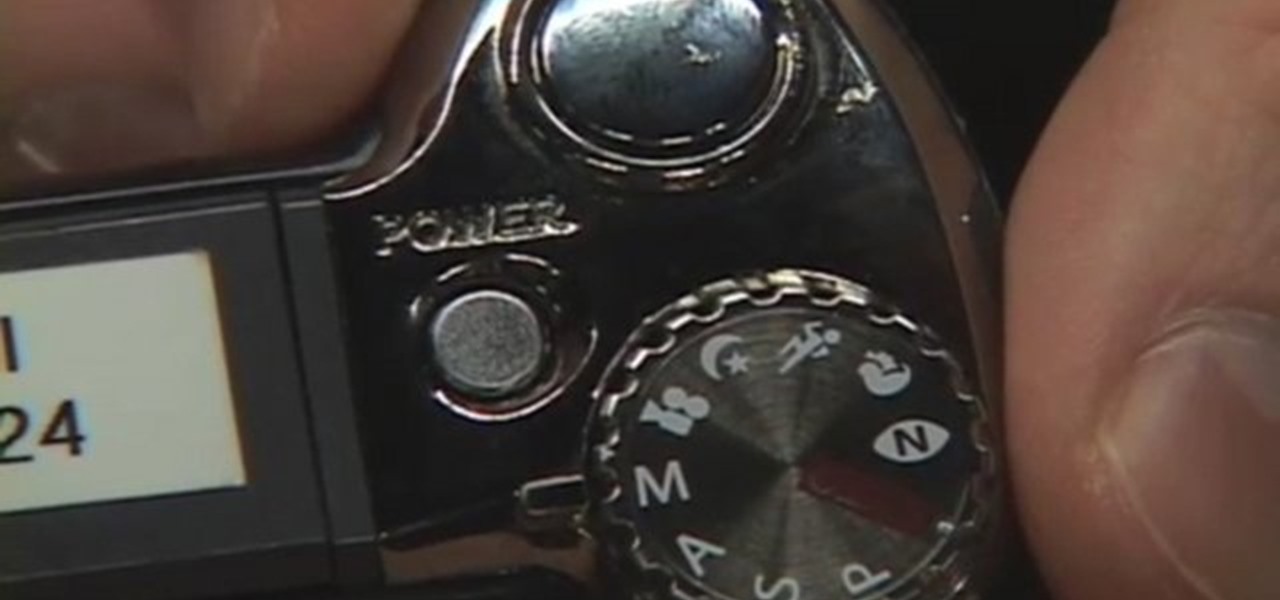
Watch to learn some specific information about how to calibrate the settings on your camera so that you get the best exposure possible.
Apple just released iOS 12.5.1 (build number 16H22) for iPhone 5S, 6, and 6 Plus, as well as iPod touch 6th generation, in addition to iPadOS 12.5.1 for iPad Air, mini 2, and mini 3. The update fixes an issue in iOS 12.5 where Exposure Notifications could incorrectly display logging profile language.

In this Final Cut tutorial, Richard Harrington discusses the common problem of backlighting, exposure and what can happen when shooting video outdoors. Proper exposure of all elements in a shoot can be a pain to achieve with a bright sun and blue sky but using the three way color corrector in Final Cut Pro, Richard is able to make all the elements pop.
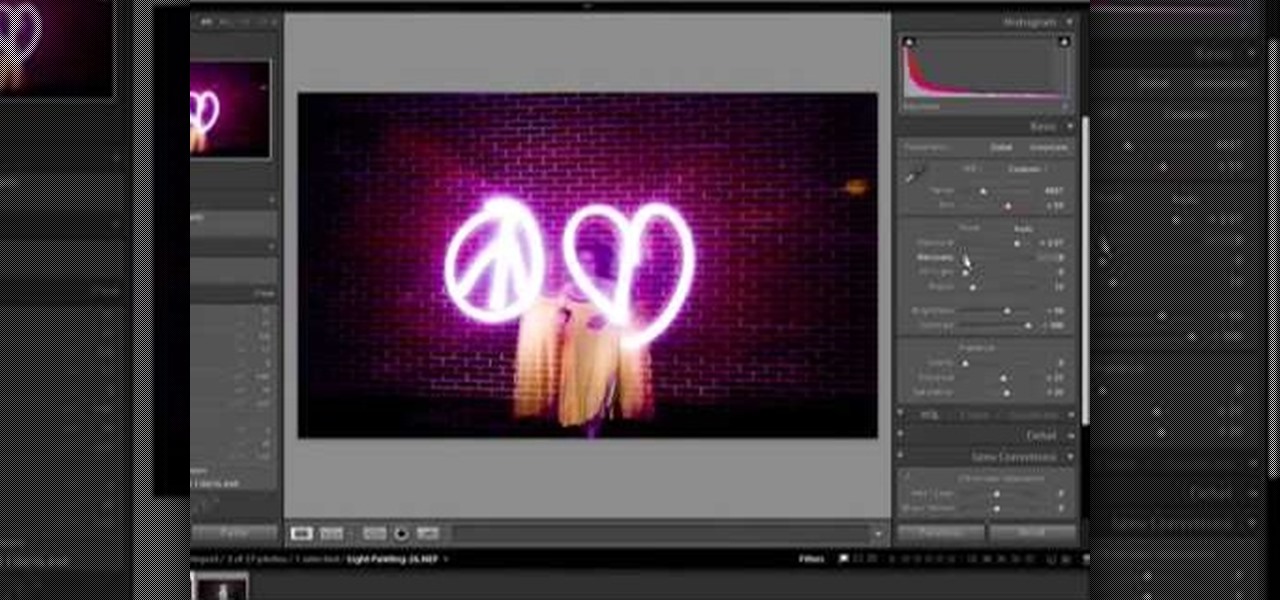
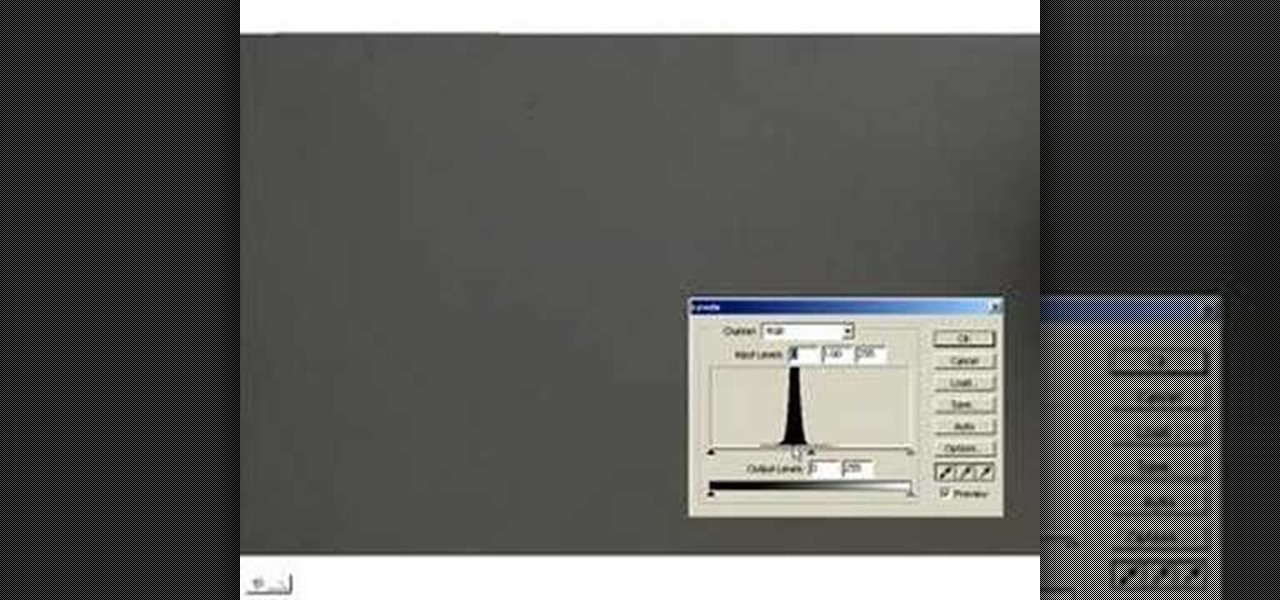
In this Photoshop tutorial, Richard Harrington takes a look at balancing out exposure issues inside of Photoshop CS4. Mixed lighting on a photo can cause portions of the image to be too bright or too dark, fortunately Photoshop gives us some great tools to take care of these types of issues. Using a levels adjustment layer in combination with a color range selection, Richard is able to greatly control the lighting in a photo. The equalize command is also covered in this video tutorial.
This is The Substream's "The Film Lab" series on cinematography basics. This is an intro into the basics of exposure. What is the difference between exposure and shutter anyway?
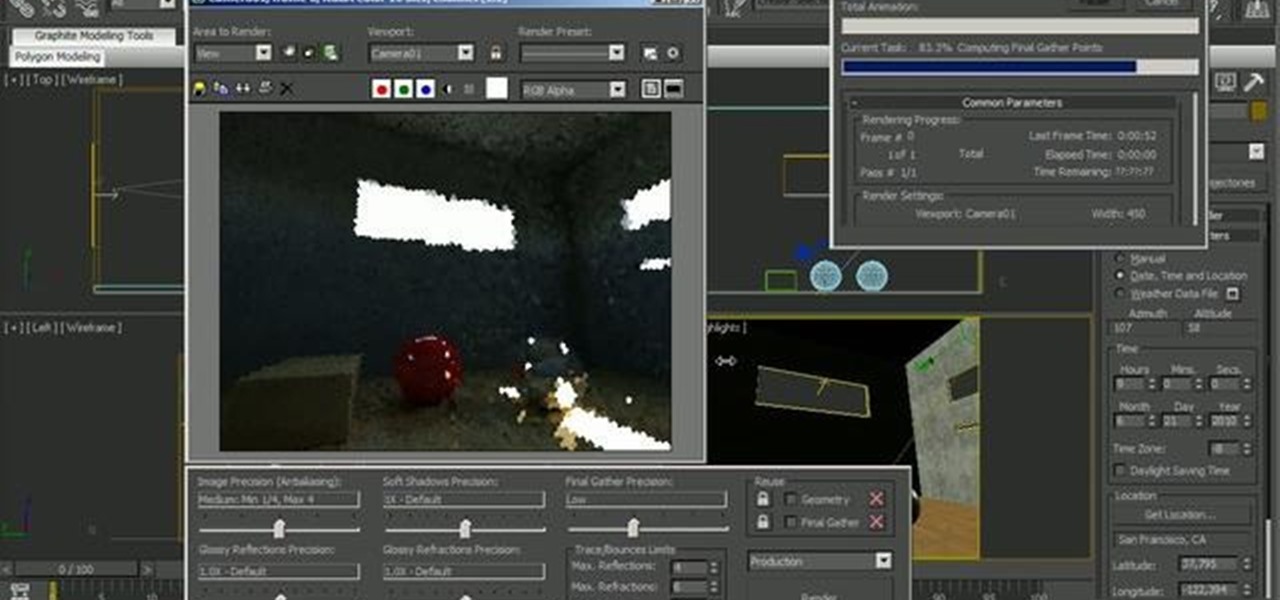
This clip presents an exhaustive overview of the MR photographic exposure tool in 3ds Max 2010. Whether you're new to Autodesk's popular 3D modeling program or a seasoned graphic artist just interested in better acquainting yourself with the application, you're sure to be well served by this free video tutorial. For more information, including detailed instructions, take a look. Use the MR photographic exposure control in Autodesk 3ds Max 2010.
The technique of creating double exposure images allows viewers to peer into a unique world, away from reality. The results of combining multiple images into one can really be quite amazing. In this week’s Phone Snap Challenge, we want to see your own take on the double exposure effect. Create your image with your cell phone and post it to the corkboard by Monday, December 12th at 11:59 pm PST for a chance to win a paper pinhole camera kit.
This video shows you how to easily create cool image effects in Photoshop using the infra red settings portion of the Alien Skin Exposure plug-in. Use infra red settings in Alien Skin Exposure plug-in.
This tutorial explains some of the different settings and filters you can play with in the Alien Skin plug-in for Photoshop and use it to adjust images. Use the Alien Skin Exposure plug-in for Photoshop - Part 1 of 2.
Using an analog camera to create multiple exposures is a technique that has long been in practice throughout the history of photography. Pressing the shutter button twice will superimpose the exposure of two different images onto the same piece of film. Sometimes done in an artistic manner, sometimes by accident—you never know what you'll get until you develop your roll of film.
Congratulations to Bryan Kiguchi for Dreaming Little Bird, our winning shot of the Phone Snap Double Exposure Challenge!
All Mod Cons. Shot and Edited on iPhone 3G.
For this double exposure I used Hipstamatic, Dynamic light, Camera+, and Finally BlendCam for the iPhone.
When a person sits motionless for hours on end in front of a television screen, it's sloth; when a camera does the same, it's art! Case in point, these beautiful long-exposure photographs of old Atari games by Rosemarie Fiore:
I thought the brightness in the cat picture mixed well with the brightness of the white sand of Destin, Florida. I wished I could have cropped the picture with the cat in it so there wasn't a huge chair on the water! Tiger (the cat) was actually watching a bug fly by, witch is also in the shadow but isn't visible through the sand. I used Instagram to apply the Hefe filter to the shadow picture and BlendCam to do the double exposure part.
iPhone 4 DXP Camera+ and PS Express
iPhone taken with Fusioncam app
Iphone apps used: Snapseed
Hello everyone, We decided to add another short video on some basic Timelapsing and long exposure shots. This video is meant more for demonstrating camera setting equipment usage. However, we will provide this brief description: Remote triggers are used to communicate with your cameras shutter, which tells the camera to fire off shots in 1sec to 30min or more intervals. Be sure to subscribe as we have more video's coming for our "Basic Photography Tutorials" webisode series. Wishing you all t...
I used iPhone app Blender to superimpose two shots, both taken in Bali—the clouds, and a famous surf spot (Uluwatu).
Photo made with Doublexpro using two Hipstamatic Prints. I used several more apps to get the end result.
I used an iPhone4 and the app DPX. Both photos were shot with Camera+, my favorite default camera.
Used MagicHourMe for the original photos and double exposed using Little Photo (thanks for the tip, Elaine! Awesome app. :) ). Shot and edited with a Samsung Galaxy S II.
A Portrait taken in the height of summer, taken with an Iphone4, cant remember which app or filter was used had too many on my phone and wasn't keeping track
Taken with Samsung Epic 4G Touch (Galaxy S II) used Little Photo to "Double Expose". I used to do this for real with an old camera on Black & White Film this is so much easier :-)
Paul Joseph Watson, Infowars.com Sunday, May 20, 2012
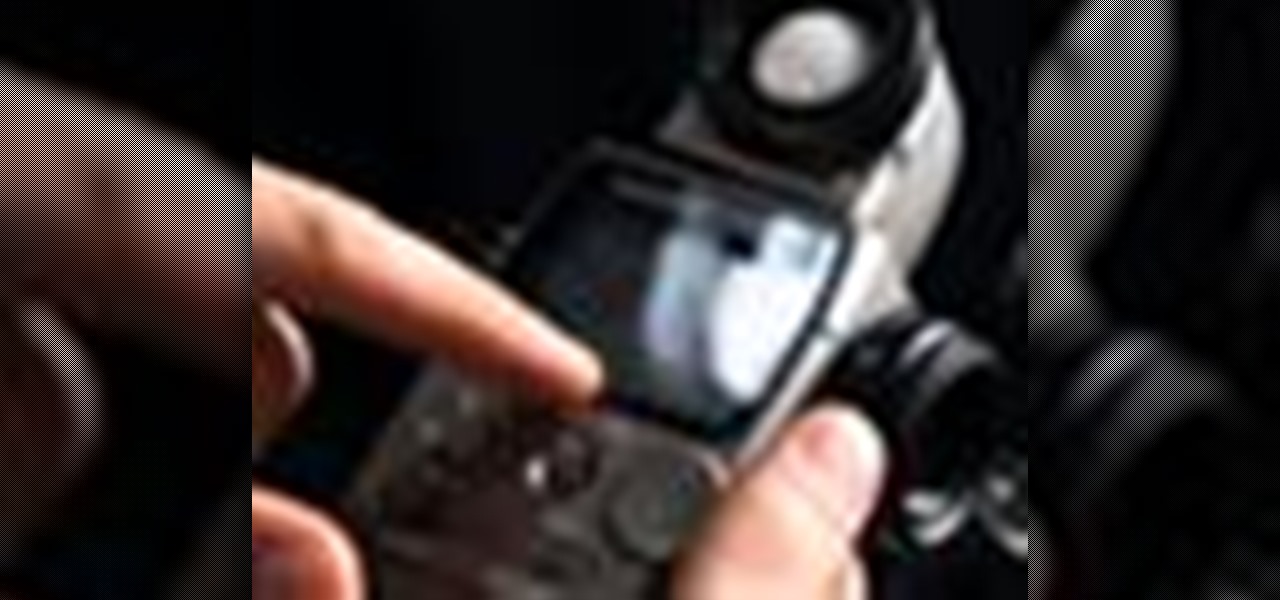
A light meter can prove to be an invaluable tool on any film set, allowing you to quickly and efficiently set lights and know the correct exposure values of those lights. Light meters were initially designed for still photographers and cinematographers can easily calibrate them to a given film stock speed for shooting film. But what about today’s digital cinematographer? I’m glad you asked. In this video tutorial you'll see how you can use a light meter to quickly and efficiently light a scen...
If there ever was a day to eat green candy, St. Patrick's Day would be it. But is there something better than the banality of green candy swarming the streets on St. Patty's Day? Yes—glowing green candy, and Instructables user BrittLiv wants us to show you how it's done.
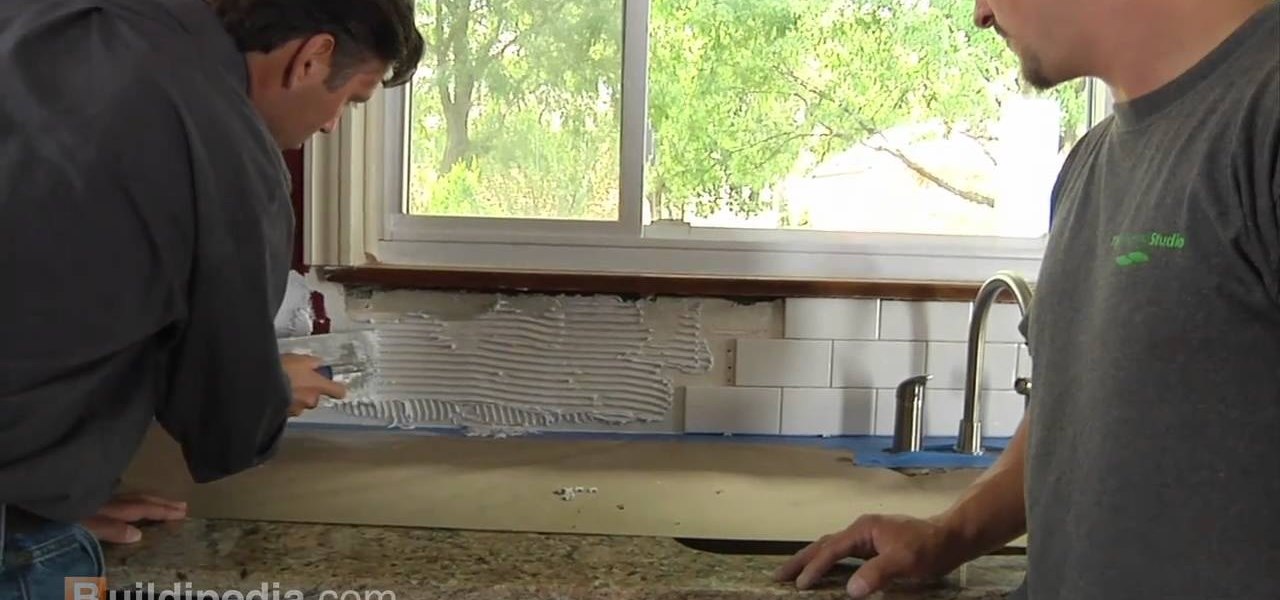
Installing a ceramic tile backsplash in your kitchen or bathroom can not only add a great new look, it can help prevent your walls from crumbling due to excess exposure to water. This simple little vid from buildipedia will walk you through the process.
Check out this video tutorial to show you how to use a Fuji FinePix digital still camera. This video was made by the equipment room at CUNY Journalism School in New York.
Light painting or light writing is one of the coolest of the coolest multimedia arts. It consists of setting a camera for a very long exposure in a dark area, then moving light sources around in front of the camera. When the aperture finally closes, you will have a photo where the light is preserved everywhere it was. Basically, you've drawn on a photo with light. How cool is that? This video will show you how to do it quickly and easily, allowing you and your friends to enjoy this exciting n...
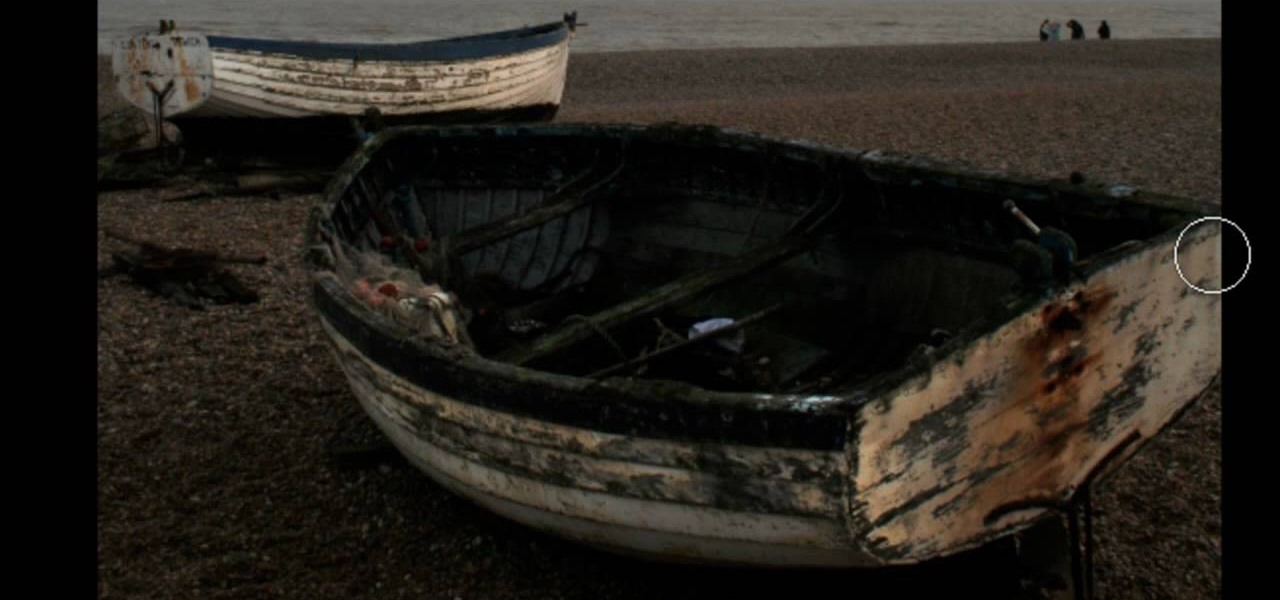
Not every photograph you take will come out perfect. The best digital cameras can't keep a photo from being too dark in certain areas, but that's why God invented Photoshop. Okay… "That's why 'Adobe' invented Photoshop".
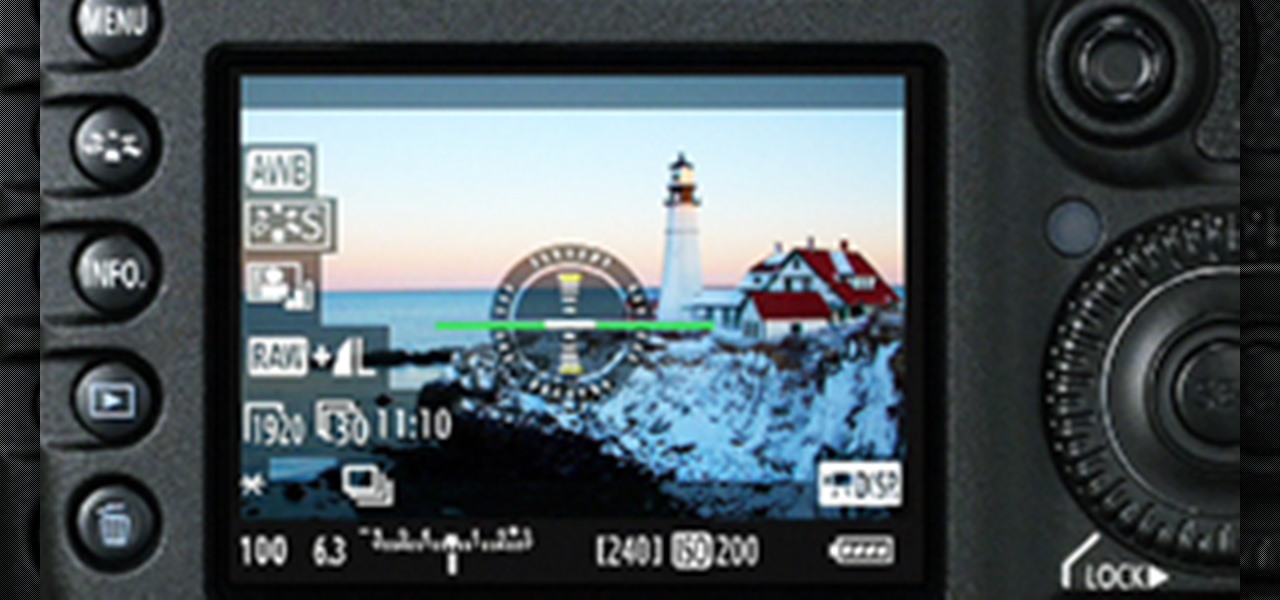
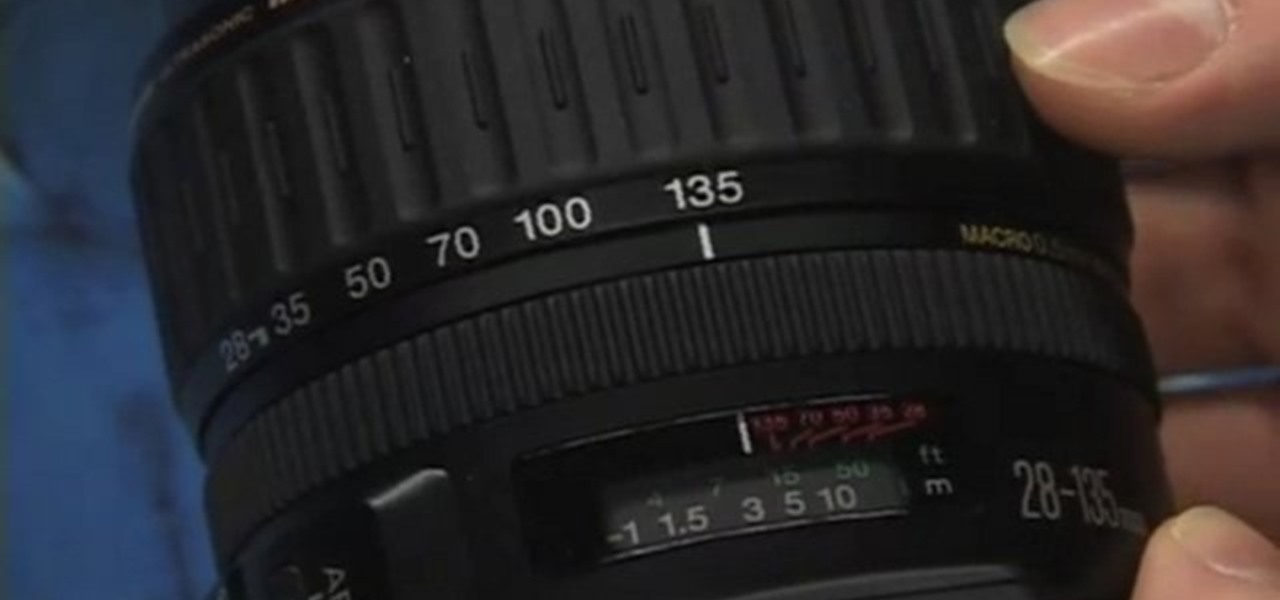
In video shooting, it's always best to select manual focusing on the Canon OES 7D digital SLR camera. If you need to adjust focus during filming, then you can manually refocus when needed, but there are also powerful autofocus options available. Watch this to see how to change the movie mode settings for your needs.
See how to shoot a time-lapse video using a DSLR and intervalometer. This video tutorial covers everything from settings you should use to making the time-lapse video in QuickTime.
Check out this video tutorial to show you how to use a Canon Rebel digital SLR camera. This video was made by the equipment room at CUNY Journalism School in New York.