
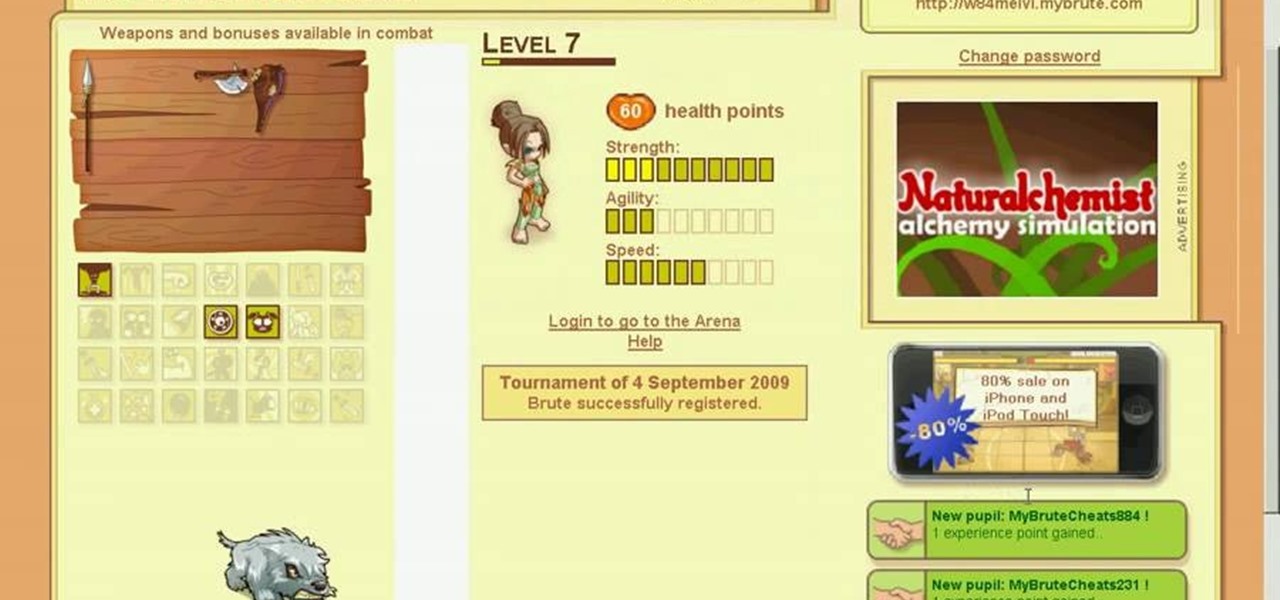
How To: Make pupils & gain exp points in MyBrute (05/13/09)
This video is showing you how to gain your own pupils and exp for free. You can also pupil me and I will pupil back just msg me. Gelerino.mybrute.com

This video is showing you how to gain your own pupils and exp for free. You can also pupil me and I will pupil back just msg me. Gelerino.mybrute.com
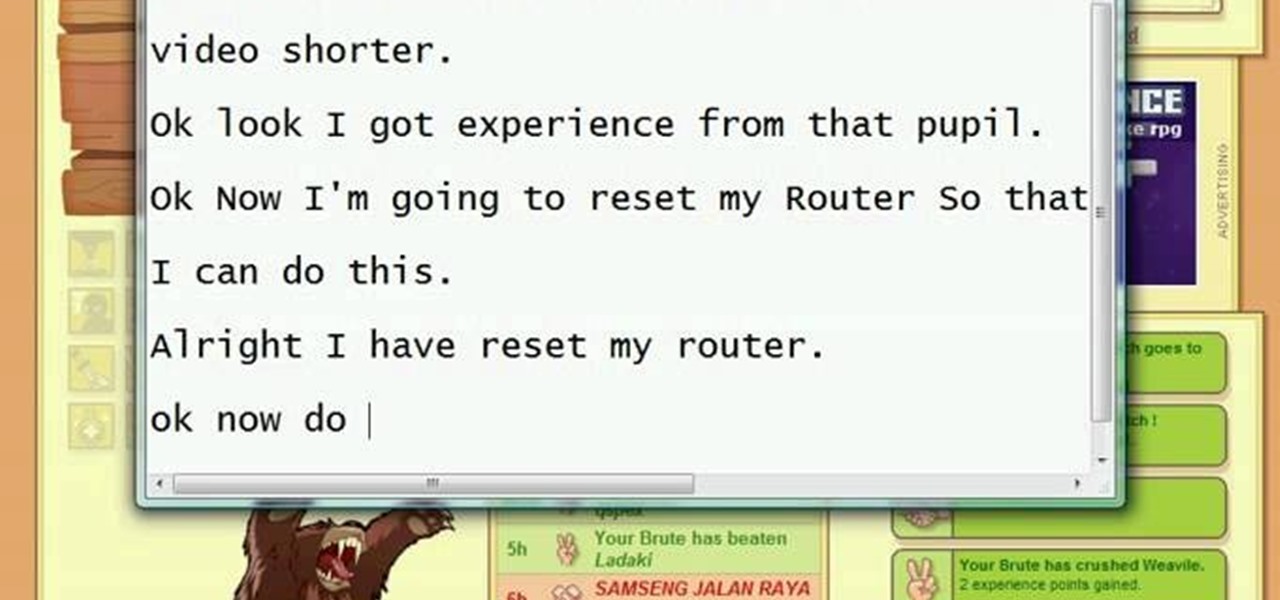
This is the Mybrute Pupil Glitch and I do it myself step by step to prove it works. This actually works please try it out yourself.
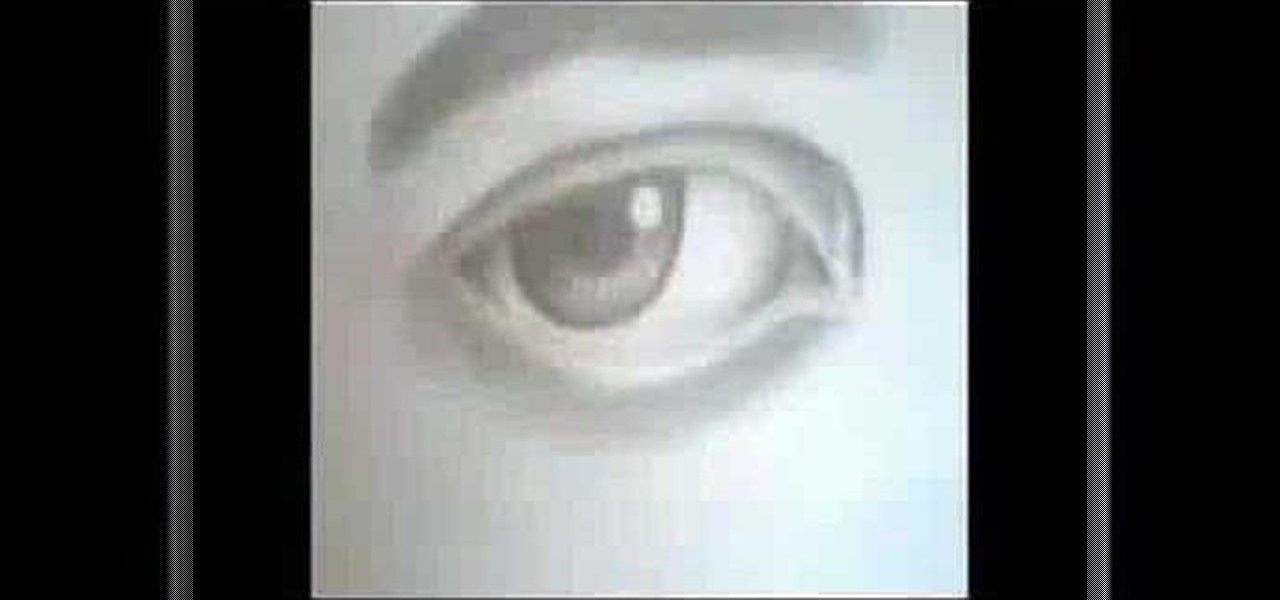
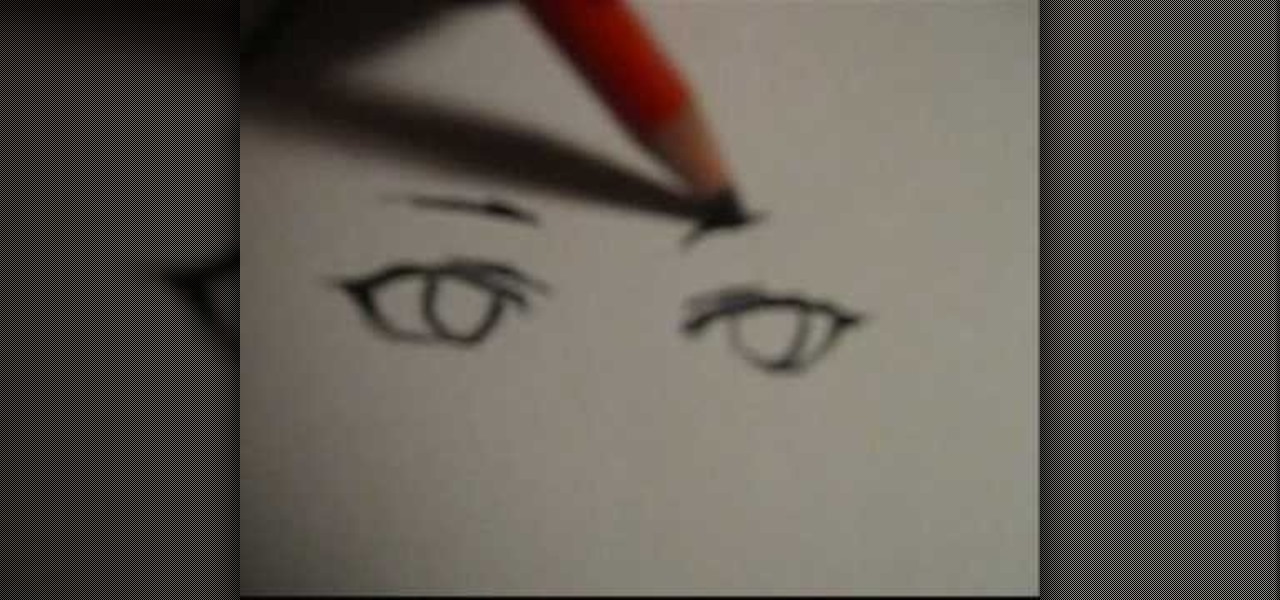
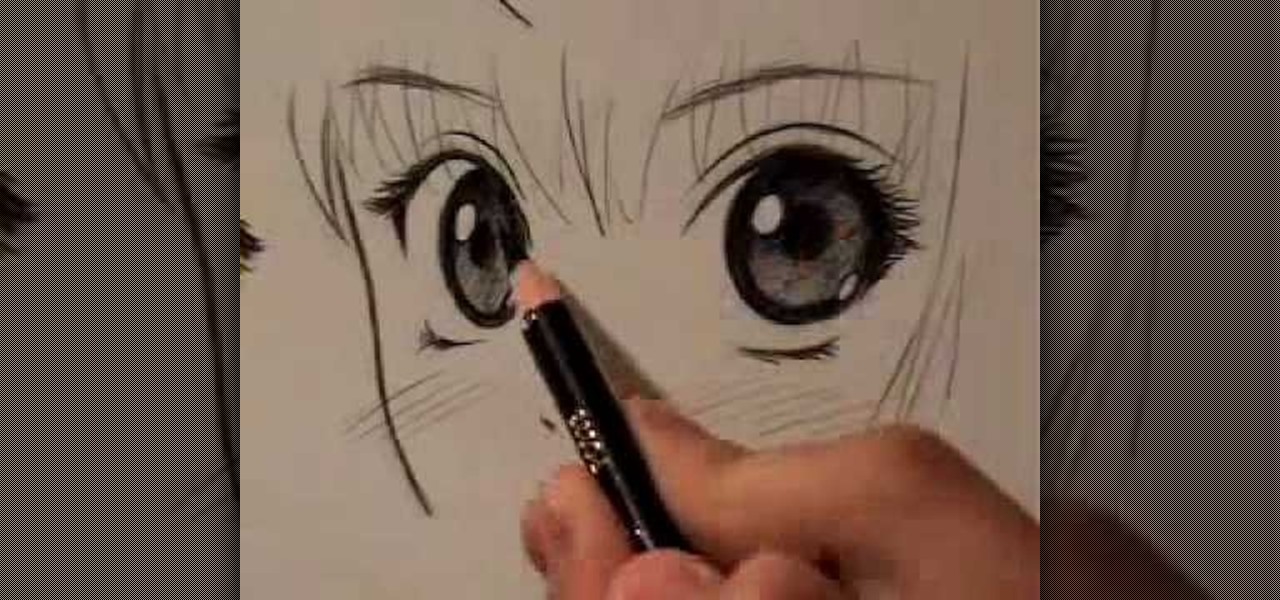
In this video, we learn how to draw a perfect eye. Start out by drawing the outline of the eye, the create the basic shape. After this, draw the crease above the eye and then the inside details of the eye. Darken the pupil, then add in lines around the pupil to show detail. Create a circle eraser mark near the pupil to show the eye having a glare, making it look more glossy. After this, shade in the sides of the eye and underneath where the bottom lash line is. From here, create the eyebrow a...
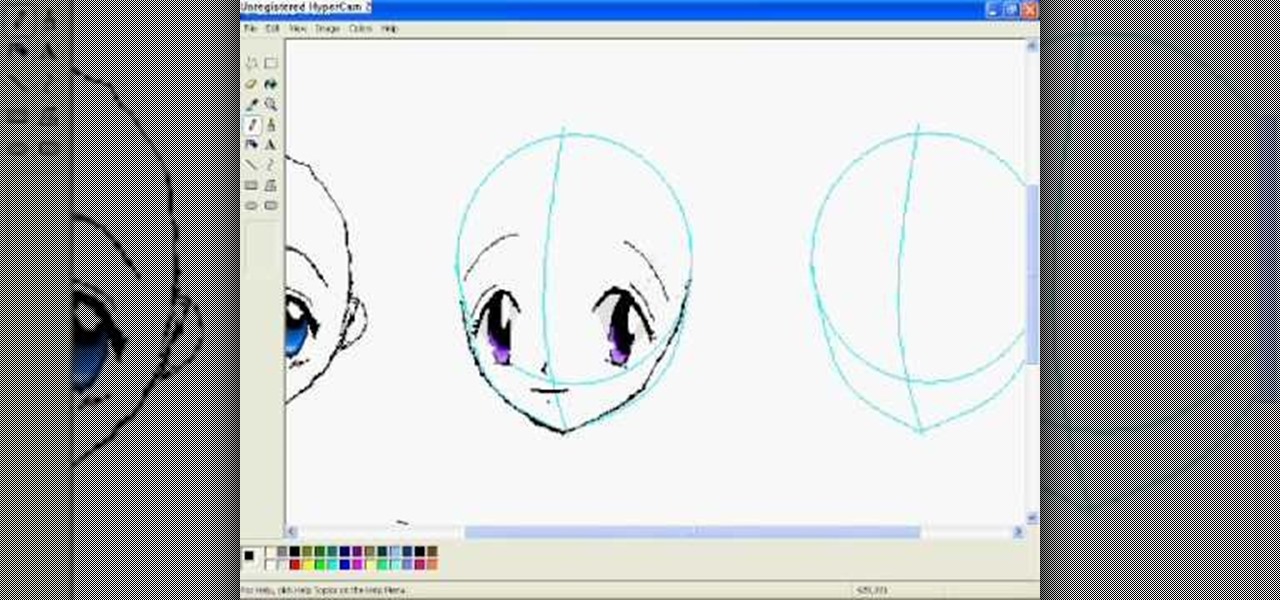
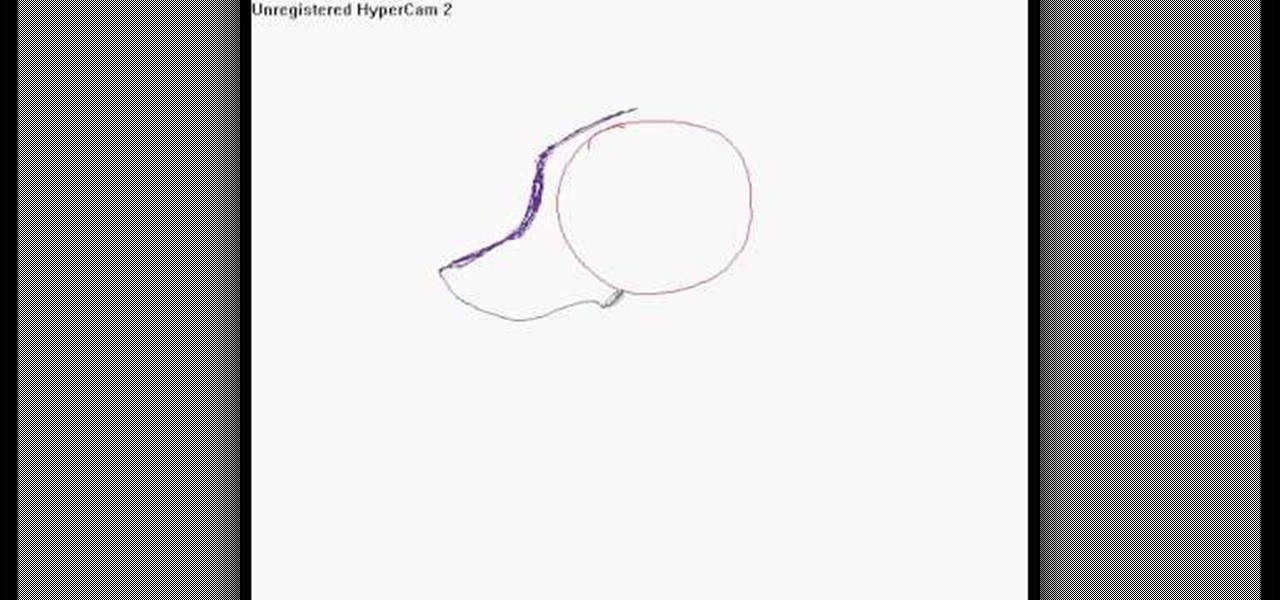
In this video, we learn how to draw anime eyes in MS Paint. First, draw the round circle for the head and draw a line in the middle for reference of where the eyes will go. To draw large eyes, draw two round circles and then a small pupil at the top. Color the pupils in black and color the rest any color you'd like. For female eyes, make the pupils much larger and add in eyelashes on the eyelids. Shade in underneath the lids and add white to show they are glossy. These are both great looks fo...
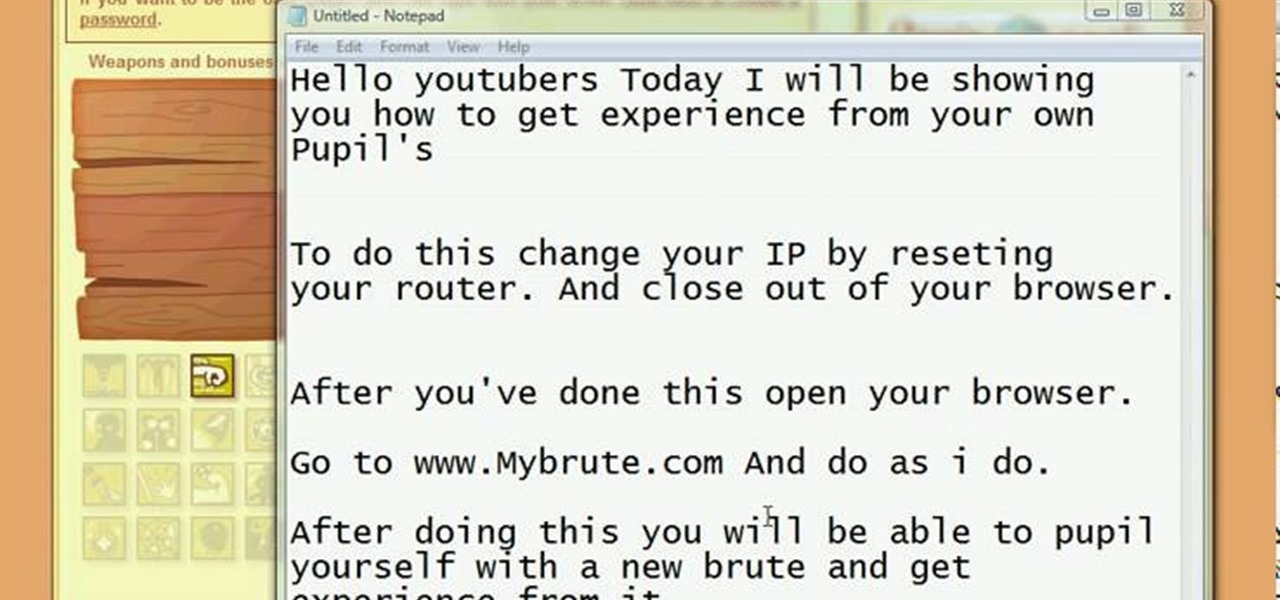
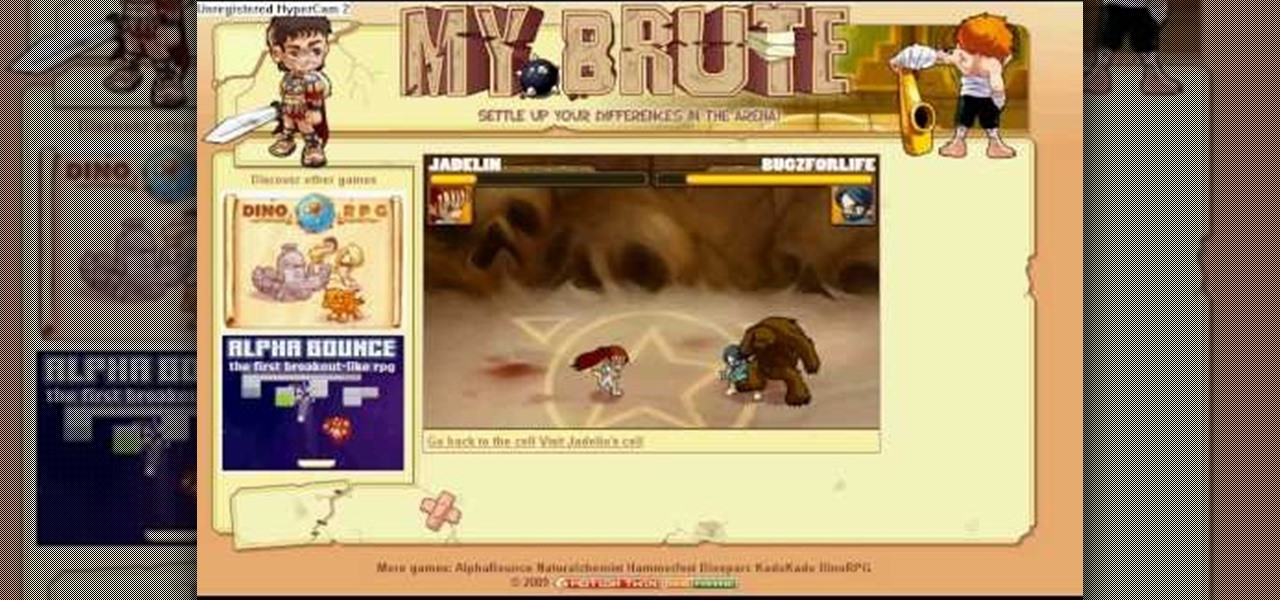
Hack mybrute with this mybrute cheat. MyBrute hacks, cheats, tricks. This video game tutorial will show you how to get experience from a MyBrute pupil glitch (05/24/09). This is a glitch so you get experience from your own pupils.
In this tutorial, we learn how to draw four types of manga eyes. The first style if for a female and they are cute eyes. Start with a half circle curved downwards, then draw a small line underneath the eye. Draw a small line above the eyes and then use a thin pencil lines to make the pupils. Make the pupils large and add a slight light in them to make them appear larger, then add on eyelashes. For serious female eyes, draw smaller eyes that have a v-shape to the edge of them, with serious eye...
From TutVid comes a great Photoshop tutorial. Follow this short tutorial and learn how to change someone's eye color.
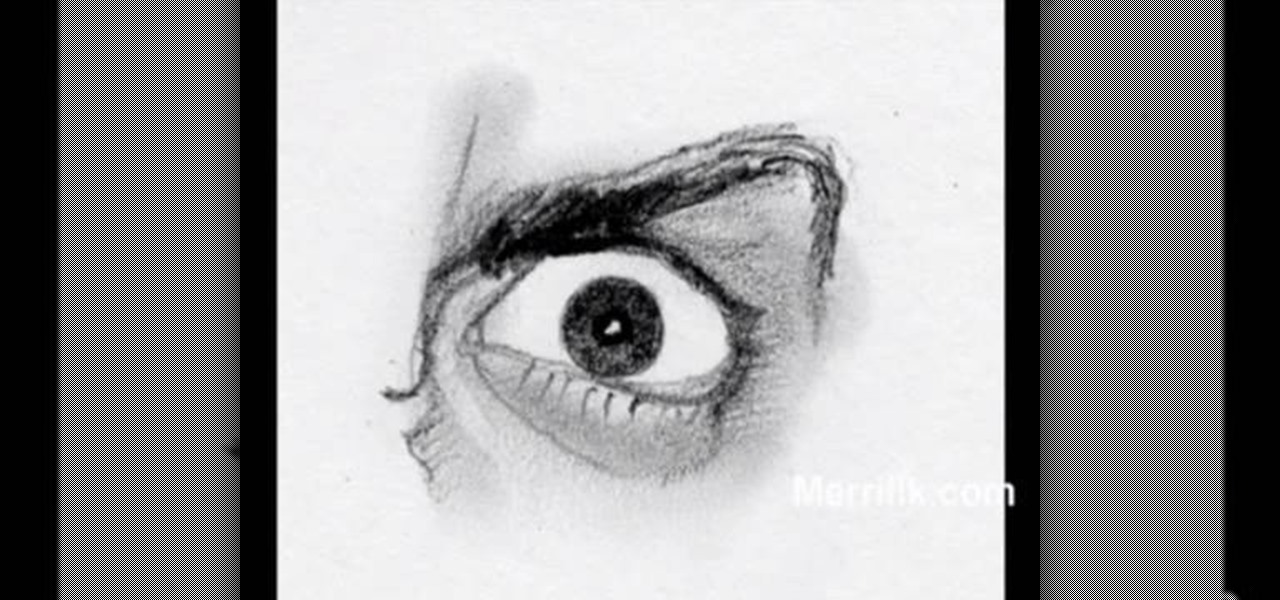
Watch this fine art video tutorial to learn how to master drawing an angry human eye in two minutes.
Hack mybrute with this mybrute cheat. MyBrute hacks, cheats, tricks. Watch this video tutorial to learn how to hack MyBrute and learn the Pupil Glitch (09/02/09).

In order to make a monster hoodie, you will need the following: a hoodie, black felt, white felt, fabric glue, scissors, pencil, and tape measurer.
For some reason most women favor white creamy deodorants. This is a disadvantage for women with prank-happy roommates and significant others who have seen this video. It will teach you how to pull the cream cheese pits prank by replacing someone's deodorant with cream cheese.
In this video, we learn how to draw manga eyes in 4 different ways. The first one is a wide eyed look where you will draw large eye and then create the pupil towards the top of the eye. Draw in the lids and the top and bottom of the eye high around it. Then, for a female eye, you will need to draw in a large eye as well. But, with these you will draw in the lashes of the eyes on both the top and the bottom. For smaller eyes, you can draw them tall but make them thinner. Crosshatch the eyes to...
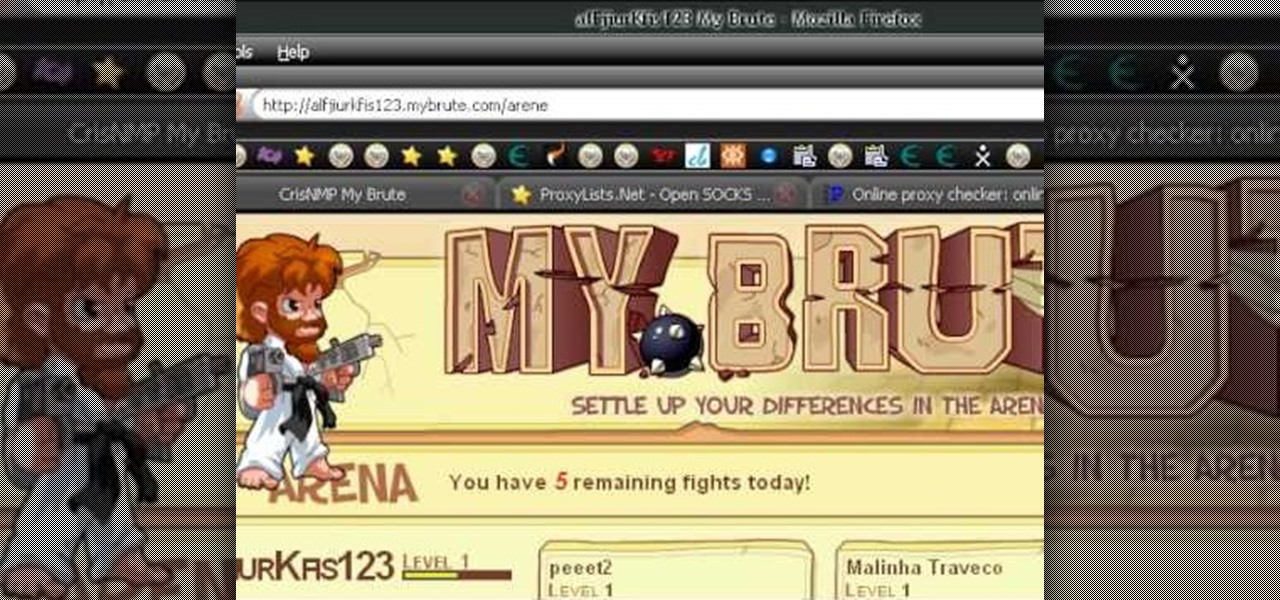
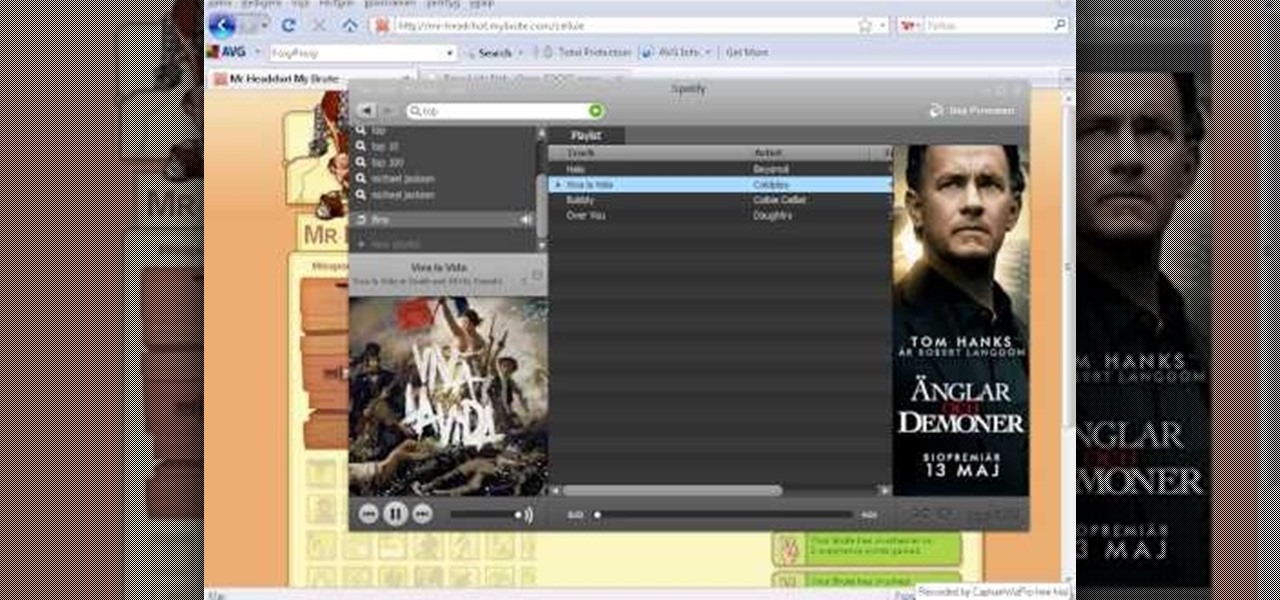
Watch to learn how to get infinite EXP with proxies in MyBrute (04/23/09). It shows how to get exp from pupils you make by passing the current two checks (Flash SOL files and IP check).
Germany-based Pupil Labs has jumped into the UX and control deep-end with a range of products that allow the user to add eye tracking to not only their existing augmented and virtual reality head-mounted displays but computers as well. This type of technology can add a new depth to the way we control devices.
In this video, we learn how to draw wolf eyes. Start out by drawing the outline for the wolf head. Then you will draw the eyes in an almond shape dragging downward on the nose. After this, zoom in on the eyes with the computer and then fill in darker lines around the eyes. Draw in the pupils on the eyes and add in the details for the corners of the eyes as well. If you want to draw wolf eyes from a side view, draw the outline of the head to give you reference, then draw the shape of one of th...

In this video, we learn how to draw an eye step by step. First, draw the curve of the eye on the top and on the bottom. Then, draw in the pupil of the eye and the inner corner of the eye. Use a light touch with the pencil to make the circle in the middle of the eye. Then, draw around it with a bolder line. After this, draw the crease above the eye, then draw shading to show where the crease line is. Next, fill in the pupil and add in a circle to make the eye appear glossy or that light is hit...
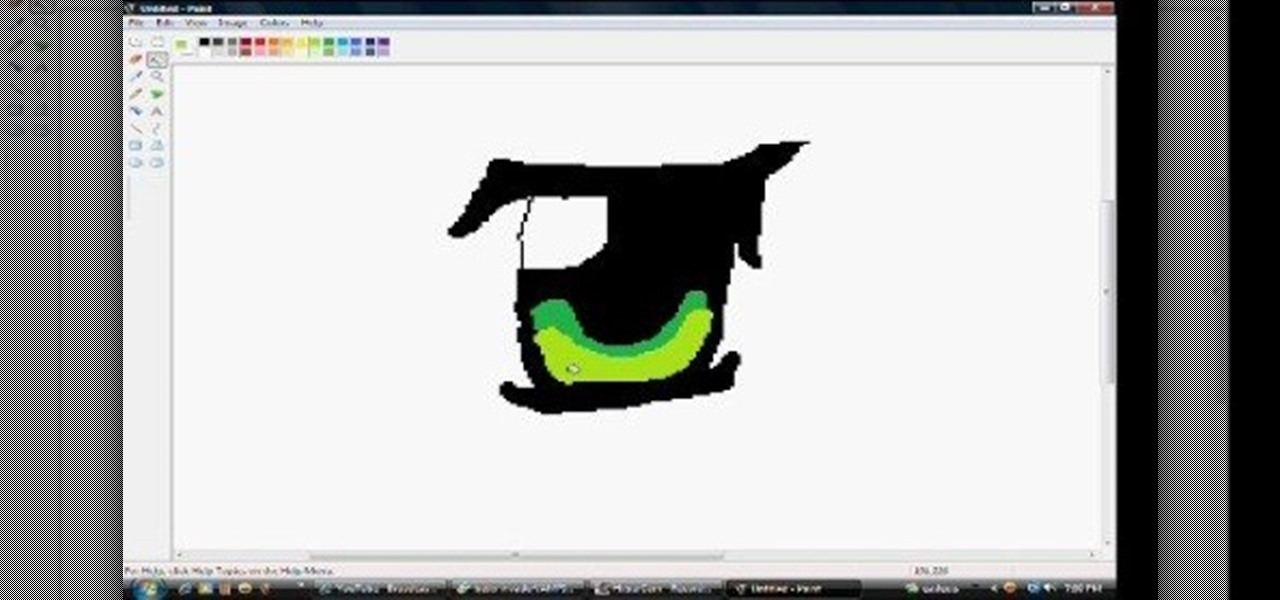
In this tutorial, we learn how to draw anime eyes in MS Paint. First, open up MS Paint and then grab a marker that is thick. From here, draw in a thick line that will be the top of the eye. Then, draw in the round area underneath the eye and the pupil inside of this. Draw in the bottom lash line of the eye, then start to add detail to the middle of the eye. Use the dark line to create a thicker line around the pupil, then fill the eye in with black. Leave a white part to make the eye look glo...

In this tutorial, we learn how to draw a fairly realistic eye. Start with a pen and draw a wispy line for the eye, like a football shape. Then, you will draw the pupil inside the eyes and the ring around it. Draw in lines around the pupil and the eye to show where the colors and shades of the eye come into play. Then, shade in the entire eye lightly. From here, darken up the upper lash and create a create on the eye. Then, make the eyelid crease on the bottom of the eye and add in the inner c...
In this tutorial, we learn how to make eyes for clay animation puppets. First, drill a hole inside of a block of wood, then insert a bull so it fits snug inside of the hole. After you have done this, use a drill to make a hole that goes half way down through the pupil. Now, use paint to fill in the hole where the pupil would be at. Push the balls into clay to hold them in place while painting. Make sure the dots you have on both eyes are even. When finished, paint a black circle around them, ...

In this how to video, you will learn how to draw a Cookie Monster cupcake. First, draw two circles for the eyes. Follow this with a furry texture oval shape for the face. Add a mouth with a cookie in it and draw the bottom as a cupcake wrapper. Draw the pupils of the eyes. Next, color the face a blue color. You can draw the cookie inside of the mouth a brown color. Use a black color to outline the areas around the mouth. Fill in the chocolate chips of the cookie with a darker brown color, and...

In this video you will learn how to draw a graffiti version of "Slimer" from the movie "Ghostbusters". The materials you will need are a writing utensil (the artist in the video uses a permanent marker) and some paper to write on. The artist begins by drawing the eyes and the pupils (the pupils appear cross-eyed). Then you draw the nose, the mouth and start outlining the area around the top of the eyes. Then draw the outline of the ghosts body then continuing around the left arm to the hand. ...
Plexiglass is the pleather of glass, and it has disadvantages vs. it's natural cousin. For one, it's much harder to cut because it melts and chips easily. Watch this video to learn how to cut plexiglass safely and accurately.

Howard Lederer, Phil Gordon, Clonie Gowen, Daniel Negreanu and Phil Hellmuth discuss the advantages and disadvantages of slow playing.

Today's word is "panacea". This is a noun which means a remedy to cure all diseases or a solution for all difficulties.
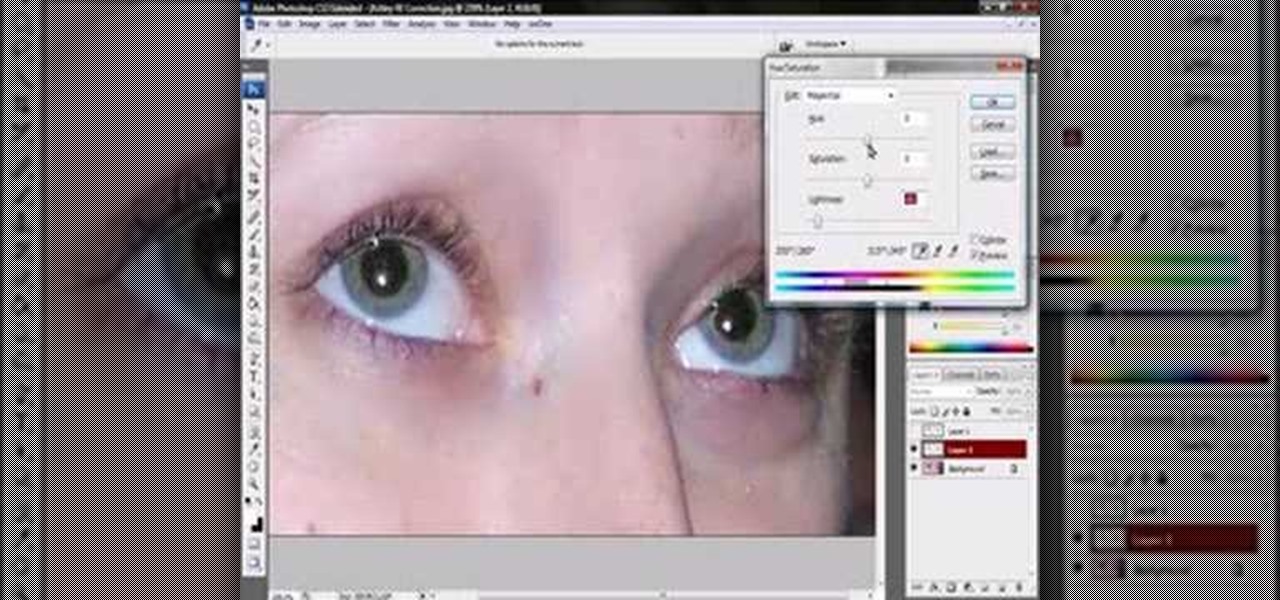
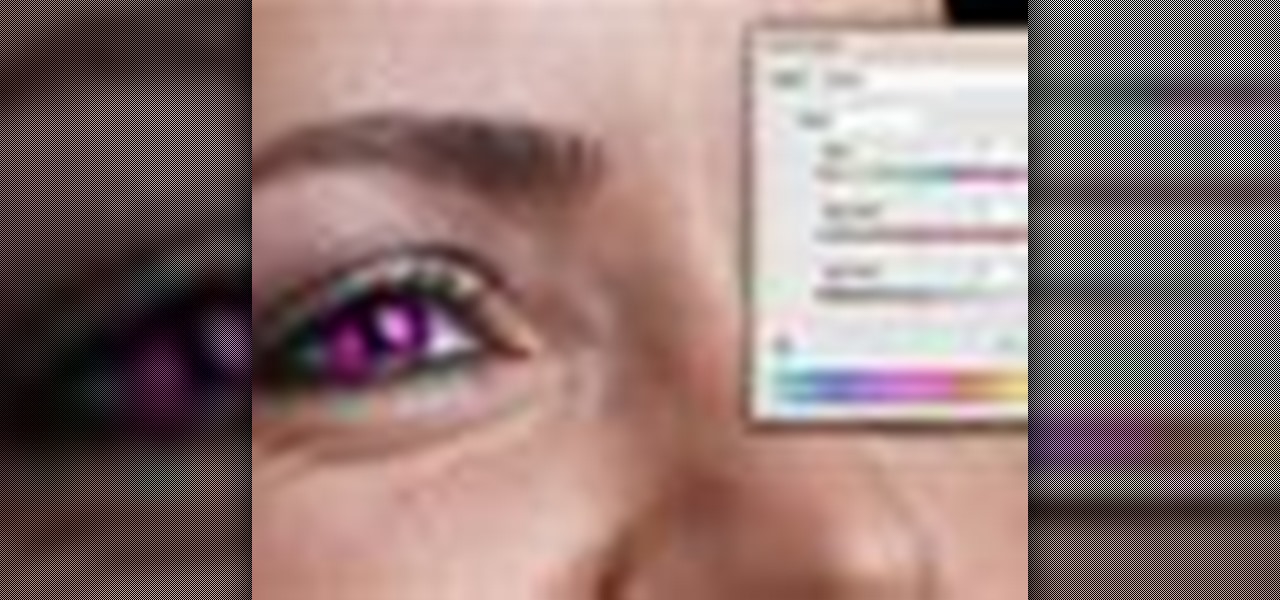
Jordan shows us a simple way to remove the red eye created by the flash of a camera using Adobe Photoshop. No matter where the red eye came from, you can remove it easily from any picture after watching this Photoshop tutorial. There are many ways to remove red eye and some are dirtier than others, but this method will give you a nice natural looking pupil in the end.
In this video drum lesson, you will learn the two most popular bass drum techniques. This includes the heels-up and heels-down methods. Each have their own advantages and disadvantages, so it is highly recommended that you learn both methods.
Click the more info tab to see the instruction on how to get a bear on Mybrute.com. This is a tutorial on how to get a Bear on Mybrute.com, An Online RPG Game, It's a very popular game that a lot of people plays everyday, You don't need to do much action with your hands just sit back and enjoy the show. Getting a bear is hard, because it's a extremely hard pet to get on mybrute.com, some sample pets are Dog,Wolf/Panther,Bear. If you can't read what I typed or did on to get a bear here's a lis...

Niantic's Harry Potter: Wizards Unite offers players an augmented reality look into the world of witchcraft and wizardry. The Wizarding World and Harry Potter novel series is full of unique and interesting characters, which is why it makes sense that Wizards Unite offers you to take the role of one of three "Professions" — Auror, Magizoologist, and Professor. The question is, which one do you pick?

To earn this trophy, you will have to find and train a recruit up to the rank of Assassin within the game Assassin's Creed: Brotherhood. Be sure to choose your pupil wisely, this achievement or trophy is worth 20 gamerscore.
In this clip, you'll learn how to create Navi'i-style eyes (with special attention paid to the irises and pupils) with Adobe Photoshop CS5. Whether you're new to Adobe's popular raster graphics editor or a seasoned designer looking to better acquaint yourself with the new features and functions of the latest iteration of the application, you're sure to benefit from this free software tutorial. For more information, watch this video guide.

Two primary pupils, Tony and Yanmy, are going to teach you how to make a magic wallet so that you can keep your "lucky money" into it at Chinese New Year!
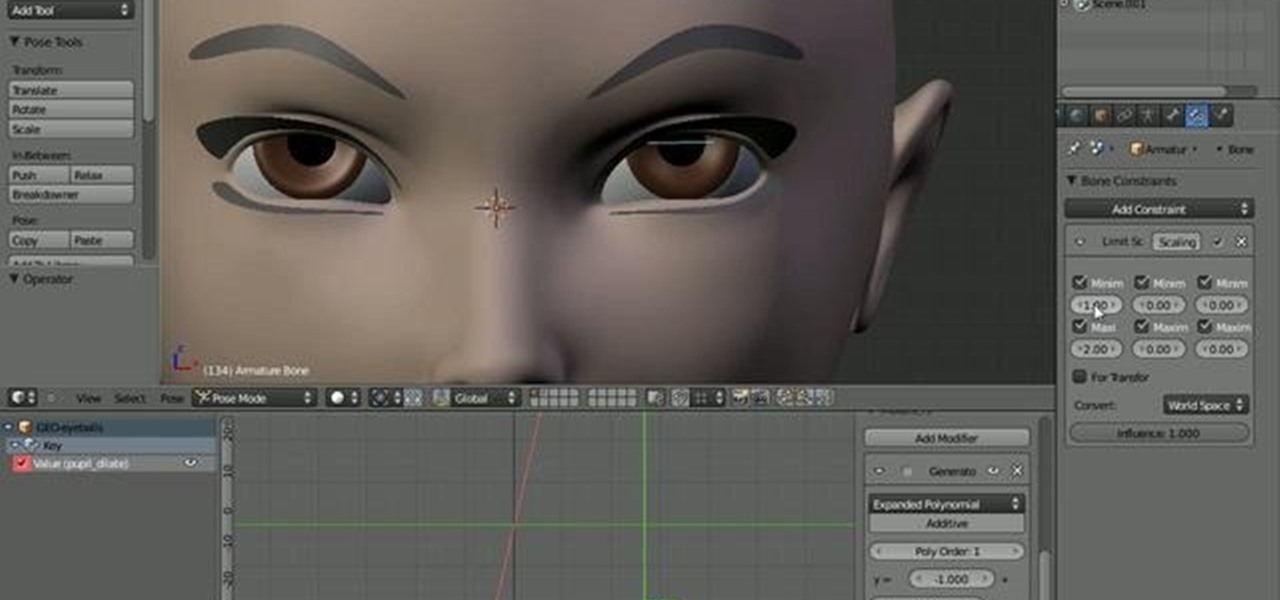
In this Blender 2.5 video tutorial, you'll see how to use driven shape-keys to dilate the pupil of an eye. The tutorial also demonstrates how to use custom bone shapes and limiting the transformation of a bone via constraints. Whether you're new to the Blender Foundation's popular open-source 3D computer graphics application or are a seasoned digital artist merely on the lookout for new tips and tricks, you're sure to be well served by this free video software tutorial from the folks at CG Co...

Tom Skowronski teaches the secrets of using an outdoor green screen. An excellent summary is given below. First check the advantages of using green screen outdoor like a lot of space, sufficient light. In the same way check some disadvantages like noises from birds, children. For the screen materials you can use paper which is cheaper but it cannot be controlled if wind blow. You can also use a board or even paint a wall green which will be better. Now to set up the screen use the screen rods...
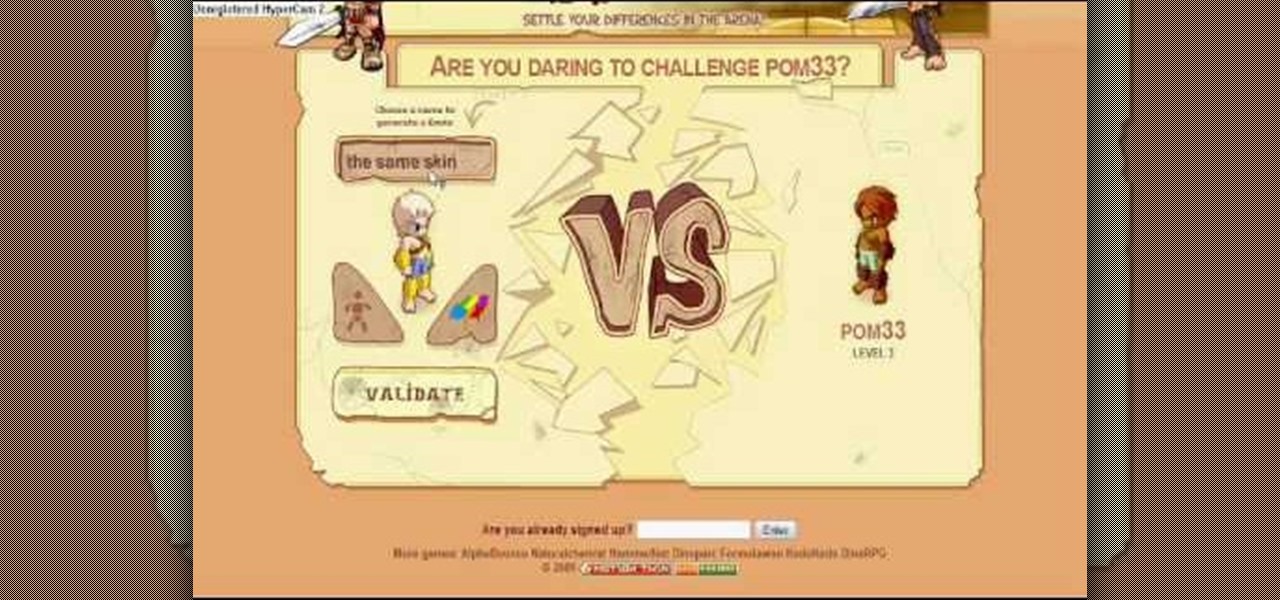
Here is a cheat guide to having more pupils or faster levels in MyBrute. You can play this game at least 5-10 minutes a day!

Here are five different techniques you can use to create rounded corners for boxes on a website. There are always different ways to do things with CSS and rounded corners is a great example of that. Each of these five techniques has advantages and disadvantages. Knowing all of them so you can choose the perfect one in each situation is the kind of thing that makes you the best CSS ninja you can be! So if you want to make cool Internet websites and be the best designer around, why not start he...
In the digital age, old fashioned film processing and developing may seem outmoded and obsolete. However, for professional and aspiring professional photographer who want o make classic-looking prints, this is far from the case. This three-part video describes how to do tray processing yourself for large-format sheets. It breaks down the equipment you will need, the advantages and disadvantages, and of course how to go about processing you own film sheets. The dark room is back!

New to Microsoft Excel? Looking for a tip? How about a tip so mind-blowingly useful as to qualify as a magic trick? You're in luck. In this MS Excel tutorial from ExcelIsFun, the 166th installment in their series of digital spreadsheet magic tricks, you'll learn about the relative advantages and disadvantages of the ampersand symbol and the CONCATENATE function (both join two [2] or more elements together into one text string).

This video presented by Cris Ippolite makes a comparison between flat files and relational databases made with FileMaker Pro 10. It starts by showing flat files, which programs like Microsoft Excel use. Flat files have a big disadvantage: they cannot communicate with other files, even those with related data. If you wish to make your job easier, you should use relational databases. With databases, the tables communicate between one another. Once you store an entry in a table, you can use it i...
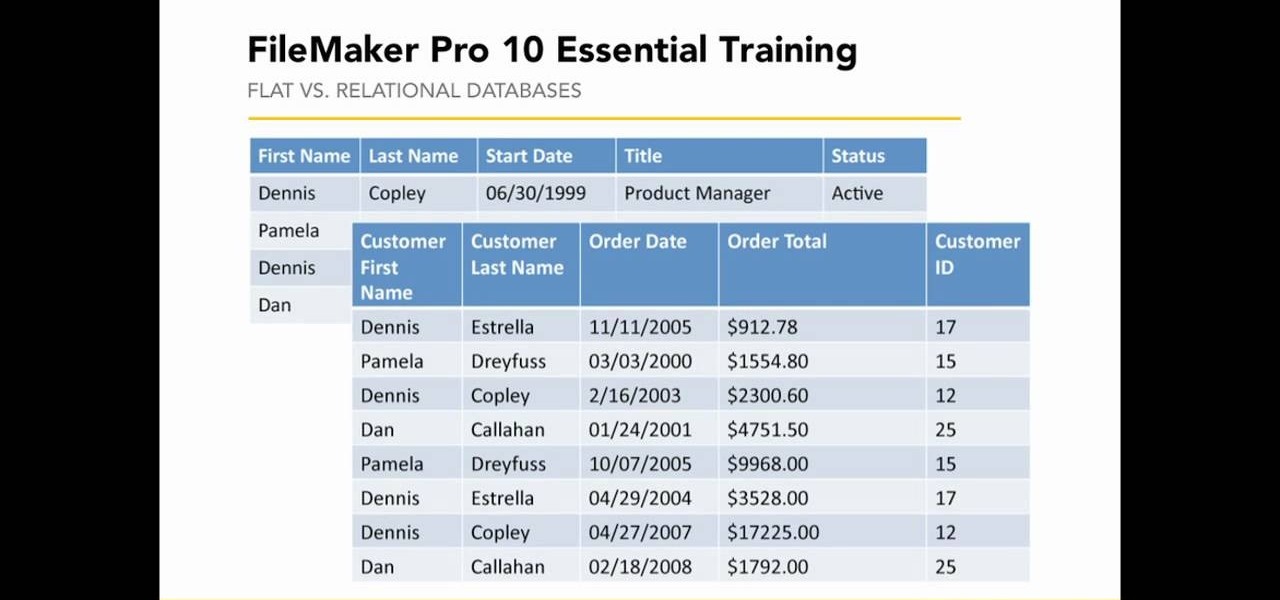
This video, presented by Cris Ippolite, makes a comparison between flat files and relational databases made with FileMaker Pro 10. It starts by showing that programs like Microsoft Excel uses, what in the databases circles, are called flat files. This flat files have a big disadvantage: it cannot communicate with other files even those have related data. So, instead of using those, if you want to ease your job, you should use relational databases. With databases, the tables communicate betwee...

In this video tutorial, Chris Pels will show how to use the aspnet_merge.exe utility to combine assemblies that have been compiled using the aspnet_compiler.exe utility. First, view the output of the ASP.NET compilation process to learn what assemblies are created. Next, learn the mechanics of using the aspnet_merge.exe utility to merge assemblies from the compilation of a web site, first seeing how to control the compiled assembly names with the –prefix option. Then see how to merge all the ...