The pen doesn't have to stop on the paper. Your art masterpiece doesn't have to stay on the canvas. You can share your favorite drawings with everyone, right on your own chest. Wear your art designs with pride by using a scanner/printer, a photo editing application, an iron, and Avery iron-on Dark Fabric Transfer paper. And don't forget your tee shirt.
The type or text you usually include in your artwork in Photoshop does not need to be in solid color. In this video you will learn to fill type with a photo in Photoshop CS2. Spice up your next artwork with this cool trick!
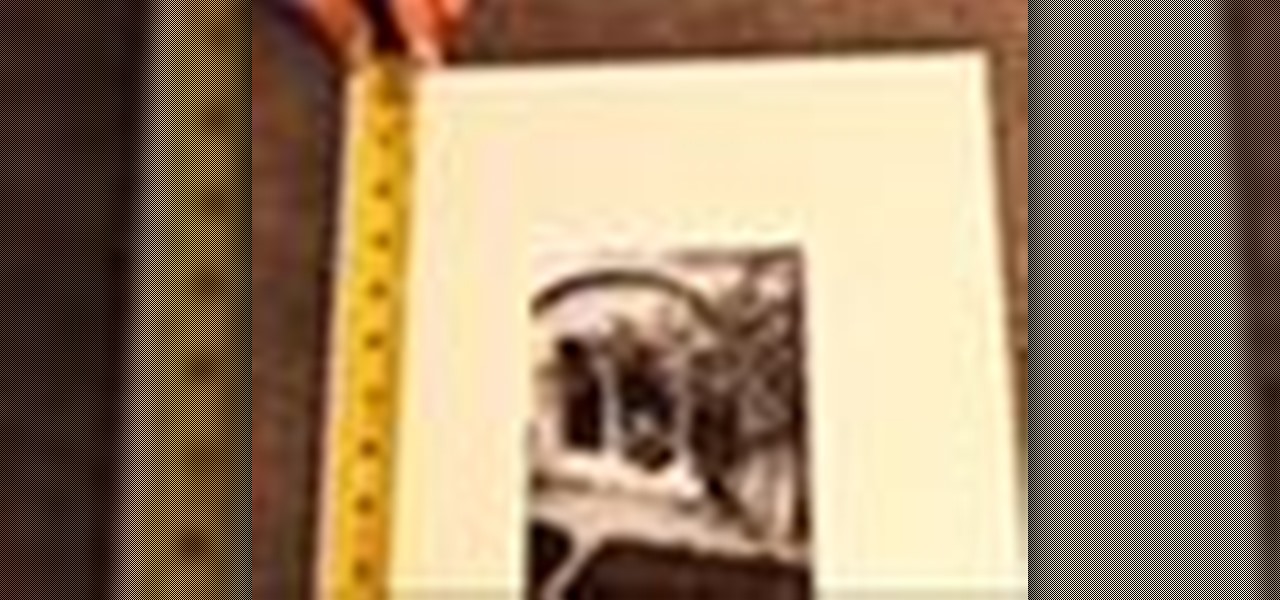
Stumped on what frame to use for your favorite piece of artwork or photo? The perfect frame will make your painting, photograph, or piece of artwork stand out on your wall. Here's how to find an ideal match.

This video, which was made at Peopleprint Community Media in Rochdale, teaches how to easily silk screen print a t-shirt in only four minutes! First, design the artwork to be used for the print, then print it on acetate. Next find a clean screen. Put some emulsion in a coating trough and slowly and steadily coat the screen in emulsion. Then dry the emulsion in a dark room and expose the screen to light. Next wash the screen with water and the artwork should become visible. Mask the exposed ar...
This video will show those who are interested how to make paper mache and how to use it in artwork as well. A quick and simple way to make paper mache starts with nothing but common newspaper. After soaking your newspaper in water for a while, place the newspaper in a blender with some more warm water and blend it into a fine paste. After this, you should strain out the excess water and then mix this solution with some whiting powder, or chalk, in order to get your finished paper mache, which...

Create your own dazzling artwork or jewelry with perler beads!

In this Adobe Photoshop tutorial Bert creates reflections from scratch with the help of the distortion filter. Learn how to make realistic reflections for your Photoshop artwork where you have glass in front of objects and other real life situations.
The internet is saturated with low-quality pictures, making it difficult to find a high-resolution image for specific albums, TV shows, movies, podcasts, music videos, apps, and books. Apple uses high-quality images, but it seems impossible to download cover art, posters, thumbnails, icons, and other images from within its apps on your iPhone. Now, with the help of a shortcut, it's as simple as can be.
Nathan demonstrates how to easily make a button using the Badge A Minit hand press button maker. First, load the button back into the blue ring. Place the artwork, face side up on top of the button back. Add the clear plastic circle on top of the artwork and put the yellow ring on top. Next, flip the apparatus over and put the purple ring on top of it. Then, put the green ring on top of the purple ring. Place one hand on top of the other on top of the green ring and press down firmly until it...
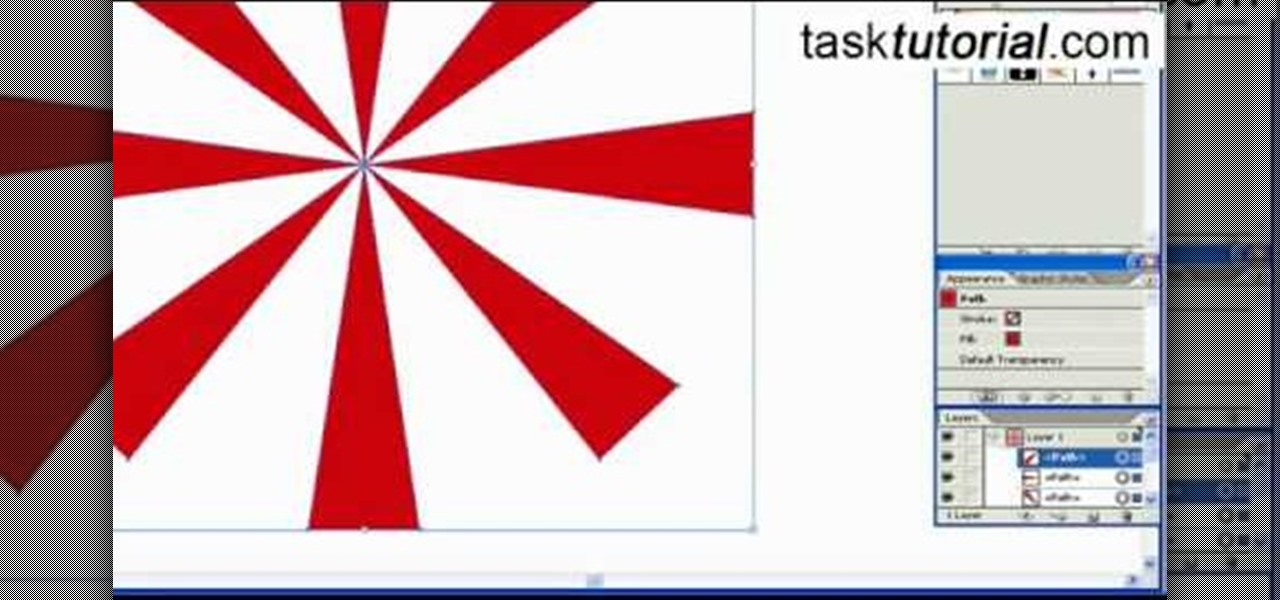
This video is about creating sunbursts using symbols in Illustrator.
A fun way to display photos and artwork in your home is with homemade frames. Keep the crafty feeling of the art and make a colorful frame for display. This project can be done with kids of any age, and they will love helping to decorate their rooms or play areas. These frames are 8 pointed star shaped decorations that add a spark to any wall. All you need are popsicle sticks, glue and any paints or glitter you may want to add to your project. So, get messy and have fun..its time to start cra...
Illustrator is a great tool for creating individual artwork. Creative and clever, it has many functions, one of which is mosaic. If you want to make your illustration or design appear to have a myriad of tiny 'squares' like a Roman mosaic, this guy can help you do it. The short clip explains clearly how to bring the chosen effect to your design. You can see on screen exactly how to do it, so you're not left in the dark, searching every menu for the right tool.
The chrysanthemum is a beautiful Chinese flower which often appears in artwork to represent autumn and the spirit of survival. Follow along with this this tutorial and learn how to add this seasonal subject matter to your next Chinese still life painting.
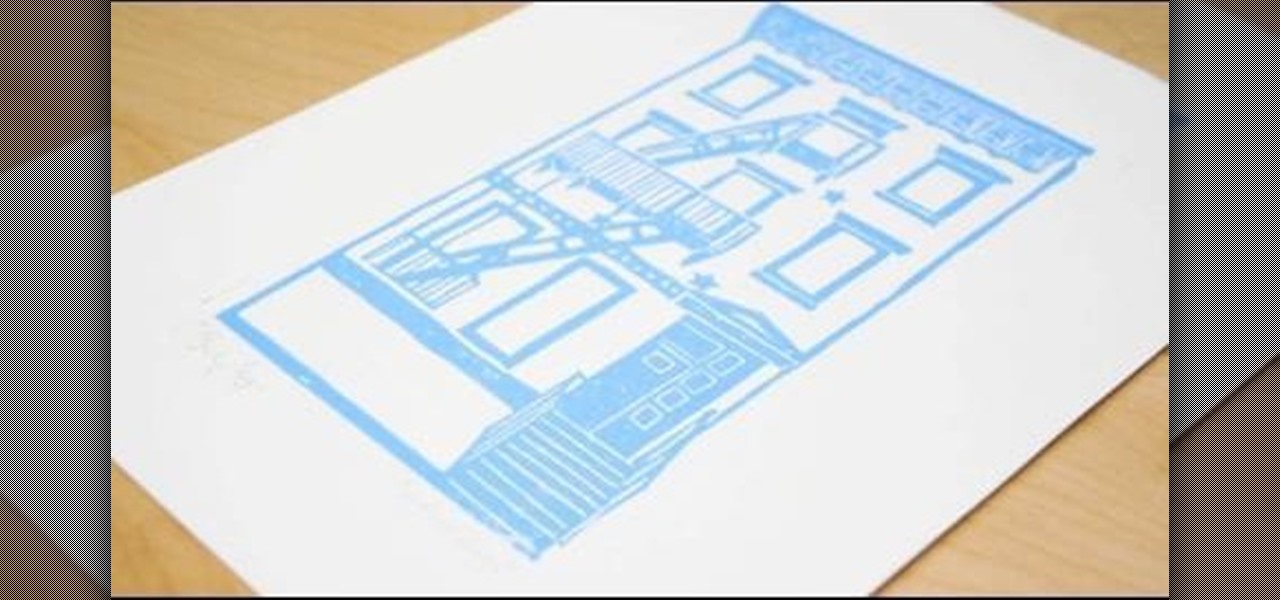
In this episode of Threadbanger, we learn from Dailey Crafton how to make linocut and rubbercut block prints. They're pretty easy to make, and you can create some pretty outstanding pieces of artwork with just a few simple steps. Just follow along in this video, and you'll be carving out linocut and rubbercut block prints in no time at all!
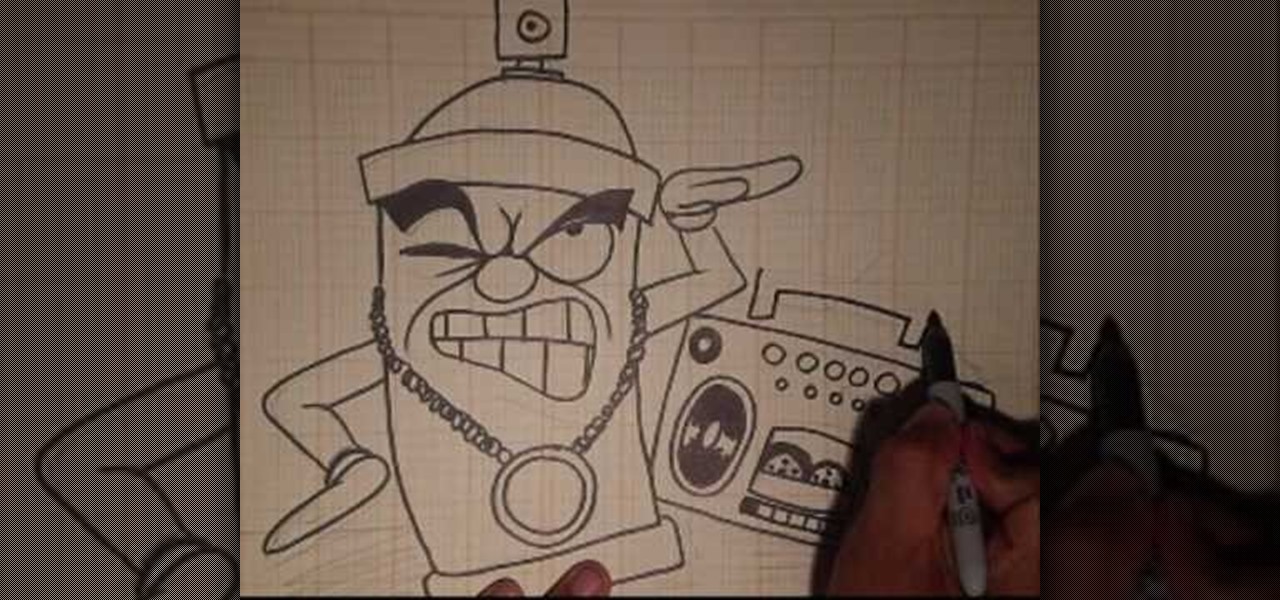
When it comes to drawing graffiti-inspired artwork, almost anything can be animated, from a piece of paper to, in this case, a graffiti spray can.
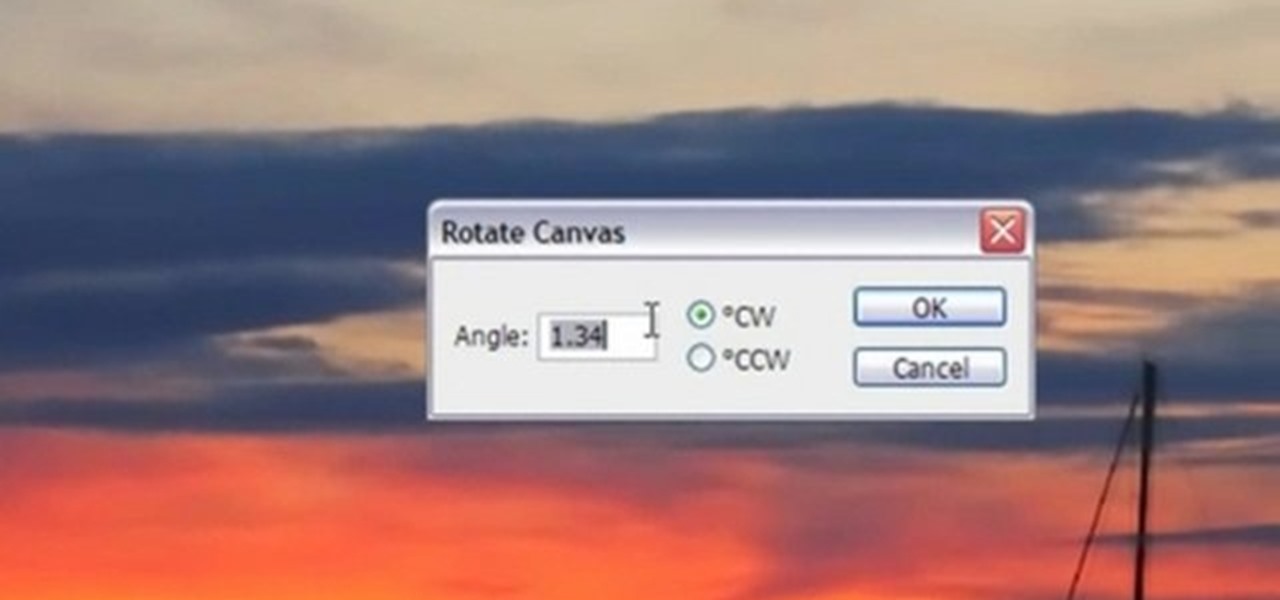
Photoshop is a great way to perfect your photos and artwork. In this tutorial, learn how to straighten a horizon, or create a straight one in a landscape image.
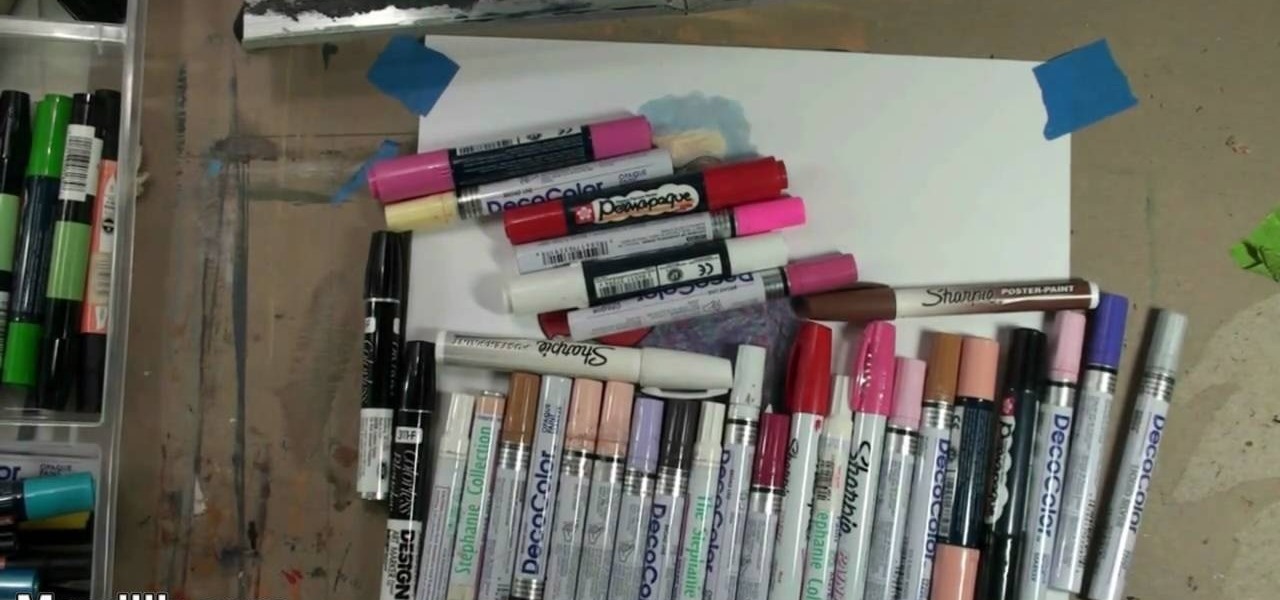
Have you ever heard of tradigital art? Tradigital art incorporates traditional materials with digital media. This is a combination of such techniques as illustration with Decocolor Markers, Prismacolor Markers, pencils, and Photoshop. Watch this tutorial to learn how to enhance traditional art methods with digital media. It illustrates the tradigital process step-by-step. Make sure to pause the video after each step and look at the screen every few seconds while you are drawing.
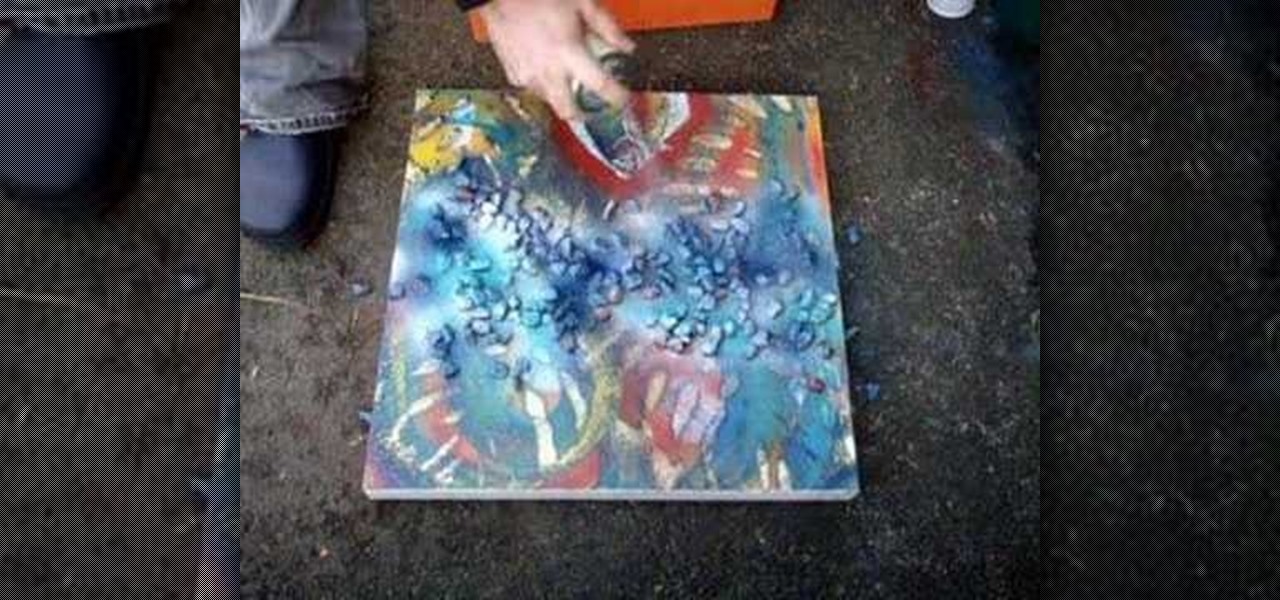
Watch this demonstration of a spray paint layering technique. All you need is some gravel and spray paint to add a unique stenciling effect to the surface of your artwork. Use any object to create negative space with spray paint. Use this technique on collages, paintings, assemblage pieces, and clothing.
Join Emma & Grace as they show you how to recycle old cereal boxes, coffee carriers, artwork and junk mail into beautiful works of art. Watch this instructional video to shred pieces of paper garbage, blend it into a pulp and press your own recycled paper.
Giclee art reproduction gives artists more options for selling their artwork. Learn how to prepare your images from a professional artist in this giclee art reproduction video series.
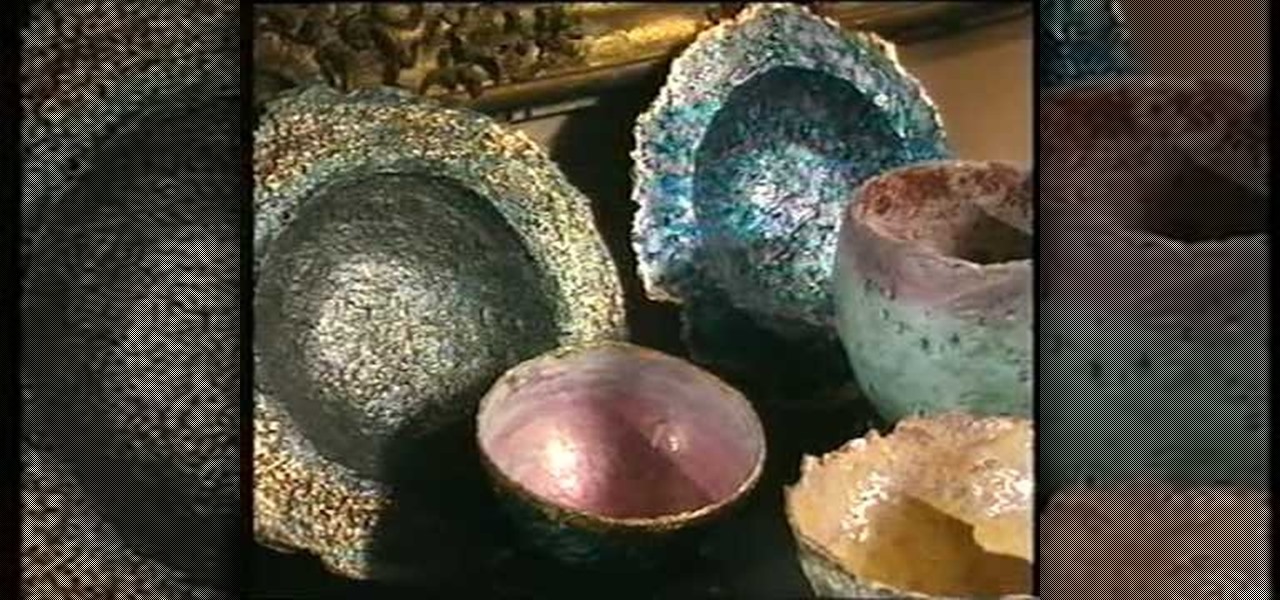
A how-to video series for using epoxy resin, silver-plated rings and pewter pendant trays to create jewelry from reproductions of your artwork.
Learn how to layout and print your artwork for screenprinting. Adobe Photoshop is the program used in this demonstration.
Sand isn't just for building castles by the beach or shoveling around the sandbox—you can use it to make beautiful, colorful artwork too!
This tutorial is very informative for those of you who aren't really familiar with the basics of Illustrator. Bert explains first, why you would want to use Illustrator instead of Photoshop, and then explains how to take an image or piece of artwork and vectorize it.
Need to spice up your images? Use Image Warp to wrap logos and other objects around your artwork/photos. In this video you'll see how to do it quickly and easily.
Comic book art is not only awesome, but it takes a really keen eye, and talent, to draw great comic book art. Steven Sanchez has a unique style and tone to his artwork, and in this great two-part video, you will learn how to draw the faces and heads that make Steven stand out from other artists.
In this video tutorial, viewers learn how to draw a chibi-style animation face. This task is very fast, easy and simple to do. Begin by drawing box-like face with any type of angle, depending on the character's emotion. Then add an ear. Now draw the eye. Make sure that the eyes are exaggerated and over-sized. Then draw a small nose in the center of the face and add a mouth. Add detail to the mouth such as: teeth, tongue and a chin. Finally, add the eyebrows and hair. This video will benefit t...
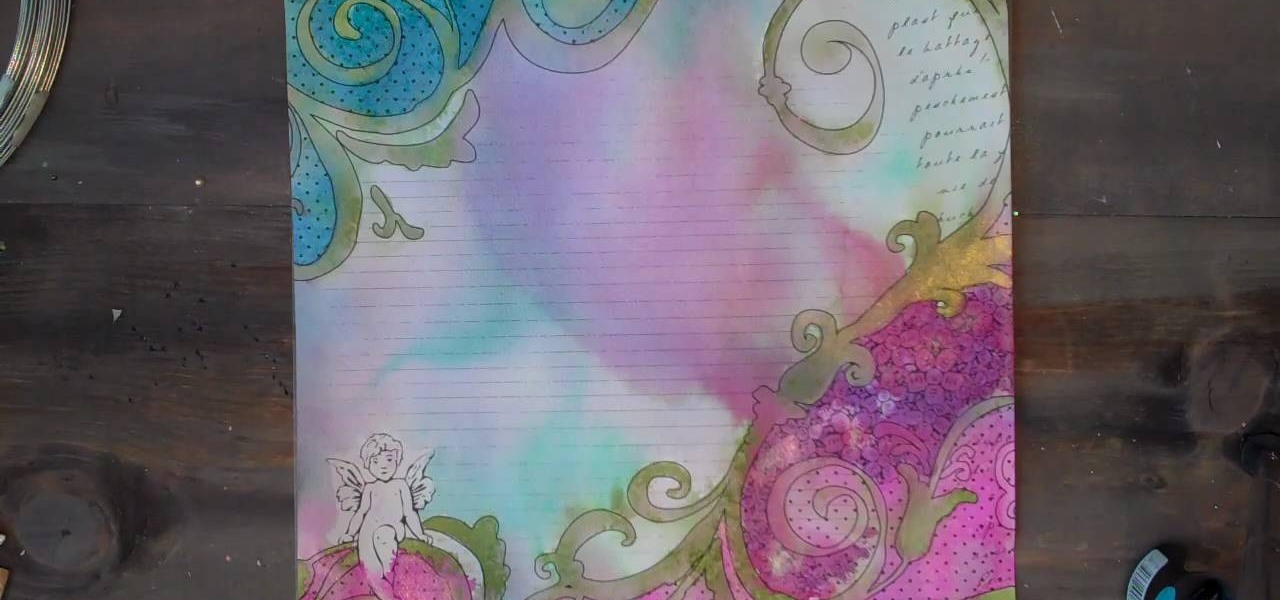
In this tutorial, we learn how to use Prima Paintables paper. These are meant to watercolor on and are very thick pieces of paper. You can take a paint brush and open up a bunch of different paint colors. Start to paint your picture, then allow it to dry. When finished, you can spray a water bottle on it to bleed the picture and make it look unique and your very own. This is something that is fun to do and makes it easy to paint your own creations using this paper that is made just for painti...
In this video tutorial, viewers learn how to draw a vampire. Begin by using the paint bucket tool to fill the entire background in black. Then start drawing the vampire in transparent blue. Sketch the outlines of the face and draw curves for the guidelines of eyes, nose and mouth. Now erase half of the face and fill it in black. The other half of the face is filled with tints of blue and purple airbrush. Finish by adding the details with opaque shades of blue, purple and white pencil lines. T...
In this tutorial, we learn how to apply decals to RV cars. First, peel your decal from the paper they come on and then place it onto the RV car where it is smooth and there are no ripples on the vehicle. Make sure the entire decal can fit onto the spot where you want to place it. If you put it onto a bump, it won't seal and there will be blur with the lines. Once you apply the decal, push on without letting any air through, dragging the paper along the artwork. To make it more flat, take a cr...
In this video tutorial, viewers learn how to make a stencil. The materials needed for this project are: contact paper, scissors and a pencil. Begin by drawing the design, shape letter or number on the contact paper. Make sure to draw the stencil on the back of the paper and make it reversed. When finished drawing, carefully cut out the design. To use it, simply peel off the invisible paper and place it onto the surface of the artwork. Then trace over it. This video will benefit those viewers ...
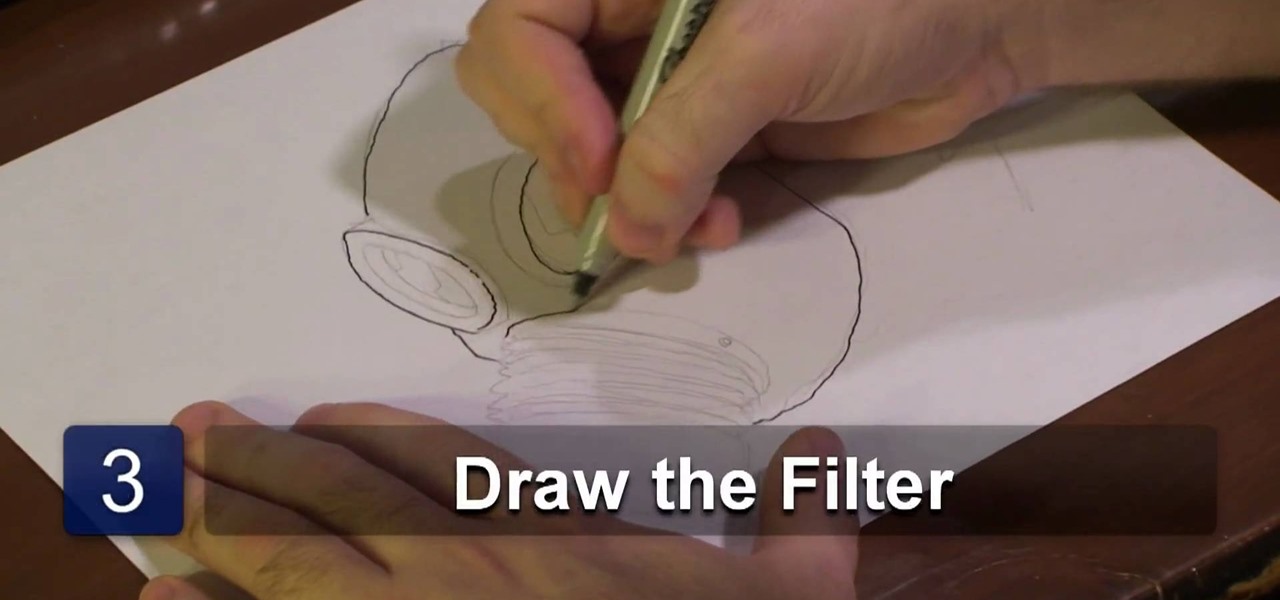
In this video tutorial, viewers learn how to draw a gas mask. Begin by drawing to oval shapes for the frames of the eyes. Then start drawing the base of the mask. Towards the bottom of the mask, draw an accordion-styled tube and attach it to a short cylinder to represent the filter. Now add more details to the eye frames by adding an inner and outer circle to show depth and detail. Then add more detail to the filter by adding lines to the tube and adding holes in the cylinder. This video will...
In this video tutorial, viewers learn how to paint sand. Users will need a palette knife and paint brush. The colors needed for the sand are: iron oxide, pure white, burnt umber and burnt salmon. Collect all 4 colors on the palette knife and apply it lightly onto the canvas. If it is too dark, add some more white paint. Then use a paint brush to smooth out the edges and blend the sand together. This video will benefit those viewers who are interested in art and painting, and would like to lea...
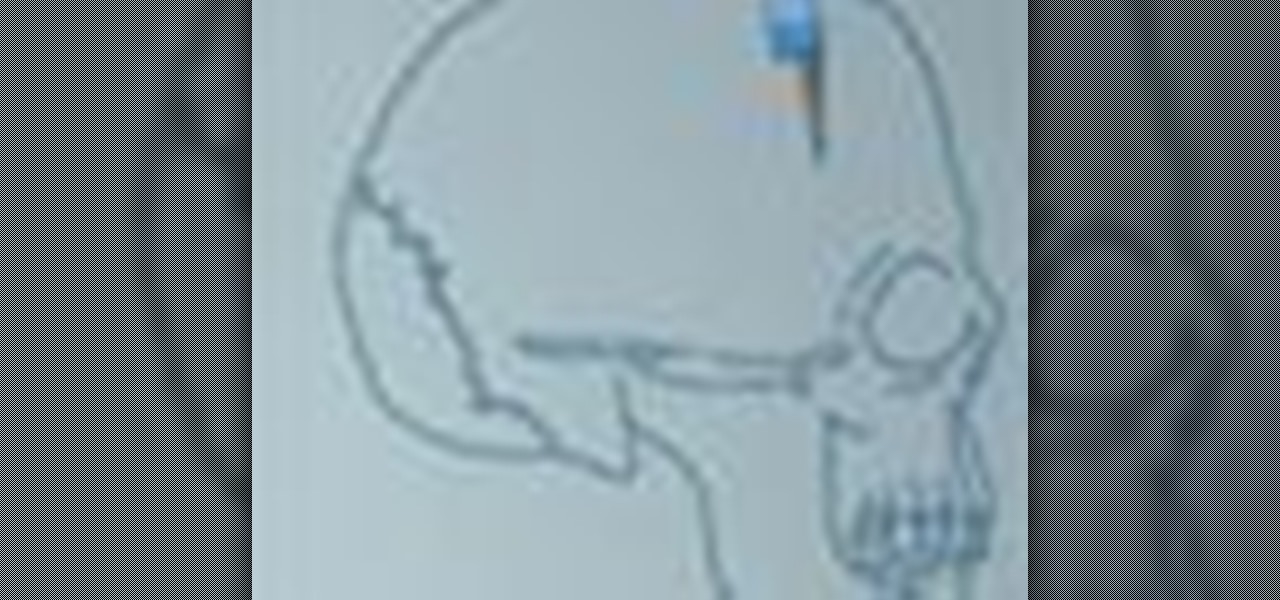
First, make the chin of the skull by drawing out a slight sharp curve facing downwards. Then, make the forehead and the upper part of the skull by drawing huge slight curves. Draw a circle on the spot where the eye socket should be. Draw a curve at the side of the circle to give it an illusion of popping out. Draw the cheekbone lines as well as the jaw lines to give the skull more definition. Draw several rectangles standing vertically to create the skull's teeth. Finish the head with a sligh...
First, outline the upper portion and lower portion of the right eye. Make the upper line darker than the lower one. Copy and paste this to create the left eye of your anime artwork. Create the eyeball using the Circle tool. Create two more circles inside the eyeball - one bigger and the other smaller. Make eyelashes by using a set of curved lines. Create at least three thick strands of these eyelashes. Create another circle inside the eyeball that intersects the two smaller circles created ea...
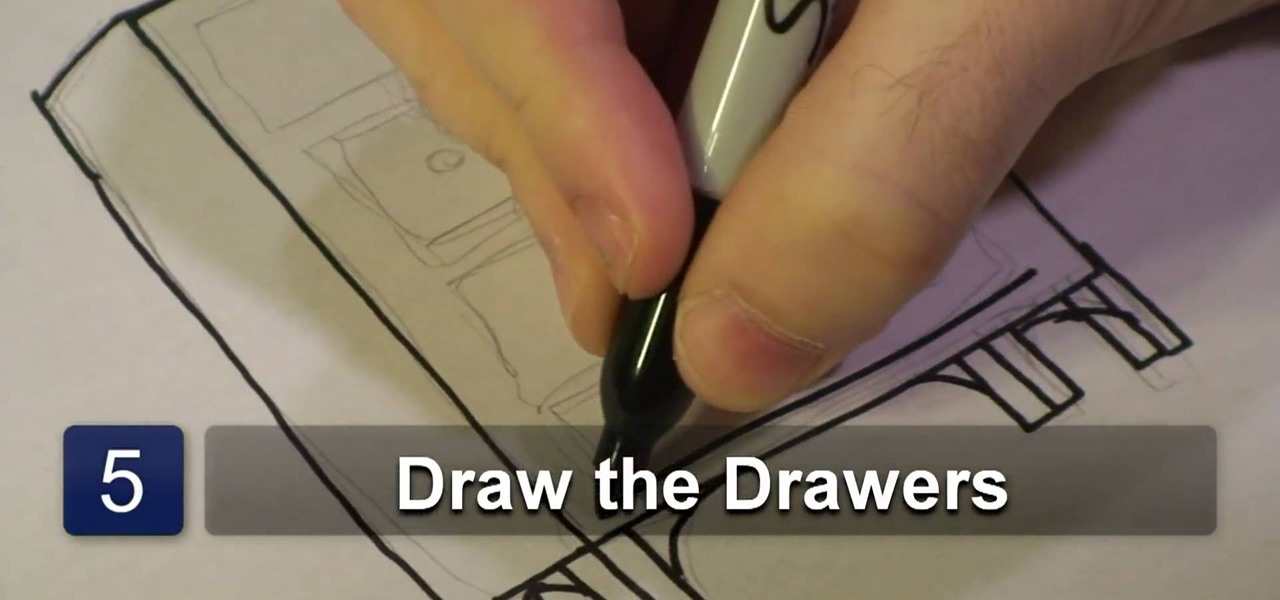
In this video tutorial, viewers learn how to draw a dresser. Begin by drawing a vertical rectangle to represent the font panel. Then add a long rectangle on one side to represent the side panel. Now add 4 pairs of legs under the dresser and add leg supports by drawing an arch between each 2 legs. For the drawers, draw 4 long horizontal rectangles on the front panel and add some doorknobs on each drawer. Finish by adding any extra detail. This video will benefit those viewers who enjoy drawing...
In this video tutorial, viewers learn how to draw a bridal dress. Begin by drawing the basic shape of the female figure. Then draw the arms wearing a long gloves. Now add the hair on the figure's head. Make the hair curly and glamorous looking. Then draw the basic form of the dress. Give the dress a lot of layers and frills by adding curved horizontal lines along the dress. Finish by drawing the bride's veil behind her head and back and any extra details. This video will benefit those viewers...
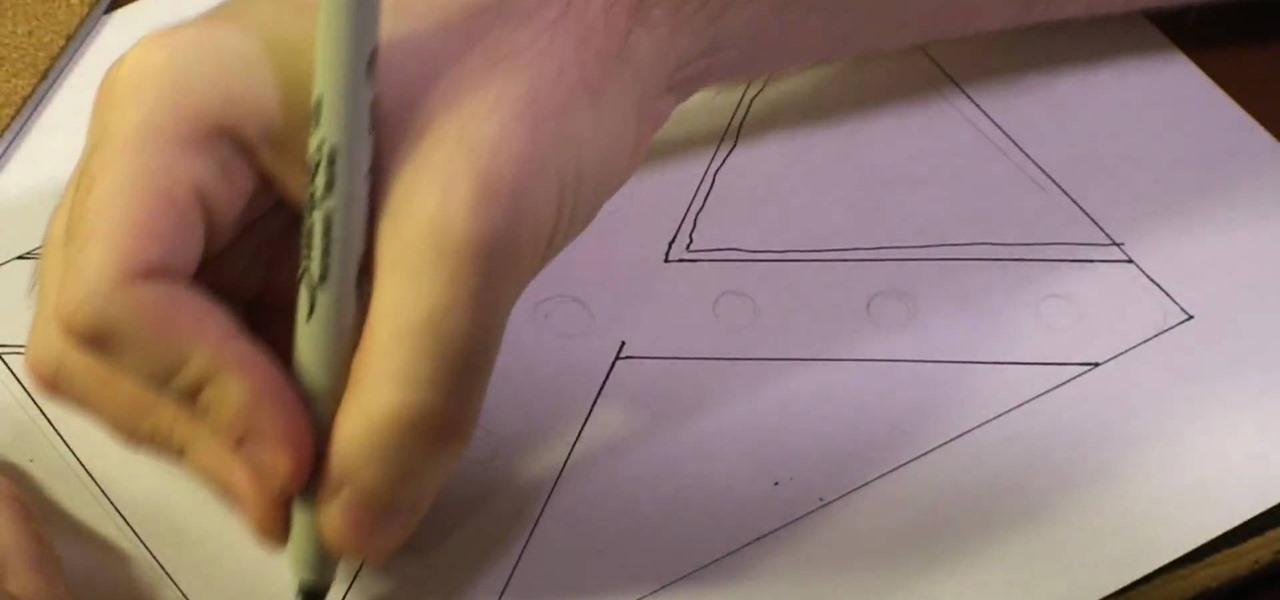
In this video tutorial, viewers learn how to draw a rebel flag. The materials needed are a ruler, sheet of paper and drawing utensil. Begin by using the ruler to draw a rectangle for the flag. Then draw an X in the center of the flag, going diagonally from the top corners to the bottom corners. Now draw outer lines on the X. Then draw the 13 stars on the flag, The first star is in the center of the X and add 3 stars on each side. This video will benefit those viewers who enjoy drawing, and wo...
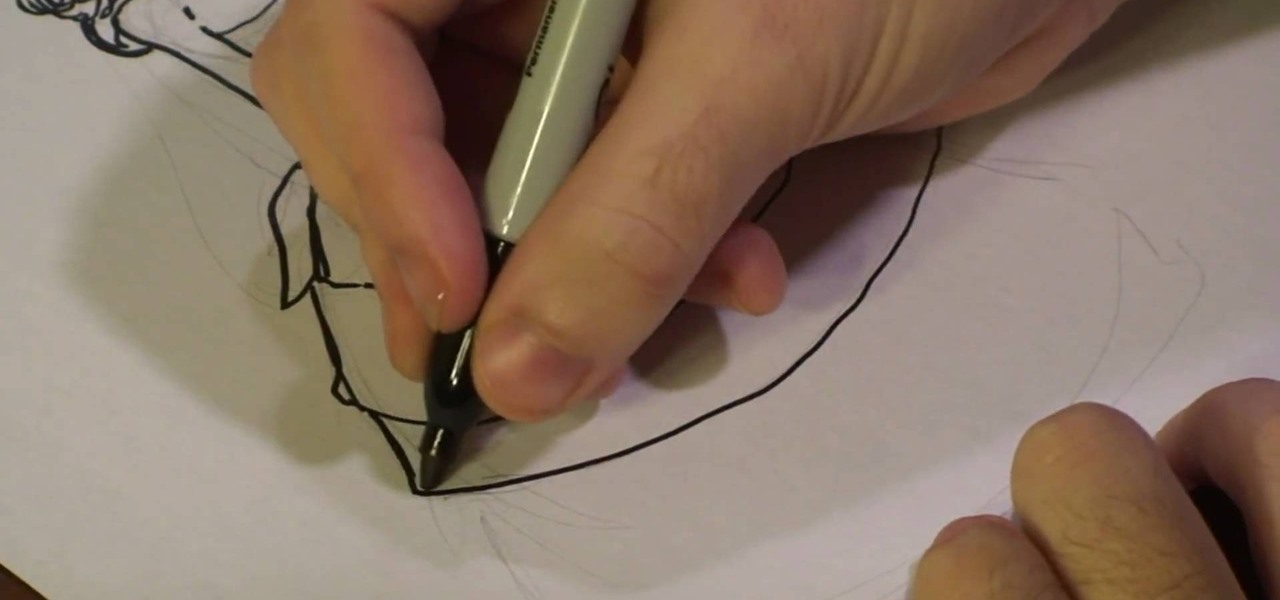
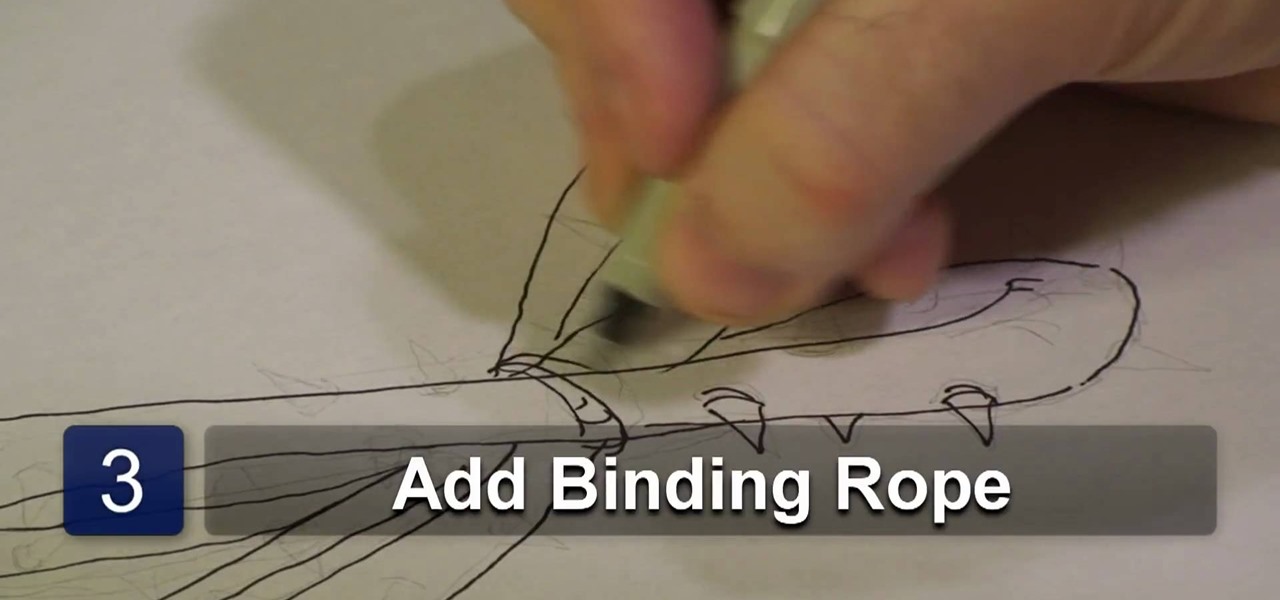
In this video tutorial, viewers learn how to draw a crown of thorns. Users will need a sheet of paper and a drawing utensil. Begin by drawing 4 semi circles. Then link the 4 circles together to form 2 vein-like thorn weeds. Now add detail by adding a rope to bind the thorns together. Then add barbs along the thorns and some more detail to give it realistic look. This video will benefit those viewers who enjoy drawing and art, and would like to learn how to draw a corn of thorns to utilize in ...
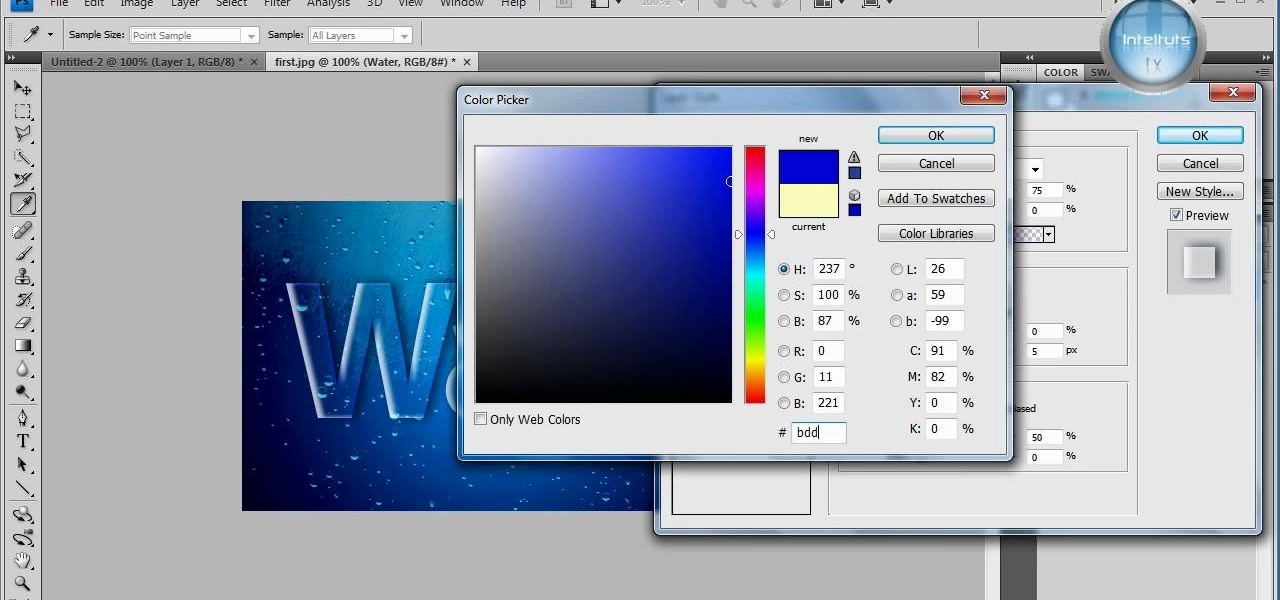
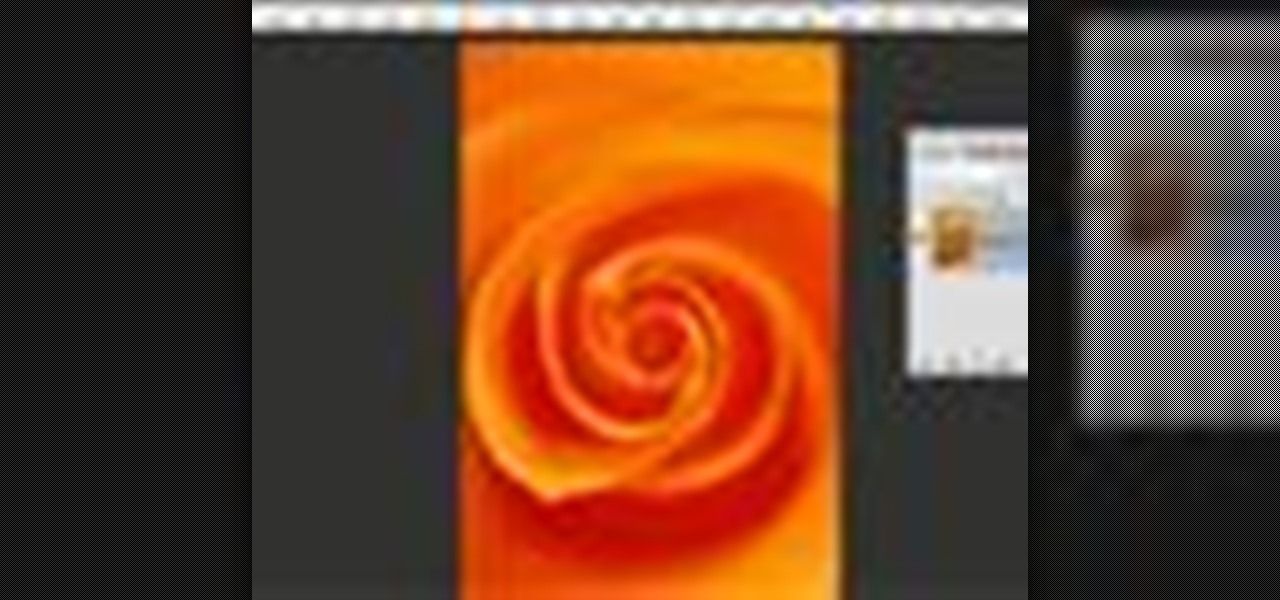
In this tutorial, learn how to make a very cool wet writing effect that you can use for graphics and logos. You will be creating this effect in Photoshop CS4. In this video, you will learn how to take tons of different layer styles and transform a basic text layer into a majestic piece of artwork. You will be shown the process step by step from the very beginning. This tutorial also shows the use of gradients and color corrections tools to optimize the full piece of work.