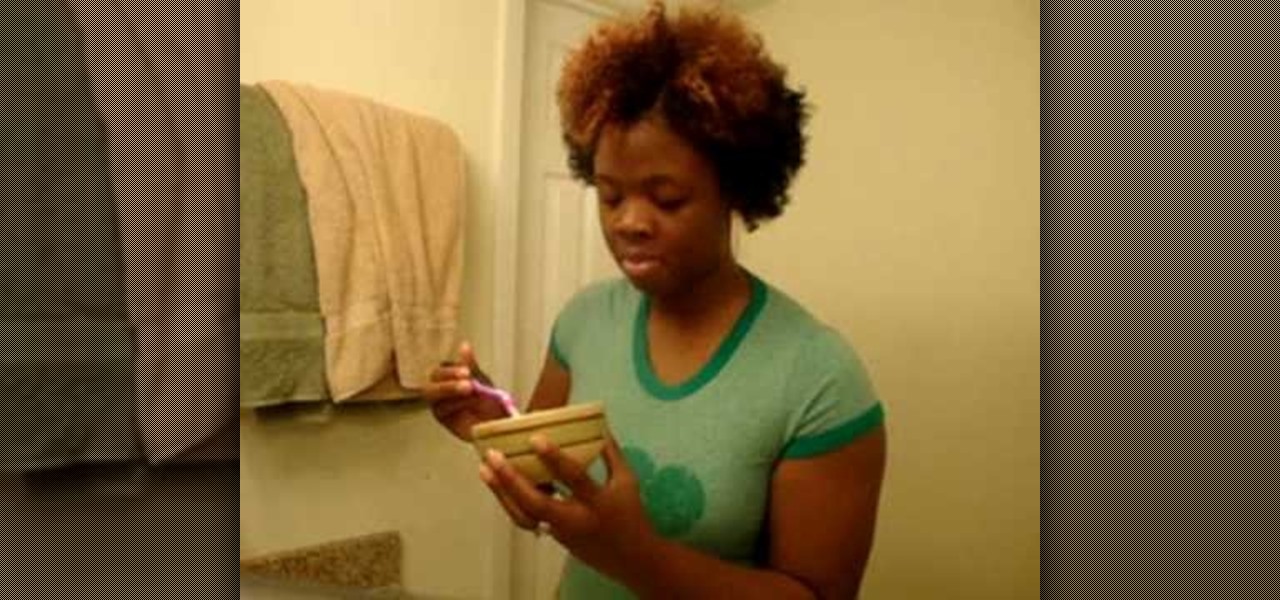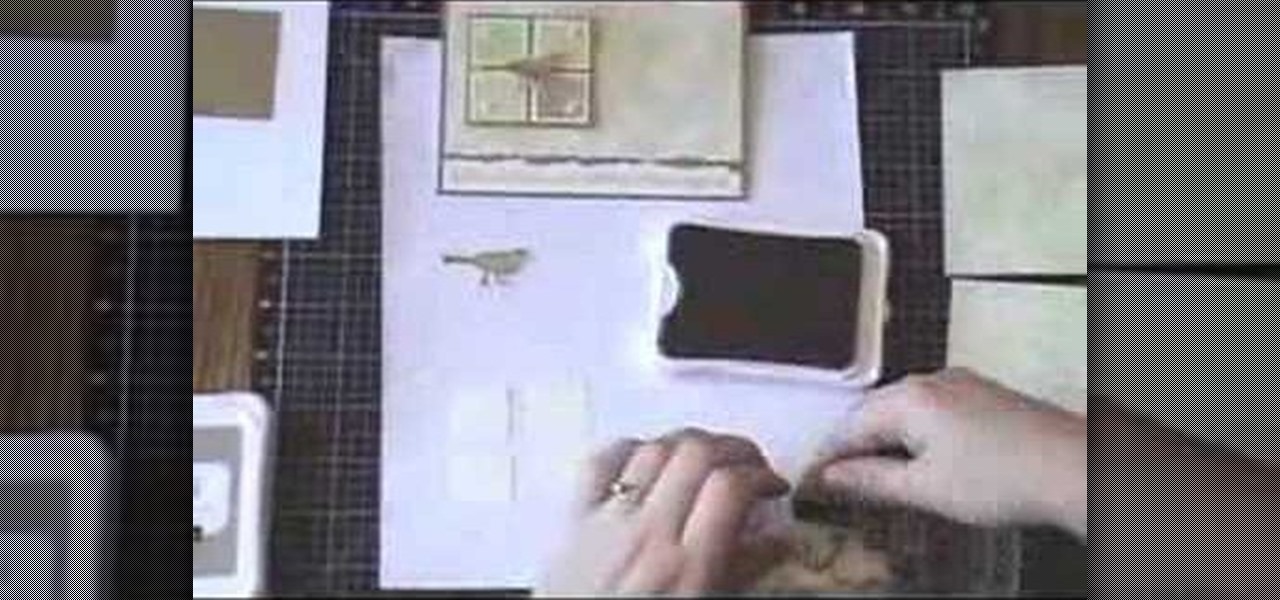
In this video tutorial, viewers learn how to create a faux suede technique on cardstock. Users will need a plastic stamp pad. This stamp pad will be used for rubbing, so it should be an extra or an old stamp pad. Users will need to re-ink the pad once in a while. This will give the cardstock a textured look. It will give an old age, distress look. Simply take the stamp pad and rub it over the cardstock. This will pick up the texture of the cardstock. This video will benefit those viewers who ...
This artsy crafty video tutorial will show you how to make glittered window-style cards. The "glittered window" technique to card-making is basically just adding glitter to shipping tape.

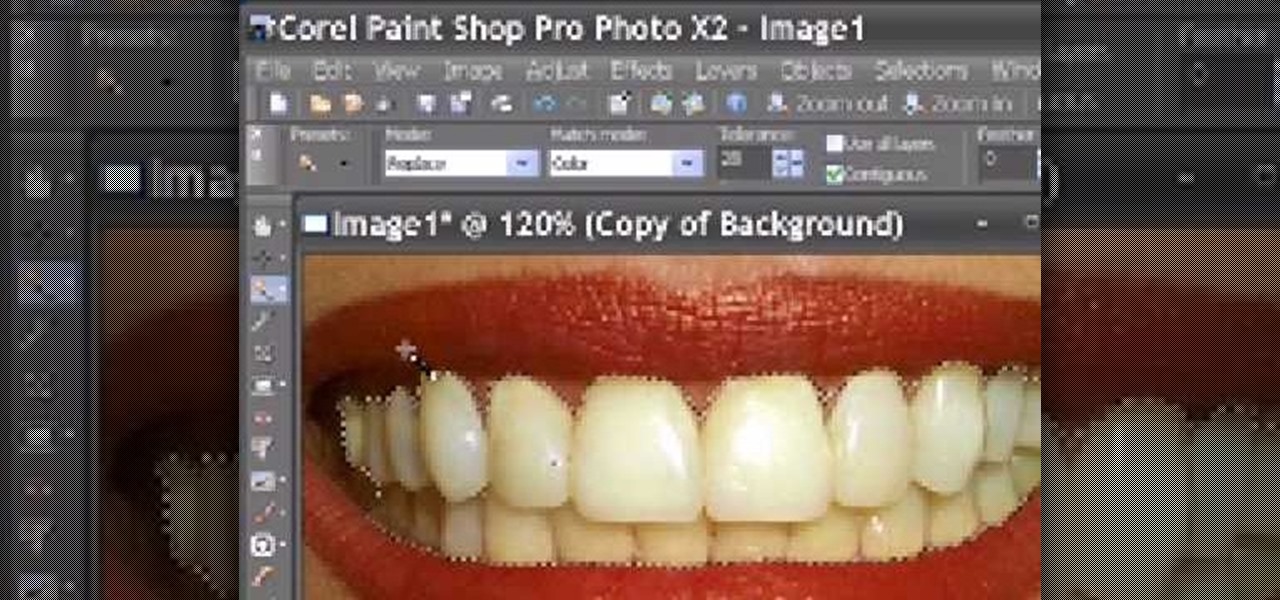
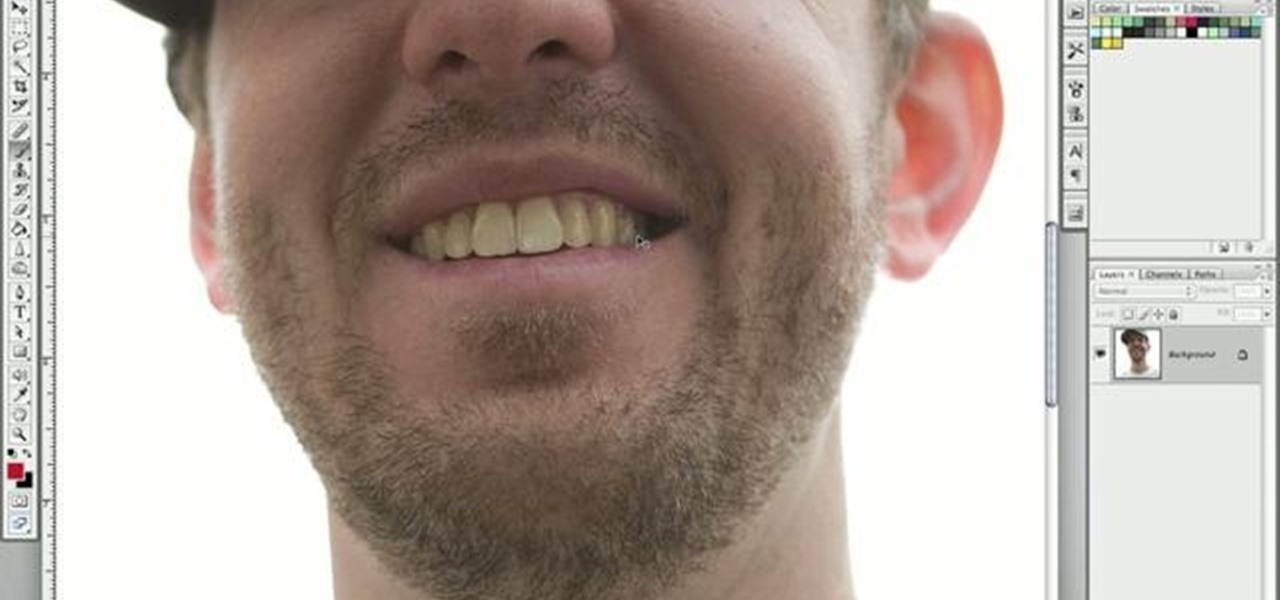
Rick from Essential Photoshop Elements has a quick and easy technique to get natural-looking results for whitening teeth in Photoshop Elements. This tutorial is done in Photoshop Elements but can use the same technique with the full version of Photoshop.
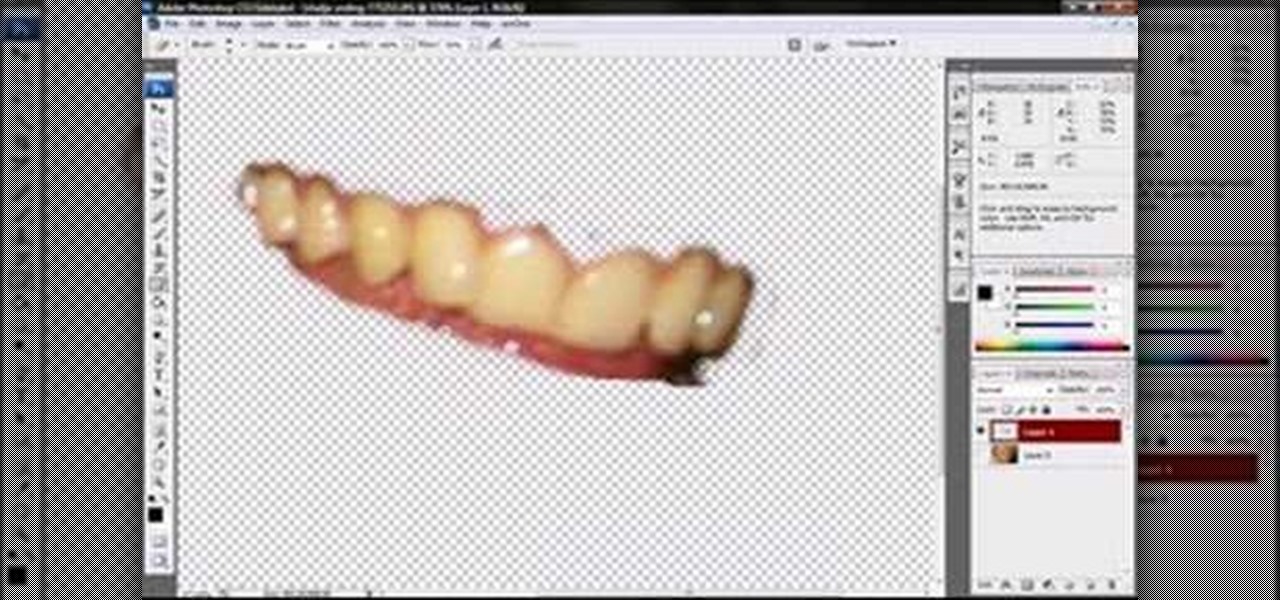
Jordan explains how to whiten teeth with Photoshop very quick and simply! Make all those coffee drinkers and smokers look like they just spent hours at the dentist''s office and whiten their teeth in minutes in Photoshop instead.
Here is a video tutorial on how to make a wallet out of cardstock. This wallet has four pockets to hold gift cards as well as a place to hold money. This type of card is great for a Father's Day, birthday, or graduation gift.
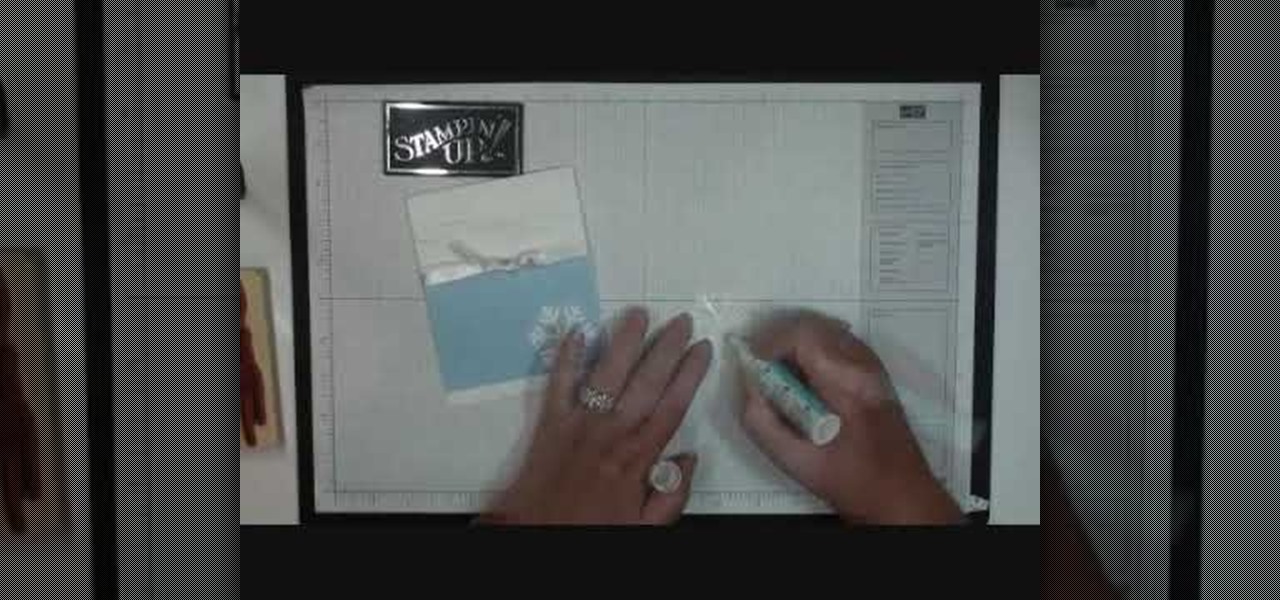
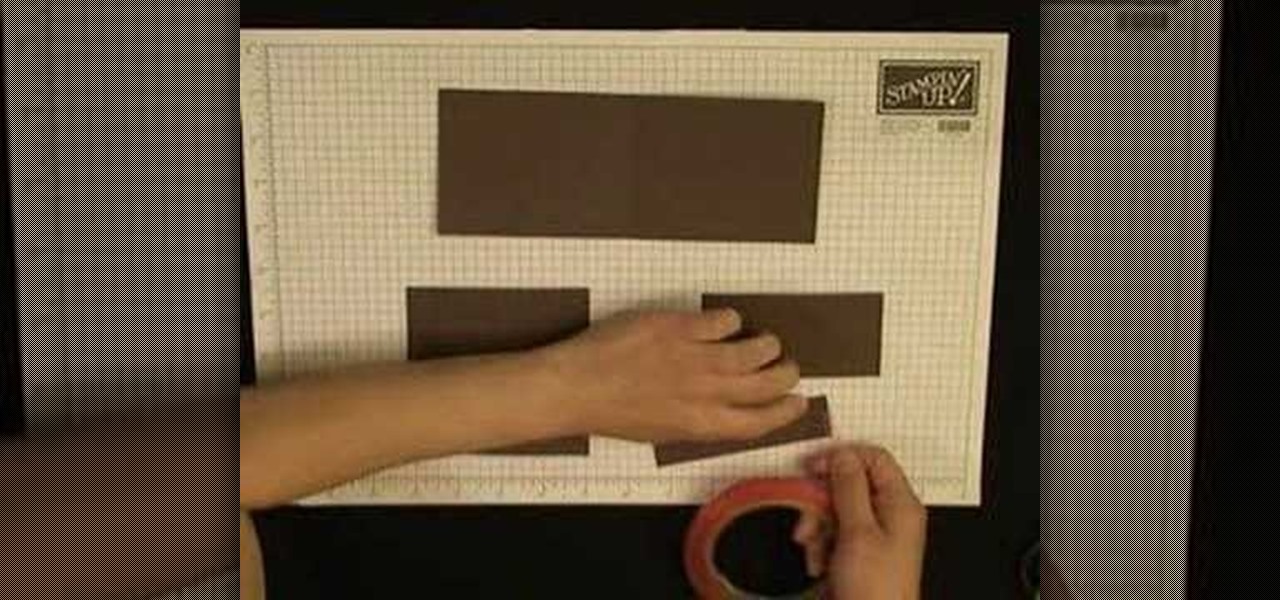
This video tutorial is in the Arts & Crafts category where you will learn how to make a quick and simple Christmas card with Stampin' Up! You will need the bashful blue classic ink, a bashful blue cardstock cut at 3" x 4 1/4", a piece of whisper white cut at 4 1/4" x 11" and scored at 5 1/2", a piece of whisper white organza ribbon and scrap cardstock for two snowflakes. Cut out the snowflakes with the jumbo snowflake punch. Stick the bashful blue on the whisper white cardstock. Using the hea...

This how-to video shows the best way yet to get whiter teeth using cheap household items! The preparation and time to do this is less than 5 minutes. Watch this video tutorial and learn how to whiten teeth.
If you've been wanting whiter teeth, you don't need expensive whitening strips. Watch this video to learn from BlackOnyx how you can just use simple mixtures to remove stains from your teeth. There are two methods to try. You can do a baking soda and water mixture, or a salt and lime juice combination.
Embroidering on cardstock is a wonderful way to add a personal touch to your holiday and greeting cards. You'll be giving your friends and family the gift of yourself, along with all your good wishes. Watch this ebroidery instructional video for tips on mastering the art of cardstock embroidery.
Whiten teeth with Paintshop Pro. Done with version X2 can be done in earlier versions. Get rid of all that yello and make your teeth white as can be.
Nobody wants to look bad in their bridal photos. But what if you have really bad teeth? In this video tutorial you will learn to whiten teeth or fix teeth for a perfect pearly white smile in every photograph.
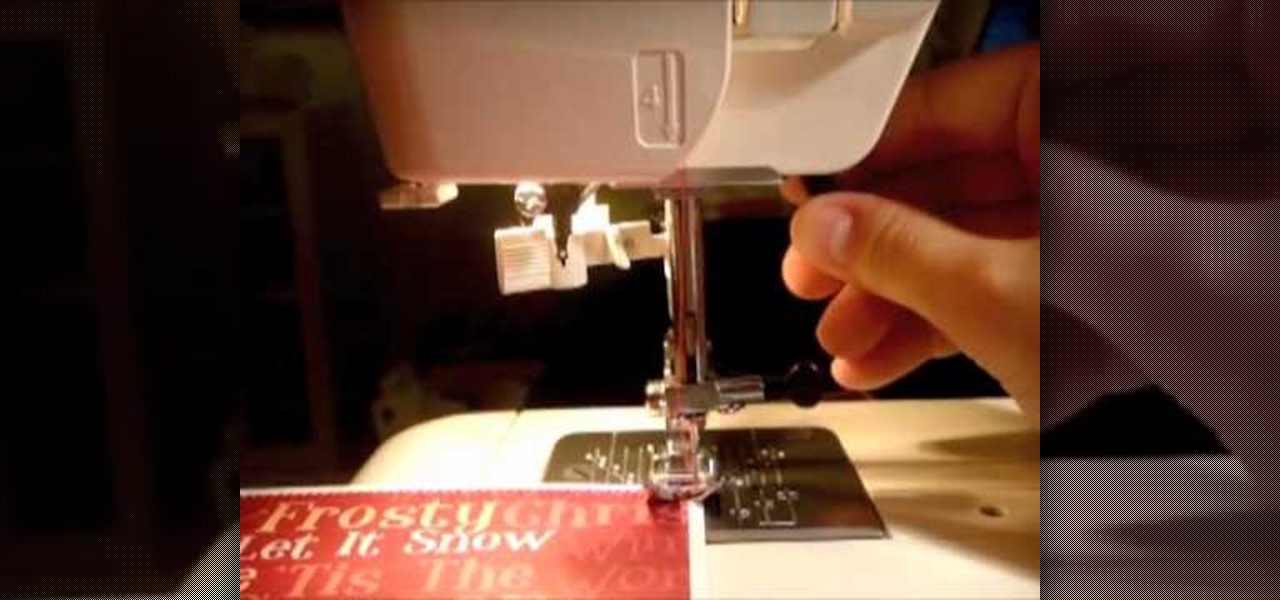
This video represents a union between two spheres of crafting - sewing and cardmaking. You can create some decorative stitching on your handmade greeting cards by using your sewing machine. Here's how you can sew on paper without ruining the paper or cardstock.
Learn how to make simple tri-fold cards with these instructions. What you will need: -5 1/2" by 11" cardstock paper -Scorer -Scissors and paper cutter -Pencil and Ruler What to do: -Score the cardstock to 3" by 7 1/4" -Using the 3 3/4" flap, from the corner measure 2 1/2" and mark with a pencil. -Repeat on the horizontal side of the cardstock. -Cut the corners using the marks as your guide. -Round the pointed end with your scissors. -Fold the card at the score line. -Embellish your card as de...
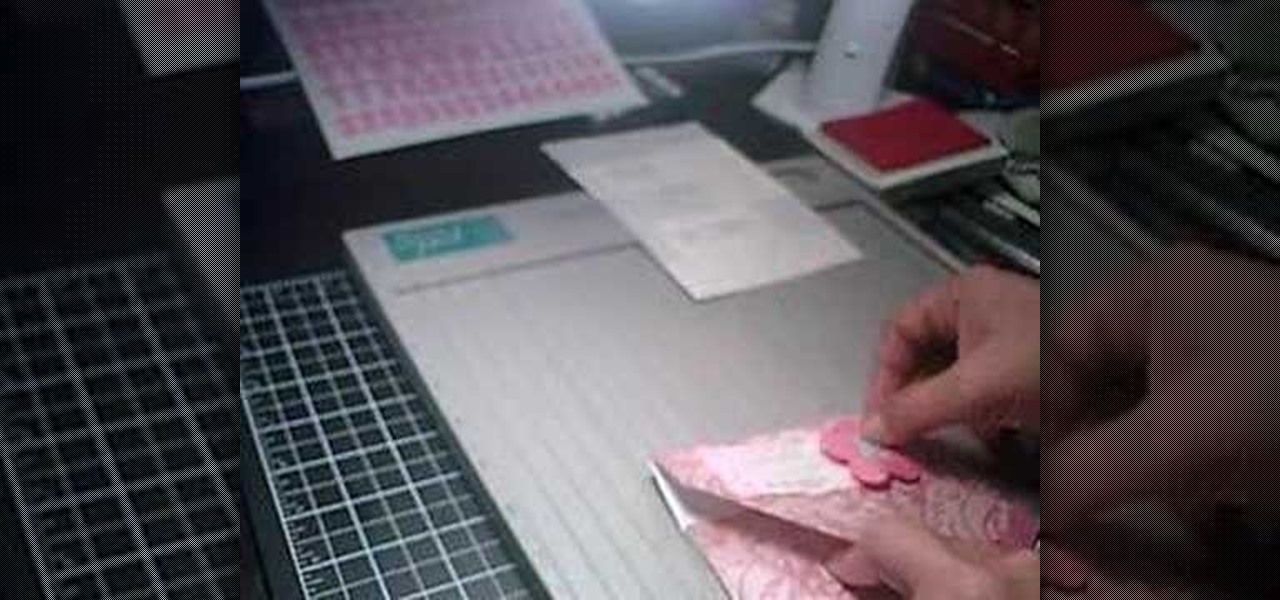
In this video, we learn how to stamp your own customized X-mas patterned cardstock. You will need: green/red stamp pads, Christmas stamps, light yellow plain cardstock and a stamp foam mat. First, stamp your yellow paper as you wish with the green and red stamp pads, you can make any pattern you'd like. Then, place on your stamps on the paper and press the clear stamp press down onto them. Now, apply your stamp color and press back onto the paper. This will make the different stamp shapes pre...
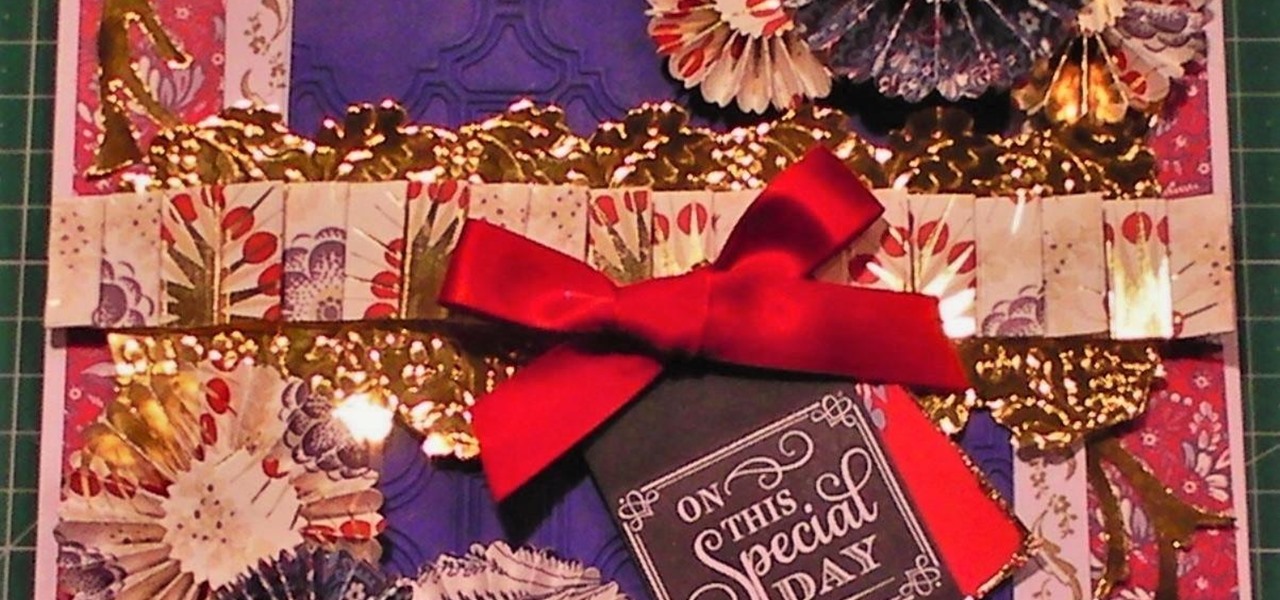
In this card tutorial project I create a mega mix of lots of layers and different textures and papers to make a great card.
In this cardmaking tutorial, I make a 7x7inch square card using the Pink Peonies from a decoupage collection kit. I also use embossed card and some gorgeous corners to create a really pretty card. Step 1: Items Used
Michelle Phan demonstrates how to create an egg mask facial. Egg white and yolk mask. Perfect for oily skin. It helps brighten and tighten the skin. The reason why the egg yolks are so good and rich for your skin is because they are loaded with Vitamin A! Protein and nutrients!
To start you will need a craft bag. They can be found at Michaels but they can be difficult to find. Take the bottom flap of bag and fold it over. The bags will be cut down to 4 and 3/8. You will next need your pink pirouette cardstocks, one will be 5 3/4 x 3 5/8 and it will be scored at 1 1/4. That will be the back of the bag. The other pirouette will be 4 1/2 x 3 5/8 and it will be the front of the bag. On the front Pirouette you will use your stamp on the front right hand corner as close t...
It's not brain surgery, but teeth whitening systems still hits the pocket books hard. However, there is a cheaper alternative to have the whitest teeth in the neighborhood, and it's called Photoshop. With Adobe Photoshop, you can have whiter teeth in seconds! Really. It's definitely the best tooth whitening remedy for those behind the camera lens. But remember… Photoshop is only a digital cure. You still might have to hide that smile in public… or consult a dentist.
Having less-than-brilliant teeth doesn't have to mean a trip to the dentist or a whitening kit. Try this all-natural remedy instead. Watch this video to learn how to whiten teeth naturally.
You'd think that in the United States we have more of a problem of women wanting to look tan year round than white and pale. But many women actually crave the vampirish pale complexion, and because not all of them are born with it, some turn to whitening/lightening creams. Some women also turn to these creams because they claim to fade dark spots.
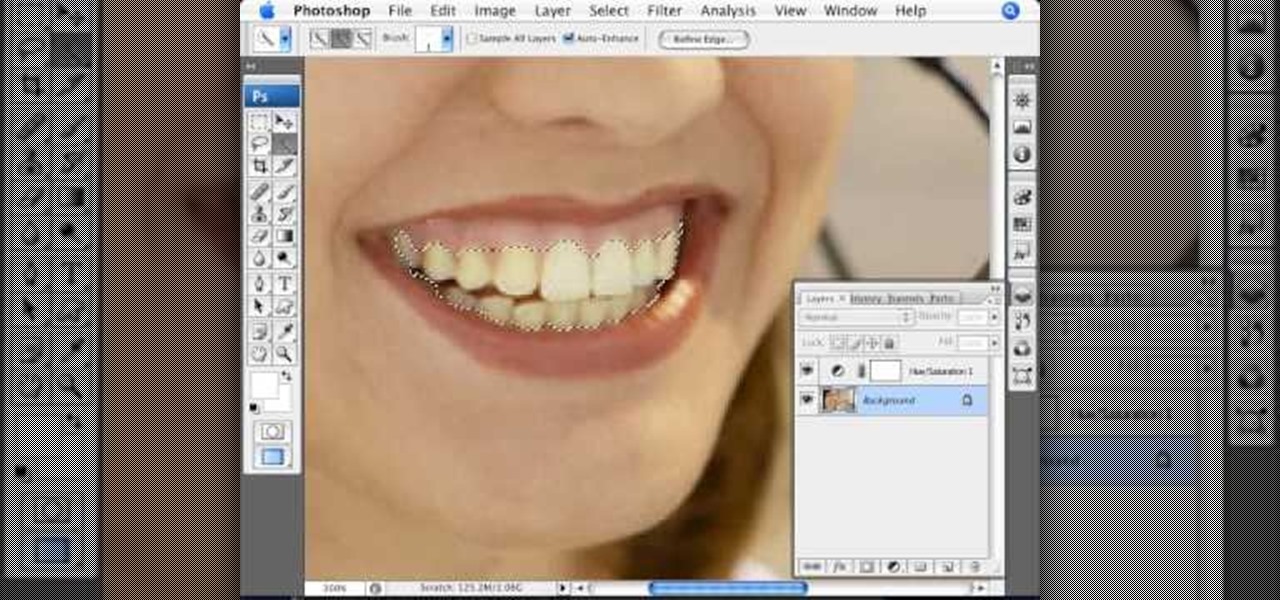
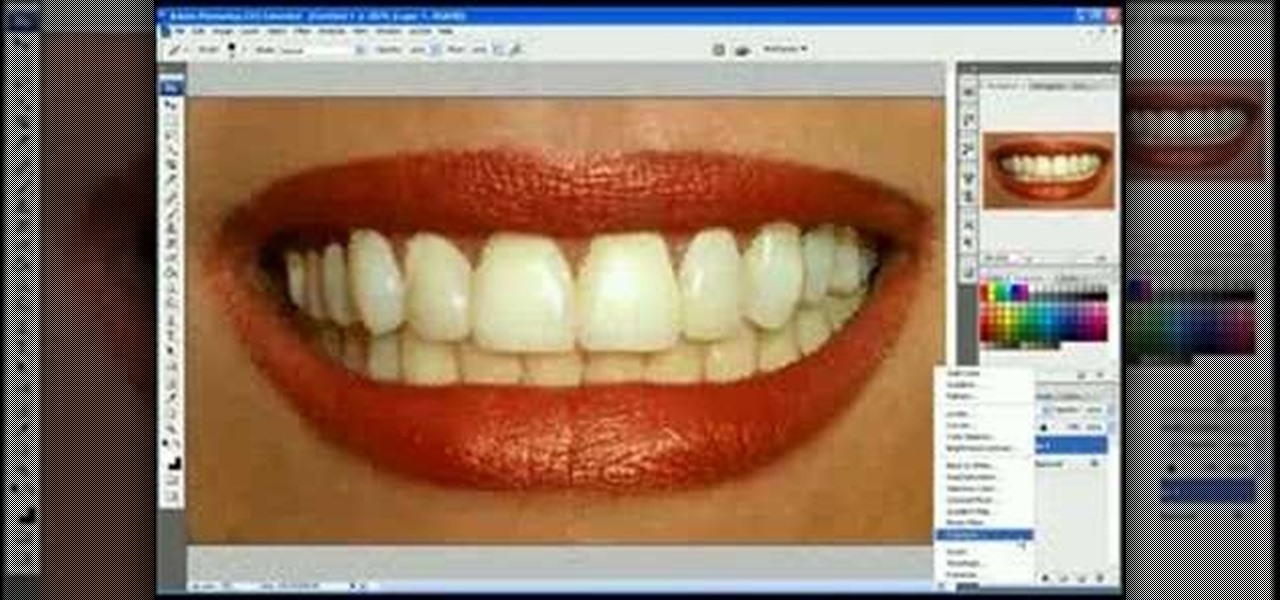
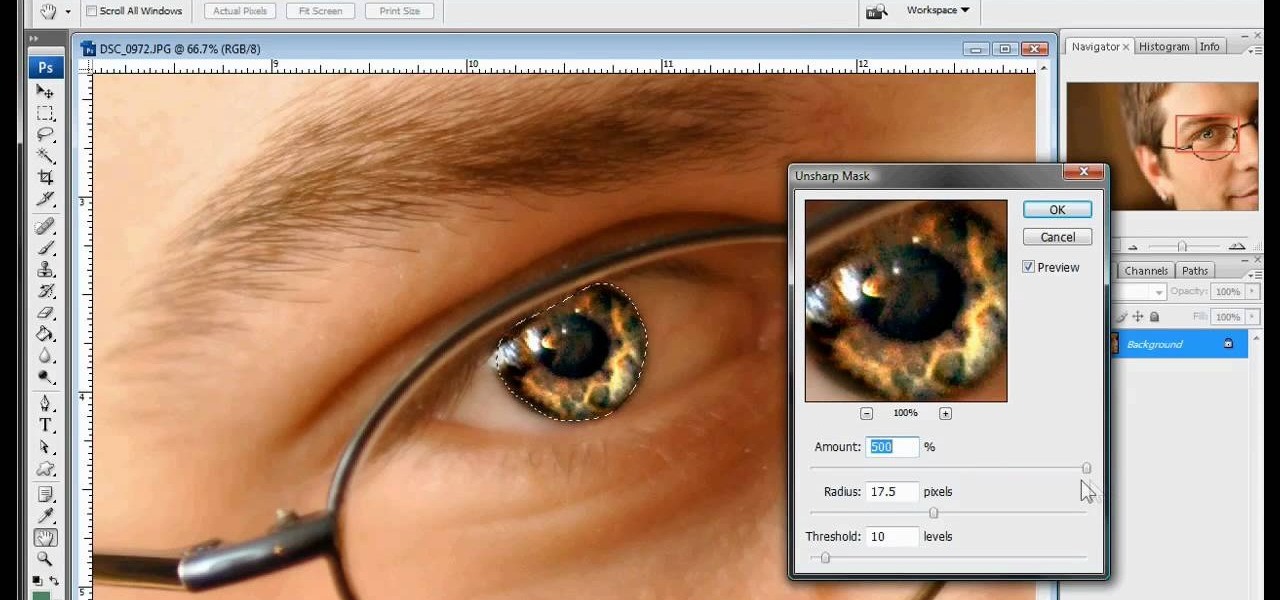
This is a terrific video on how to whiten yellow teeth in Photoshop, taught by Link. First, he zooms in on the teeth and uses the quick selection tool or magic wand. This is a pretty easy task. You just have to click and drag. If you put too much of the gums, you can hold down alt, then drag the areas you don't want. Make sure you use a small brush when using these modifications. All you have to do then, is go into the heat saturation and select shift-control-I, which inverts the selection. T...
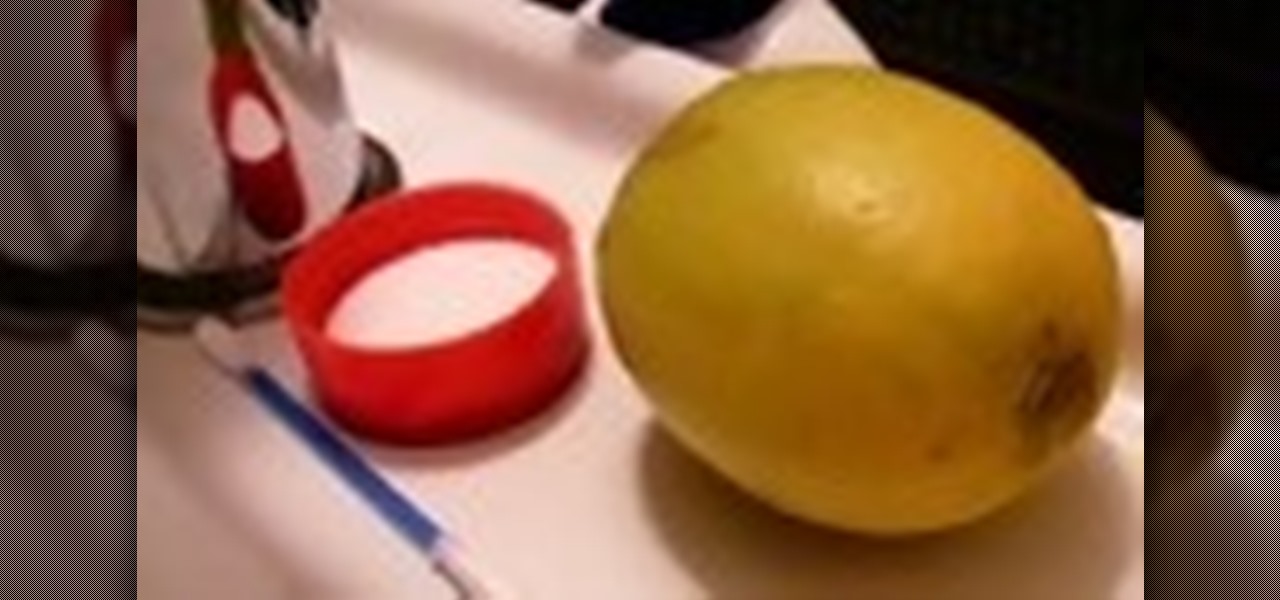
In this tutorial, we learn how to whiten teeth in one minute using household items. You will need: a lemon, baking powder, and a cup to do this. First, pour baking powder into a cup and then squeeze the juice of a lemon into the cup. After this, mix the two together until you have a paste and all water. Now, rinse your mouth out with this mixture. Do this several times a week and you can get your teeth to become eight shades whiter! This is a great way to whiten your teeth without having to s...
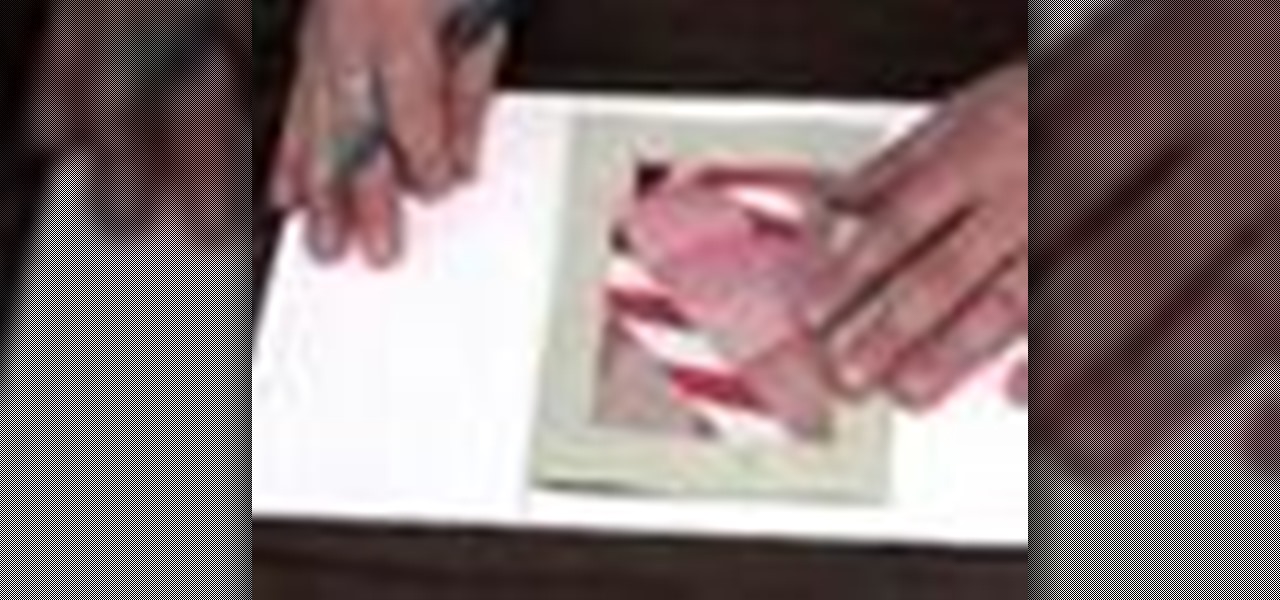
Glossy cardstock and an acetate sheet protector are great material to use for doing a fossilized stone technique on paper. This effect makes an unusual finish you'll find yourself using over and over in greeting cards. Watch this video card making tutorial and learn how to create a fossilized stone technique on glossy cardstock, and how to make an all occasion greeting card using the stone finish paper.
Come learn how to create an embossed cardstock to match your patterned paper like many of the new ones on the market today. All you need is a piece of cardstock, a metal charm and a popsicle stick.
In this tutorial, we learn how to bleach your teeth for really cheap. First, buy the Plus White teeth whitener kit from a store or online. Once you have the whitening kit, grab plastic teeth molds and see how they fit in your teeth. Once you do this, add some of the whitening gel to the molds, then push them into your mouth on both the top and the bottom. Make sure to rub the gel all the way around your teeth as well so you have a layer of gel all over. Leave this in for the recommended amoun...
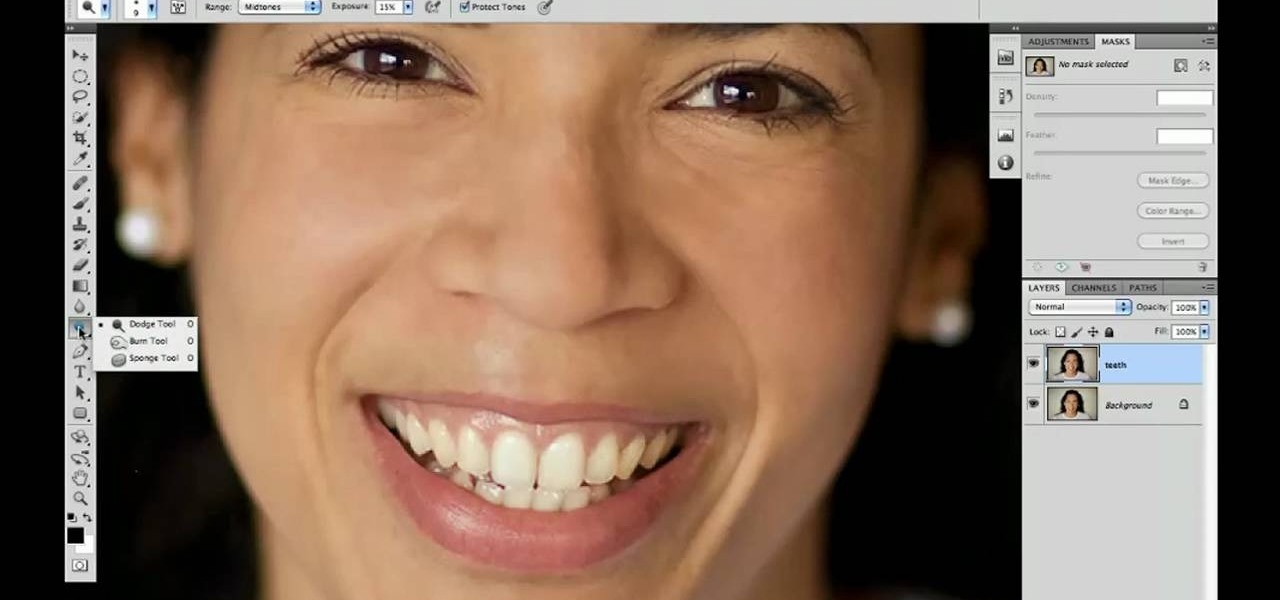
Polish those not-so-pearly whites with Adobe Photoshop CS5's Dodge & Sponge tools. This clip will teach you what you need to know. Whether you're new to Adobe's popular raster graphics editing software or a seasoned professional just looking to better acquaint yourself with the program and its various features and filters, you're sure to be well served by this video tutorial. For more information, including detailed, step-by-step instructions, watch this free video guide.
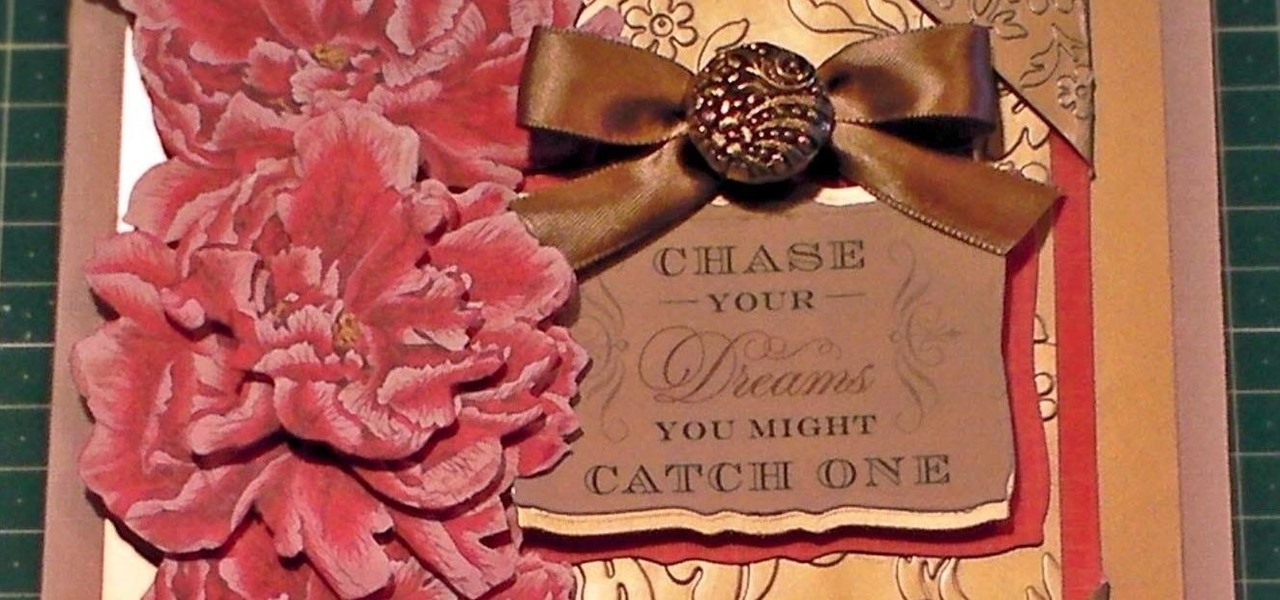
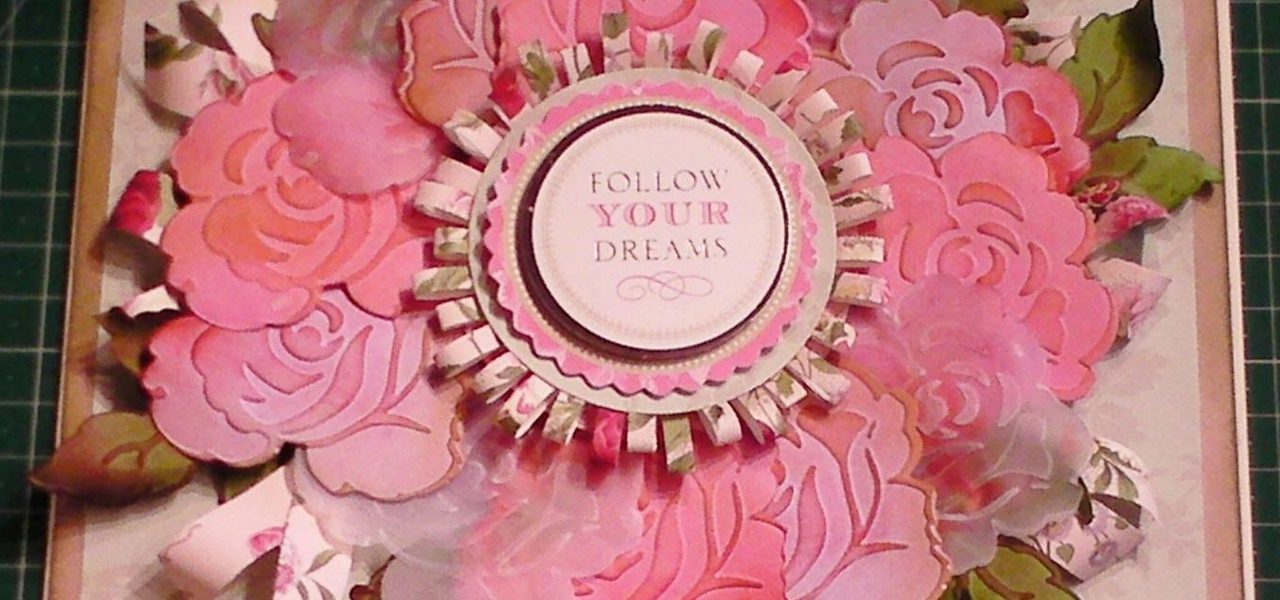
This card is awesome, there is no other words for it! It is pretty, eyecatching and just so gorgeous, using cardstock and vellum to create a wreath made of embossed roses. There are a few different techniques in this tutorial to make the wreath but they are all easy when you see how. Step 1: Items Used
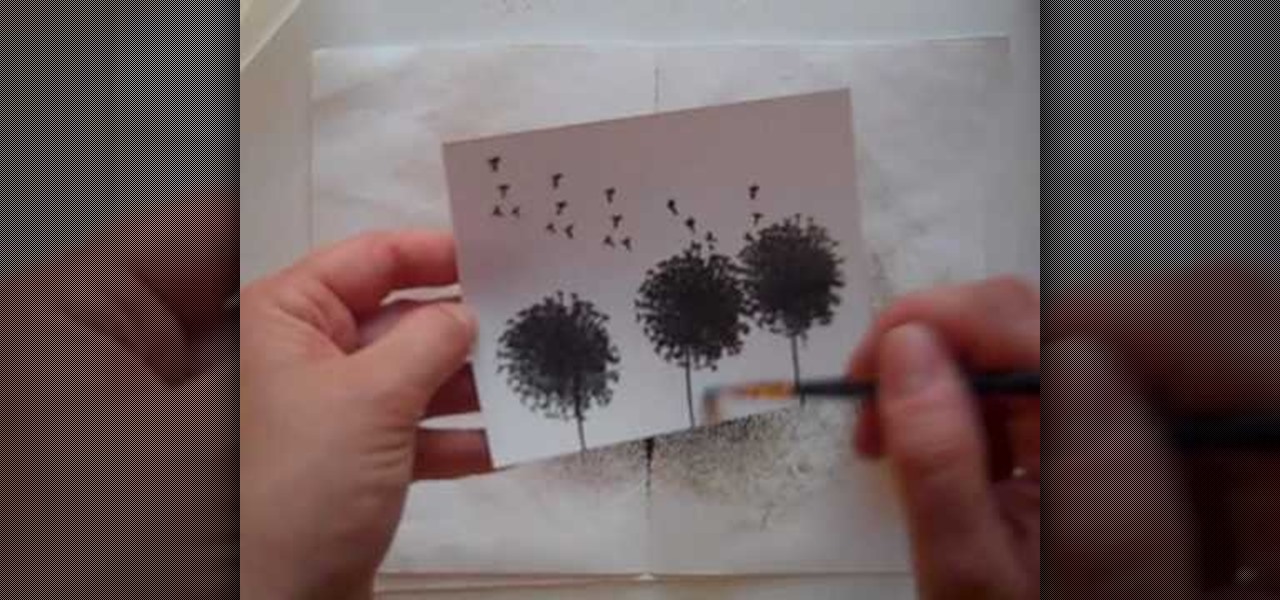
Anyone interested in scrapbooking can learn how to do the Brayer technique with ink refills for cards with this video tutorial. You will need a piece of glossy cardstock as well as stamps. Make sure to keep your fingers off the paper to avoid smudging. You will need the dandelion stamp to stamp the cardstock. Add a stem stamp to your flowers followed by the dandelion fluff along the top of your paper. Then, emboss your stamps with black embossing powder making sure to use a separate piece of ...
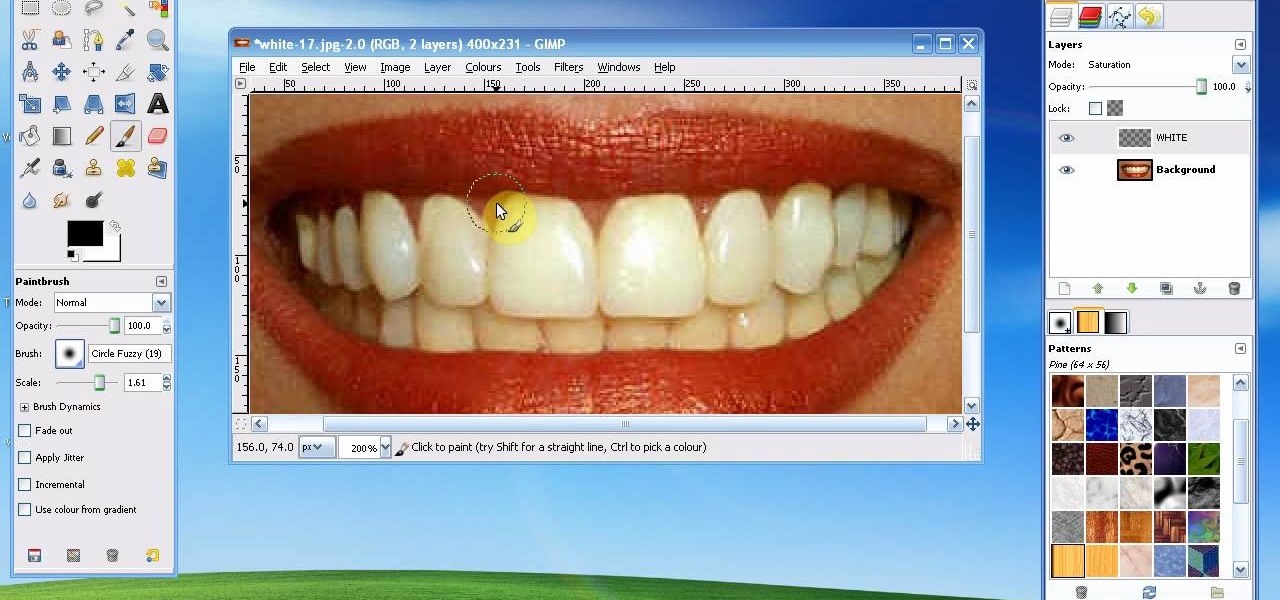
In this tutorial, we learn how to whiten teeth in the Gimp image editor. First, open up GIMP and zoom in on the teeth of your image. From here, create a new layer named "white", making sure it's transparent. Now, make sure the white tab is on the top and go to "mode" then "saturation". Select the brush named "circle fuzzy 19". Put the scale around 1.5 or 1.6 and then draw on the teeth, which will make them white! Do this for all of the teeth, then when you save you can use this as your image ...
In this video we learn how to whiten teeth in Photoshop like a professional. Start off by opening up Photoshop and zooming in on the teeth in your photo. Start out by selecting a hollow brush and then paint the selection onto the teeth. Paint around them carefully and make sure you don't touch the gums in the middle and on the top of the teeth. Once you have selected the entire area of the teeth you will see them all covered in red. Then, go to "select" and "inverse", then press the button fo...
In this video, we learn how to whiten yellow teeth at home with a lemon. You will need: a q-tip, baking soda, and a lemon. First, cut the lemon in half and squeeze out all the juice into a container, then add in baking soda to the juice to make a paste and mix together with the q-tip. Now, apply this mixture onto your teeth and leave on for around 10 minutes. After you have done this, you will have whiter teeth in just a few minutes! Only use this mixture a couple times a week, because it is ...
Polish those not-so-pearly whites! With Adobe Photoshop CS4, it's easy to digitally brighten your smile. See how it's done with this video lesson. Whether you're new to Adobe's popular image editing program or a seasoned graphic design professional just looking to your bag of tricks, you're sure to be well served by this video tutorial. For more information, including step-by-step instructions, and to get started digitally whitening teeth yourself, watch this free video guide.
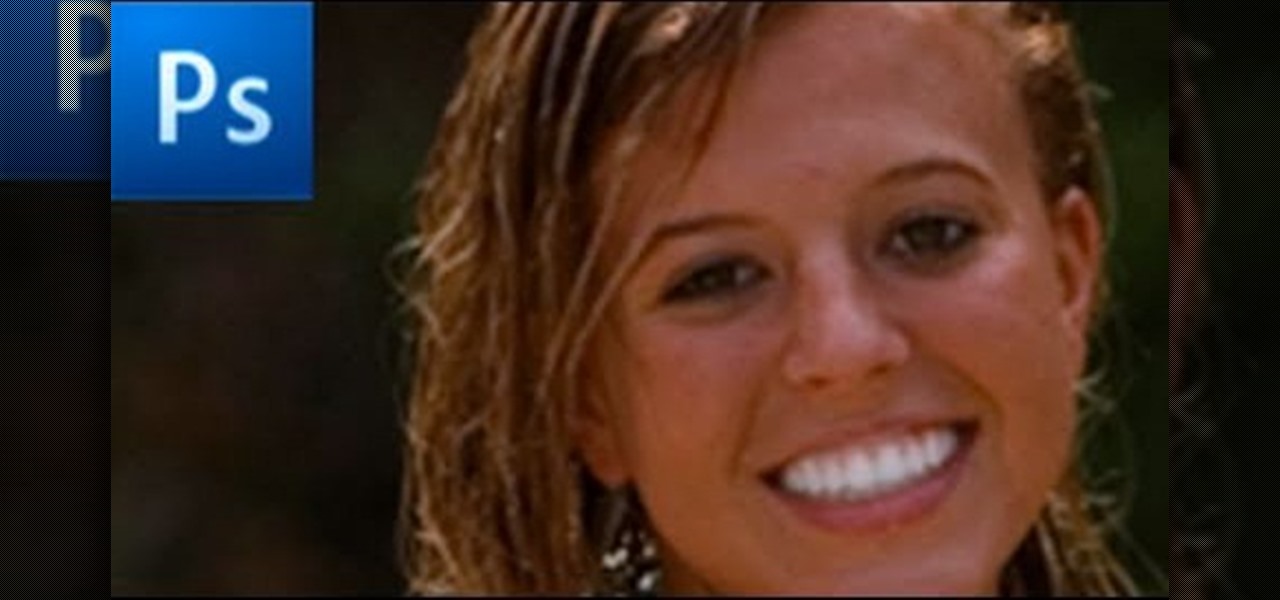
The white bits on a person's face are often what make them appear healthiest and happiest. In this tutorial, learn how to enhance someone's face by improving the white areas of their faces. In it, you will learn how to focus on the eyes and teeth of your subject to whiten and enhance them. With this trick, your subject will appear cleaner, healthier and more alert.
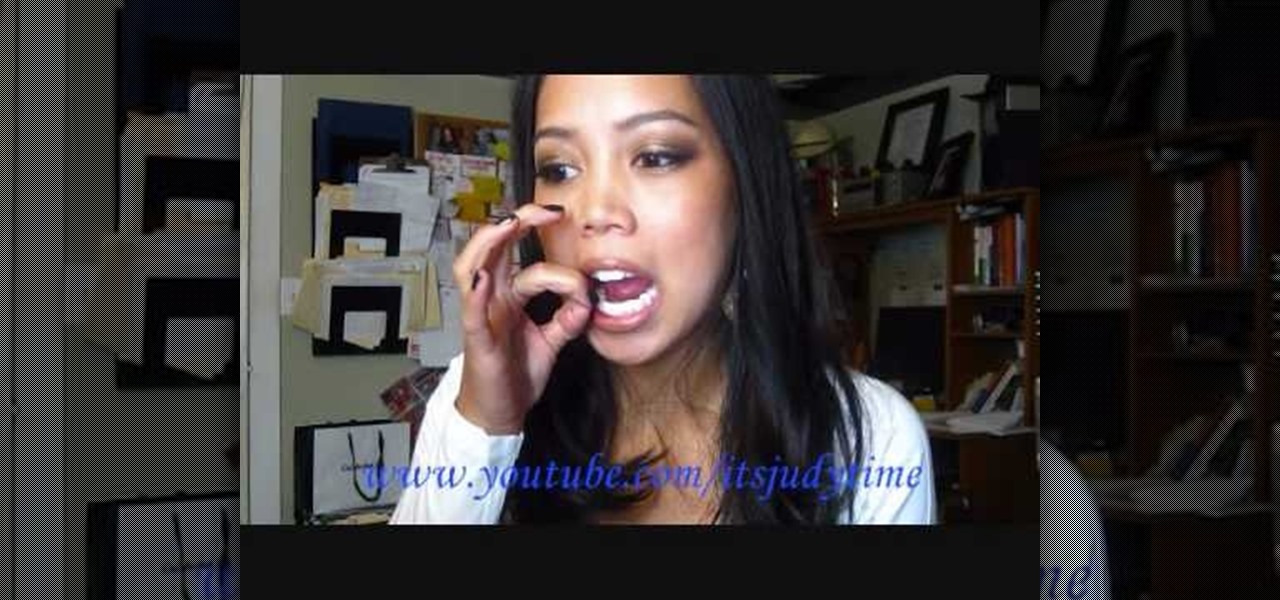
Judy discloses her teeth-whitening secrets in this video. Using Crest Whitestrips: Advanced Seal, Judy shows the proper way to apply the strips in order to achieve maximum efficiency. The advanced seal strips are not as gooey as the original and work better, according to Judy. Simply peel off the strips and apply it to both your top and bottom rows of teeth, making sure that there are no bubbles my pressing the strips against all of your teeth. Only using these strips once a day will ensure t...
Learn how to whiten your teeth using Photoshop with this video tutorial. 1. First thing you will want to do is remove the padlock if your image has one. You should be able to find this in the top right hand corner of your screen or in the background layers option.
In this how to video, you will learn how to whiten teeth in Photoshop. First, open an image that you want to edit in Photoshop. Zoom in to the teeth as much as you can. Next, go to the brush tool and set the diameter to 21. Hold shift and q to put you into quick mask mode. Now paint over the teeth with your brush. Whatever is red will be your selection. Once you are done painting the teeth, select press shift and q again. Go to select and choose inverse. Next, go to image and adjustments and ...
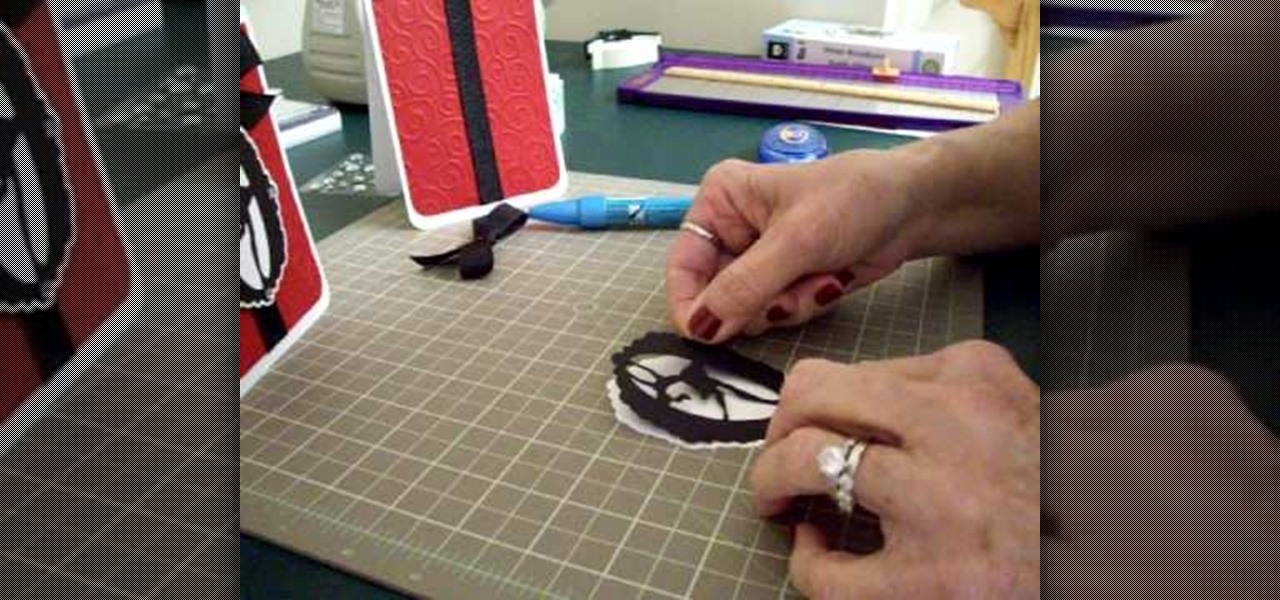
Make a simple, elegant card using Winter Woodland. Go to page 50 of manual. Cut tag and skater at 3 inches. Use 8 1/2 x 11 cardstock and cut vertically to 4 1/4 inch. Fold from top to bottom. Round corners of cardstock and red matte. Make red matte 4x5. Run red matte through cutter bug using swirls folder. Insert between two plates and run through. Place black grosgrain ribbon down the center. Stick to front of card. Glue skater to background. Place square crystals around skater. Create and p...
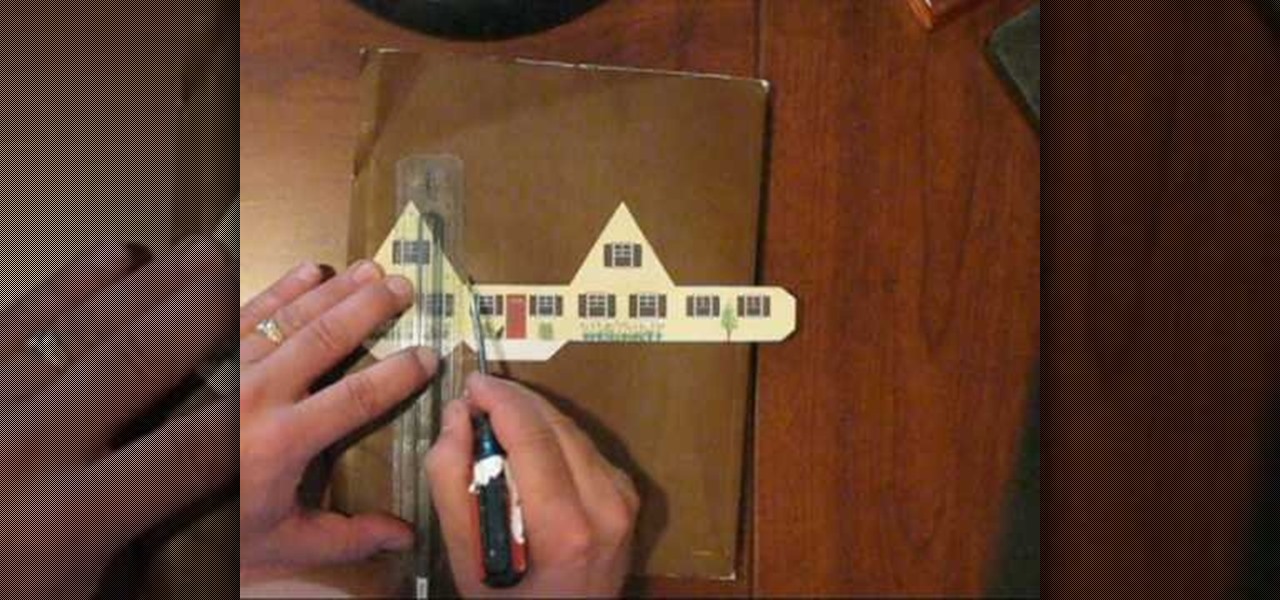
To make a Cottage Pop-Up Card, you will need the following: the printable pattern available at Victoria Norman Home , scissors, a ruler, cardstock, glue, and a flat head screwdriver.