


Don't want one of your Facebook "friends" knowing your status updates? Prefer to keep a few of those "friends" out of your photo albums? Would you like to prevent a few "friends" from accessing your address?
The simple answer would be to remove all of those so-called friends—you know, the ones that aren't really your friends. But there's plenty of reasons to keep those acquaintances and would-be buddies, like socializing with fellow workers and potential clients or stalking your favorite musician.
So, the best answer? Split up your web pals into Friend Lists. You can set up lists for anything—schoolmates, coworkers, instate buddies, potential love interests—whatever. And you can set each of those separate Friend Lists to see what you want them to see. But that's not all you can do to make sure you have the private experience you want on Facebook. Below are 10 steps that you may or may not want to use to safeguard your Facebook information—it's up to you.
Step 1 Friend Lists
This will outline how to set up a Friend List, edit them and choose what information they see. You can create up to 100 different lists. In those, you can store up to 1,000 of your friends. Chances are, most of you don't have that many, but maybe someday.
Creating Friend Lists
1. From your Home or Profile page, click on Friends.
2. On the Friends page, click on the Edit Friends button.
![]()
3. On the Edit Friends page, click on Create a List.
![]()
4. The Create New List box appears. Enter the title of your Friends List in the space provided.
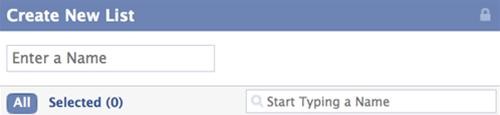
5. Search for people by typing in their name or simply browse the list shown. Select those you
want in to include in the list. Once selected, the photo will be highlighted in blue and a check
mark will appear.
6. Click on Selected to see everyone in your current list, to see if you forgot anyone. Click on All
to go back and search for those you missed.
7. Click on Create List to seal the deal.
![]()
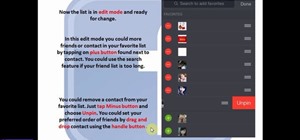
Editing Friend Lists
To view or add/delete people from your created Friend Lists, just go to Edit Friends and select your list from the left-hand column.
Protecting Status Updates
If you want to write a status update only to a specified Friend List, type in your status update and click on the lock icon.

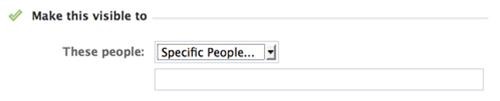
Select Customize. In the drop-down menu under Make this visible to, select Specific People, then type in the name of your Friend List. Then, click Save Setting.
Protecting Profile Information
Using Friend Lists is one of the best and easiest ways to control who sees what on your Facebook profile. It's saves time compared to setting preferences with individual friends.
1. Click on Account in the top right-hand corner.
2. Choose Privacy Settings.
3. Select Customize Settings.
4. Click on the drop-down menu next to each option you want to change, then select Customize.
5. In the drop-down menu under Make this visible to, select Specific People, then type in the
name of your Friend List. Then, click Save Setting.
There's a lot of information you may want to protect, like your posts, bio, places you check in to, photos you're tagged in, wall posts, contact address, etc., and Friend Lists makes it easy to control who sees what.
Step 2 Social and Third-Party Ads
If you don't want your name and profile picture to appear in Facebook's Social Ads, then you might want to stop it from happening.
1. Click on Account in the top right-hand corner.
2. Choose Account Settings.
3. When in My Account, click on the Facebook Ads tabs at the far right.
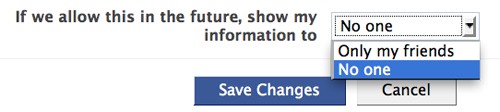
4. Click on Edit third party ad settings.
5. Select No one from the drop-down list and hit Save Changes.
6. Click back on the Facebook Ads tab.
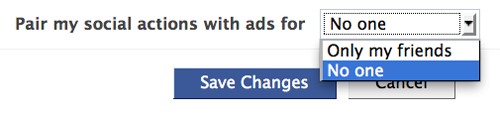
7. Click on Edit social ads setting.
8. Select No one from the drop-down list and hit Save Changes.
Step 3 Instant Personalization
The Instant Personalization feature shares your personal data with not only Facebook, but non-Facebook partner sites, like Bing, Rotten Tomatoes, Pandora and Yelp. To stop this, you need to disable it, if not already done.
1. Click on Account in the top right-hand corner.
2. Choose Privacy Settings.
3. Click on Edit your settings in the bottom left, under Apps and Websites.

4. Click on Edit Settings for Instant Personalization.
![]()
5. Un-check the box that says Enable instant personalization on partner websites.
![]()
Step 4 Contact Information
Sure, you can protect your contact information from certain friends, but what about keeping third-parties away? It might be best to just remove all of your contact info, specifically your phone and address.
1. Click on the Profile tab in the top right.
2. Select Info underneath your profile picture.
3. Click on Edit inside the Contact Information section.
![]()
4. Make sure all of your Phone and Address information is blank and click the Save Changes.
Step 5 Facebook Search
If your profile is opted in for Facebook Search, then everyone can access your profile page, albeit without total access. Regardless of your privacy settings, it's best to make yourself invisible to everyone with Internet access.
1. Click on the Account tab.
2. Choose Privacy Settings from the drop-down menu.
3. In the Connecting on Facebook section at the top, click on View Settings.

4. By Search for you on Facebook, choose Friends Only from the drop-down menu.
![]()
Step 6 Public Search
Not only can people search for you on Facebook, but they can search for you via Google, Bing and other search engines. Make sure to turn off Public Search if you don't want to be seen outside of Facebook.
1. Click on the Account tab.
2. Choose Privacy Settings.
3. Click on Edit your settings in the bottom left, under Apps and Websites.
4. Find Public search and click on Edit Settings.
![]()
5. Un-check the box that says Enable public search.
NOTE: If you set Facebook Search to Friends Only in Step 5, then Public Search will automatically be disabled. You must have Facebook Search set to Everyone in order to enable or disable Public Search manually.

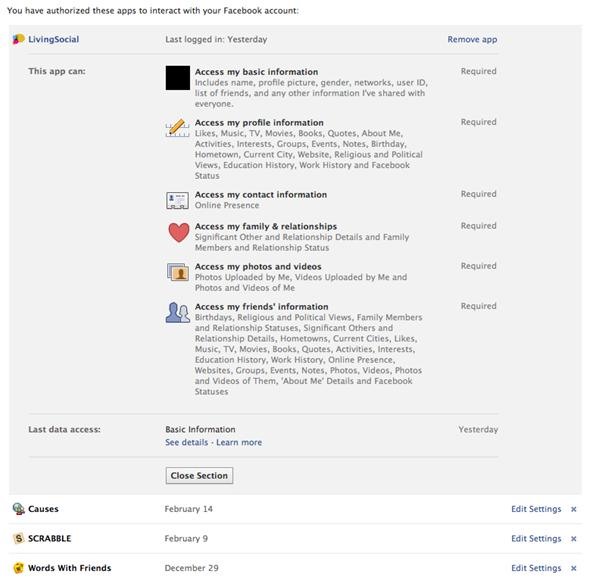
Step 7 Application Access
If you have third-party apps connected to your Facebook (most of you will), it's time to get rid of the ones you're not using, or ones you deem mistrustful.
1. Click on the Account tab.
2. Choose Privacy Settings.
3. Click on Edit your settings in the bottom left, under Apps and Websites.
4. Find the Apps you use section.
A. Turn of all platform apps will do just that. But who wants to get rid of all their apps?
B. The other two choices are Remove unwanted or spammy apps and Edit Settings. Both
do the same thing.
5. Click on Remove or Edit Settings and find the app you want to remove or edit.
6. Click Edit Settings or just hit the X to remove the app altogether.
NOTE: Most options are required by apps, but some you can remove, like posting to your wall. If you don't like what they have required access to, then simply hit Remove app. Below is an example of what one application has access to.
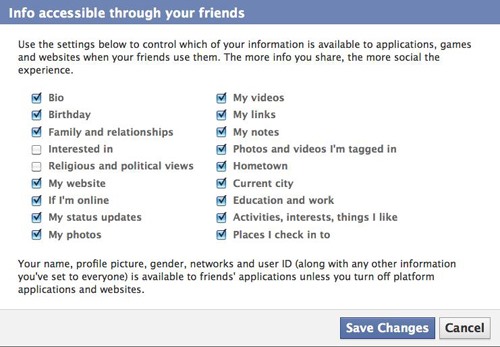
Step 8 Info Accessible in Apps
Some friends may be using the same apps that you do, which means they can see more of you when they're using those apps. If you don't want to share a lot of information with your friends, then you can change some of the settings.
1. Click on the Account tab.
2. Choose Privacy Settings.
3. Click on Edit your settings in the bottom left, under Apps and Websites.
4. Click Edit Settings from the Info accessible through your friends section.
5. Select what information you want available to applications, games and websites when your
friends use them. Hit Save Changes.
Step 9 Browse Safely
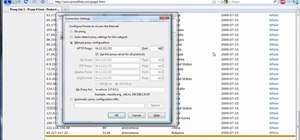
Protect your browsing experience by preventing hackers access to your information when on a public network connection. Make sure to set up Secure Browsing (https) and login alerts.
1. Click on the Account tab.
2. Choose Account Settings.
3. Click Change next to Account Security.
![]()
4. Check the box for Secure Browsing (https). Click Save.

NOTE: Whenever you use a Facebook page or third-party app that takes you out of secure browsing, and you allow it, it will disable it completely and you'll have to go back and reset your preferences. Don't assume it will automatically switch back.
When in Account Security, you can also change settings for Login Approvals and Login Notifications and check your recent Login Activity.
Step 10 More...
There's a lot that goes into protecting your Facebook profile. More than meets the eye. But here are a few links to other actions you can take to make a more private social experience.
Just updated your iPhone? You'll find new emoji, enhanced security, podcast transcripts, Apple Cash virtual numbers, and other useful features. There are even new additions hidden within Safari. Find out what's new and changed on your iPhone with the iOS 17.4 update.


4 Comments
Informative post!!!
Wow - I'm so going to like this site - I have been hacked to death and I want to learn what they are doing - I have only been using computer for a year
what if Instant Personalization option isn't available for me? I just can't un-check the box that says Enable instant personalization on partner websites.; < what can I do? btw. amazing information!
Hmm. Not sure. Facebook recently updated the Privacy Settings on accounts, but the Instant Personalization setting can still be found the same way... Account < Privacy Settings < Apps and Websites (Edit Settings) < Instant Personalization (Edit Settings) < Close the pop-up box (if you get one) < Make sure "Enable Instant Personalization" is un-checked.
Maybe you're in a country that doesn't have this option? If so, you're lucky. One less thing to worry about.
Share Your Thoughts