This video, produced by Photoshop Universe, teaches how to reduce beard stubble or 5 o'clock shadows from male pictures. We are shown how to use the dust and scratches filter, layer mask, as well as the advanced layer style command "blend if" on the underlying layer helps us to make this possible. The first step is to duplicate the layer and then select filter, noise, and dust and scratches. The second step is to apply some dust and scratches to the beard selection. Finally we blur the layer ...

Photoshop is the perfect program to use when you want to make adjustments to photos you have taken. You can really make a sky pop in any of your pictures by using Photoshop to manipulate the color by following this tutorial.
This video tutorial offers an introduction to the terminal for those making a switch from Windows to Mac OS X, one of the most powerful (yet cryptic) of OS X, which will allow you to interact with OS X's underlying UNIX layer. If you'd like to get acquainted with the terminal, simply press play!
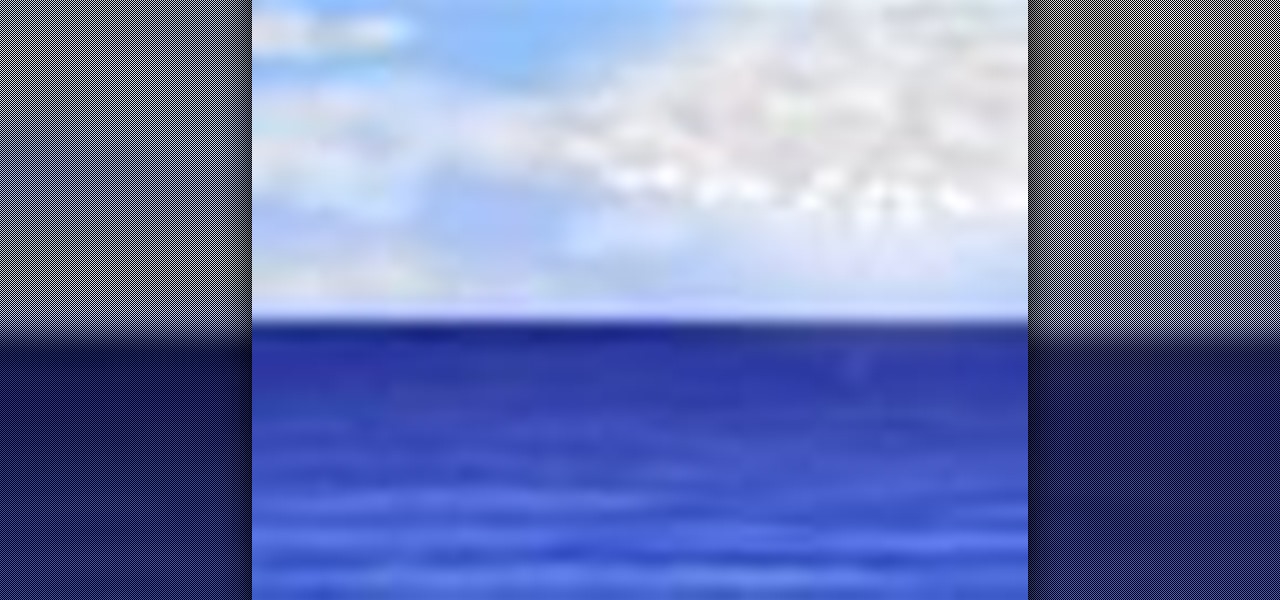
Pixel Perfect is the "perfect" show to help you with your Photoshop skills. Be amazed and learn as master digital artist Bert Monroy takes a stylus and a digital pad and treats it as Monet and Picasso do with oil and canvas. Learn the tips and tricks you need to whip those digital pictures into shape with Adobe Photoshop and Illustrator. In this episode, Ben shows you how to create cloud over a sea in Photoshop.
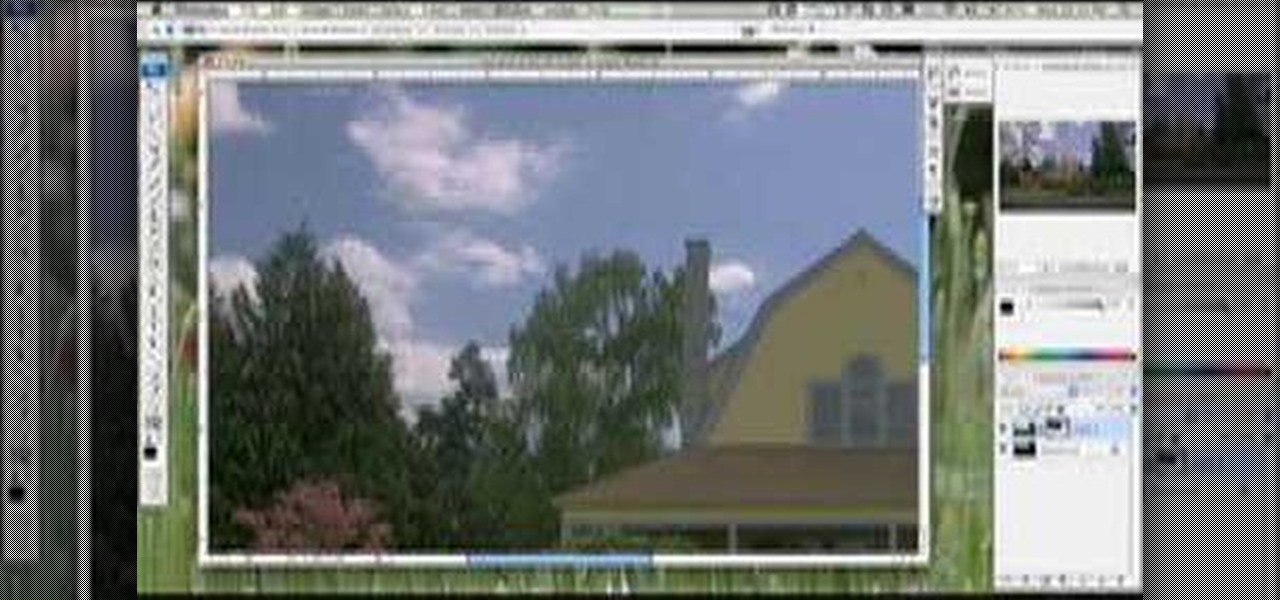
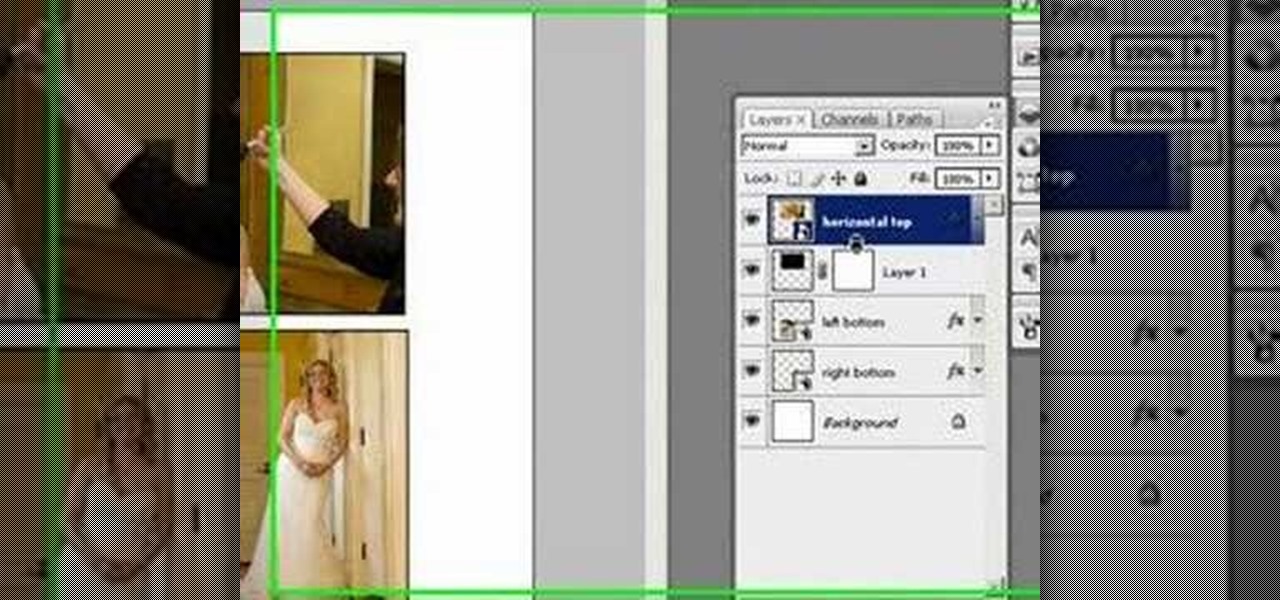
Learn how to combine images with a mask in Adobe Photoshop by opening the same raw file twice and applying separate exposures. This technique is used to perhaps mask out the sky or the windows. Using the negative exposure making the initially over exposed sky black and the dark parts white which is what the mask feature operates on. Then the designer selects cuts out the sky in the mask layer and makes it invisible so that the second layer or underlying picture shows through.

Want to lay a hardwood floor yourself? It's easy. Provided, that is, you have all of the following materials: wood panels (preferably with built-in foam underlay), plastic sheeting, duct tape, tapping blocks, a hammer, a crowbar, a straight edge, a miter square, a pencil, string line, some spacers, and a saw. For complete instructions on putting it all together and installing your own custom wooden floor using panels, watch this free DIY guide.

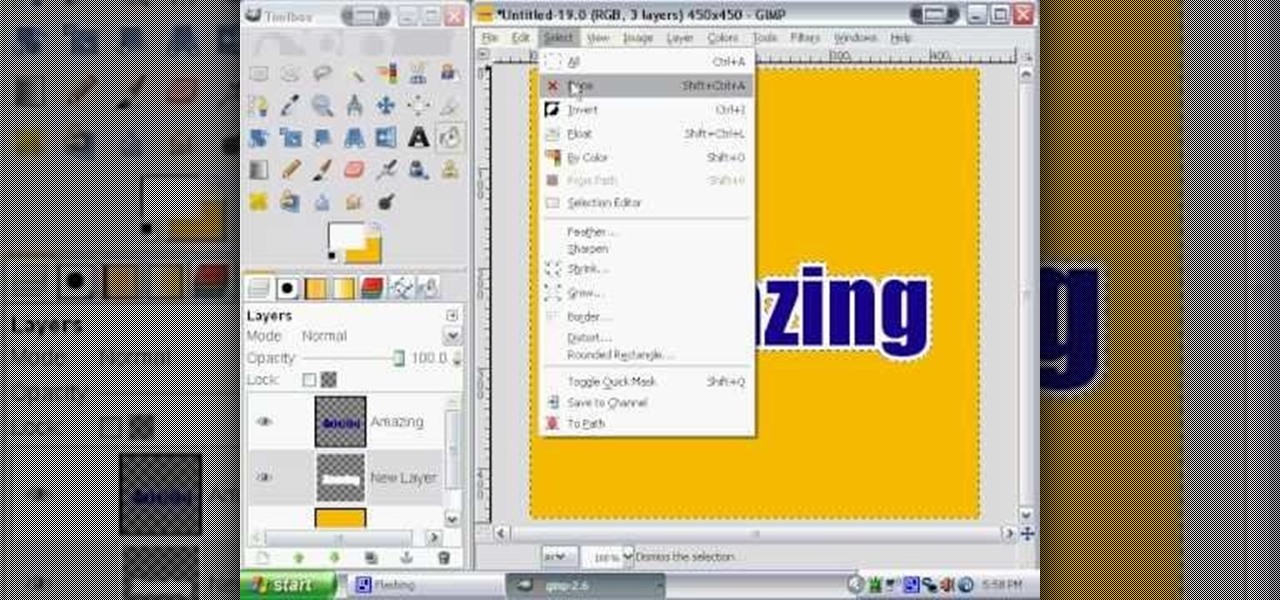
This video tutorial from TutVid shows how to create a simple movie poster text effect in Adobe Photoshop CS4.
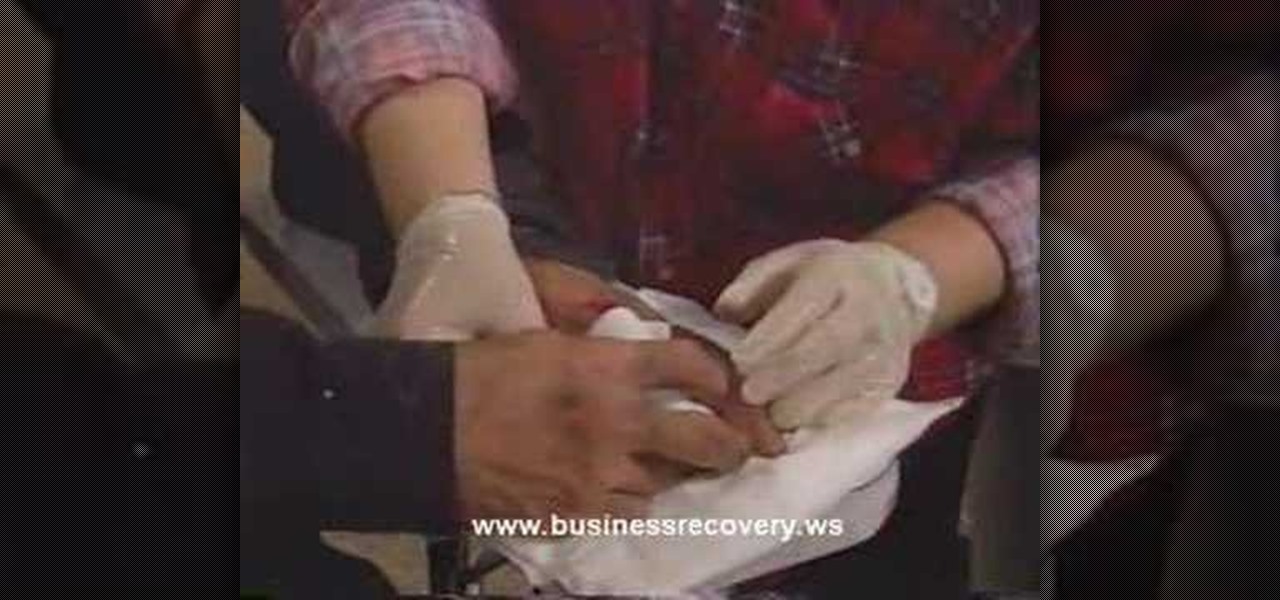
Many injuries do not require an ambulance, but they must be referred to medical aid for further treatment. This first aid how-to video will show you how to identify wounds that require further treatment. Underlying and dirty wounds, foreign objects, and stitches are all injuries that require a patient to go to a doctor or hospital.
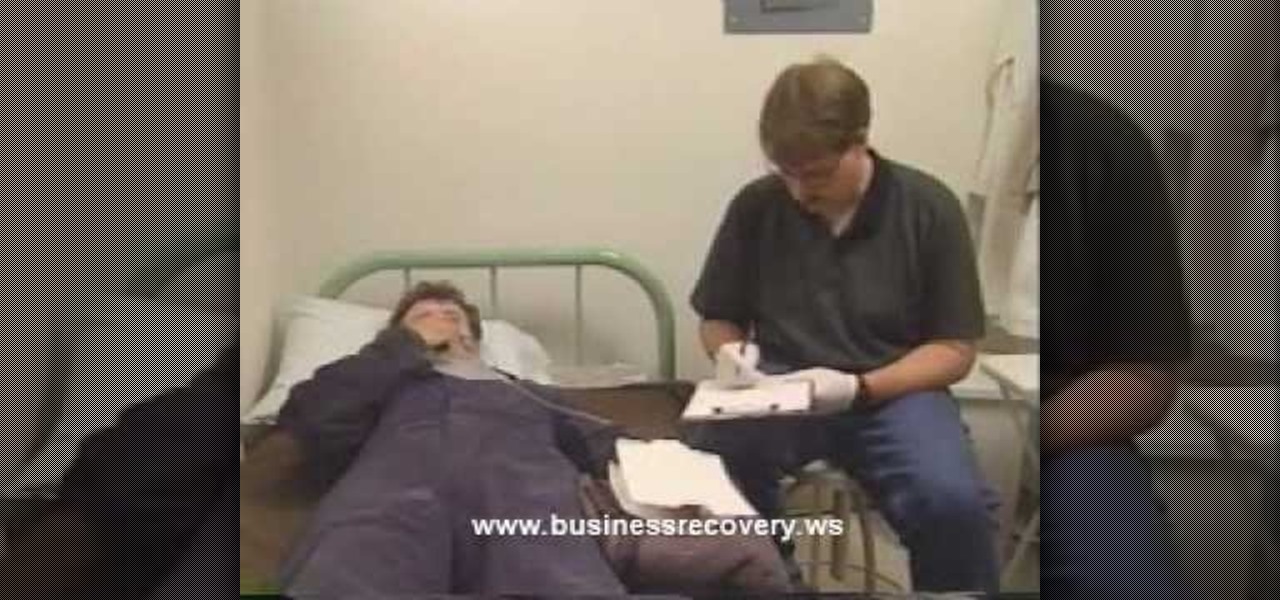
Wounds that involve underlying structures usually require immobilization. The purpose for immobilizing an injured victim is to provide support. This first aid how-to video demonstrates the proper technique for immobilizing someone who has serious wounds or injuries.
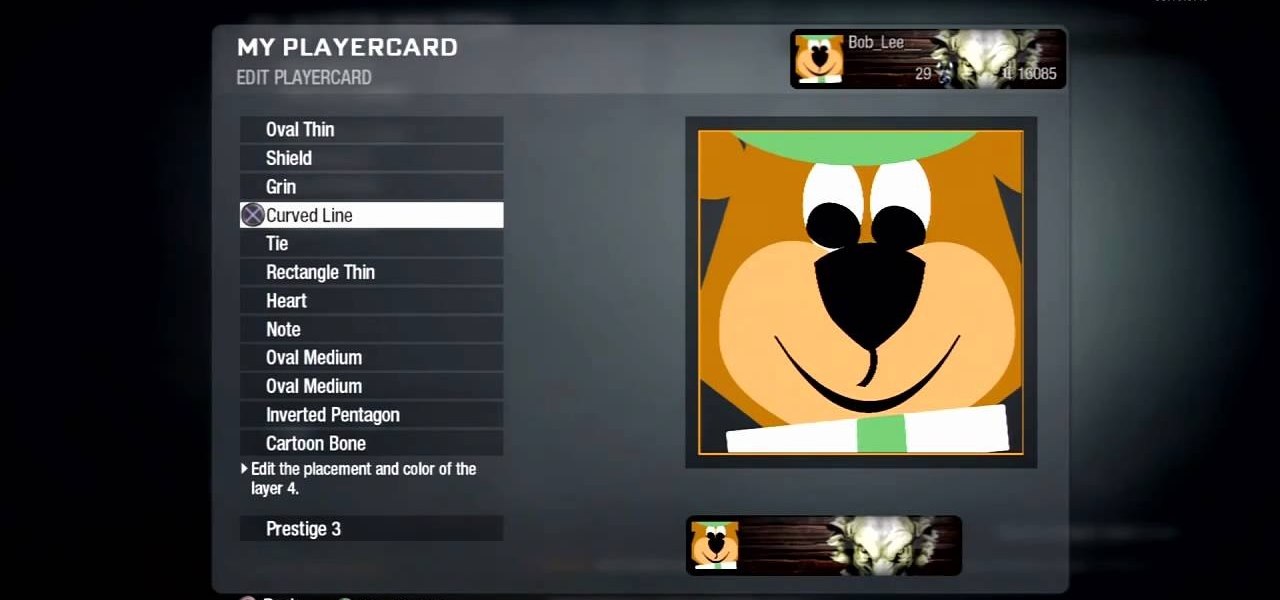
Are you smarter than the average bear? Show the world by using Yogi Bear as your Black Ops playercard emblem. This clip will teach you everything you'll need to know to draw a custom Homer Simpson emblem in the Call of Duty: Black Ops Emblem Editor.
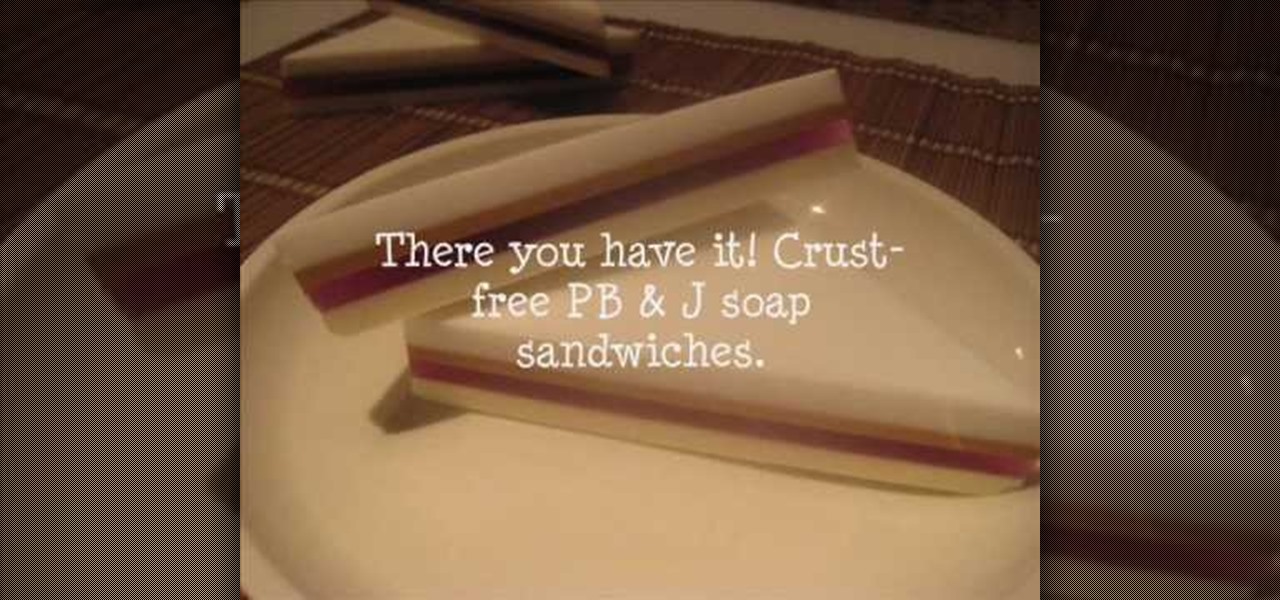
Layered soap is an effect used in everything from the simplest two-colored soaps to complex rainbow-hued and even checkerboard patterned soaps. Layering soap is actually a beginner's soapmaking method, so learn how to do this aesthetically interesting technique by watching this video.
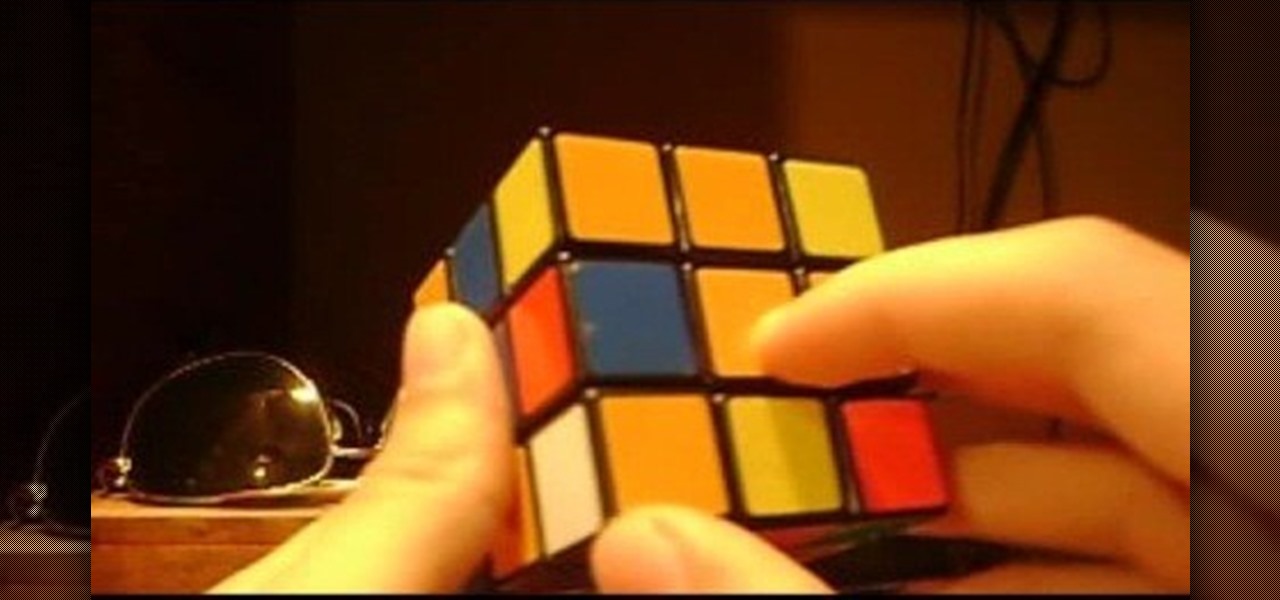
If you know nothing about solving a Rubik's Cube, don't you think it's about time you learned? Don't you want to be able to walk into a party store, find that Rubik's Cube display on the shelf, and solve the puzzle in front of your friends like it's nothing? Of course you do, who doesn't want to impress people?
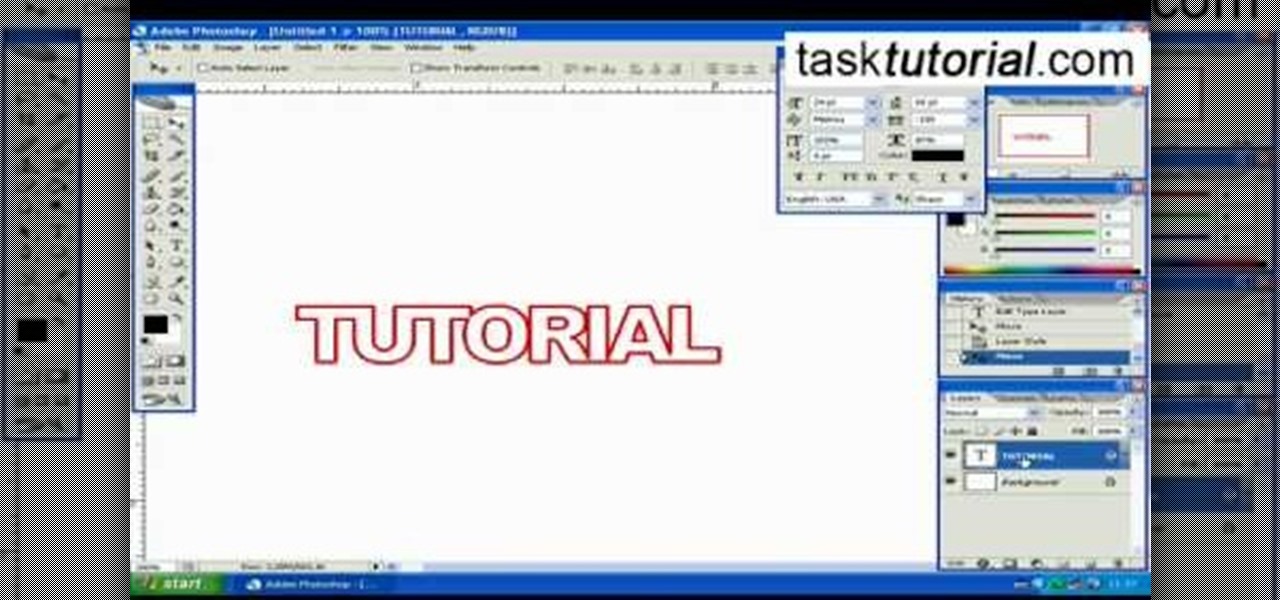
This how-to video is about how to create a simple text effect in Photoshop.
The Skrags/Gorgers are formidable opponents on the battle field in Warhammer, if you use them correctly. But half of having a good army is making sure they look good. In this video you will learn some techniques including glazes, layers, blends and more to pain a GREAT looking Gorger figure!
Whether you're new to Adobe InDesign or a seasoned graphic arts professional after a general overview of CS5's most vital new features, you're sure to be well served by this official video tutorial from the folks at Adobe TV. In it, you'll see how the all-new Layers panel lets you manage objects in complex documents with more control in InDesign CS5.
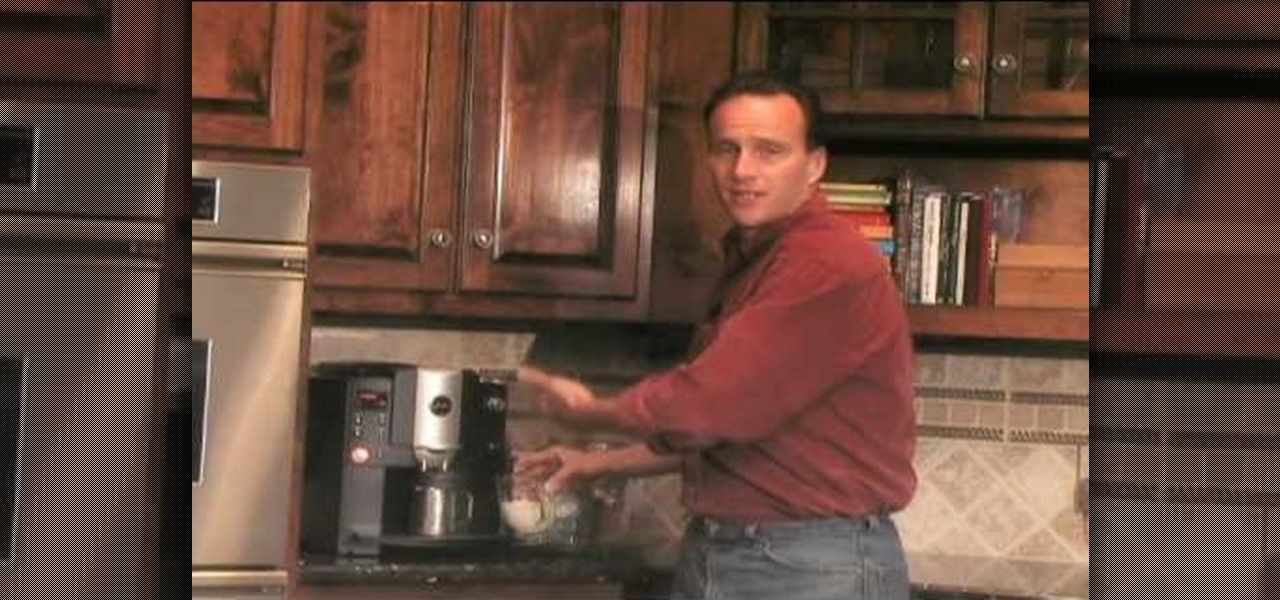
Bob Doyle shows how to make a layered latte at home. You need an espresso machine, any brand, and milk. Skim milk foams better but whole milk tastes better, so choose which you prefer. First, steam about 3 ounces of milk until your glass is about full. Set it aside. Start the espresso. Plan for about 6 ounces of espresso. Use a container with a lip to control how you pour because the key to a layered espresso is how fast you pour your espresso into your milk. Pour slowly, alternating with a f...
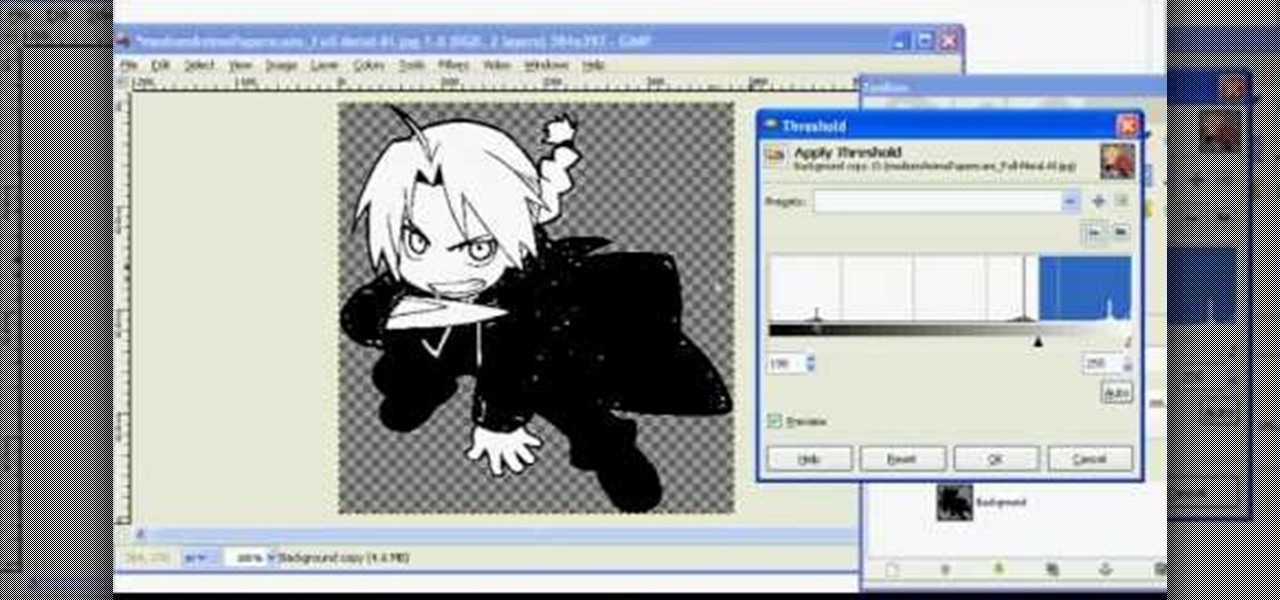
In this tutorial, we learn how to make 2-layer stencils in GIMP. First, cut out the background before you begin. Now, right click on your main layer and then select "add alpha layer". After this, select the magic wand tool and delete all the white areas on the outside of the picture. Now duplicate the layer, then hide the top layer and select the bottom layer. Now, go back to threshold and move it all the way to the right to get an outline of the image. From here, go back up to the top layer ...
This video demonstrates how to make a broken mirror effect using Photoshop.
Layers are very important component of Photoshop. Without knowing how to use the layers correctly, one can not utilize the maximum what Photoshop offers to designers and digital artists. For a beginner, this video provides a good basic knowledge about Photoshop layers. Layers enable you to arrange different parts of a picture and manipulate them without effecting the content of other layers. Layers are added by using layers panel. Each layer is named accordingly. We can change the order of la...
Learn how to toggle layer visibility in Photoshop in this video tutorial. Nocole Young will show you how to do this easily. When you are working on any image in Photoshop, you usually create a number of layers. You would like to see what the image will look like before you start editing the image. You can always toggle the visibility between the layers by clicking the ‘eye-ball’ toggle on the right hand side of the page on the layer panel. Click the ‘eye-ball’ toggle next to a layer and you w...
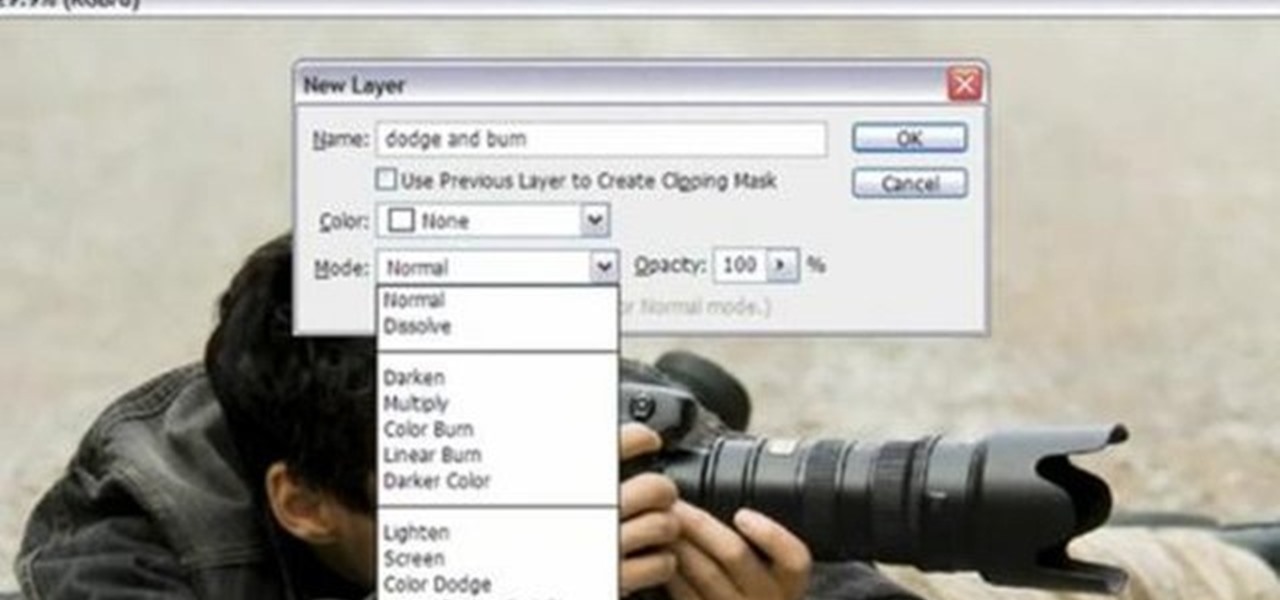
Yanik Chauvin demonstrates how to do Non Destructive Dodging (lighten) and burning (darken) of images using the tools in Photoshop. He shows the image of a man lying on earth with his camera. To start the work he wants to make a new layer which can be done in two ways either by clicking on the ‘layer’ button on top of menu or by pressing down the alt key and clicking on the new layer at button of the layer palette. It will bring up the dialogue box. He named it “dodge and burn” and from the l...
Click in File and New to create a new document, press OK and select the text tool and click once on your file and write something, then close the window. Click in move the active layer to make easier to move the text. Go again to the text tool and click on the Color to change the text color. Press Crtl+O, select the background layer and change the color to the one you want, now select the bucket tool and click on the background to paint it with the color you have selected. Go back to the text...
This Adobe Acrobat 9 Pro tutorial shows you how to work with layers. Learn how to view, navigate and control layers in Acrobat 9. Also learn how to add a PDF page as a layer, and use Adobe 9 Pro Preflight tools to assign objects to different layers. Great tutorial for anyone new to using Acrobat Pro, or needing to view the newer tools in Acrobat 9 Pro.
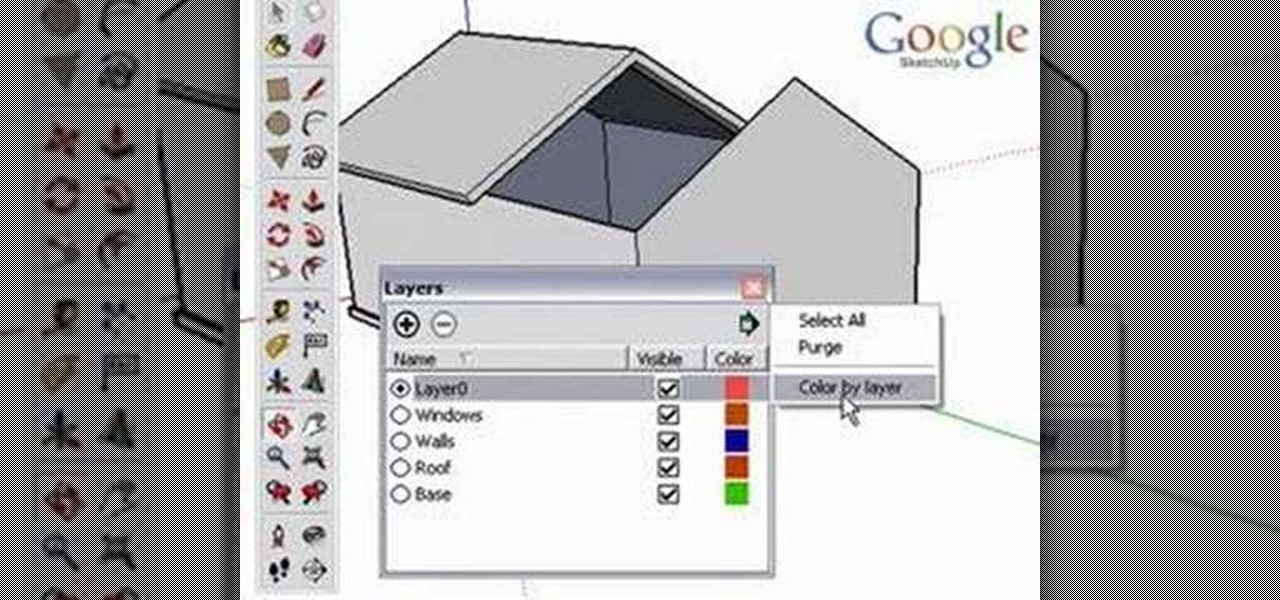
Using layers in SketchUp is different than many other applications. This instructional video to learn how to use layers, the layer dialog box, as well as some layer tips. In other applications, layers control actual geometry. This is especially true in CAD software. SketchUp's layering system only controls the visibility of the geometry, not the actual geometry itself.
You can't accurately draw a human face - heck, any part of a human body - without knowing about how the underlying bones and muscles contribute to structure. And while disecting is by far the best thing you can do to improve your knowledge in these two fields, we don't all have the ability to do such things. So this video is the next best alternative.
Just because it's called palm reading doesn't mean it's only "palm" reading. Palmistry involves more than mere palms — it looks at all parts of the grasping side of the hand, including the fingers. And in this two-part video from Jim Winter, a professional palmist, tarot reader, face reader and graphologist, you will learn the secret, underlying meaning behind a person's fingers. Knowing the digits is just as important as knowing the sweaty palm.
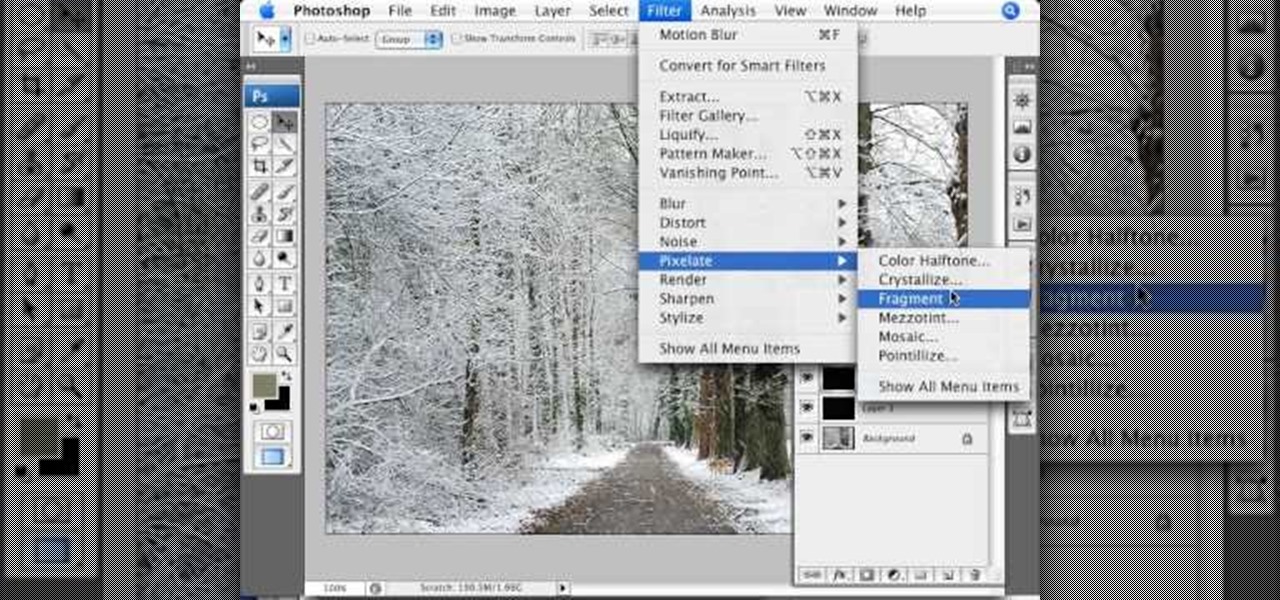
Learn how to simulate snow in your photograph in this video tutorial by photoshopuniverse. For this you'll need a photo depicting winter scenery. Add a new layer, fill it in with black, go to filer noise and add noise as shown using the given amounts. Go to filter effects and add blur to the layer. Go to images and adjust the levels to reduce the snow-flakes as shown. And add some motion blur to it. Change the blend mode to screen, duplicate the layer, rotate the new layer, apply the filter c...
This video by photoshopuniverse shows you how to make any photo seem as it was taken in a studio. Take the working photo and add a new layer over it and fill it in black as shown. Add a newer layer over that and add the filter> render> clouds effect. Increase the opacity of the cloud layer and merge it with the black layer as shown. Add the splatter effect and the sprayed stoke effect as shown onto the merged layer and add a hue and saturation adjustment layer and colorize it as desired. Go t...
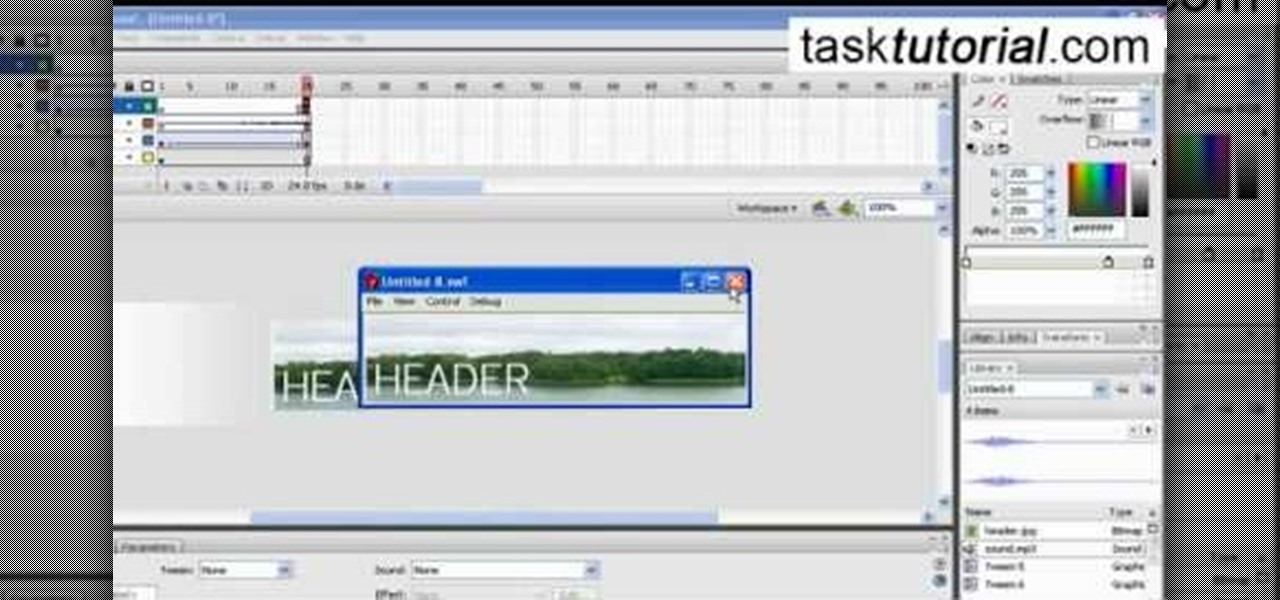
Today we learn about creating a header appearance in animation w/sound in Flash. First your import image. Create a new layer and then create our new shape. Then delete the stroke. Next select the shape and change its size to frame 20 and then press F6. Move your image as shown in the video. You will be asked to create a new layer three times. Just repeat the process of layer until you have a total of 35 layers. Now onto getting you animation to move. Mass layer is also acceptable in creating ...
Pixel Perfect is the "perfect" show to help you with your Photoshop skills. Be amazed and learn as master digital artist Bert Monroy takes a stylus and a digital pad and treats it as Monet and Picasso do with oil and canvas. Learn the tips and tricks you need to whip those digital pictures into shape with Adobe Photoshop and Illustrator. In this episode, Ben shows you how to create fabrics in Photoshop.
Pixel Perfect is the "perfect" show to help you with your Photoshop skills. Be amazed and learn as master digital artist Bert Monroy takes a stylus and a digital pad and treats it as Monet and Picasso do with oil and canvas. Learn the tips and tricks you need to whip those digital pictures into shape with Adobe Photoshop and Illustrator. In this episode, Ben shows you how to work with layers in Photoshop.
If you have been learning how to work with smart objects in Photoshop CS3, you may have noticed that some funny things start to happen when you try to use layer masks with smart objects. Most often, you layer mask doesn't move with the smart object. This Photoshop tutorial will show you a workaround for layer masks not linking with smart objects.
In order to make Clarified Butter, you will need the following: butter, a saucepan, knife, measuring cups, and a spoon.
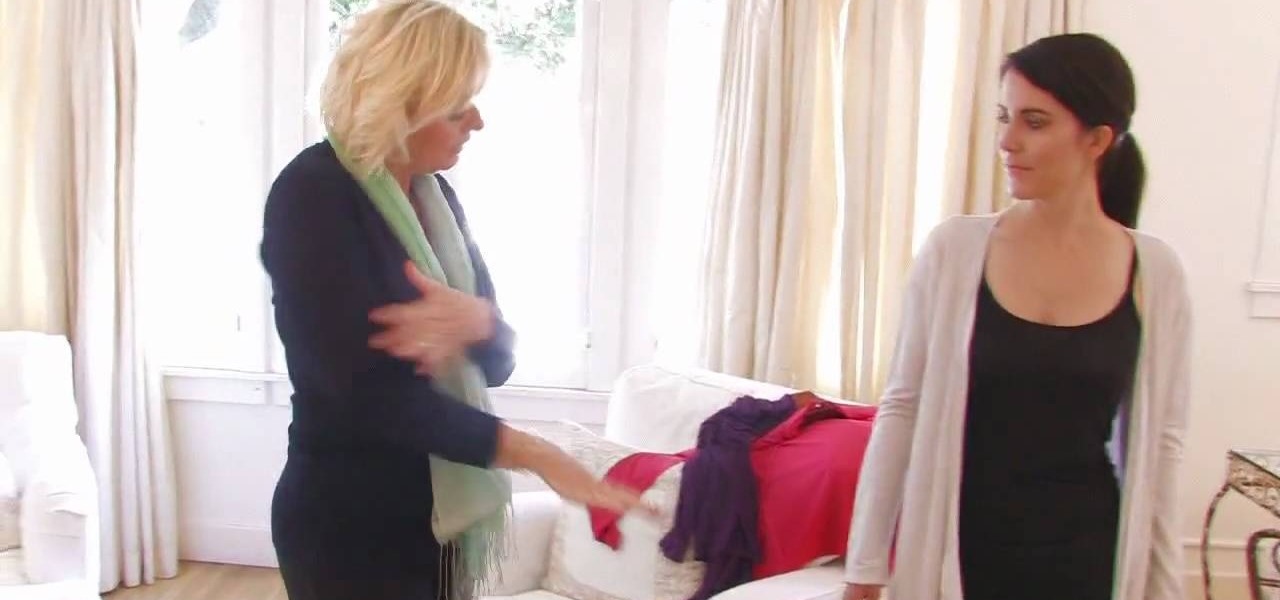
In this video tutorial, viewers learn how to layer clothes fashionable. When layering, do not wear thick clothing to avoid bulkiness and thickness. Wear thin clothing to make the layer more thin and less wide. Make sure that length of the clothing is right and vary in length. Use layers to flatter various parts of the body. This video also provides a visual demonstration of how to layer a shirt. It has 3 different layers that all vary in length. This video will benefit those viewers who are i...
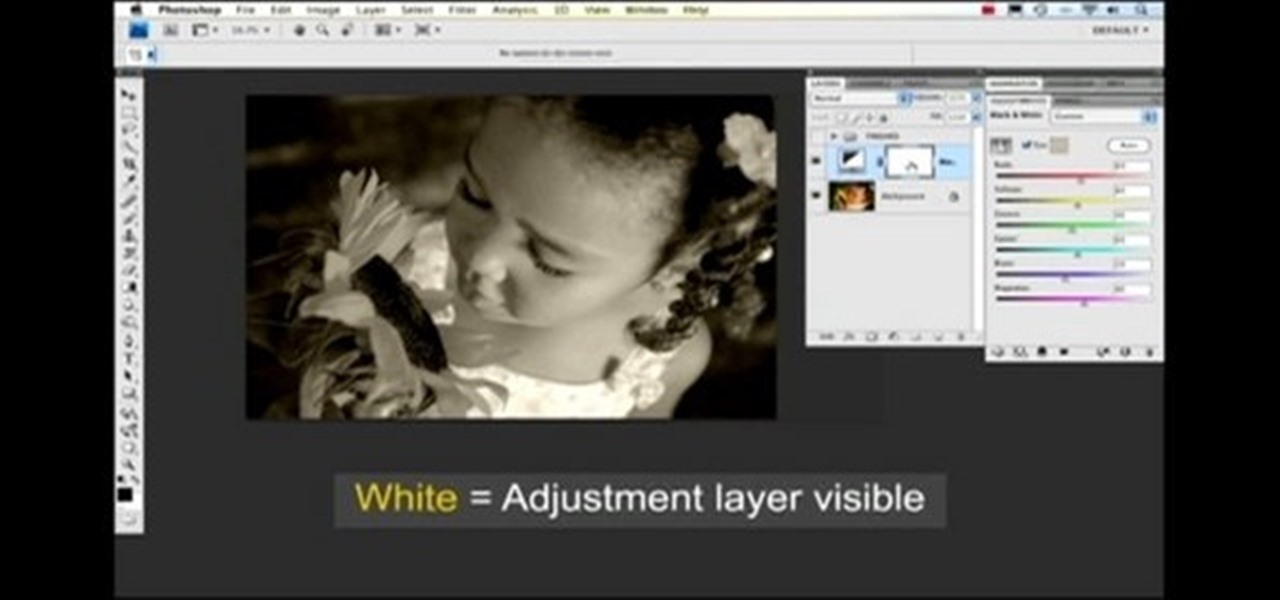
Nichole Young demonstrates how to hand color using layer masks in Photoshop CS4, which also works in Photoshop CS3. The procedure can be summarized in two stages: turning the picture you would like to edit black and white and then bringing color back into it to give it a hand-colored look. The black-and-white effect is achieved by creating a new layer over the background layer. The next step is to give the picture a warm look by adjusting the layer’s respective color balance. Then bring the c...
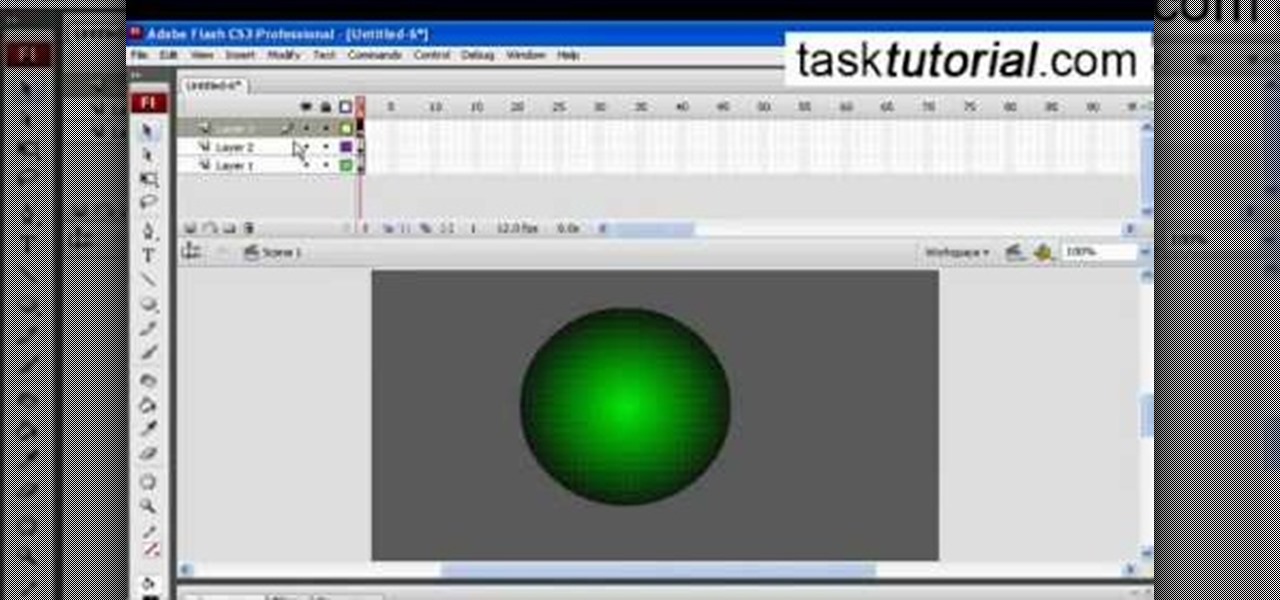
In this video tutorial the instructor shows how to create a text on a rotating sphere in Flash. To do this first create a gray background in the flash tool. Now make a new layer, select the oval tool and set the color gradient to green color and select the oval shape on the gray background. Similarly create an another sphere which will act as a mask for the text. Now create a new layer and add text to layer in white. Now move to frame 20 and make a key frame with all layers. Now drag the text...
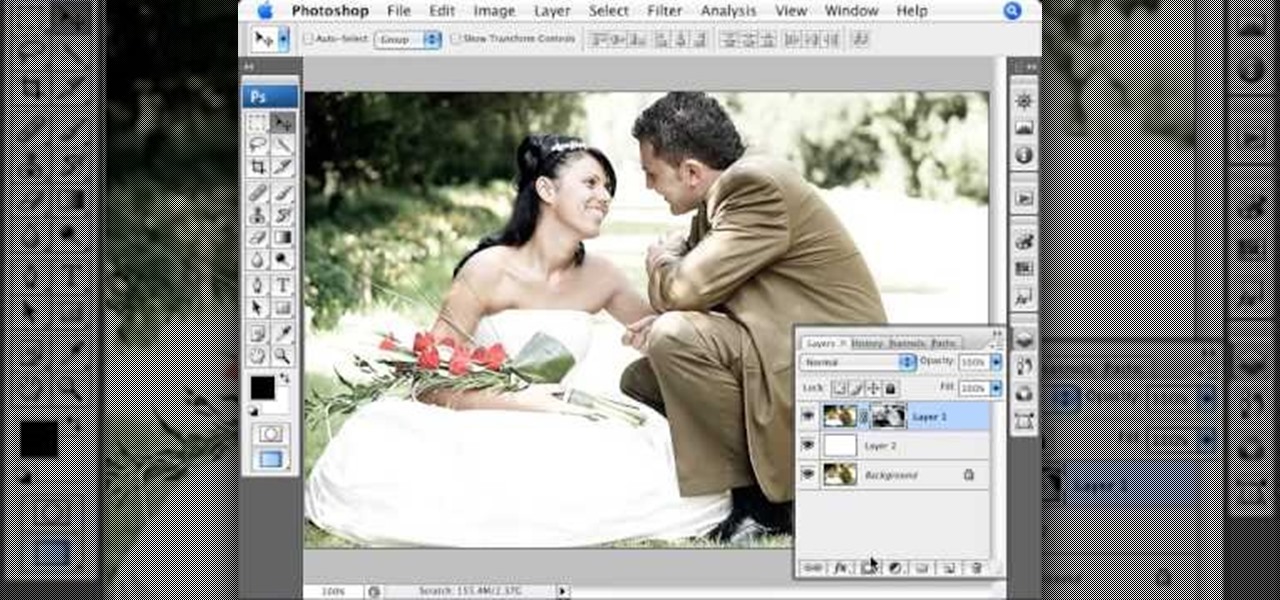
In this Photoshop tutorial the instructor shows how to mask a photo to itself and produce a glowing effect. First open the image in the Photoshop tool and duplicate a layer and add another layer in between filling it with white. Now select and copy the whole layer. Add layer mask to it and alt click it. Now paste the copied layer on the masked layer. Now do the control+I to invert the masking. Now the images gets a glowing effect on which you can apply the glossy effect on it. Now merge all t...
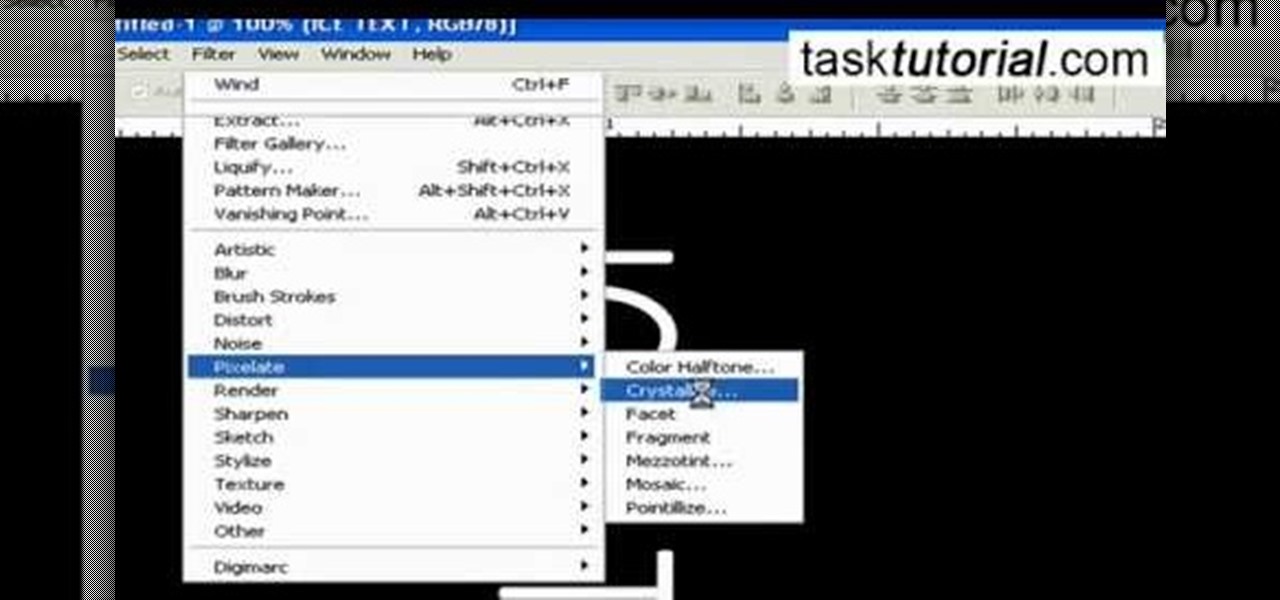
It is a tutorial that how to make an ice text effect on Photoshop. First create a new layer select paint bucket tool switch black color and paint the layer now create an other layer, choose type tool then switch the white color and create a text "ice text" after go to layer pallet merge the layers after that again create another layer select paint bucket tool and select black color now select ice text layer then go to image menu rotate canvas click clock wise then go to filter choose crystall...
This image editing software tutorial shows you how to separate layer styles in Photoshop CS3. Learn how to separate your layer styles from it's parenting layer in Photoshop!
This is a tutorial in Adobe Photoshop CS2 demonstrating primarily the use of the quickmask tool to make precise selections of organic shapes. Other topics covered include adjustment layers and layer masks. So watch and learn how to enhance photos using quickmasks, layer masks and adjustment layers in Photoshop CS2.