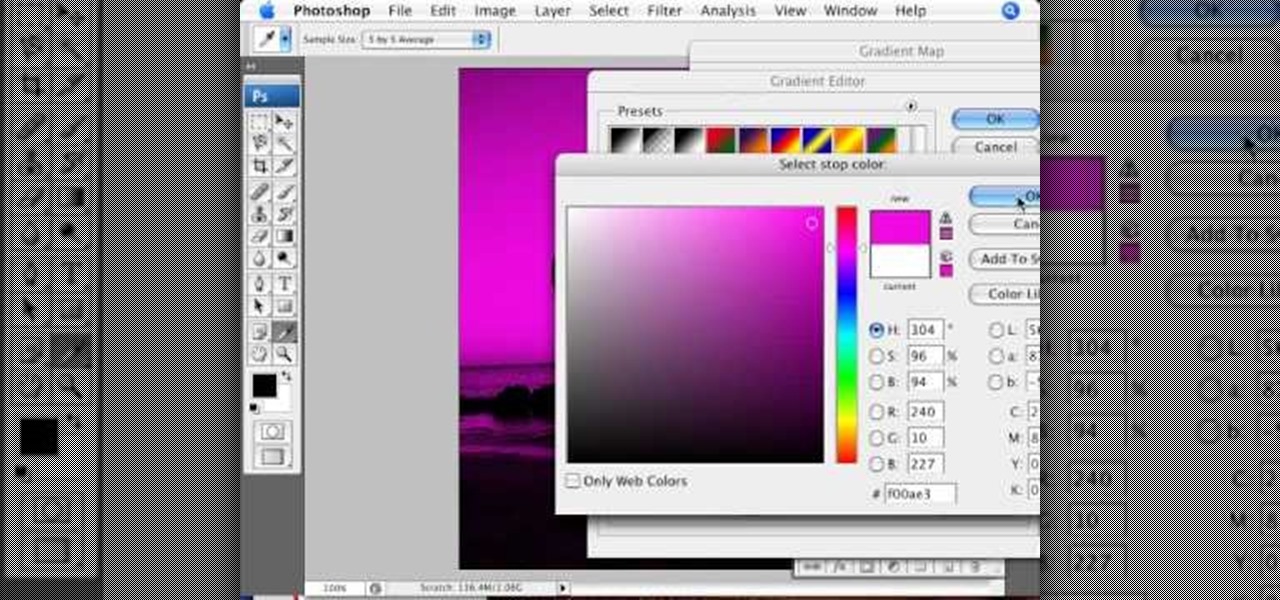
In this video tutorial brought to you by photoshopuniverse, you will learn how to apply mood lighting to images in Photoshop. This is achieved by applying an adjustment layer, called a gradient map, which allows you to adjust the color of the light in an image. You will learn how to access the gradient map from the adjustment layers menu, how to apply the gradient map, then overlay the new layer and fine tune the gradient to create more dramatic looking images.
This video tutorial is an easy intro to making gradient text in GIMP… the free Photoshop alternative. It's easy to make your text a little more fancy with a gradient. It's so easy to use a gradient, that you have to learn it, or you'll never forgive yourself. This is GIMP 101. Learn it. Master it.

This video tutorial from TutVid shows how to create a simple movie poster text effect in Adobe Photoshop CS4.
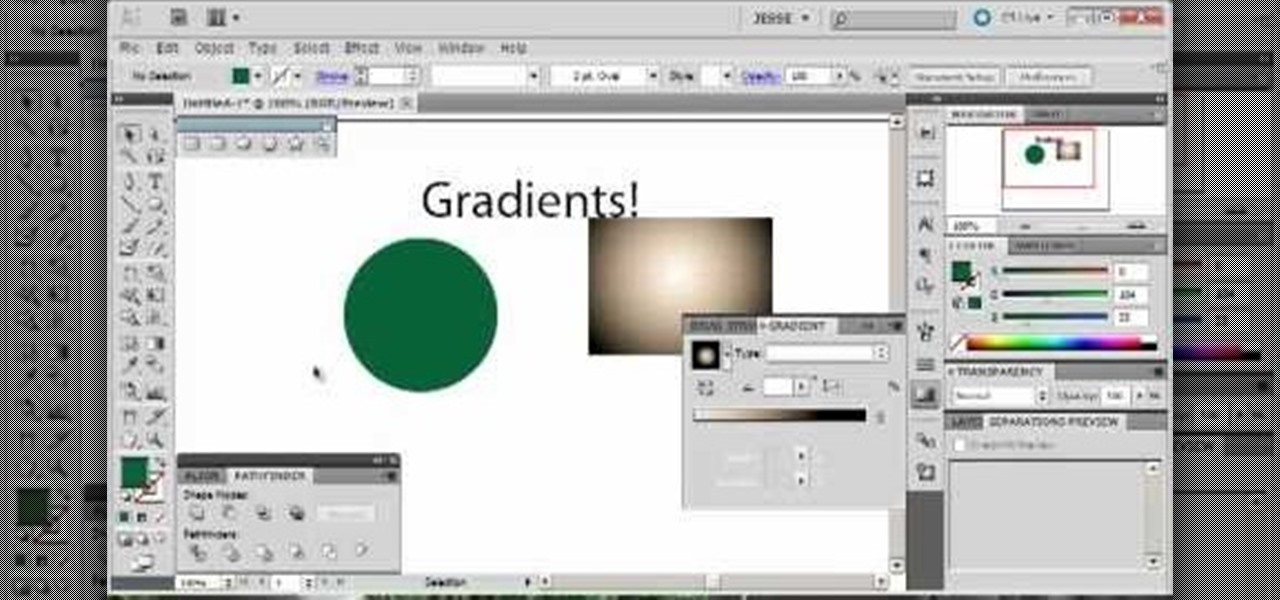
Gradients help you change the colors of your projects in Adobe Illustrator 5 so it's precisely the shade you want. You can also transition from one shade to another using gradients, and this tutorial shows you how to get the most out of gradients in Adobe Illustrator 5.
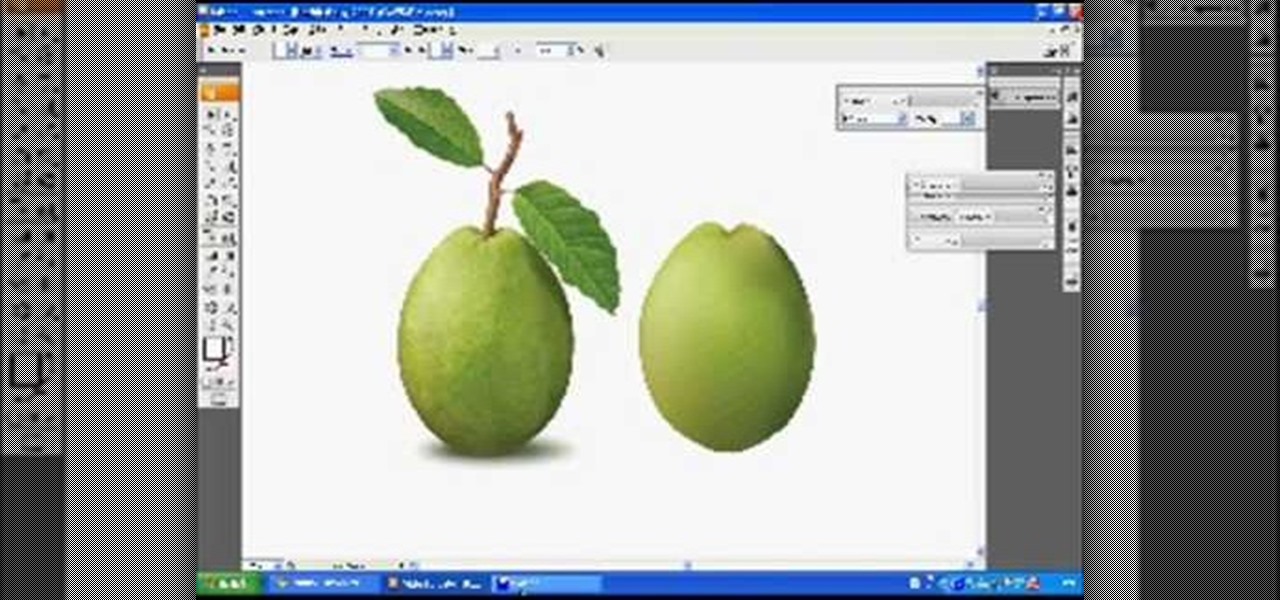
Want to figure out that illustrious feature in Adobe Illustrator that everyone's talking about? The gradient mesh tool? This Illustrator tool can help create beautiful and photo-realistic vector images, like this example of a guava fruit. Learn how you can master the gradient mesh tool, which isn't easy— it requires patience and passion, so just keep practicing until you've got it down pat!
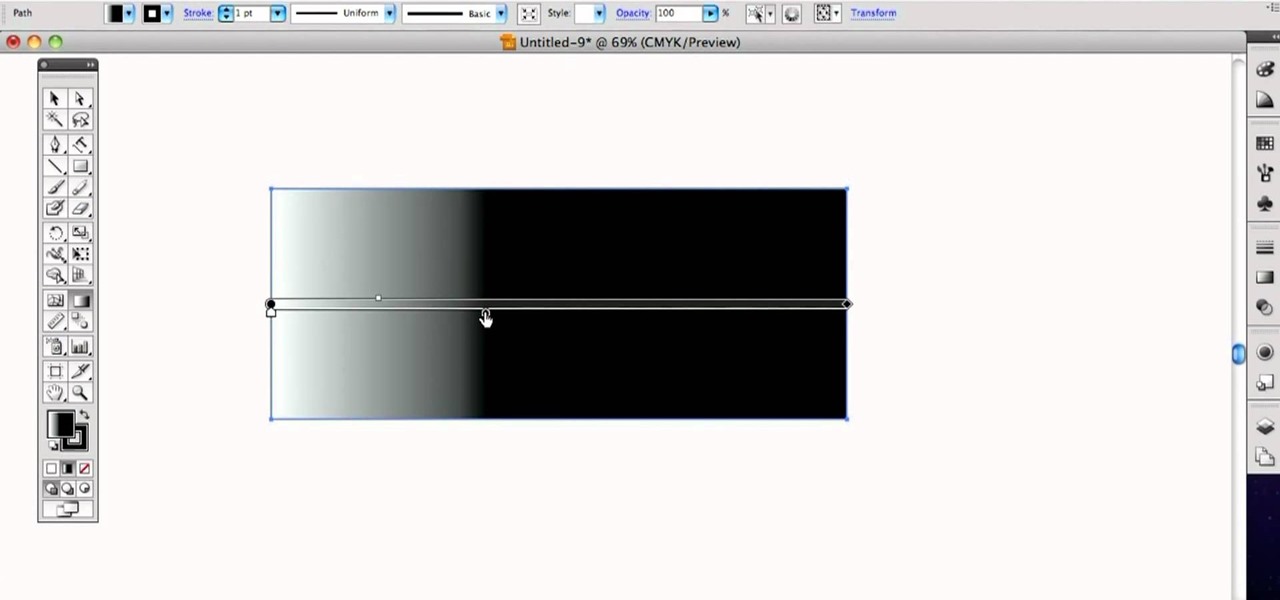
See how to use the Gradient Tool tool to generate custom gradients when doing design work in Adobe Illustrator CS4 or CS5. Whether you're new to Adobe's popular vector graphics editing software or a seasoned professional just looking to better acquaint yourself with the program and its various features and filters, you're sure to be well served by this video tutorial. For more information, including detailed, step-by-step instructions, watch this free video guide.

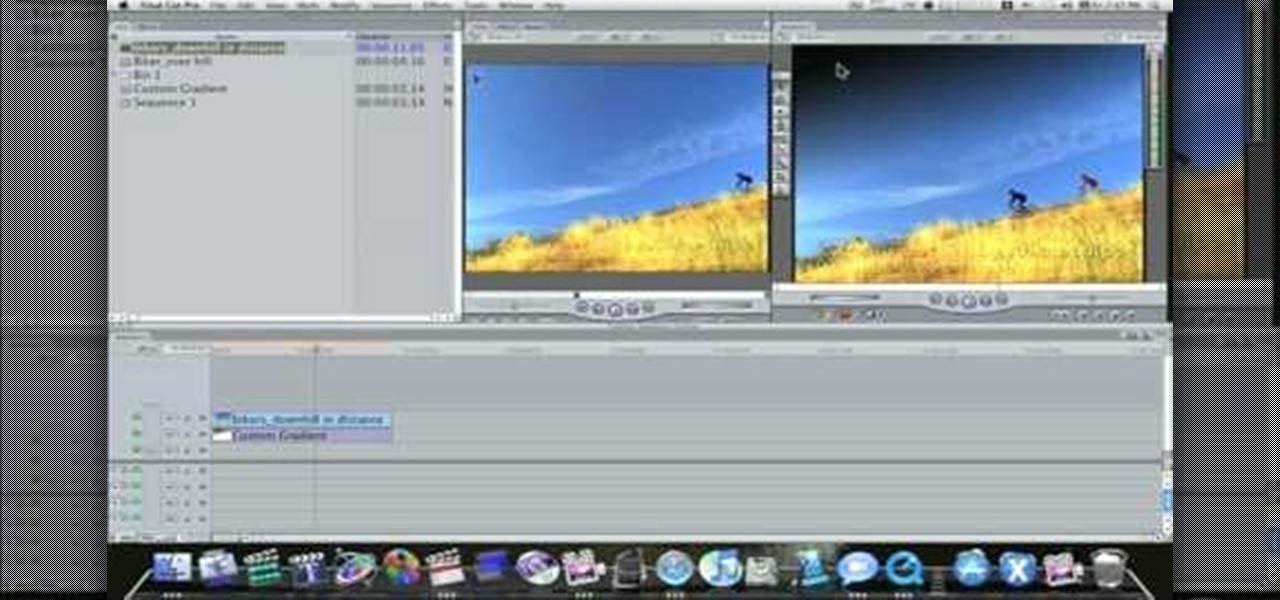
This video tutorial teaches you how to use Traveling Luma Matte in Final Cut Pro 6. To do this, you have to go to custom gradient. Open the "Find" option and type Custom Gradient or Gradient in the search field and click Find All. This will bring up a separate search window with the gradient effect you are looking for. This search window can be shown in your browser or removed from your window. The video then teaches how to use the Gradient effect. You can add the gradient effect to your vide...
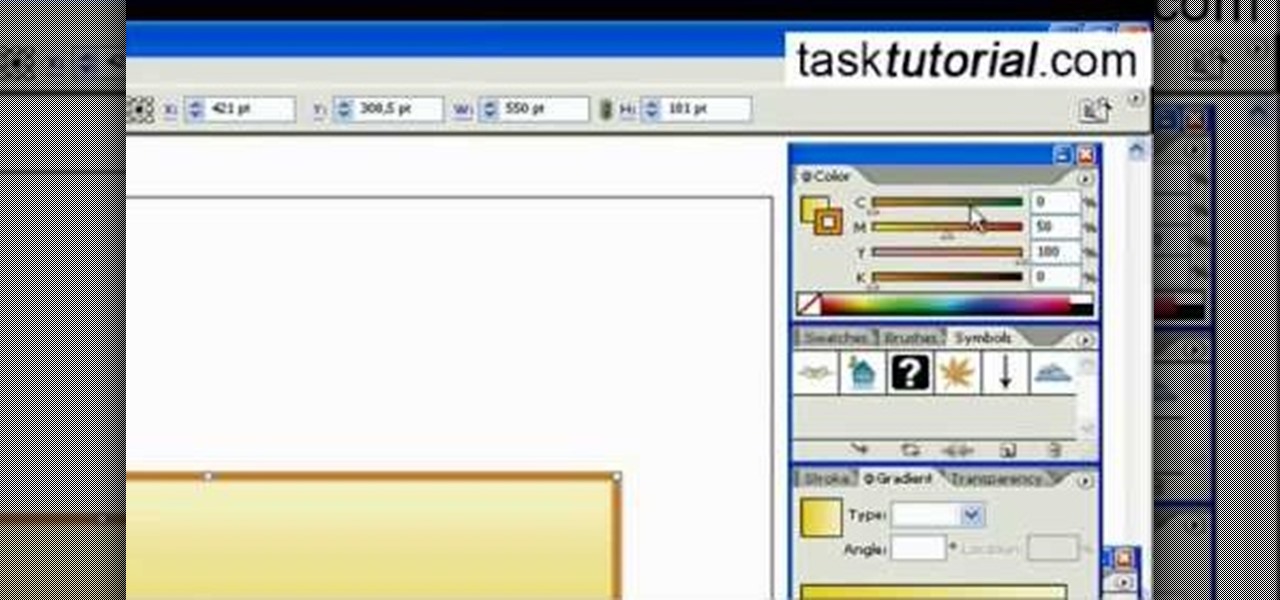
In this video tutorial by Task Tutorial we learn how to create a YouTube subscribe button using Adobe Illustrator. The first step to creating a button is to select the rectangle tool and draw a bar and then select a gradient fill. Next create the first color in the gradient and then the second color in the gradient. After that you'll want to change the gradient angle and also change the stroke width. Then you'll want to edit the stroke color to 9.6%. Then select the text tool and create your ...
This clip demonstrates how to generate gradient masks using the Vanishing Point filter. tricks, you're certain to like this free video software tutorial. For more information, including detailed, step-by-step instructions, and to get started making your own gradient masks, take a look!
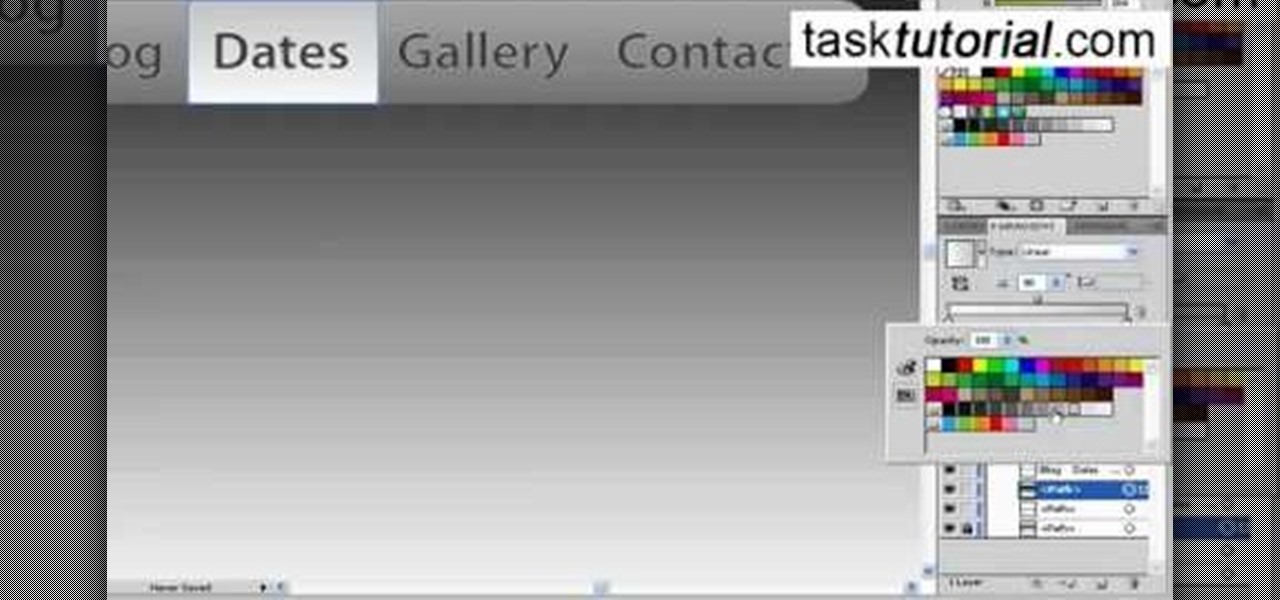
First thing you need to do this is to select rectangle tool and make a shape and select the gradient fill and change the angle of gradient to 90 degree. Now color and resize it as showing in the video. Now type your navigation texts like blog, contact, gallery etc. Now size your text for your rectangle shape. Now set the texts in the bar and resize your bar.
In this web application development tutorial you will learn how to use brushes in Microsoft's Silverlight for color, gradient and video. Learn how to write ASP.Net functions in Silverlight to control colors, shapes, gradient and videos on your web app or web page.
In this video tutorial you will learn to make a gradient in Adobe Photoshop CS2. This example involves the creation of a metallic reflection gradient. Feel free to experiment with different colors to achieve the effect you want!
Want to learn how to mask text using gradient in Flash? In this 3 minute video, the viewers will learn just that. First of all, create the text that you want to mask. Next, prepare the gradient that you will be masking your text with, remember to set alpha to zero. Select the free transform tool and rotate the shape over the text. Now convert it into a movie clip and have the gradient shape move from one side of the text to the other using the timeline.
Now you can easily animate gradient image using Flash. For this you need to open flash, and then import an image which you want to work with. Create a new layer. Draw a rectangular. Go to color option and choose liner. You have to keep alpha in one side of gradient. Ad few key frames and use motion tween. Now go to your picture. You also make the same key frames of that. So it will be regular. After watching this tutorial you will be able to make nice gradient animation using Flash.
In this video tutorial by Tasktutorial, learn how to make a paper scroll in Photoahop. Select the rounded rectangle tool and draw a shape similar to the shape shown. Open layer options. Go to gradient. Select the indicated gradient and delete the marker shown. Adjust the other markers as indicated and use the control+g shortcut to duplicate the layer. Position the shape as shown and using the pen tool draw the paper outline by clicking and holding to obtain the required shape. move the paper ...
Learn how to create a black and white gradient effect in Photoshop. Part 1 of 2 - How to Create a black and white gradient effect in Photoshop.
If you're looking for a good tutorial on how to make a classy, minimalist desktop background, this tutorial shows you how! Using nothing more than a single shape and then your brushes and gradients tools, you can create an attractive wallpaper in Adobe Photoshop.
This video is a tutorial on creating an Icon Logo in Photoshop Cs4. Go to File and open a new document. In the Layer option, set up a new layer and give it a name. Using the pen tool, create a shape for your logo, it can be anything you like. When you have the shape you want, right click and select Make Selection. Now you can fill the shape with a color. Press ctrl+U for the Hue/Saturation option to get the exact color that you want.
New to the PSE gradient tool? This clip will teach you what you need to know. Whether you're new to Adobe's popular raster graphics editing software or a seasoned professional just looking to better acquaint yourself with the program and its various features and filters, you're sure to be well served by this video tutorial. For more information, including detailed, step-by-step instructions, watch this free video guide.
Learn how to create an eye-catching gradient wipe transition effect within Adobe Premiere Pro CS4 or CS5. Whether you're new to Adobe's popular non-linear editor or a seasoned video professional just looking to better acquaint yourself with the program and its various features and filters, you're sure to be well served by this video tutorial. For more information, including detailed, step-by-step instructions, watch this free video guide.
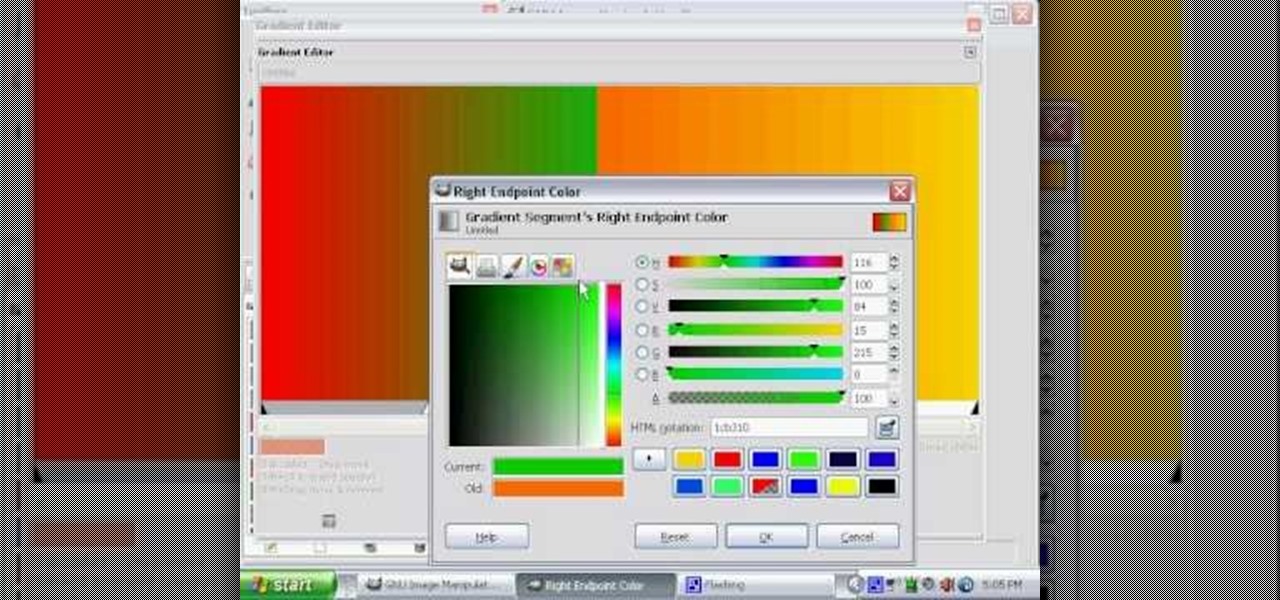
Wondering how to make a custom gradient in GIMP? This clip will show you how it's done. Whether you're new to the GNU Image Manipulation Program, GNU's popular free graphics editor, or a seasoned designer just looking to pick up a few new tips and tricks, you're certain to enjoy this free video software tutorial. For more information, including detailed, step-by-step instructions, and to get started making your own custom gradients, take a look!
To create a Christmas ornament in Illustrator is very simple if you follow the steps below. Before starting the process one should ensure that all project files used in the tutorial is available. First by holding the shift key draw an oval, then go to gradient and create a new gradient which is at right side of the window. Now select red color and make it darker, then select 'Radiant' from the tool and switch the color positions. Select the ellipse tool once again and create a new shape on to...
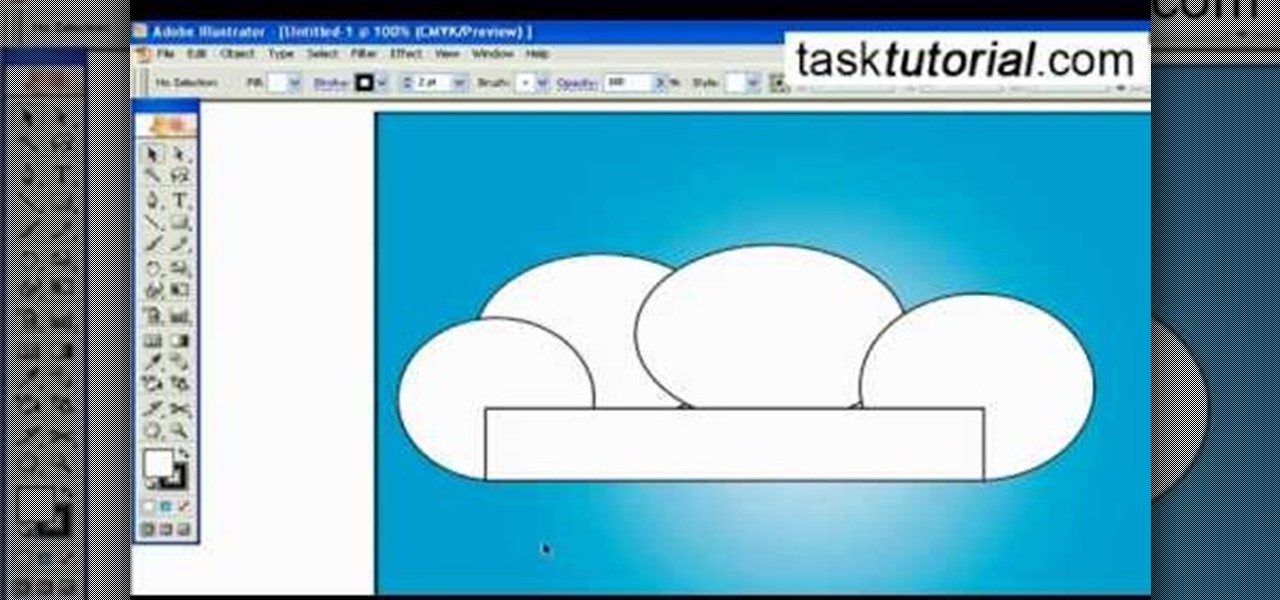
A great free video training from tasktutorial on how to create a cartoon cloud in Adobe Illustrator. All the project files are available to download for free at the Adobe website. First create a background: select the rectangle tool then create a new layer and draw a rectangle across the canvas. Now select the path, go to gradient and edit the it a bit until it's a shade of blue. Lock the gradient and create a new layer. Select white fill color and 2 point black stroke and draw a few oval sha...
This software tutorial shows you how to use the threshold adjustment tool in Photoshop CS3. The gradient tool is covered as well. See how using threshold and gradient can turn a boring image into a more dramatic tonal image using Photoshop CS3.
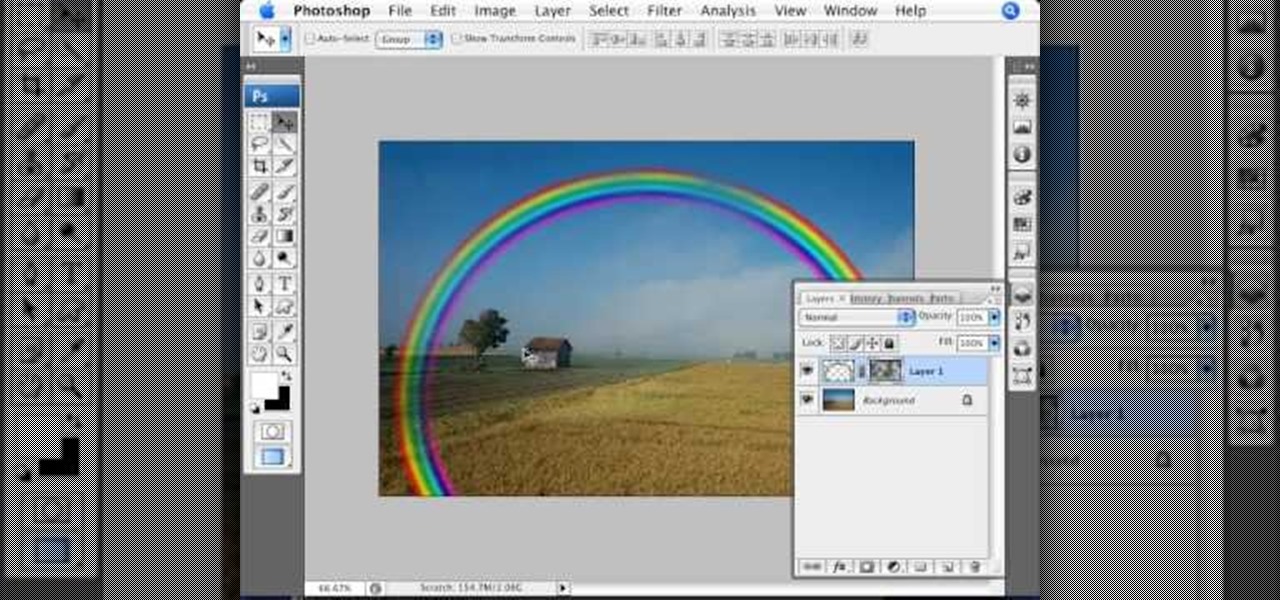
Open the picture you wish to place a rainbow within. A good scene has clouds that are receding into the distance and the light angle coming in from the front of the scene. A rainbow effect appears when by the sun is shining from behind you into the mist-filled air where it is refracted by raindrops.
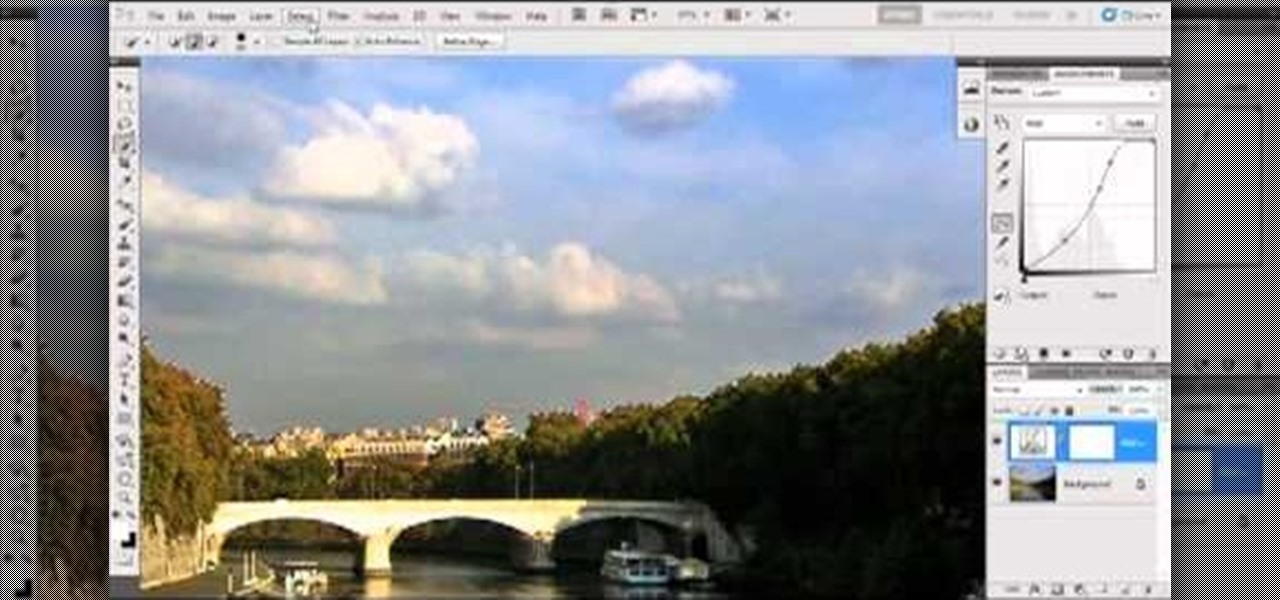
Bring out the colors in your clouds and sky images - or any other picture you want to retouch. This short tutorial shows you how to use the gradient tool in Adobe Photoshop and s-curves to adjust the color and contrast in your image.
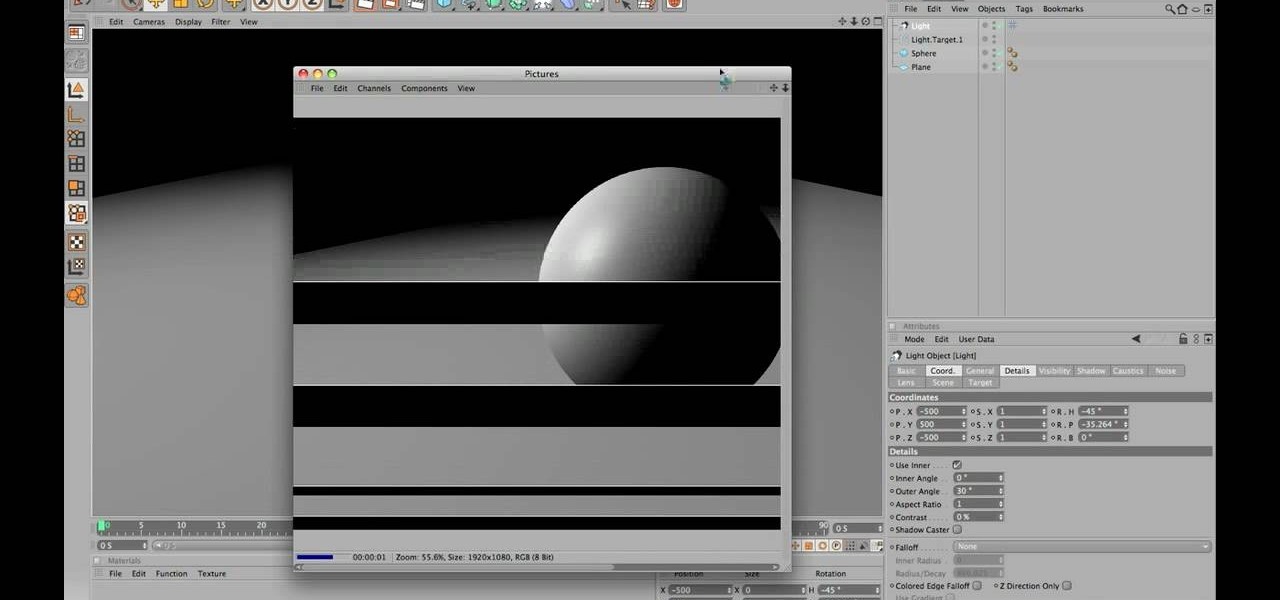
There is no such thing as a perfect Cinema 4D render. There are always more techniques to learn to improve your skills at using this powerful software. This video will teach you how to use the light objects options to reduce the gradients on surfaces in your rendering, making them look smoother and more real.
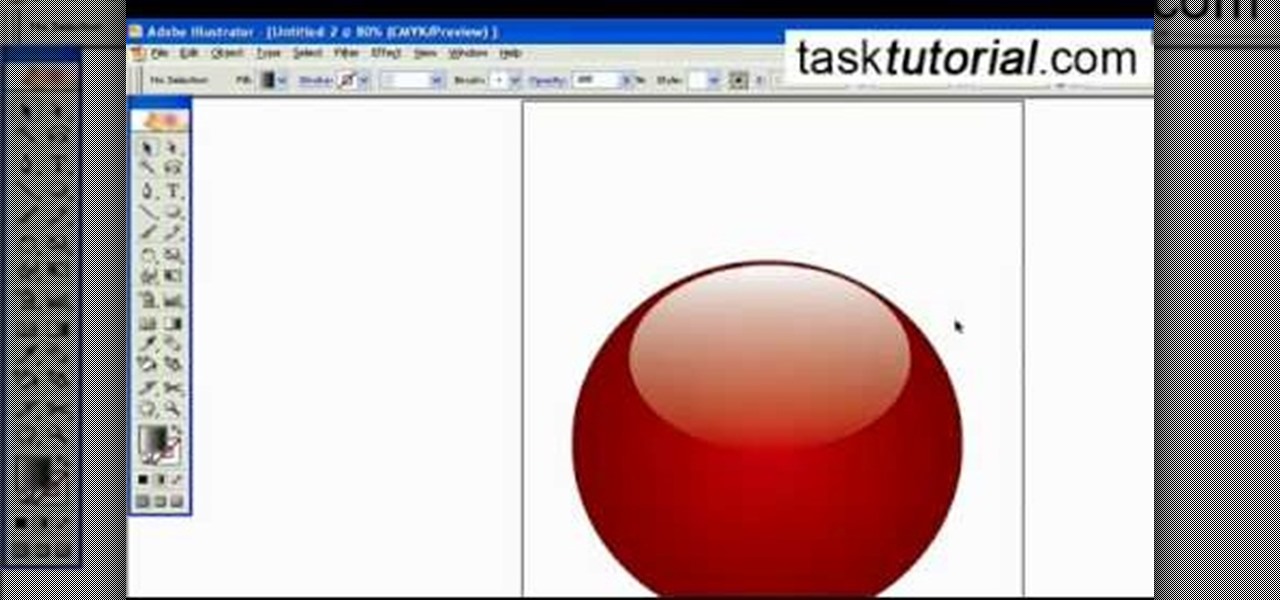
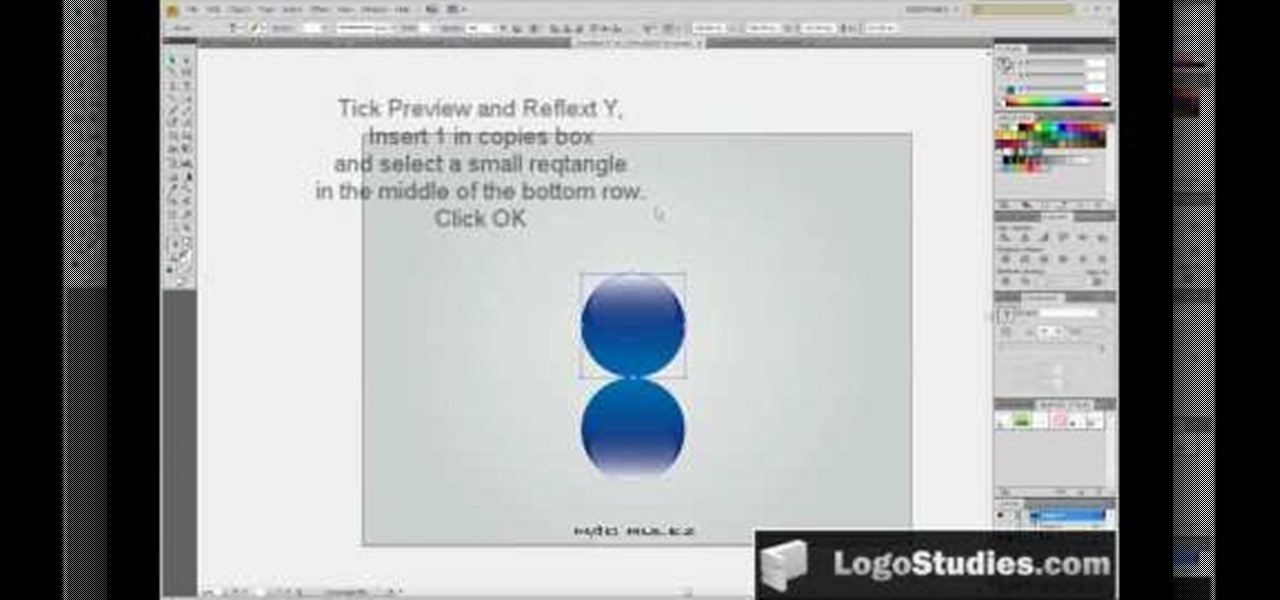
In this video tutorial, viewers learn how to create a 3D sphere and reflection in Adobe Illustrator. Begin by using the ellipse tool and create a circle. Select the black and white gradient, and drag the colors that you want into the gradient panel. Now hold the Alt key and draw a smaller circle inside. Fill it with white/transparent gradient. Select the sphere and go to Object/Group. Now go to Effect/Distort and Transform/Transform. Tick the Preview and Reflect Y, insert 1 copies box and sel...
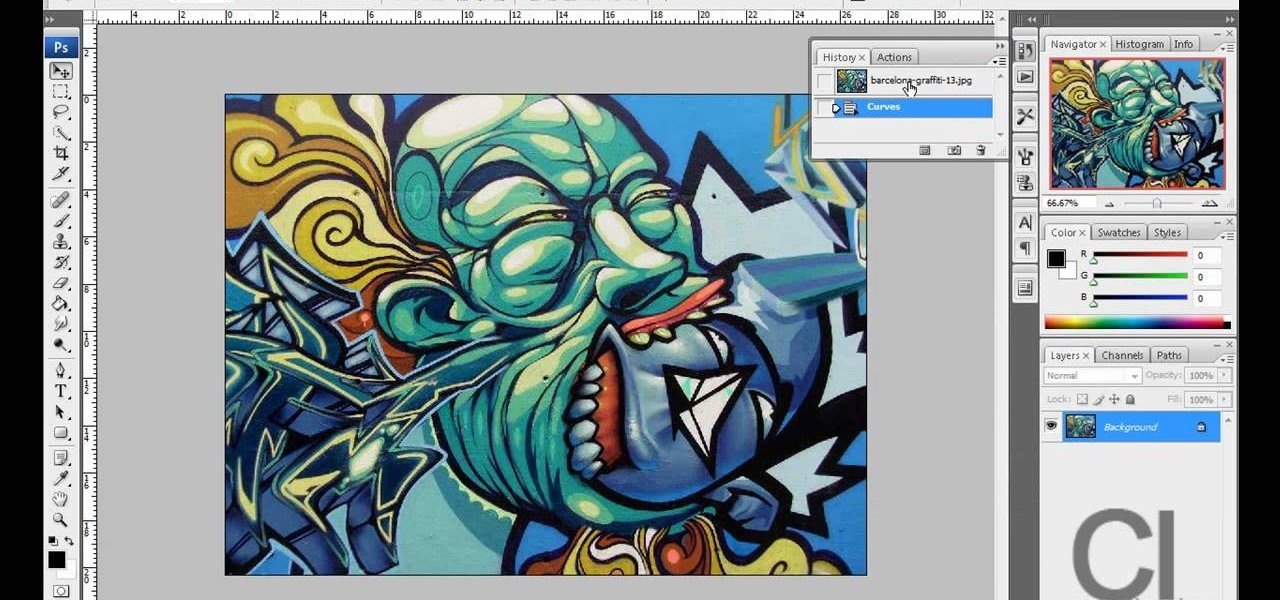
This video demonstrates a way to use the lomo effect on pictures in Photoshop. The effect makes colors stand out more, thus making the picture stand out more. The first step in adding the lomo effect is to change the color curve levels of the picture by going to Image > Adjustment > Curves in Photoshop. They should be changed very slightly, from a straight line to a slight "s" shape curve. After this, the gradient map should be changed to a black to white gradient. Finally, the mode of the ne...
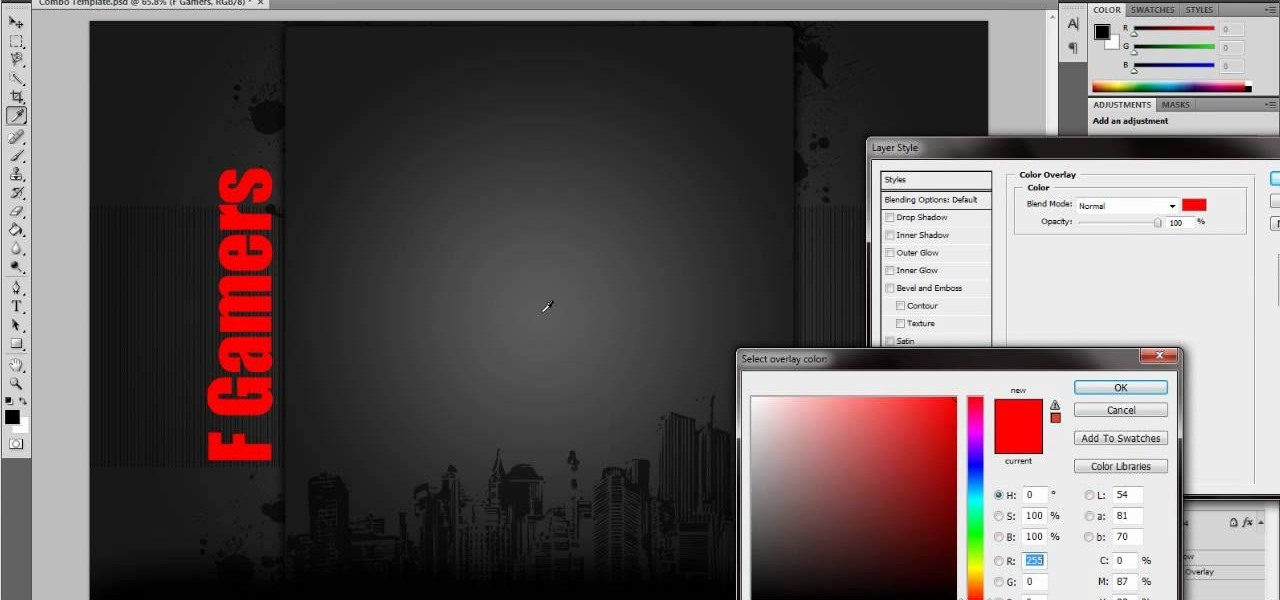
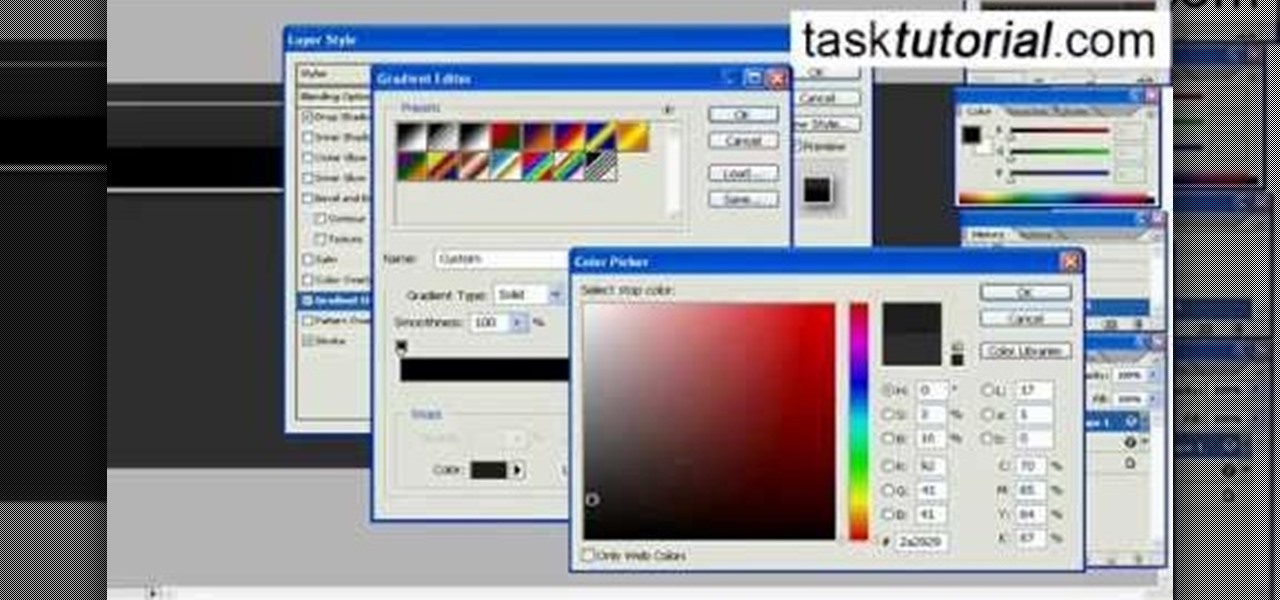
This video instructs you on how to make a stylish bar with metallic text in Photoshop. First, you create a rectangular bar. Then create a layer with a stroke size of two pixels and a white color. Using the drop shadow on the menu, you set the opacity to sixty percent, distance to five pixels and size to about fifteen pixels. You will select gradient and create a gradient overlay. Then adjust your gradient and the text. Move it to the place you like best and you will have a bar with metallic t...
In this Photoshop tutorial the instructor shows how to create a dollar sign button in Photoshop. Open Photoshop and select the ellipse tool and make a around shape. Now open the layer select the layer tool. Now open the gradient editor and make a gradient as shown in the video. Now change the gradient angle to around 124 degrees. Now tweak your colors a little bit as shown in the video. Now make an other layer with low opacity as shown in the video. Now you have two inter leaving layers and c...
In this Adobe Illustrator tutorial, Bert Monroy from PixelPerfect shows you how to use the Gradient Mesh tool, which lets you divide pretty much any shape (like an apple) into a mesh. Wish a mesh created, you can alter the color of an intersecting point of the mesh with a solid color. This tool will help give your Illustrator objects more dimension and realism.
This tutorial discusses gradients, and how to customize them in Sony Vegas 7 and 8.
Adobe InDesign CS2 has a great feature in that you can fill text with a gradient. However, if you try to do that in Illustrator CS2 it might appear that you can't. In this video you'll see just how easy you can do it and keep the text editable.
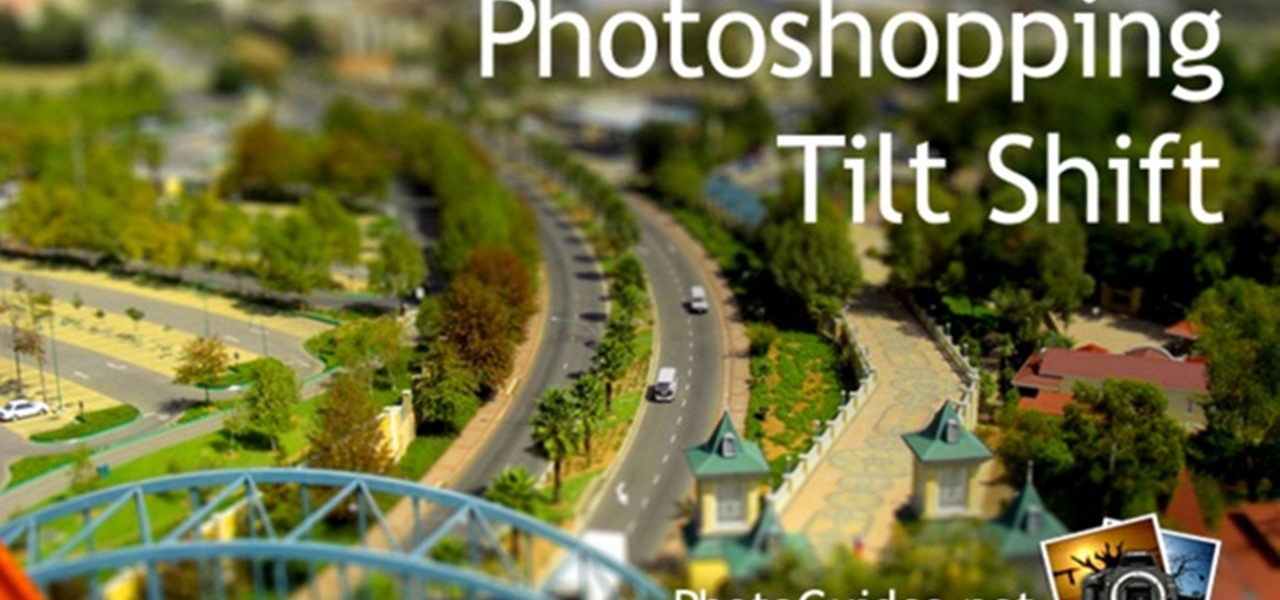
1. To make tilt shift take one picture which is taken from high angle with any content like car and buses. Now open the picture in Photoshop and change it to quick mask mode to create and edit the selection.
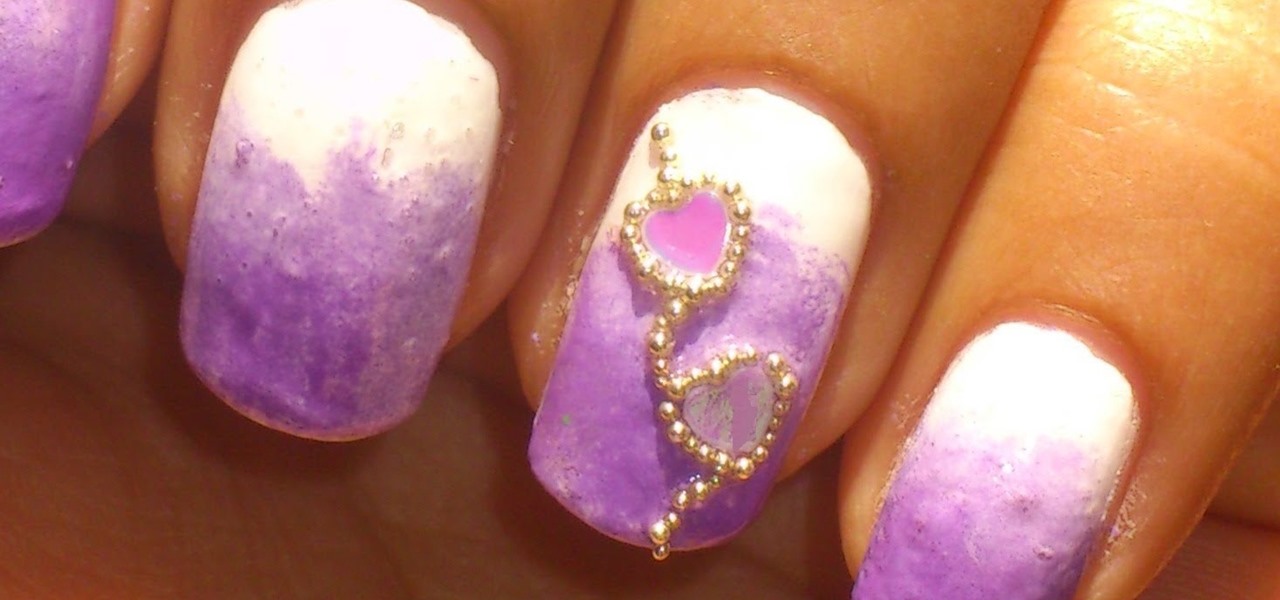
This is a very cute and simple gradient or ombre sequinned nail art with hearts nail polish design that a did a few days back and just wanted to share with all you girls here.
Open the picture you want to edit. Right-click on the main picture layer in the box and then select "Duplicate Layer". Then, in the same box, go to the drop-down menu that says normal, and change it to "Overlay". Then, select Filter>Other>High Pass. In the box that comes up, set the radius to 7.4 pixels. Next, go to Layer>New Adjustment Layer>Gradient Map. Then, when the box comes up, click OK. Then click on the main gradient in the Gradient Map. In the new box, there is a bar that goes from ...
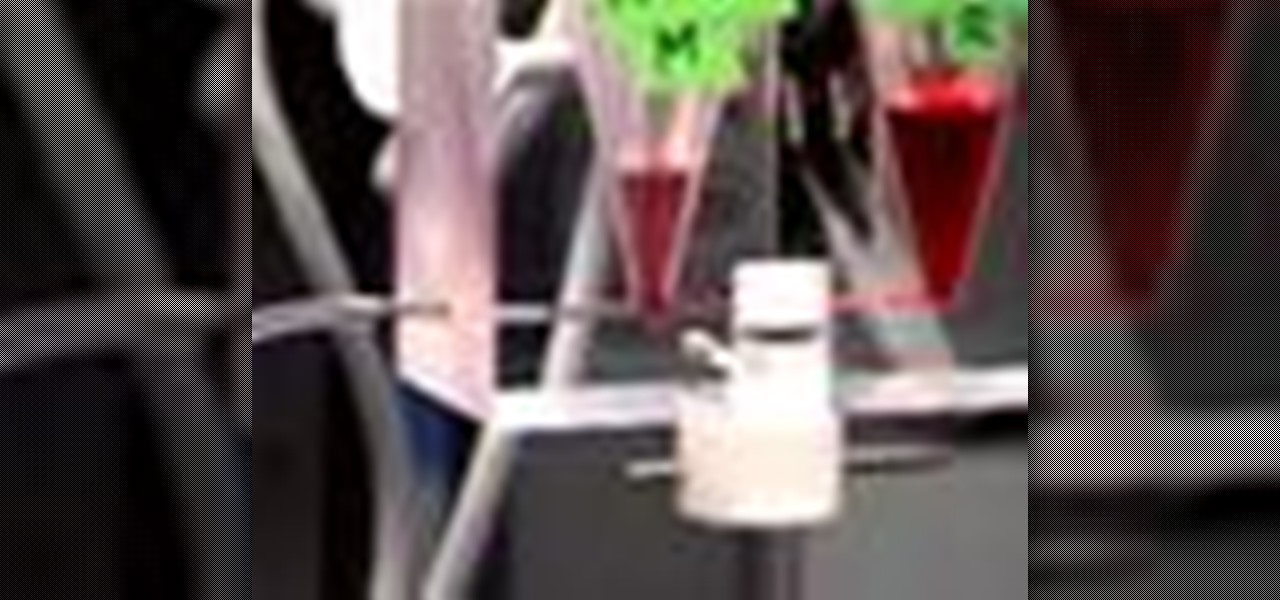
The Department of Biological Sciences at the University of Alberta brings you this video tutorial specifically relevant to your student laboratory courses, specifically microbiology. If you're a student at any school of biology, this information will be helpful for learning how to mix gradients with a gradient mixer in the lab.
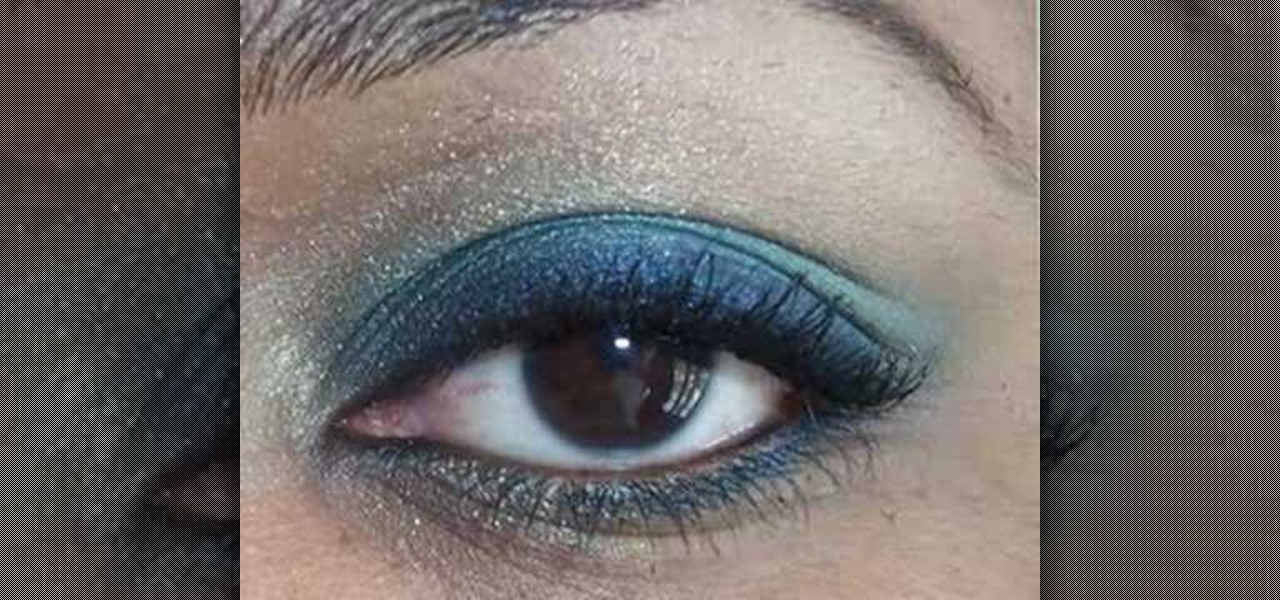
Here is a simple gradient eye look created with Cool Heat Mac products. Follow along and learn how easy it is to apply this dark and light blue eyelid color.
This video shows you how to create color gradients in Photoshop.