
How To: Make a Heel Klickin' Jitterbug Out of McCormick Vertex Elements
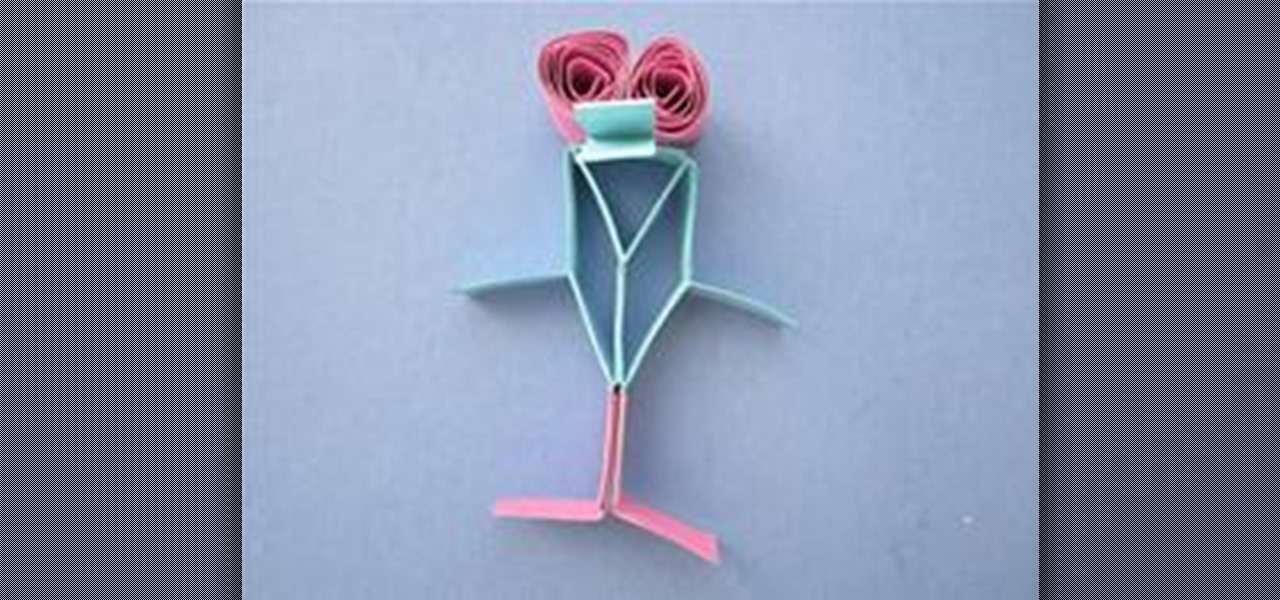
Use geometry to make an adorable and fun heel klickin' friend using McCormick vertex elements! You will need:

Use geometry to make an adorable and fun heel klickin' friend using McCormick vertex elements! You will need:
Cover a heart shaped or round box with designer paper
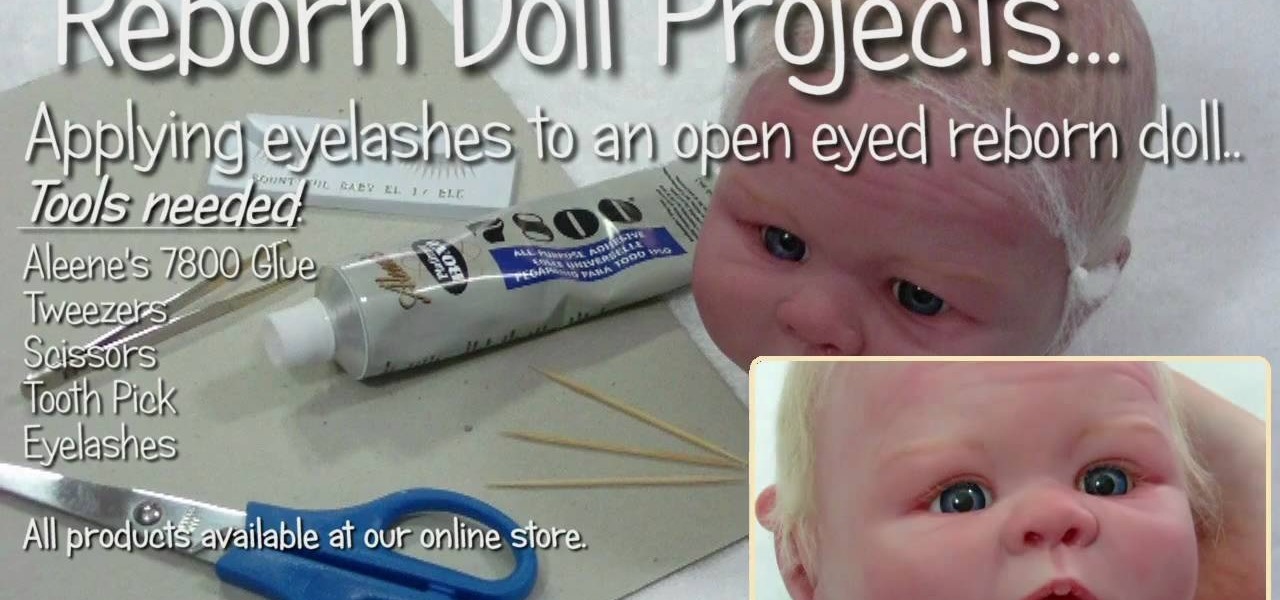
In this video, we learn how to apply eyelashes to open eyed reborn baby dolls. First, you will need to prepare the glue by placing it on a flat surface and letting sit for a couple minutes. Then, take the new eyelashes and remove the existing glue with tweezers. After you do this, dip the base of the lashes into the glue. Do this slowly and make sure to wipe off any excess glue when you're finished. Place the glue evenly around the entire lash. Now, bring the lash to the eye and insert it int...
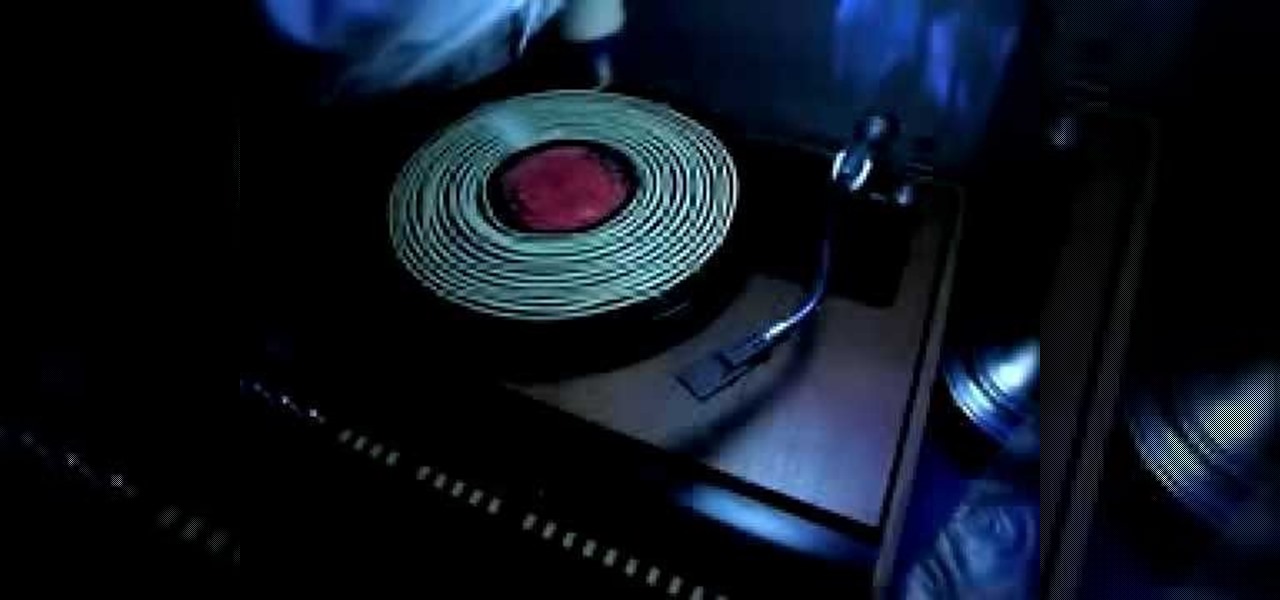
This video shows how to clean old records using Titebond II wood glue. He has the record turning slowly on the turntable, and while it's turning, slowly squeezes a line of glue around and around onto the surface of the record, starting from the middle. He explains that it takes between four and twelve hours for the glue to dry completely. After the glue is applied to the entire record, he takes an old credit card and spreads the glue evenly onto the record, all the way out to the edge. When t...
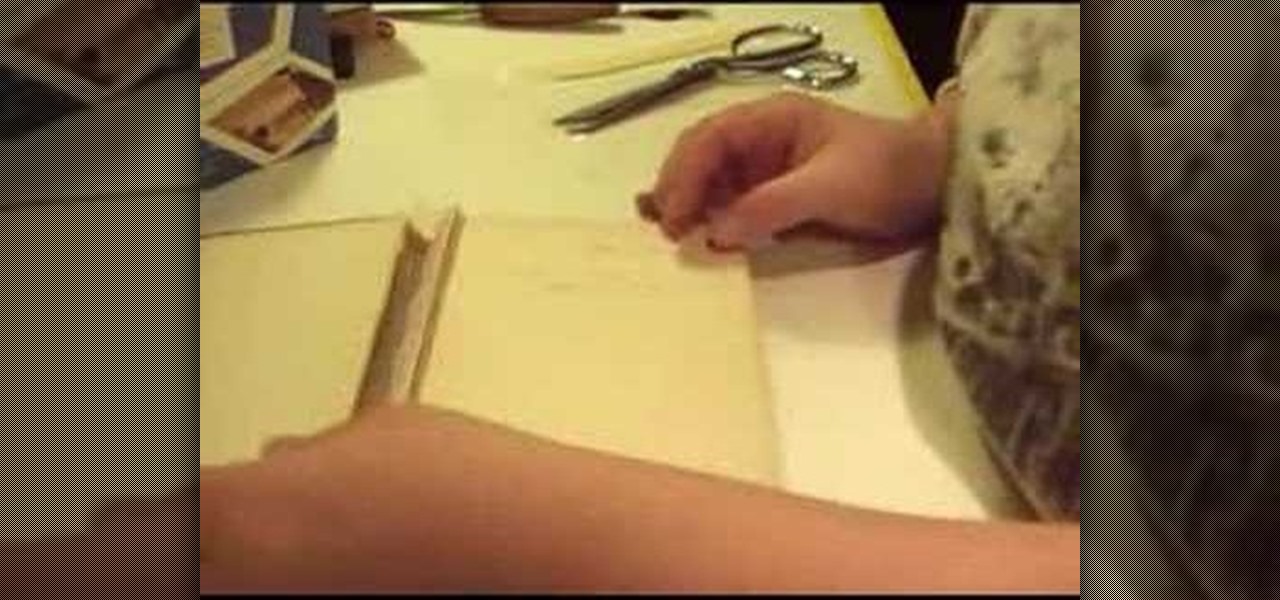
In this video molly1216 explains her method of repairing a hardcover book hinge. She mentions that this method should be used for inexpensive books that are not worth being sent to professionals.
Have a bunch of old magazines sitting around the house you'd like to recycle? Use old magazines to make a cool basket that suits your more eco-friendly side. Learn how to make a coiled basket out of magazines with help from this how-to video.
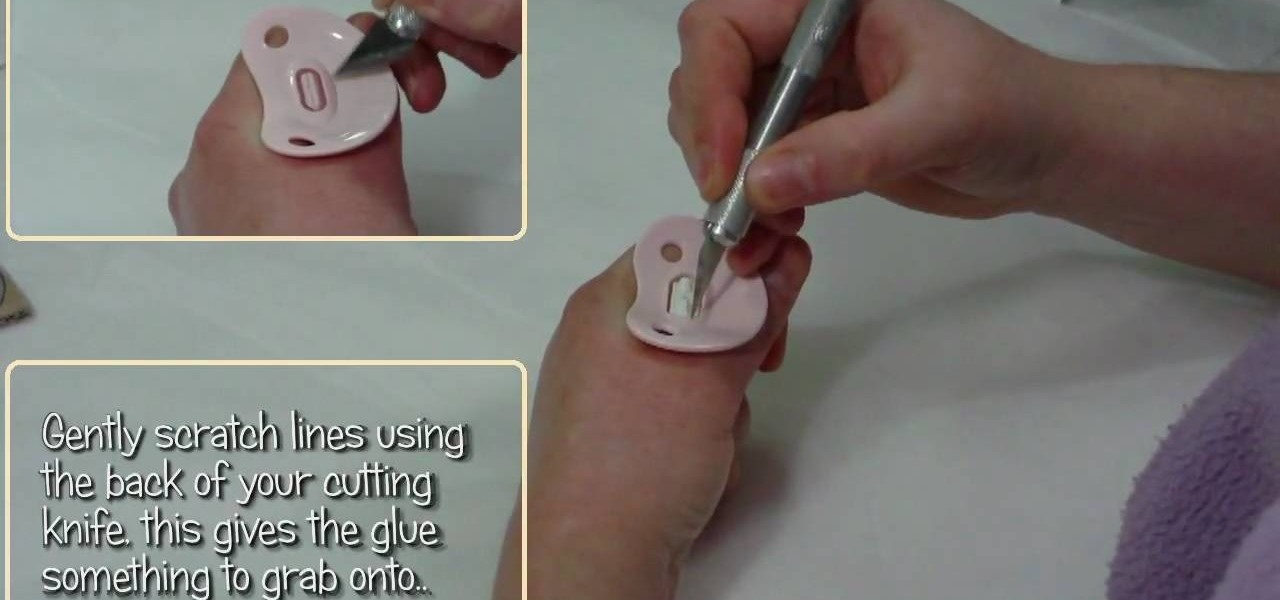
In this tutorial, we learn how to glue a magnet onto a dummy/pacifier for a reborn doll. First, gather all the tools you need to do this project. After you have these, remove the teeth from the pacifier. Next, scratch lines using a cutting knife so the glue grabs onto the center better. After this, apply the glue and the magnet, then place it on the dummy and press it there for several seconds until it is firm in the right place. After this, glue the surface of the pacifier onto the baby, the...

This is a quick and fun craft for making cute little fluffy penguins out of pom poms. You'll need one large black pom pom, one medium white pom pom, one medium black pom pom, three small orange pom poms, two small black pom poms, a pair of googly eyes and a hot glue gun or textile glue. Be careful around the hot glue gun!
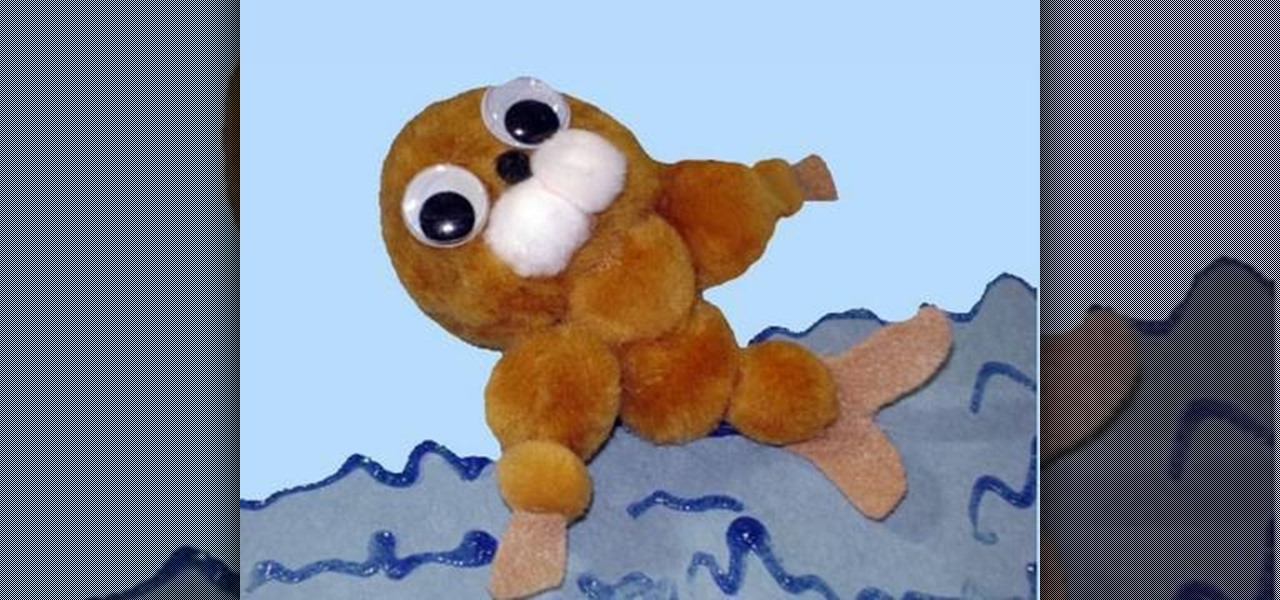
In this video tutorial, viewers learn how to make a pom pom seal. The materials required for this project are: 1 large brown pom pom, 4 medium brown pom poms, 3 small pom poms, 2 white pom poms, 1 small piece of brown felt, 2 googly eyes, glue and scissors. Begin by gluing the brown pom poms together. The large pom pom is the head, 4 medium pom poms are the body and 2 small pom poms are the hands. Then glue the 2 white pom poms and mini black pom pom on the head for the mouth and nose. Glue t...

In order to make a ribbon tree, you will need the following: 50 2" pieces of ribbon, scissors, a hot glue gun, hot glue sticks, and a floral tree.
In this video, we learn how to assemble a flower-fold die-cut with a glue gun. First, cut out different fabrics in the flower shape. Put them all into different piles according to their sizes. After this, put hot glue into the middle of the fabric and fold the flowers in half. When finished, put the pieces together with hot glue going in a circle. Continue to do this with all the different sizes. When you are done, all the colors of fabrics should show, then place a button in the middle with ...

In this tutorial, we learn how to make stacked hair bows. Start off with three separate bows: red, white, and blue. Make sure there is a string still hanging from the red one, but the strings on the white and blue are cut off. Now, put glue from a hot glue gun and place it on the middle/side of the blue ribbon, the glue the white one where the glue is and hold together. Next, take the red bow and glue it to the center of the blue and white bow. Hold the red bow in place until it's completely ...

In this tutorial, we learn how to craft a pom-pom ladybug with your kids! The materials you will need are: 1 large red pom pom, 1 medium black pom pom, 1 pipe cleaner, 2 googly eyes, and one piece of lace. Start off by gluing the black and red pom pom's together with a hot glue gun. Next, use a hot glue gun to glue the googly eyes onto the black pom pom. Now glue black pipe cleaner around the red pom pom to make a stripe on the back of the ladybug. cut the pipe cleaner into little round shape...
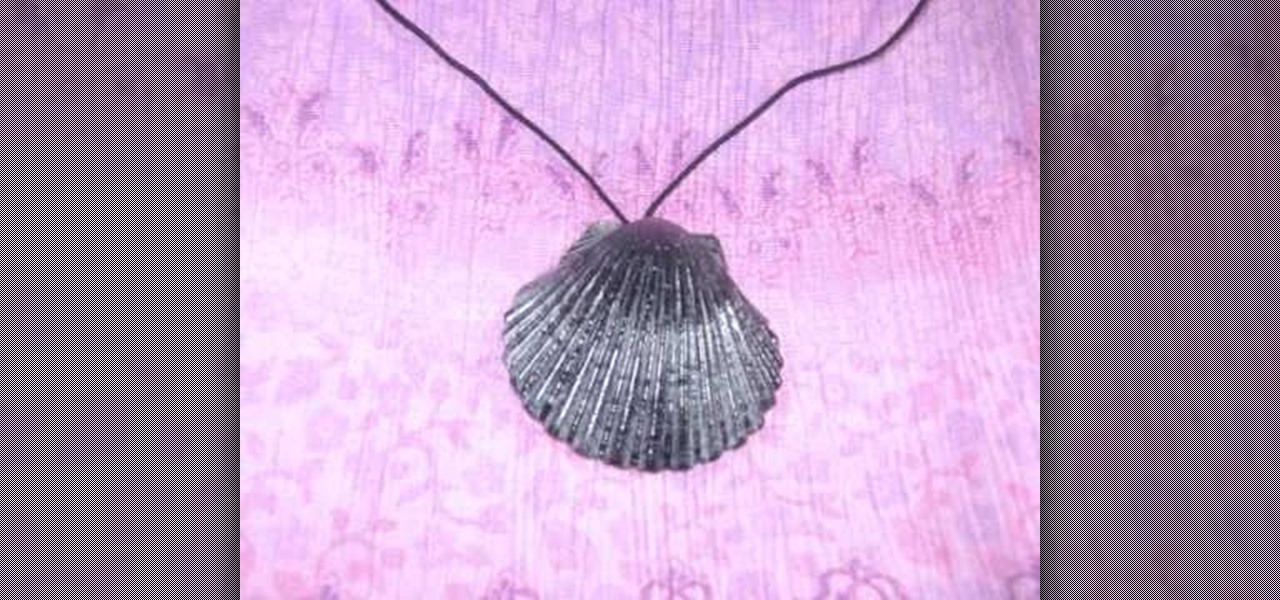
In this tutorial, we learn how to make a simple shell necklace with your kids. To make this, you will need: a sea shell, a hot glue gun, and a necklace string. First, tie your string into a knot at the end of it. Next, grab your shell and apply glue with the hot glue gun to the inside base of it. Now, press the knot that you just made onto the glue in the shell. Let this set up until the glue is completely dried, and you're finished! You can apply more glue to the top if you want a more secur...
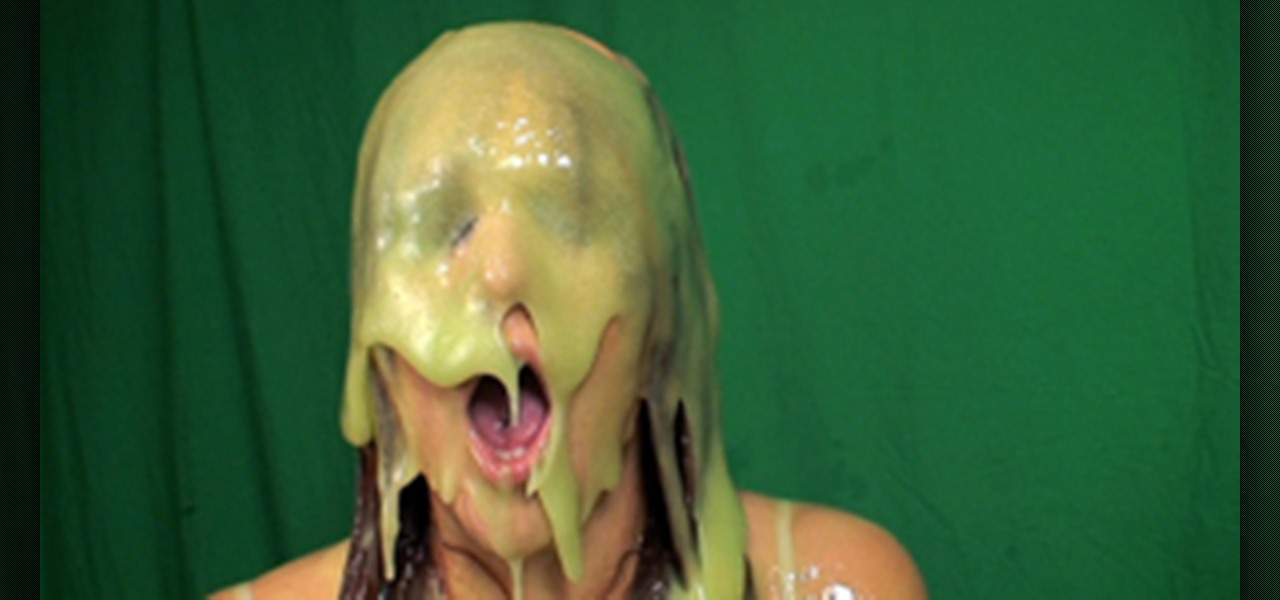
Make Slime! This one is easy. Just mix equal parts of glue and water and then add an equal part of liquid starch. Just like that you have gooey slime. The more you play with it the more fun it becomes. This acclivity causes the polymer chains in the glue to cross link with chemicals in the starch. The result is an awesome stretchy slime.
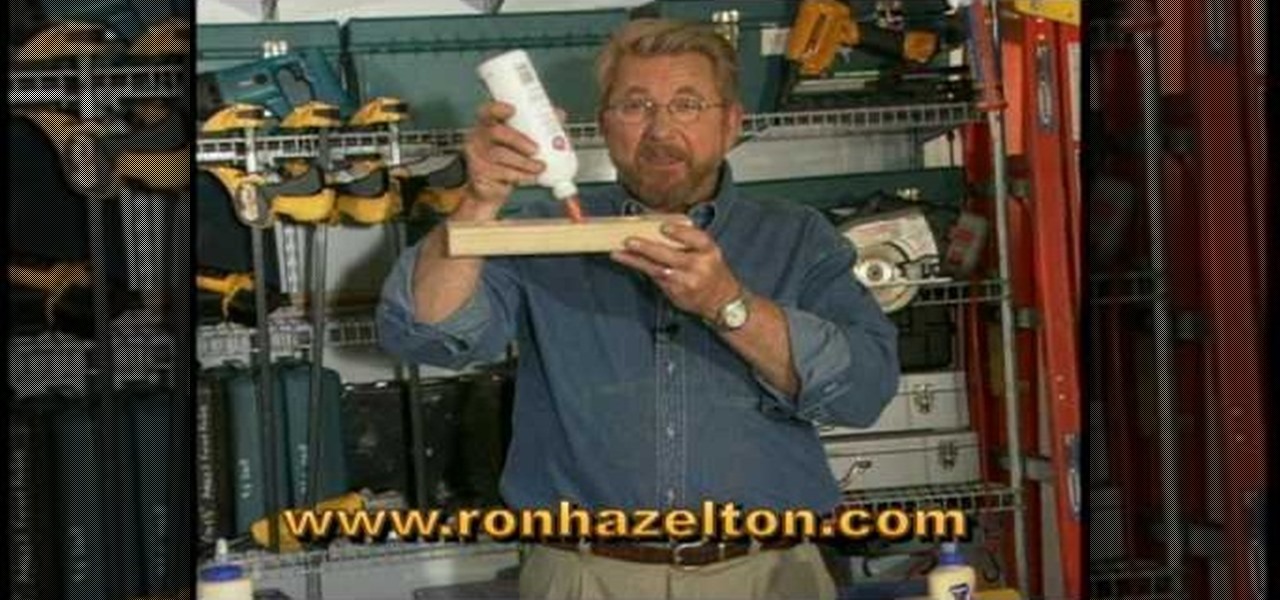
Sue at Paper Source demonstrates how to glue like a pro. PVA is a great paper glue, while methyl cellulose extends drying time (which is perfect for precise adjustment) and is also reversible (making it really handy for archiving). Watch this video crafting tutorial and learn how to use PVA and methyl cellulose glues.
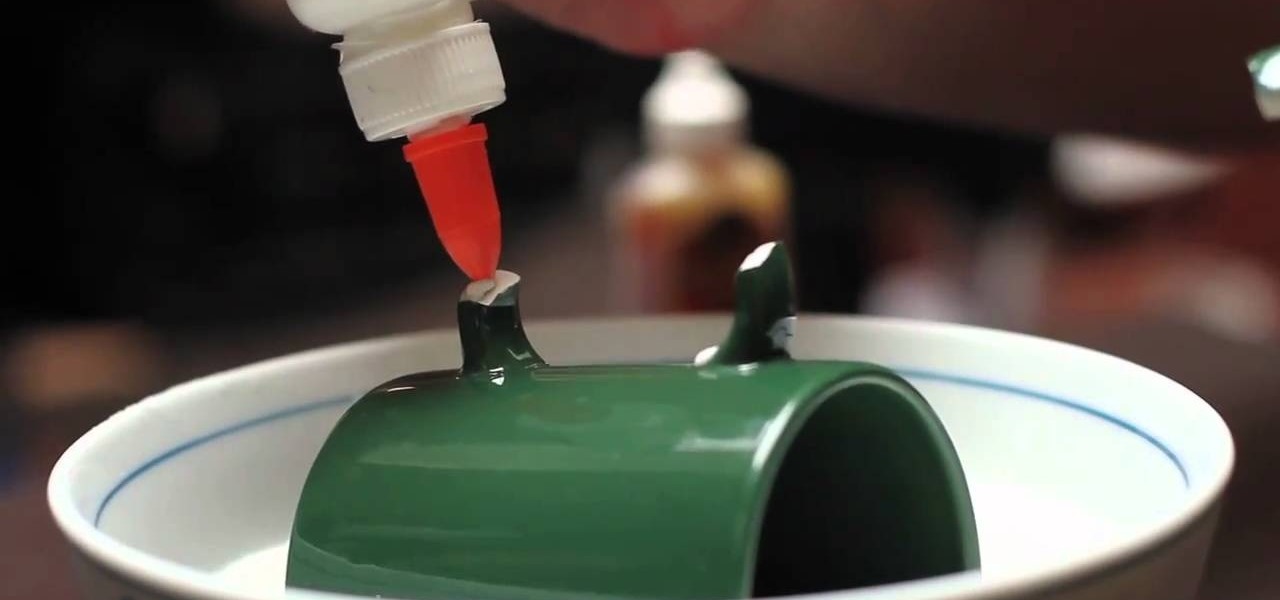
Did you accidentally drop your favorite Star Wars mug on the kitchen floor? Don't lament your cruel fate and sweep the mug pieces up to toss in the trash can; instead, just glue it back together.
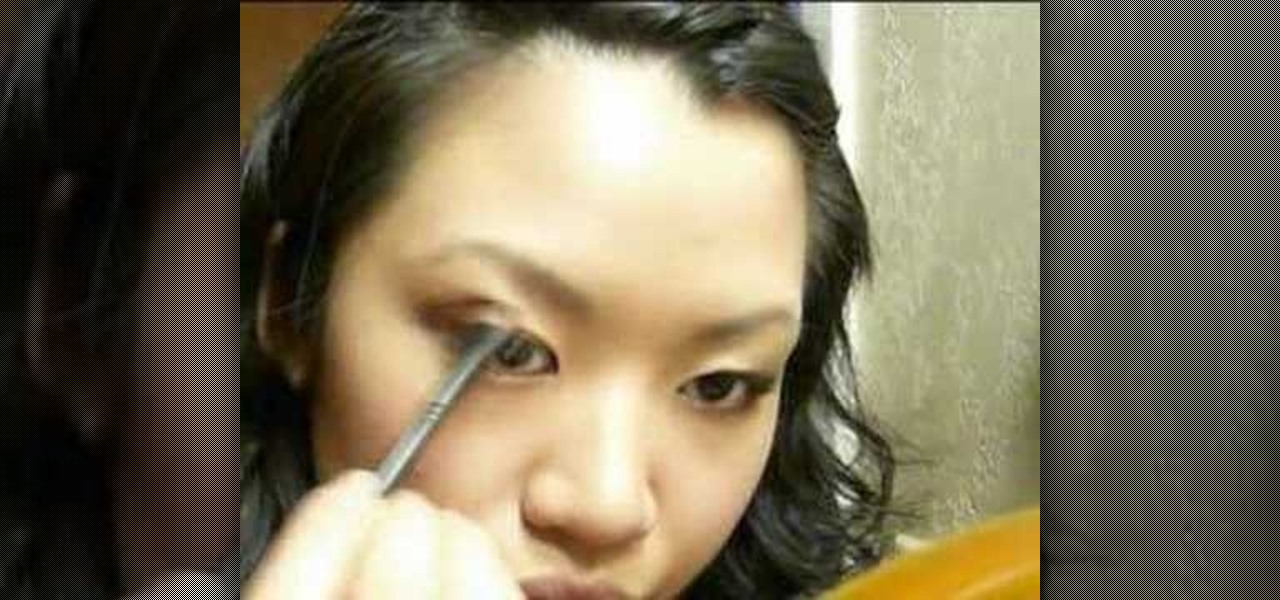
How to apply eyelid glue & makeup to Asian monolids This is a tutorial on applying glue to the eyelid if you have a monolid. This will give the eyelid a crease and make the eyes open wider.

You may know how to cut and sand plywood, but bending it is a totally different skill set you need to master, but this woodworking how-to will show you the right moves in seven easy steps. In the video, a bend is being applied to plywood for a curved chair leg, but this method could be used for any kind of plywood bends.

To start making your tea and toast, roll about a section of white fondant about four inches by six about 1/8th inch thick. Now take a one inch circle cutter and cut out one circle. Now taking a half inch circle cutter, make an impression in the center of the first circle being careful not to go all the way through. Now you have your saucer for your toast. Next, take a one inch square cutter and cut that out of the fondant as well. Cut it in half diagonally and poke tiny little holes with a to...
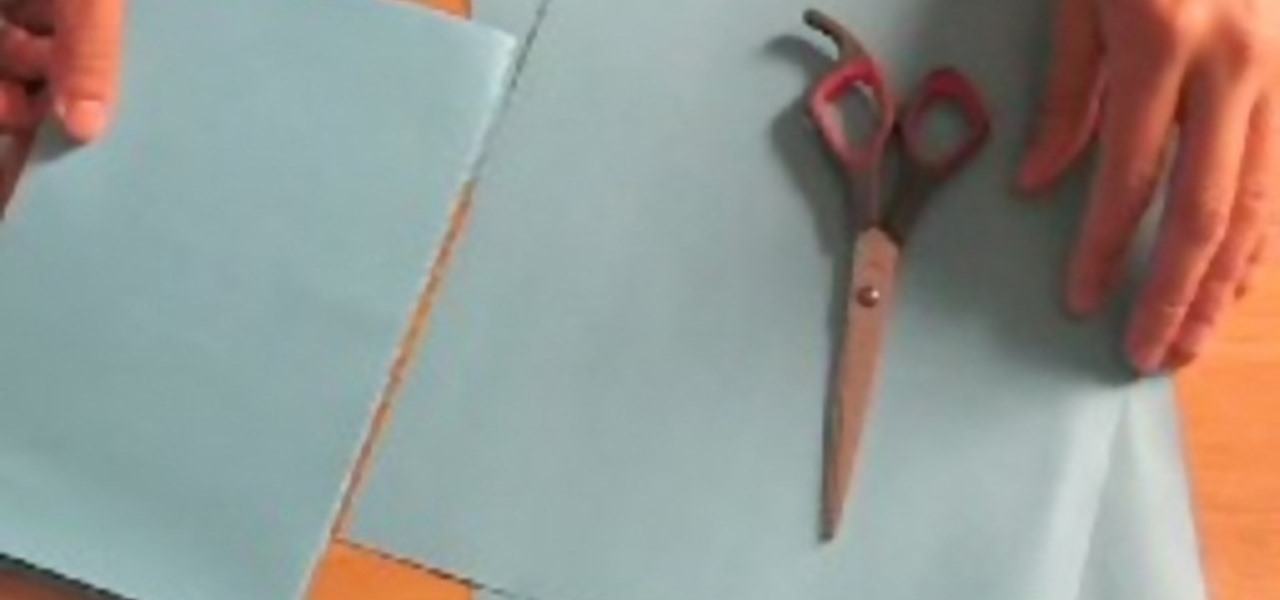
Here's a quick and simple booklet that can be made out of two sheets of paper. It's great paper craft for a school project or just fun. All you need is paper and scissors. Fold both pieces of paper in half hamburger style. Use scissors to cut knotches into your fold. Fold your other piece of paper hotdog style. Follow the rest of the instructions, assemble and you have a quick and simple paper booklet.
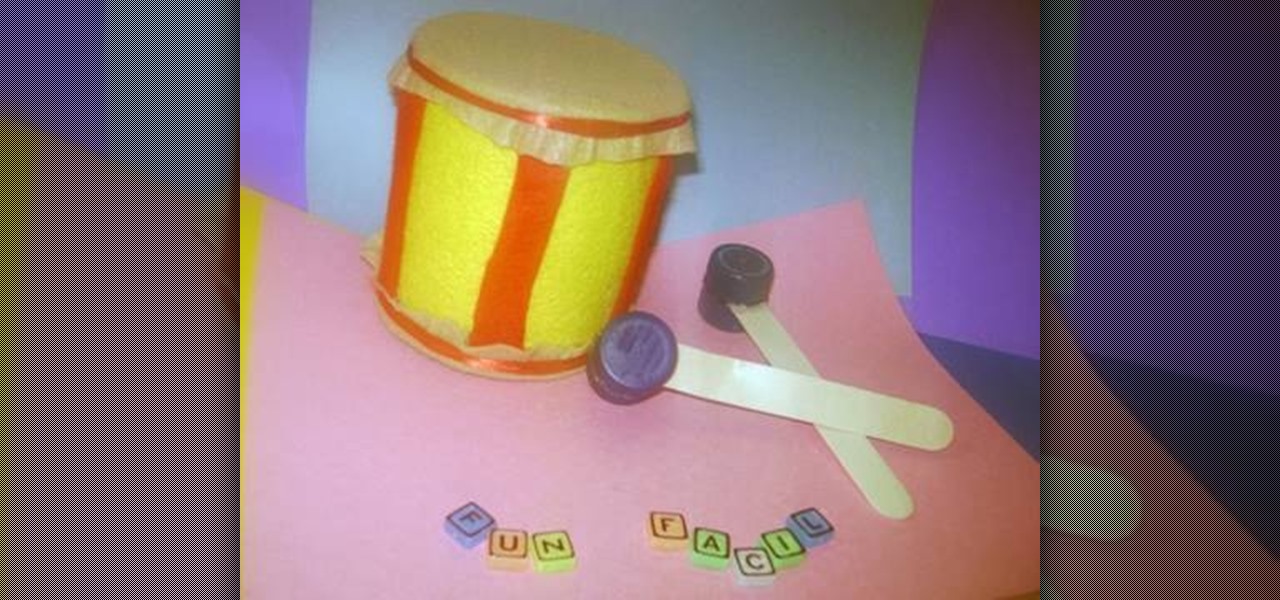
In this tutorial, we learn how to make a toy drum. You will need: felt, recycled tin can, 1 red lace, 4 soda caps, 2 popsicle sticks, glue, and scissors. Cit, cut the felt into a circle and glue it around the tin can. After this, take red felt and cut it into strips, then glue on the side of the tin can so it's striped. When finished, apply glue to the top of the can and then cover with additional pieces of felt. Tie a ribbon around the top and the bottom of the felt on the fan. To make the s...

In this tutorial, we learn how to make a colorful paper turkey. For this, you will need: colored paper in red, orange, yellow, white, black, purple, and brown, a bag, scissors, and glue. Now, take the orange, purple, and yellow papers and cut out two teardrop shapes of each. Then glue them to the top of a brown paper bag. Then, cut out eyes using the black and white papers. Glue these onto the top of the bag to make the eyes, then use the brown to cut out the sides of the turkey, and glue on....

In this tutorial, we learn how to make 3D nails. You will need: nail glue, nails, glitter, nail polish, tools, and anything else to decorate. To start, paint the nail and then apply small ribbons to them at the top. You can also add in glitter if you would like. Glue the ribbons by using nail glue or super glue. For the rest of the nails, repeat the same process, making all of them look different by adding small pearls, different shapes, and glitter. Let these dry, then you can place them ont...
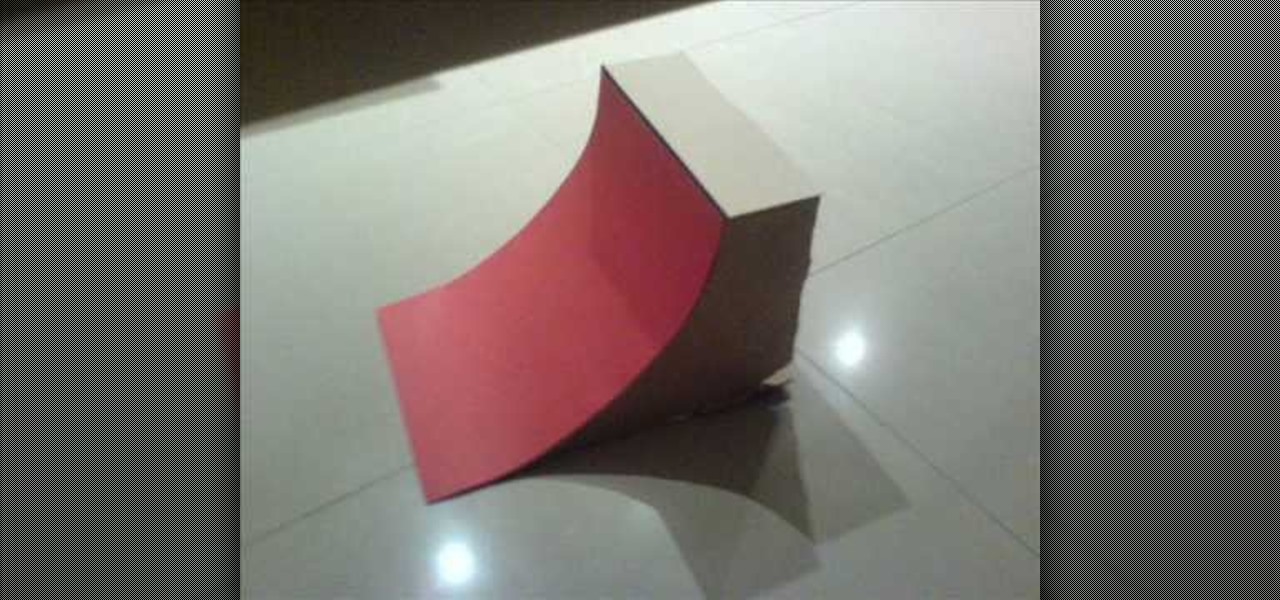
This is a video tutorial in the Hobbies & Toys category where you are going to learn how to build a Tech Deck quarter-pipe. For this you will need hot glue gun, hot glue sticks, coat hanger, cardboard, card and scissors. First cut out the three pieces of the frame out of the cardboard. Then glue a support to the bottom of the 3 pieces. Now glue the card on top of the frame. To make the coping, cut off a length of the coat hanger that is equal to the width of the quarter -pipe and glue on the ...
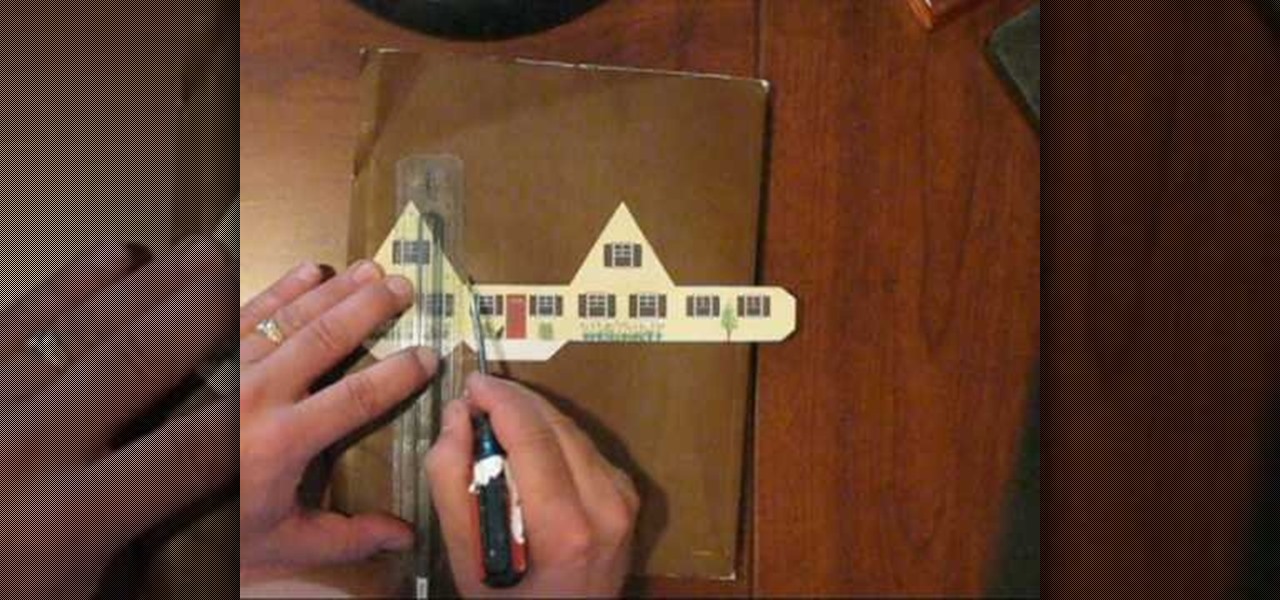
To make a Cottage Pop-Up Card, you will need the following: the printable pattern available at Victoria Norman Home , scissors, a ruler, cardstock, glue, and a flat head screwdriver.
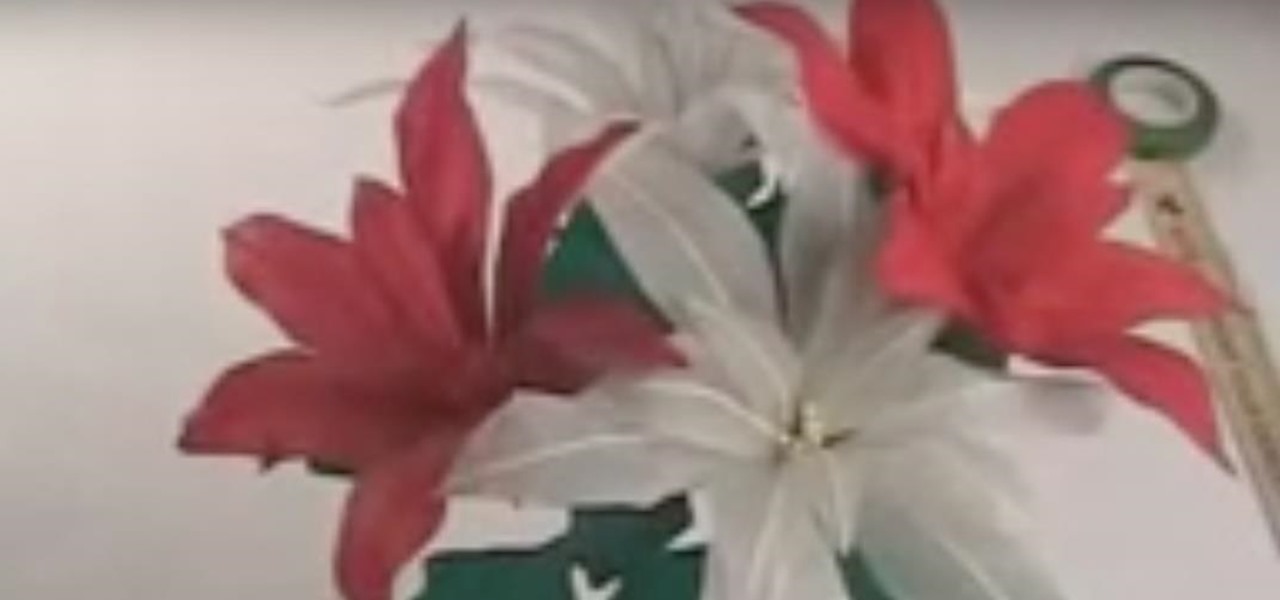
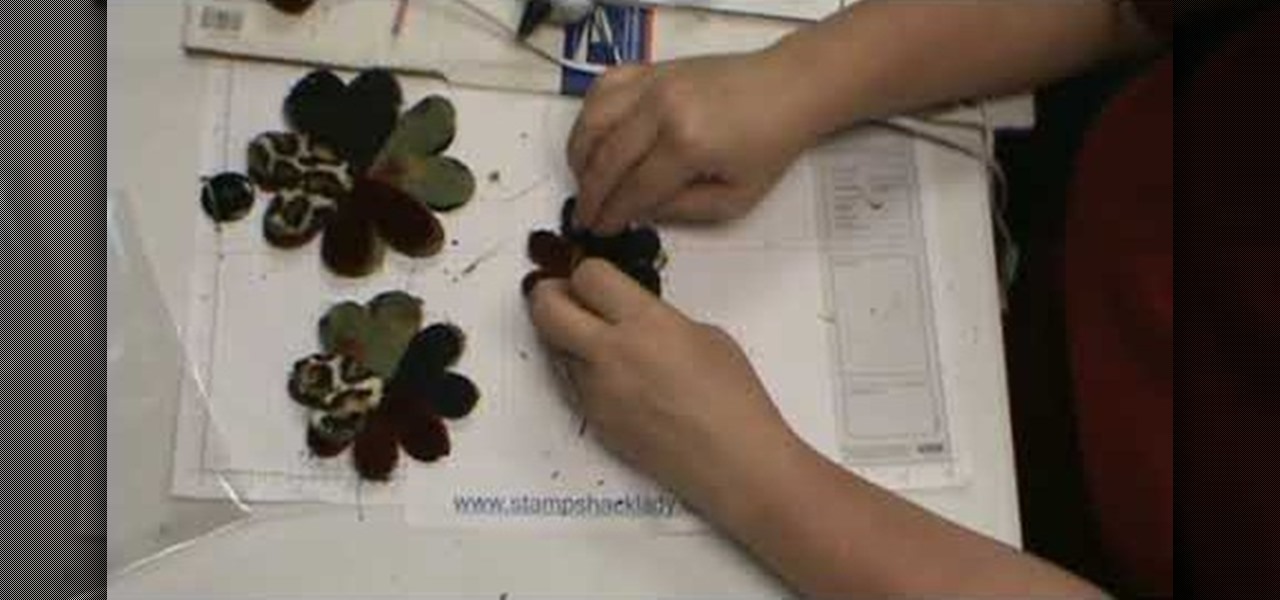
First, cut out pattern pieces. You will need 8 leaf patterns in total. Now, put two leaf patterns together and attach to a leaf with glue. Add a wire in the middle of the wire and glue it closed. Now, stretch your petals to give fullness, you should have 13 petals in total. With your finger, smooth glue onto the petal, then clip wire off of the petals.
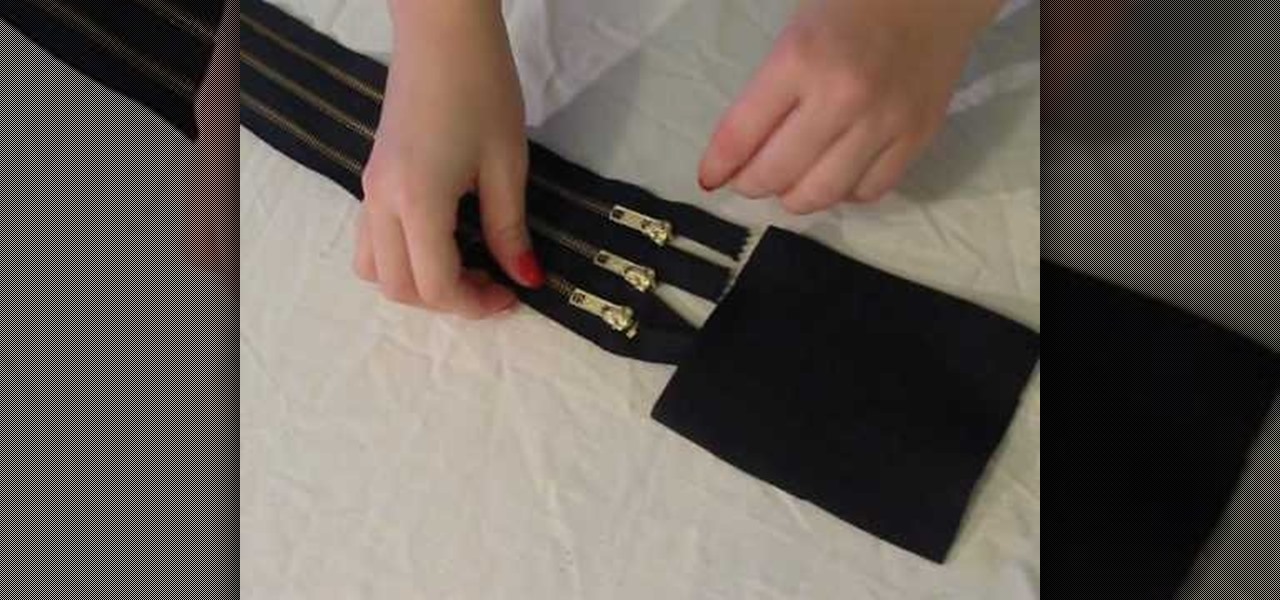
This video shows how to make a simple and stylish belt out of three zippers, a square of wool, and a glue gun. For those who are not skilled at sewing, there is no sewing required in the making of this belt. Taking the hot glue gun, place glue lengthwise along the back of the middle zipper and glue the top and bottom zippers to the middle one. After this is done, get a large square of fabric such as wool and glue the ends of the 3 zippers to the fabric. This fabric will serve as the location ...
We all remember that "special" kid from 2nd grade who always wore homemade clothing and ate glue because it tasted funny. Well, although we don't recommend you ever go chugging the Elmer's, glue is useful for more than just gluing things together.

This video shows you how to make a tech deck quarter pipe. You will need the following materials: wood pieces, cardboard, a small metal bar, glue, and scissors. The first thing you will need to do is cut out the base, this requires cutting out three equal parts (as seen in the video). The base pieces are then glued onto a back board for support. Small slits are then cut in each base to allow space for the metal bar. Glue the bar onto the base, making sure that only the bottom of the bar gets ...
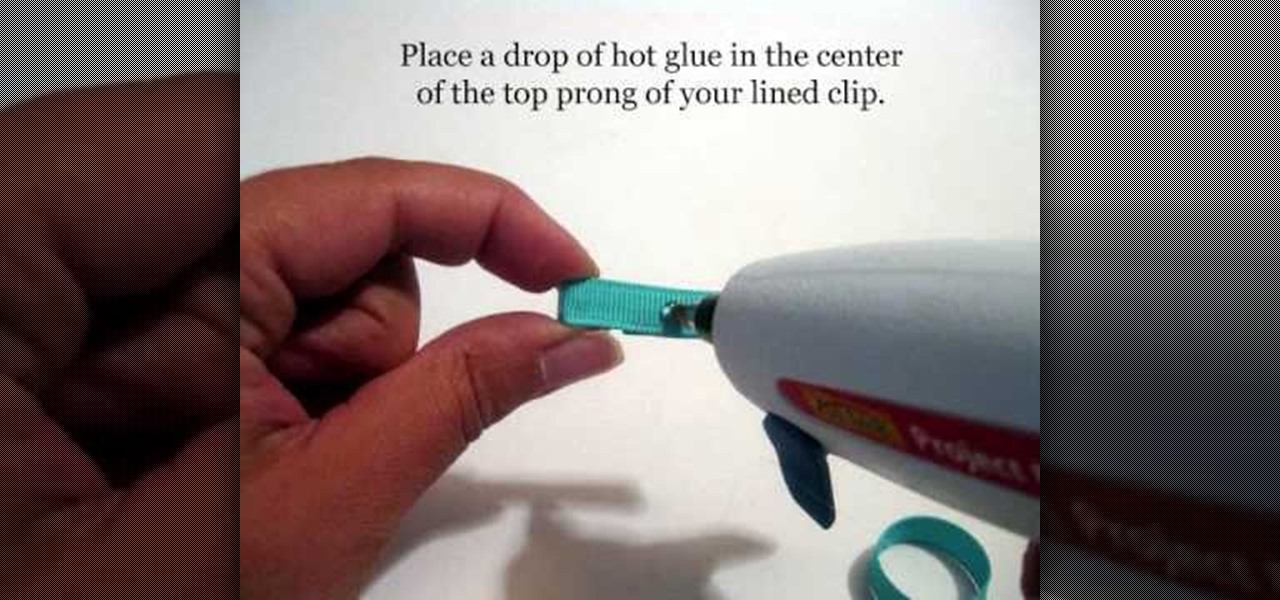
This video shows us how to make infant mini clip hair bows.This requires a high temperature hot glue gun.Three ribbons of the length 4",3" and 1.75" are required.Also needed are an alligator clip,sharp scissors and a lighter.Take the ribbons and seal it with a lighter just enough to melt the ends.Insert a 4 inch long ribbon in between prongs of alligator clip.Make sure the ribbon is centered and flat side of alligator clip is down.Quickly fold the ribbon over the top prong and press firmly to...

Jen Spencer teaches how to save money by making a Ribbon Tree at home. You can create this by using some of your ribbon scraps. Cut them into two inch strips, you'll need scissors, a hot glue gun, and a green floral tree. They come in a variety of sizes and also white. Fold the strip in half making a loop. Add a dab of glue on the end and close it. Jen warns be careful with the glue gun. Do that with all the ribbon strips. Place a little glue on the tree and glue the strips on. On top you can...
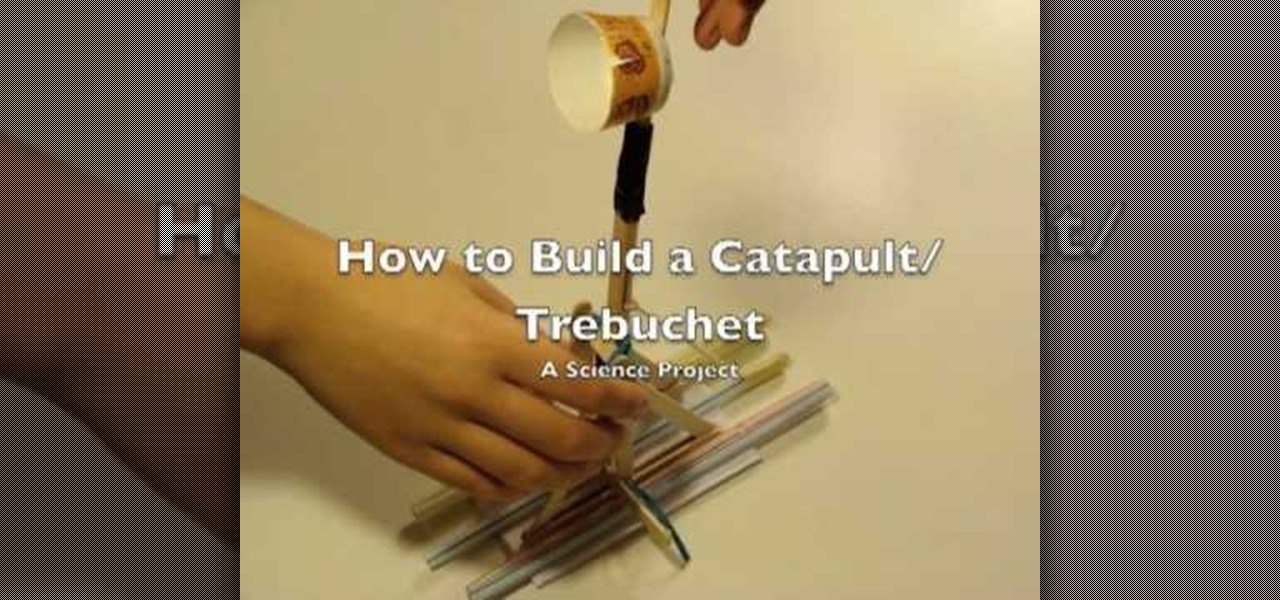
This video demonstrates how to make a catapult out of popsicle sticks. For this project, you will need the following: 7” rubber bands, a box of popsicle sticks, a hot glue gun, a Dixie cup, and tape.

The wilderness can give you all sorts of different types of material needed to survive. If you need food making a trap can be made with ease, but what if you need glue? Well in this two part tutorial, you'll find out how to make pitch glue with a variety of uses, such as fixing equipment and fletching arrows. Enjoy!

This video shows us a fun science project to do with our kids; it teaches us how to make flubber out of glue and cornstarch. In one container pour a small amount of liquid starch. You can find this in most laundry aisles in the store. Next in another container, pour in an equal amount of white school glue. Mix the two together by pouring the liquid starch into the glue. If the mix is real sticky, add more starch and if it is real runny, add more glue. To color your flubber you can dab it over...

This is step-by-step video tutorial on how to make a basic but adorable cat puppet. The kids will have such a good time cutting and gluing the materials to make their very own puppet. The process is very quick and very easy. The materials you will need are: Felt (black, white and yellow), 2 googly eyes, scissors, and fabric glue. First cut out 2 triangles for the ears. Glue the circular edges of a half circle of felt together and glue the ears to it. Glue the eyes, nose, mouth, whiskers, and ...
Use whole saws or drill bits larger than the necks of the glue bottle and about a ten inch 2x4 piece of wood. Drill holes for the amount of bottles you want to have. You can add feet to your rack if the necks on the bottles are too long for the rack by gluing a couple of small wood blocks underneath on both ends.

This video tutorial belongs to the Arts & Crafts category which is going to show you how to glue latex in 4 easy steps. This is really easy and very fast to do. First you clean the surfaces using mineral spirit and a piece of cloth. Next you apply a thin layer of latex glue using a cotton bud or a brush. In the third step, you let the glue dry for about five minutes and then put the two surfaces together. And finally you apply pressure to the seam with a seam roller. That's it! The latex shee...
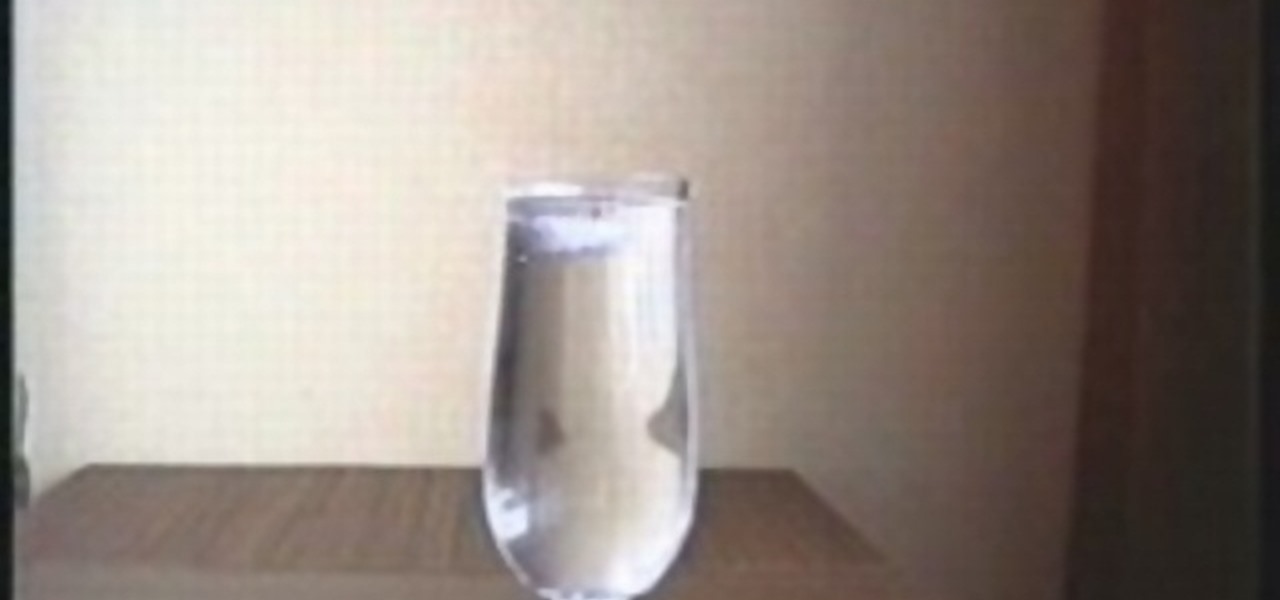
Is it possible to glue an ice cube? You have to see it!

In this video, we learn how to make hip hair accessories. First, you will need some little cut out shapes, flowers, bows, bobby pins, and hair barrettes. Now, grab your bobby pin and heat up a hot glue gun. Put the glue onto the bobby pin, making sure to avoid gluing your fingers. Put it on the side that doesn't open so it's on the back of the pin. Then, quickly glue on whatever you would like to be on the pin. After this, let the pin dry and you can wear it in your hair. This will save you m...