In this video tutorial you will learn to create a motion blur effect in your images using Photoshop. It's a cool trick to enhance the feeling of motion in an image. Like any other tool in Photoshop, don't overuse it!
You can use a Gaussian Blur in a number of ways, but Israel Hyman's purpose in this video podcast is simply to expose you to some new possibilities. It’s a brief Izzy Video because he's just throwing out some ideas. In the future, he’ll show how to create the effect.
Andy Coon made this tutorial so users of Final Cut Pro can learn how to blur out images so they won't get sued.

There are many different ways and many different apps that allow you to censor a racy photo and then share it to Instagram or Facebook. If you're in a time crunch and don't have the time or the patience to deal with something like Photoshop, then Snapseed is a great and easy app that will blur out your raunchy images in a quickie.
Google's new camera, aptly named Google Camera, has been all the rage since it was released onto Google Play last Friday. The main reason is the amazing Lens Blur feature that adds depth-of-field Lytro effects to photos, without the use of any expensive accessories or extra hardware, like on the new HTC One M8. The camera does this by utilizing a depth map through the processing of multiple images. Frame your photo, move the camera (phone) in an upward tilt or motion, and the software capture...
Think locally, not globally. Learn how to selectively blur the background of an image while keeping the subject in focus by using a layer mask. Selectively blur parts of an image in Photoshop.

In this video tutorial, viewers learn how to create fog using Adobe Photoshop. Begin by importing the image into the program and duplicate the image. Now go to Filter, select Blur and select Radial Blur. Set the amount to 100, Blur Method to Zoom and Quality to Best. Now select the rectangular marking tool and select the sky. Then open the Hue/Saturation menu and set the Saturation to -100. Use the eraser tool to remove the gray from the edges. Now use the paint tool and paint white streaks o...
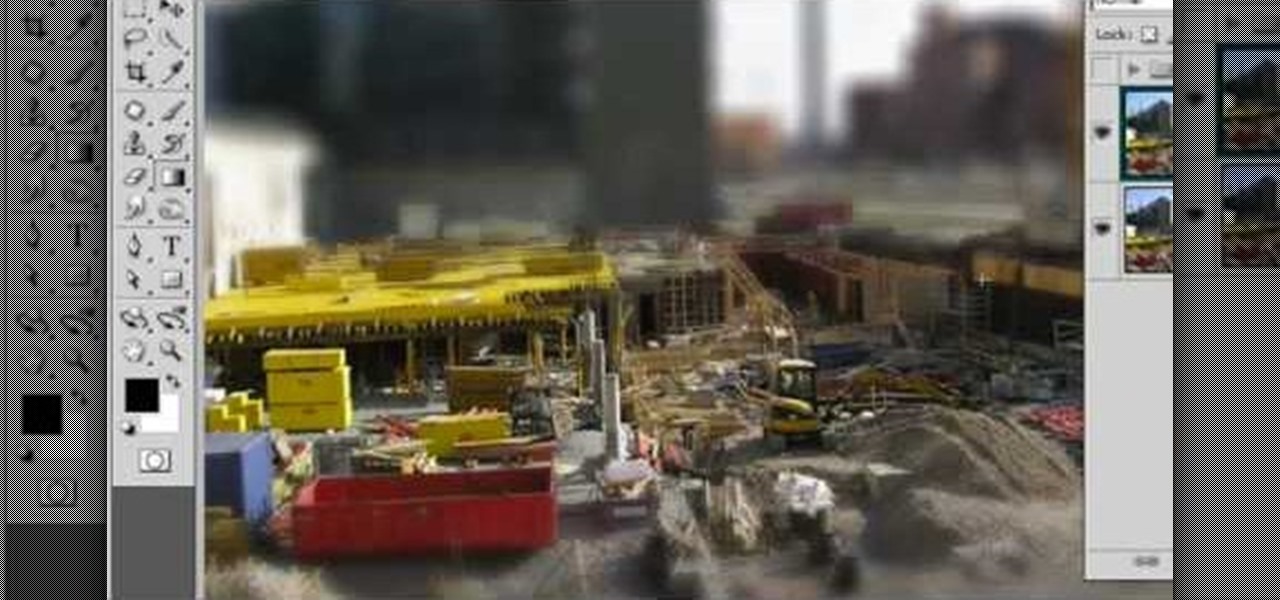
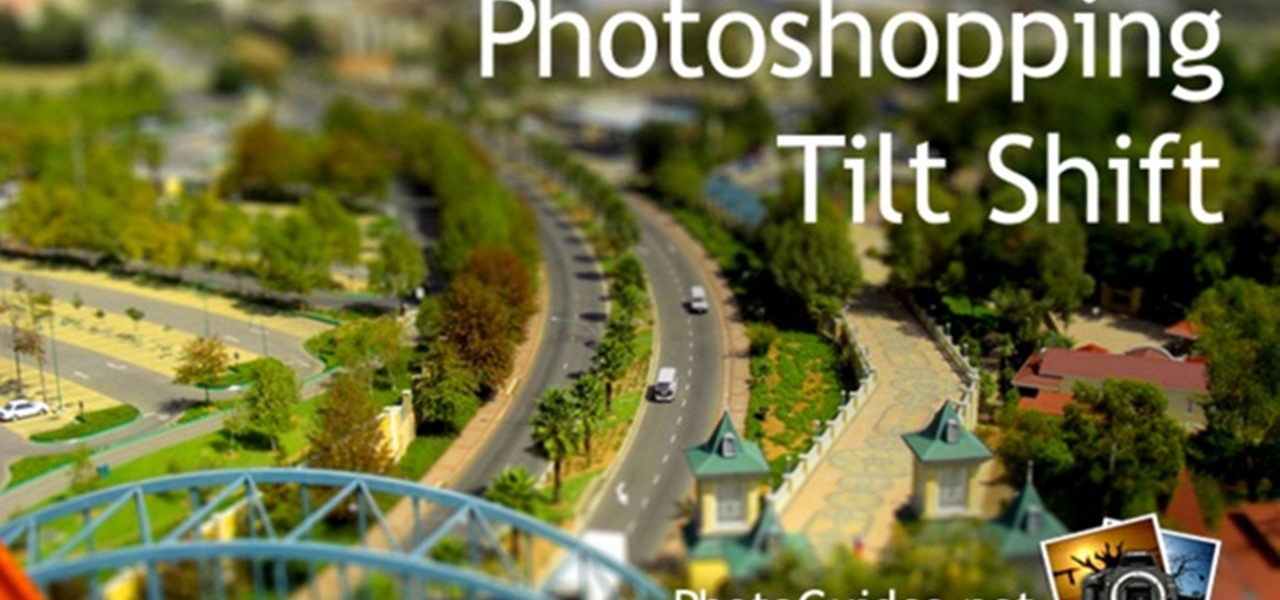
Easily turn your pics into table top style miniatures with this easy to create effect. This takes panarama photographs from afar and fades certain areas creating a toy scene effect. It's magical. Turn cities into model like images that resemble fantasy more than real life. To do this in Photoshop you're going to use the blur tool, layer masks, copies and gradient tools.
Gaussian Blur is a filter that blurs an image. But it's also the math behind the Feather command, drop shadows, and everything that is soft in Photoshop. Watch this video and learn why Gaussian Blur is so important. Whether you're new to Adobe's popular raster graphics editing software or a seasoned professional just looking to better acquaint yourself with the program and its various features and filters, you're sure to be well served by this video tutorial. For more information, including d...
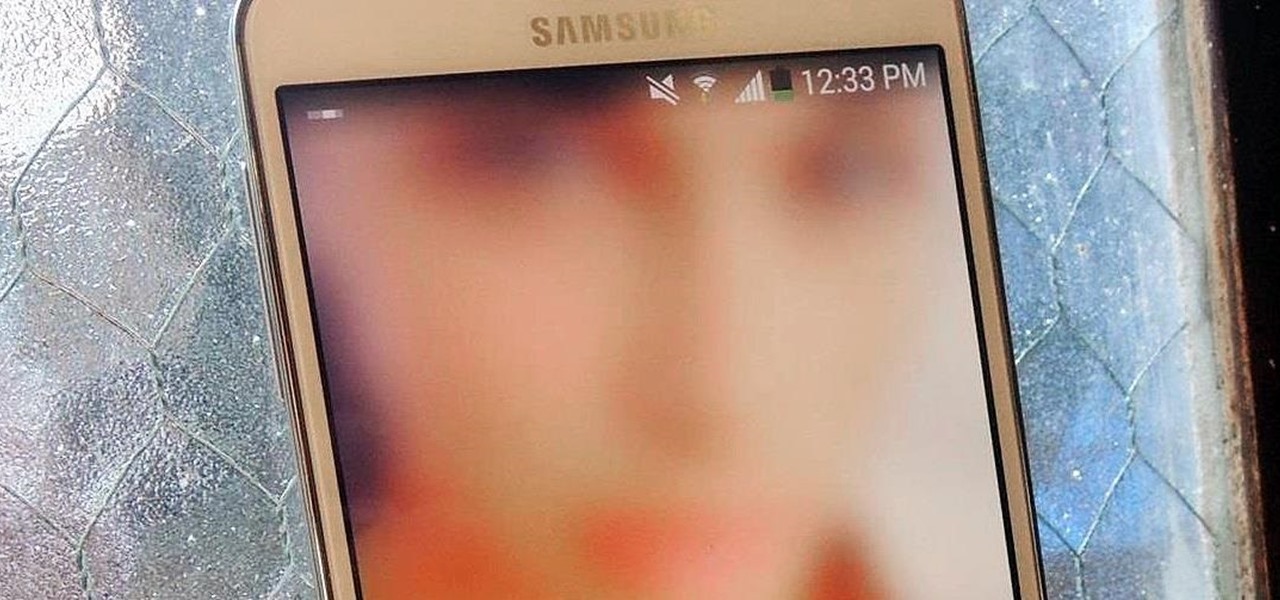
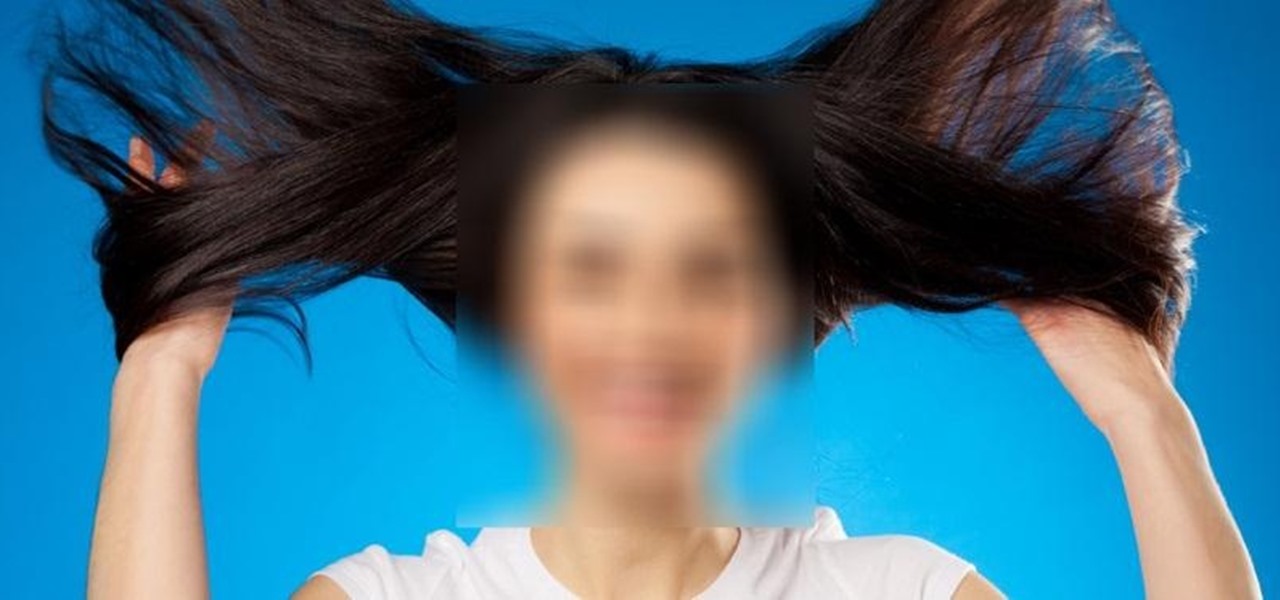
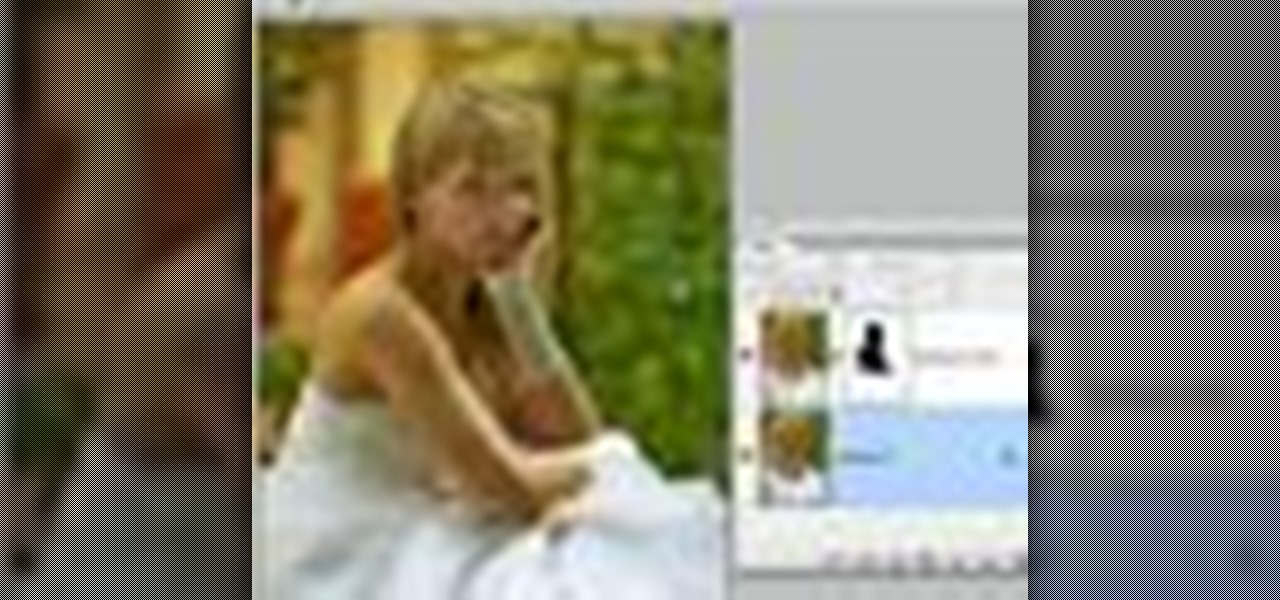
When you watch the news or a television show where someone doesn't want to be identified, it is common to see the face blurred out or obscured. In this Adobe Photoshop tutorial you will learn how to blur someone's face in an image and preserve or hide their identity. So if you are producing videos or podcasts or need to hide part of an image, this tutorial will show you how to do it in Photoshop.
In this how to video, you will learn how to turn a photo into a line drawing in Photoshop. First, open your image in Photoshop. Create three layers of the same photo. The top two layers will be worked with. The bottom layer will remain the same. Take the top layer and change it to color dodge. Select control and I on the keyboard to invert it. Go to filter and blur to choose Gaussian blur. If you have dark lines, use a small amount of blur. You can use a lot of blur to get a unique look. Clic...
This tutorial shows you how to blur backgrounds on portraits or macro type images using GIMP image editing software.
If you have Android KitKat, you're fortunate enough to be able to use the new Google Camera, which has tons of great features, including Photo Sphere, Tiny Planet, Panorama, and Fisheye. With so many photo options and no additional hardware needed, it's hard to not to like this camera.
Apple's implementation of blurred backgrounds was met with mixed reception in concurrence with iOS 7's release. Some viewed the design as rather dull and headache-inducing, while others like myself enjoyed it because the translucency created a more focused and noticeable foreground.
Learn how to use the Gaussian blur tool to add mood to your digital photos while maintaining sharpness and detail. Meet the Adobe Photoshop pen tool! Whether you're new to Adobe's popular image editing software or simply looking to pick up a few new tips and tricks, you're sure to benefit from this free video tutorial, which presents a complete overview of how to use the Gaussian blur filter when touching up a photo. For more information, and to get started using the Gaussian blur tool yourse...
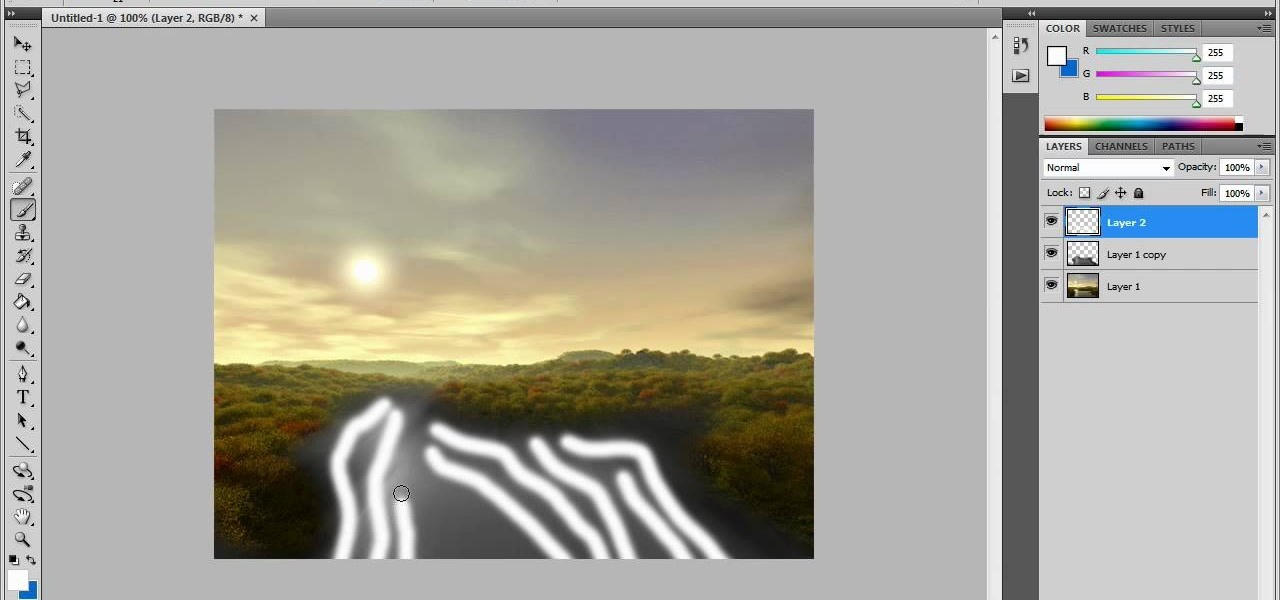
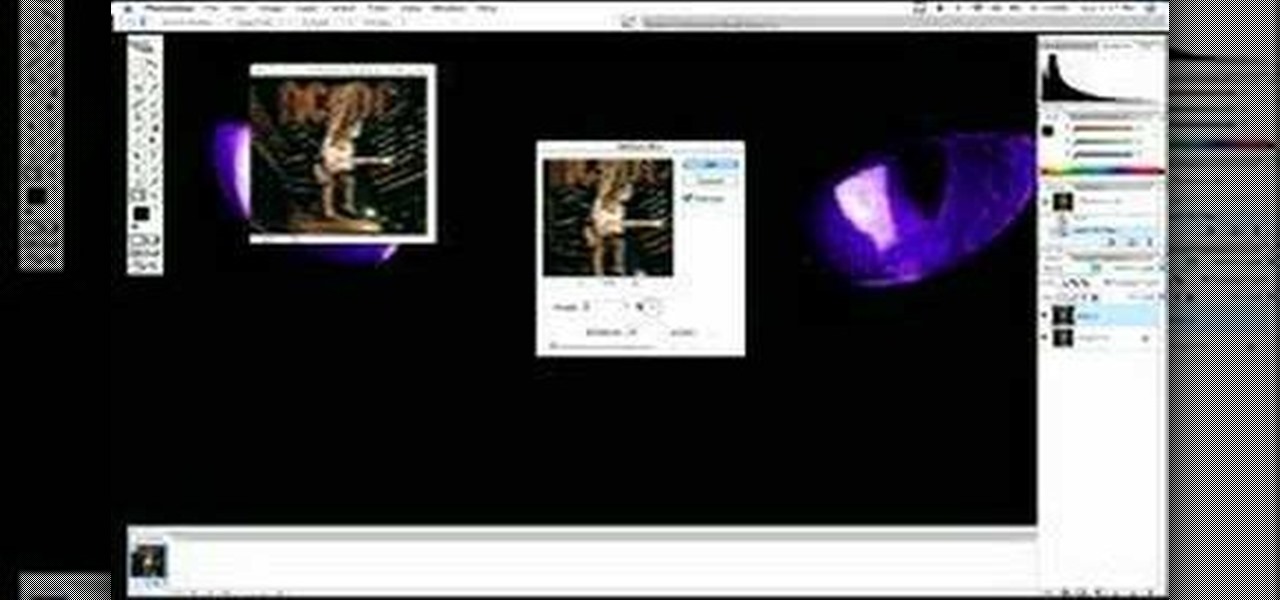
Adding motion to graphics using Photoshop can create an exciting and dynamic effects. Select a picture you want to add motion to. First, duplicate the background layer. Then under Filters, select blur, and then select Motion Blur. Then you set the angle of the Motion Blur. You can select any direction and also set the intensity of the blur by setting the distance setting. Then you will need select the eraser tool and select under Options select the brush. Chose a soft edge brush and erase ove...
When creating an aesthetically pleasing image, sometimes more is more. Blending images together and blurring the edges is a great method for creating desktops featuring multiple photos of hottie Sam Worthington, or simply for creating a pretty website background.
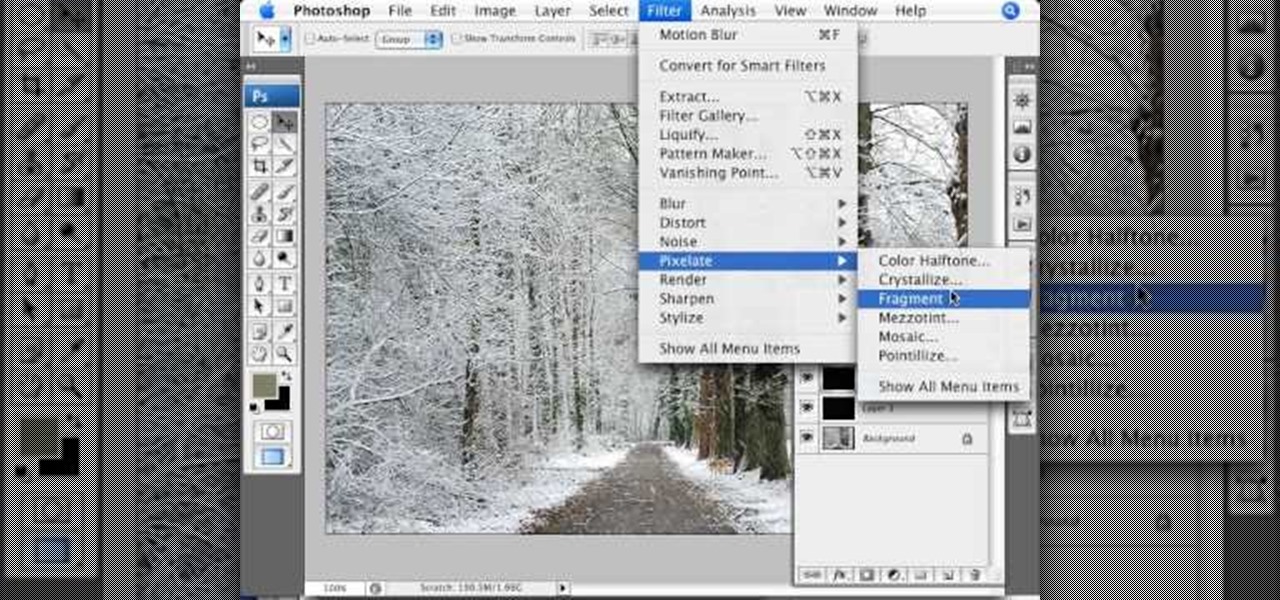
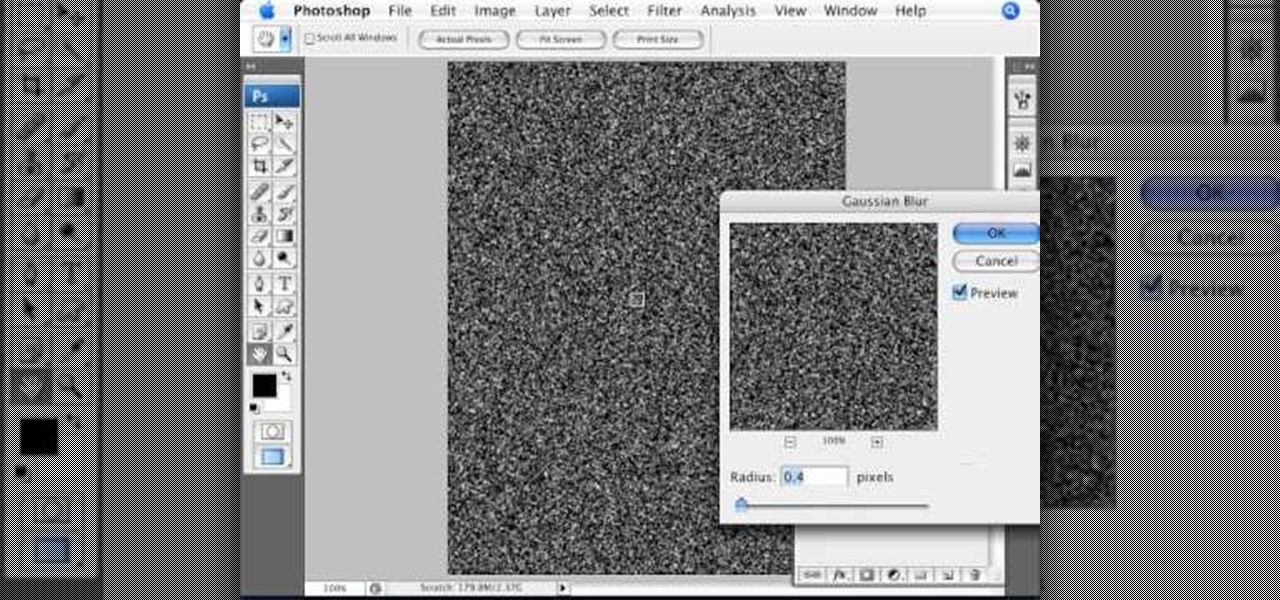
Learn how to simulate snow in your photograph in this video tutorial by photoshopuniverse. For this you'll need a photo depicting winter scenery. Add a new layer, fill it in with black, go to filer noise and add noise as shown using the given amounts. Go to filter effects and add blur to the layer. Go to images and adjust the levels to reduce the snow-flakes as shown. And add some motion blur to it. Change the blend mode to screen, duplicate the layer, rotate the new layer, apply the filter c...
This tutorial for GIMP users shows you how to take a basic image (preferably an outdoor one!), and then use a few effects like the dissolve layer mode, gaussian blur and motion blur to make it look like snow is falling.
This 3D software tutorial shows you how to use the blur effect in modo. The blur tool allows you to blur neighboring pixels on a mesh. The Blur tool is quite useful for any painting task. The modo blur tool, like all painting tools in modo, can be composited with various brush tools, inks and jitter nozel.
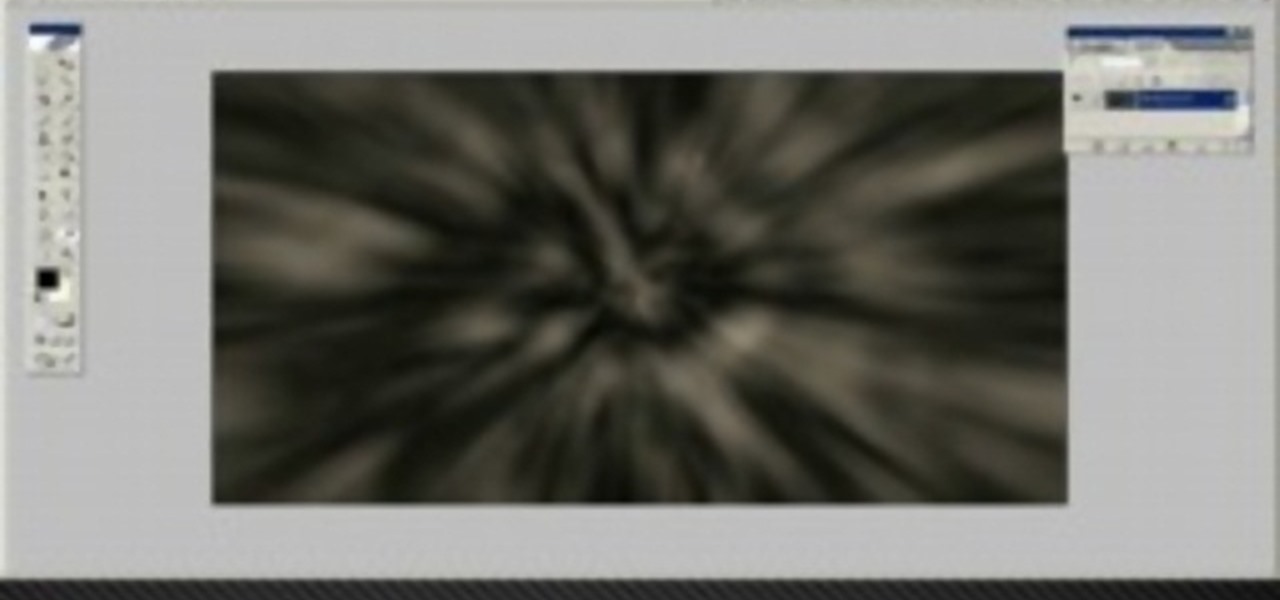
In this tutorial, we learn how to blast effect a picture in Adobe Photoshop. First, open up a picture in Photoshop, then go to filter, then blur, and radial blur. Change the amount to 77, the blur method to 200m, and the quality to best. After this, hit "ctrl+I" to invert the colors. When you are done with this step, the picture will look like it has been blasted! To make this more different, you can change the colors on the picture or add in any other settings that you prefer. When finished,...
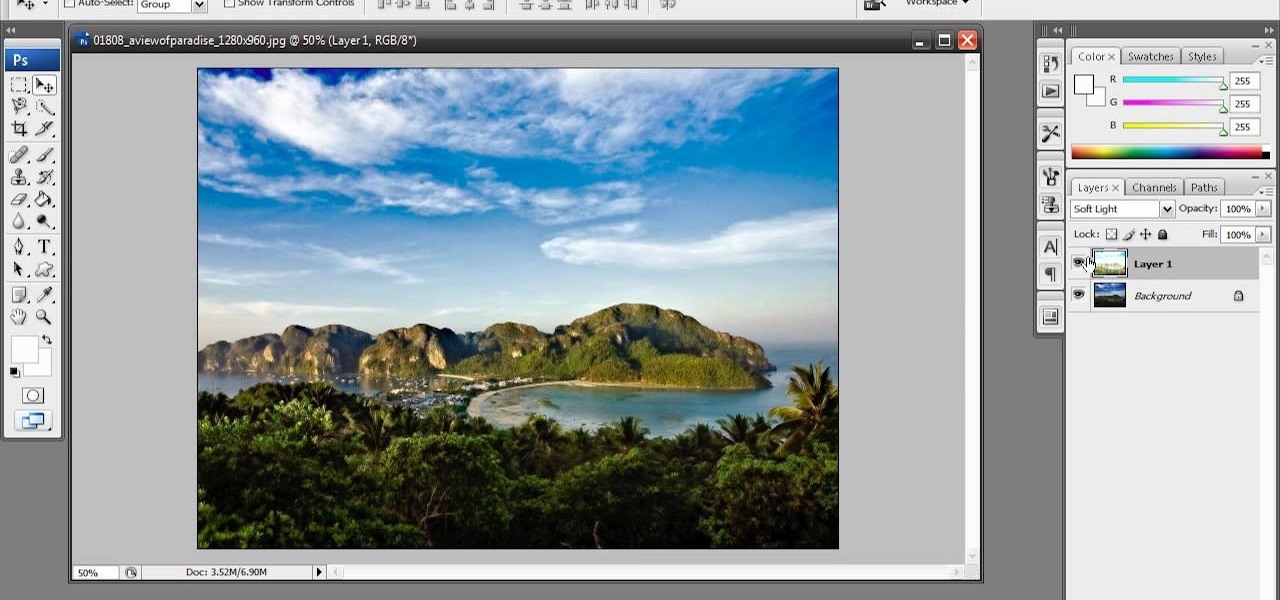
In this video tutorial, viewers learn how to enhance an image in Adobe Photoshop. Begin by duplicating the layer by press the Control and J buttons. Then change the blending mode to Soft Light. Now press the Control and M keys to open Curves, and drag the curves up to brighten the image. Then click on Filter, go to Blur and select Gaussian Blur. Set the Radius at 2.7 pixels and click OK. This video will benefit those viewers who enjoy editing images, and would like to learn how to enhance a p...
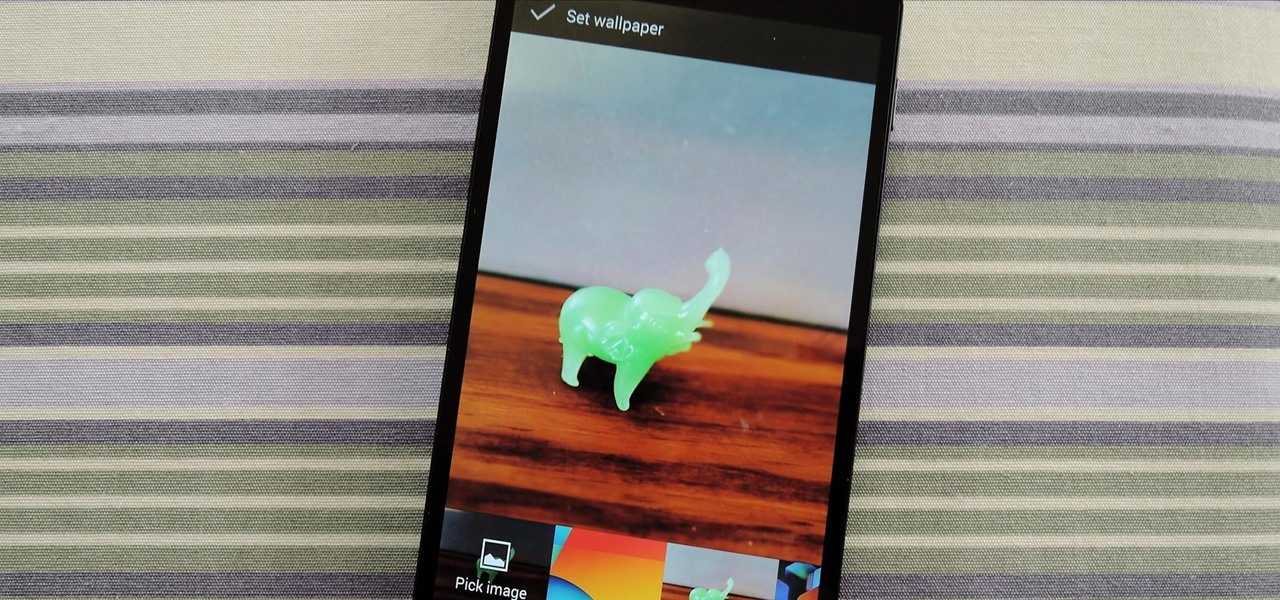
Adobe Photoshop CS4 lets you create images and graphics that represent your personality. This video tutorial demonstrates how to make a quick, cool, and easy wallpaper design for your personal computer desktop. Either copy the provided example, or make your own tweaks and come up with a cool custom design.
1. To make tilt shift take one picture which is taken from high angle with any content like car and buses. Now open the picture in Photoshop and change it to quick mask mode to create and edit the selection.
Tutorial on how to create realistic reflections on Photoshop with the objects. Take a base ball image then open layer pallet and duplicate the base ball layer its shortcut is Ctrl j. Go to image menu adjust the canvas size change height to 200 and anchor to the top then click OK then go to edit select transform change to flip vertical, select move tool then move the base ball vertically down change opacity to four percent. Finally go to filter select blur then motion blur with an angle 90 deg...
We all got a little jealous of the iPhone 7 Plus's dual-lens camera during the Apple Keynote in September. It's okay, you can admit it. But just because your Android doesn't have two lenses doesn't mean you can't recreate the fun bokeh effect of the iPhone's now wildly popular Portrait Mode.
Try "unfocusing" your photographs for some dreamy, evocative and somewhat abstract takes on life. Check out the two tutorials (here and here) from Michelle Geoga of Lights! Camera! Photoshop! for tips on unleashing the blur-power of your camera. You can see plenty of example images there to help you out.
Some of my Facebook status updates are absolutely hilarious, and sometimes (though rarely) even my friends updates can get me on the floor laughing. And like most of you, I'm sure, when you come across something funny—you have to share it.
Learn how to create a motion blur effect with Mental Ray in 3ds Max 2010 or 2011. See how to control the camera's shutter speed, the quality of motion blur, and how to decide if a single mesh has motion blur or the entire scene. You'll also take a look at fast motion blur option using Scanline Fast Rasterizer option. Whether you're new to Autodesk's popular modeling software or a seasoned 3D artist just looking to better acquaint yourself with the application, you're sure to be well served by...
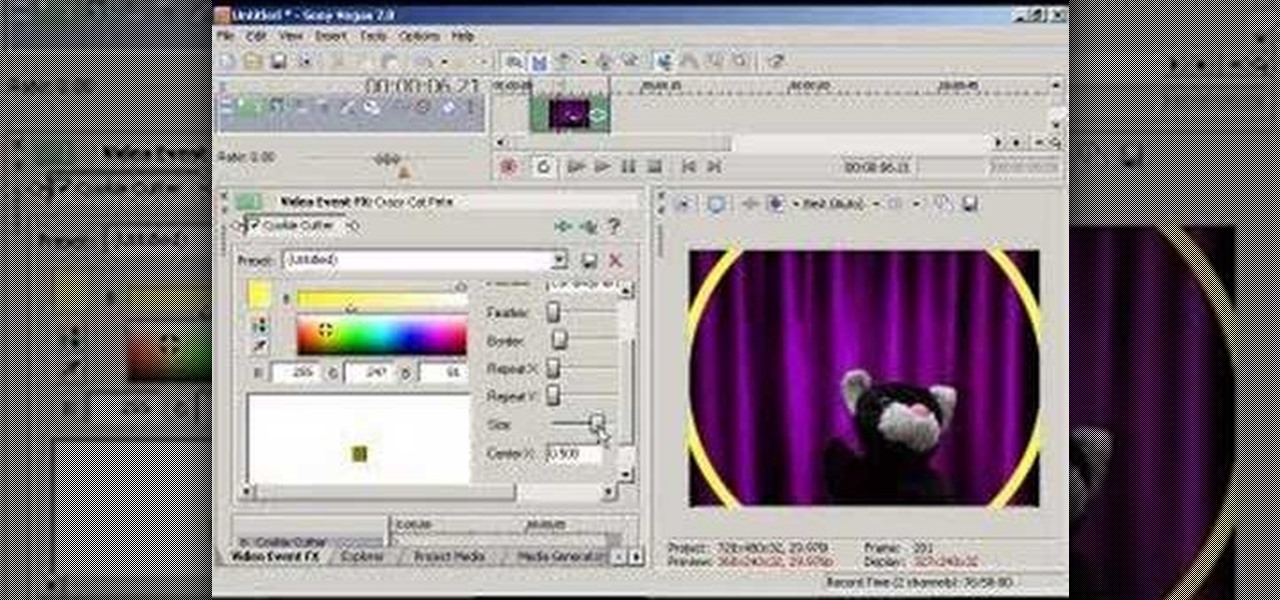
This tutorial teaches you all about blurring in Sony Vegas! Learn how to adjust the angle of blurring, the strength, and the different types of blurring.
This tutorial will help if you need to blur either a person or section out of the screen using Vegas Video. You may want to adjust the blur options to make it more or less blurred in your section -the more contrast there is the better this will work.
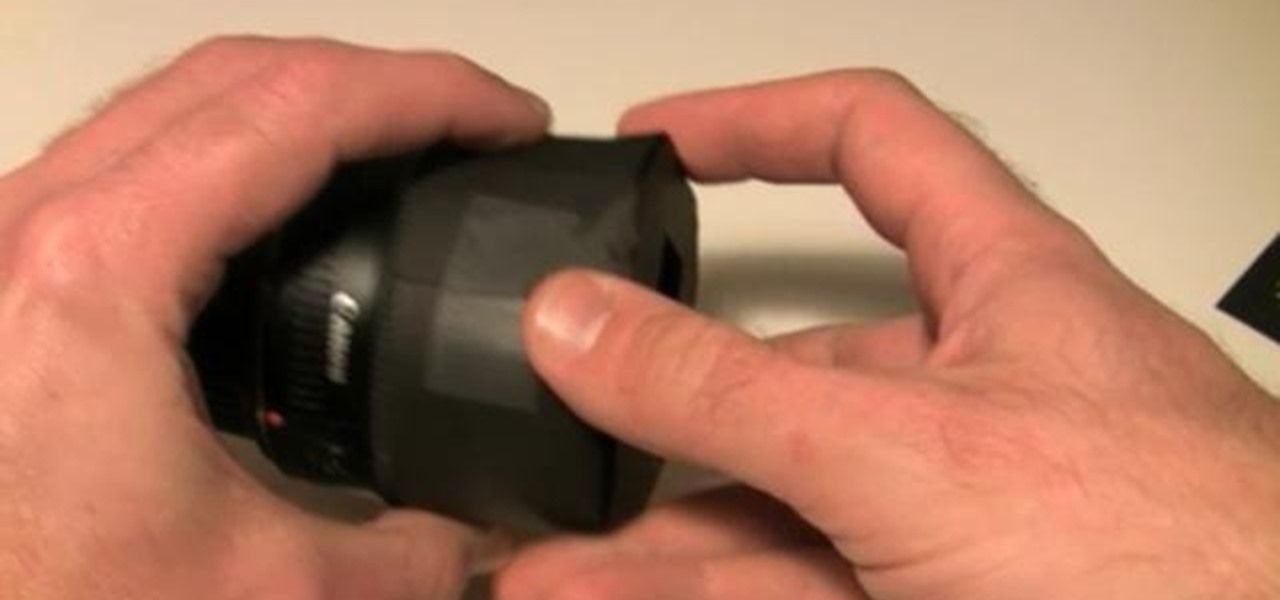
How to make that cardboard hood to assist you in making your own custom bokeh when shooting images.
In this video tutorial you will learn to soften portrait images with diffusion. You will need the Channels palette to do the trick. Learn also to adjust the level of Gaussian blur.
Google's new camera app has a highly innovative and unique feature dubbed Lens Blur, and the most interesting thing about it is not necessarily what it does, so much as how it does it.
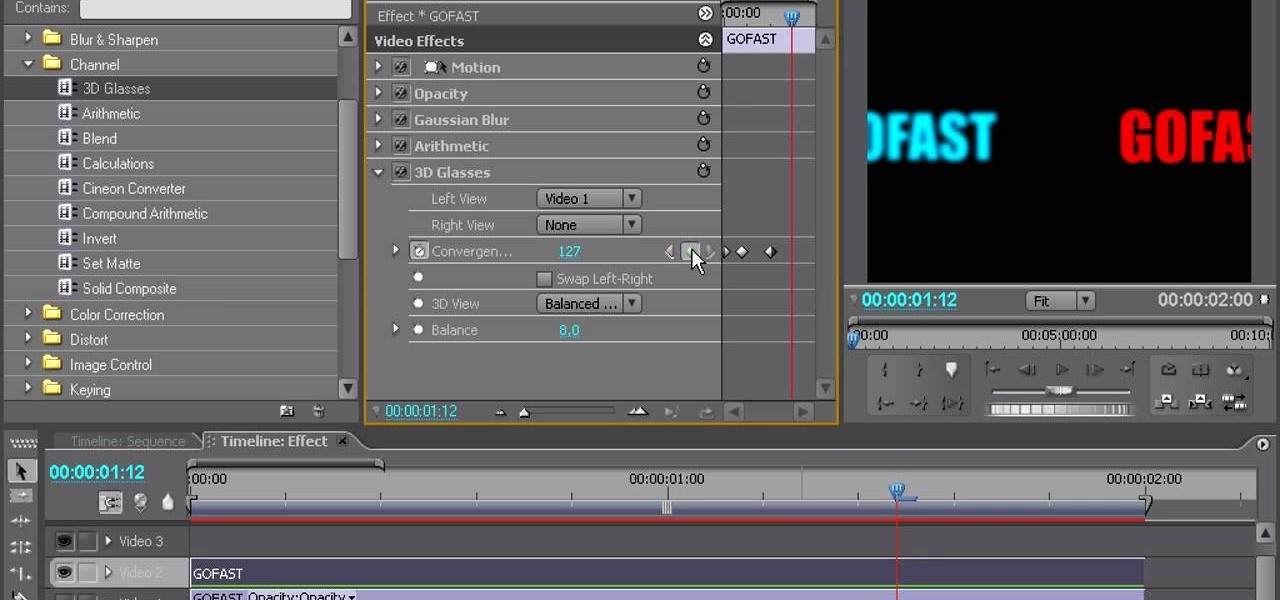
Creating good-looking titles is one of the oft-neglected but most important parts of creating a really appealing video, especially if you want to post it online. This two-part video will teach you how to animate blue in-out effects with keyframes and create a 3D glasses effect for a title using Adobe Premiere Pro.
Want to enhance your photography? Check out how to blur water for a dreamy effect in your photographs.
The Orton effect in Photoshop is acheived by combining an image with a duplicate that has been softened or blurred slightly. This will give you original image a luminescent appearance and enhance most portraits and landscapes.
This step-by-step tutorial will teach you the correct way make a Light-Saber effect using Paint.net.In this video, you will learn how to gather the Light-Saber image, paste the image into Paint.net, choose the preferred color for the Light-Saber, and other special effects such as: sizing your Light-Saber, 'blurring' your Light-Saber, and learning the correct way to save your project.Your first step is to right click on the Light-Saber image and click 'Copy'. Next, you open Paint.net. Then you...
Open an image and on the layers panel add a new layer by clicking on the fifth icon below the layers panel. A new layer is created with the name 'layer 1' and your previous layer would have the name 'background'. These names can be changed by you. For now we'll leave them as they are.
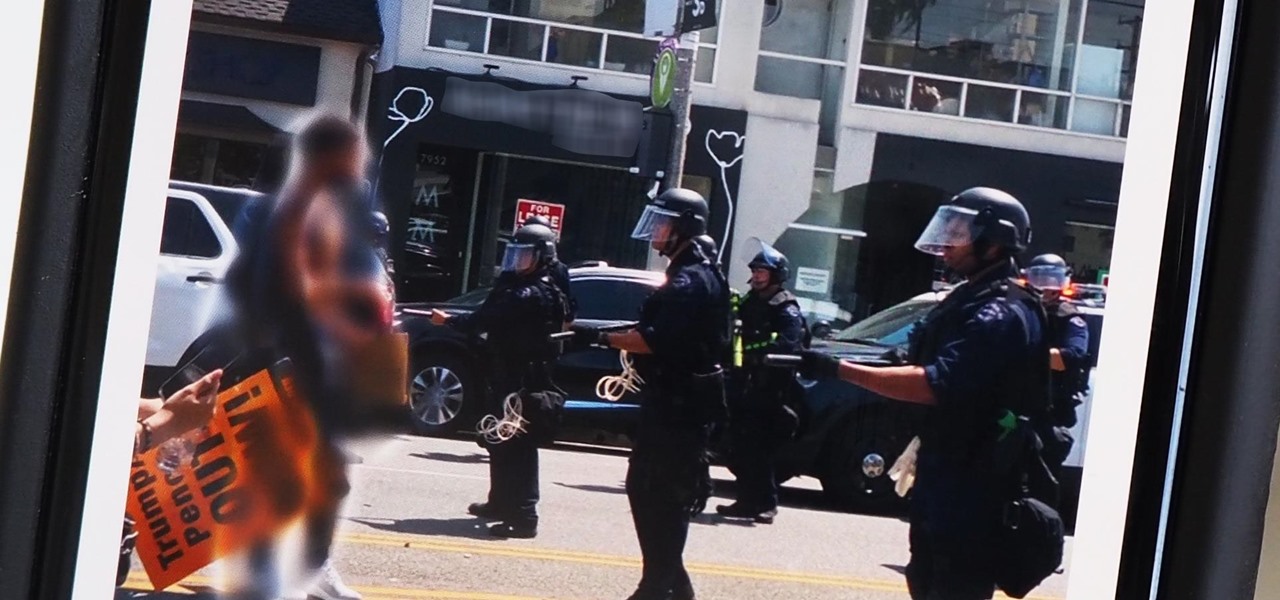
Every single photo you take carries with it a considerable amount of seemingly "invisible" yet important information known as metadata. Although metadata is usually helpful to sort your photographs by location and date, that same information could potentially be used against you, especially if the pictures are taken during a precarious situation.