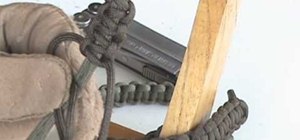
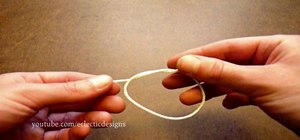
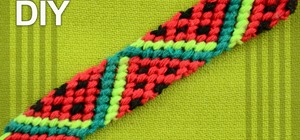
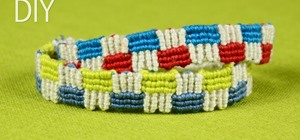
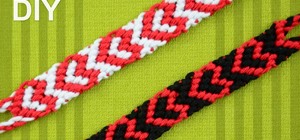
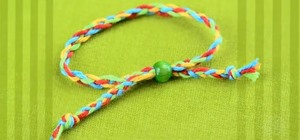
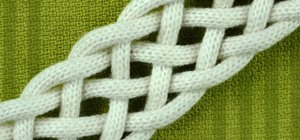
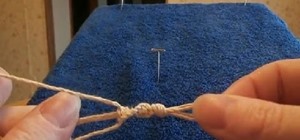
Within some military units, it is a tradition to make what is known as a "combat bracelet" using paracord from a soldier's trouser ties and a button from their uniform. Each soldier makes one for the next so each one has a bracelet made by someone else. These are then worn on the mission by each soldier and only taken off when the whole unit returns. In this tutorial you will learn how to make these combat bracelets.
Step 1
Obtain about 3m (10 feet) of paracord. This can be approximately measured using your two arms stretched out wide (the distance between your hands is now about 1.5m, so you need to pass it between your hands twice). You could also use a measuring tape or anything else to get it to about 3m.
Step 2

Find the middle of the paracord and fold it in half.
Step 3

Wrap the looped end around your wrist to get the circumference of your wrist.
Step 4

Tie off the long end with some string or something, it doesn't really matter what, because it will be removed later.
- If the cord or string will fit around a button or other item that you will use as a clasp, you can add it to the cord directly now. Place it at the top end, where the tie is.
Step 5
You now have a loop with 2 longer lengths coming off. These 2 long lengths are what we'll be using to weave the bracelet. They are numbered 1 and 2, and colored red and blue.
Step 6

Begin weaving. Pass 1 under the loop, then over 2.
Step 7
Pass 2 over the loop and then between 1 and the loop. This leaves 2 on the side 1 was, and vise versa. Remember this.
Step 8

Tighten by pulling on the loose ends.
Step 9

Repeat this step, using the same 1 as before, but this time it's going right to left instead of left to right. This makes the bracelet straight and even.
Step 10

Repeat the second part of the knot from the other side, too. Go over the original loop and through the opposite strand.
Step 11
Keep using 1, passing it under the loop then over 2, then 2 between 1 and loop until your about 3cm from the end of the loop, then cut off the excess 1 & 2 cord. This is where the lighter comes in useful, you need to melt the cut ends of 1 and 2 so it fuses with the weave and stops it all coming undone. You may now also undo the string or thread you used to tie the loop in the first place.
Step 12

This should give you a snake-like piece of woven paracord with a smallish loop at one end (the head). At the opposite end, (the tail) you need to sew on your button. Place your button according to how tight you want the bracelet.
- Put it a short distance from the tail if the bracelet is too loose.
- Use a bigger button than the one shown here for cord this size.
Step 13
Remove the temporary tie that you added in step 4. You can cut it if you need to.
Step 14

Wear the bracelet by putting the button though the loop.