

Remember the arcades? Were you saddened when they closed up one by one, leaving no outlet to actually go out and socialize while you played video games? With all the home consoles and internet connectivity, gaming has evolved, but the social factor has been eliminated. Sure we can play against others, but they may be miles and miles away. Remember back in the day when you could go down to the corner store to play your favorite game and show off your skills in front of a crowd? Well, all is not lost.
In this article, I will guide you through a scratch build of a simple, yet elegant arcade and console emulation system. With hard work, you will utterly dazzle your friends—although, be warned: the author is not responsible if they then try to move in.
Step 1 Determine Space Requirements
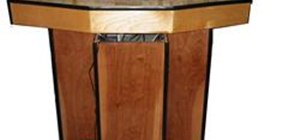
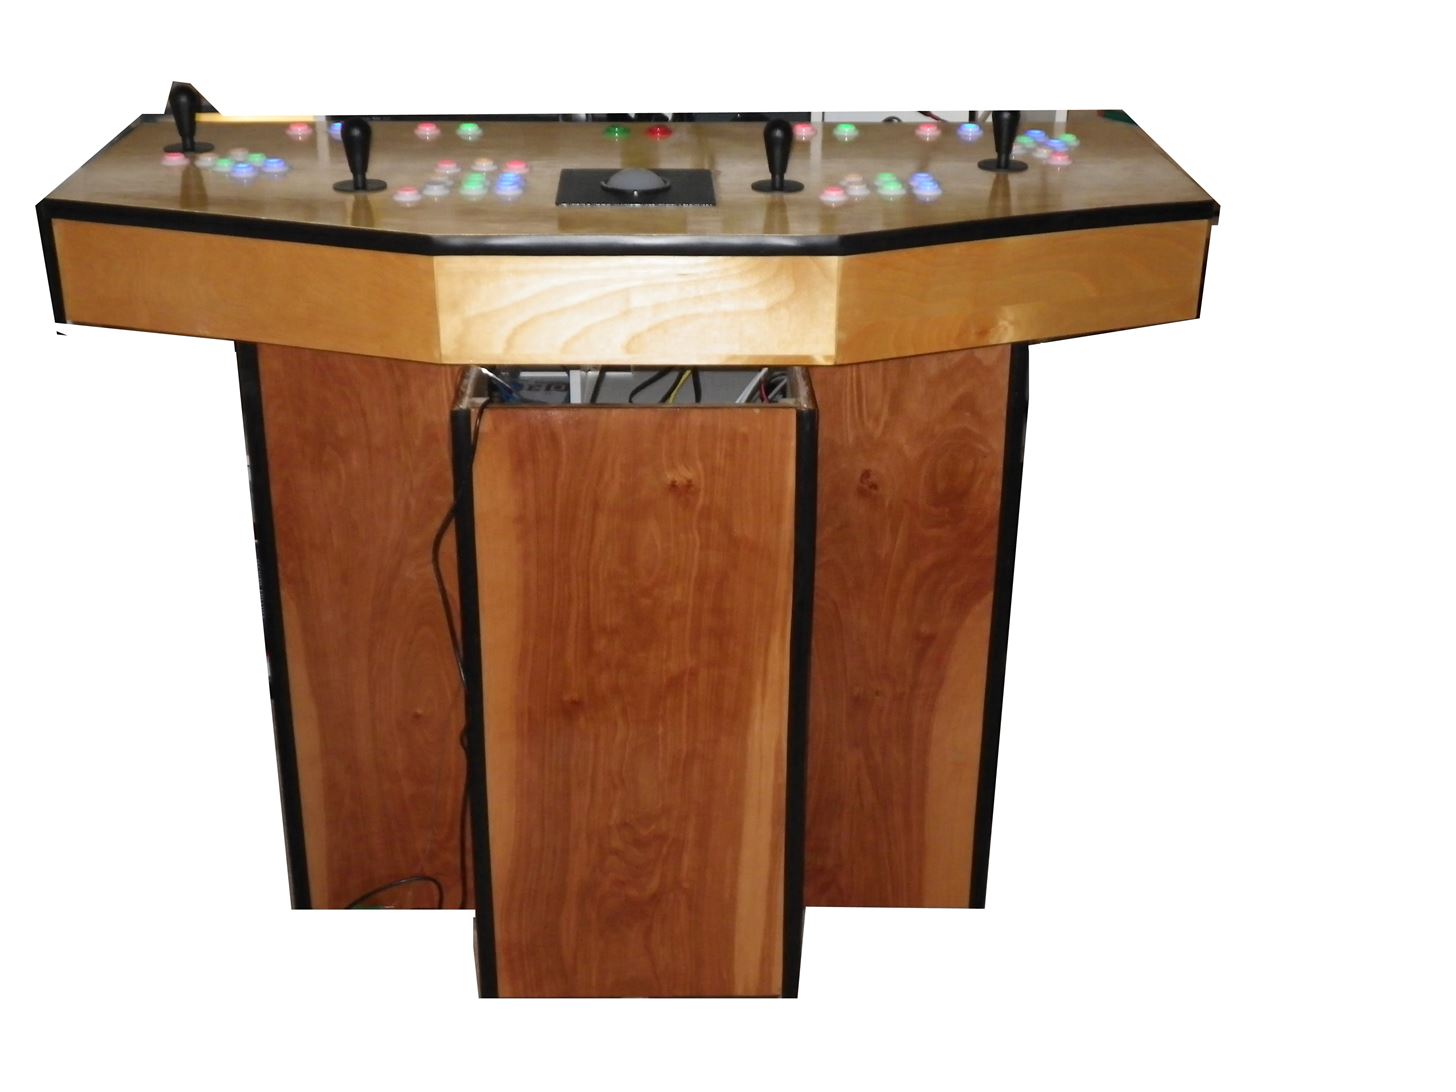
Initially, I wanted to build a full on arcade cabinet; however, the space constraints of my home had other ideas. I wanted to find a way to incorporate fun into my existing entertainment center. This How To guide will explain how to build a pedestal-style arcade system.
Step 2 Obtain Materials
There are many decisions you will be required to make in order to get the look and feel that you want from your cabinet. You will notice that for this project, I decided to go with a very clean and natural wood grain finish.
Warnings
- This guide is intended for people that are both comfortable and knowledgeable in the proper use of various power tools.
- Make sure to allot at least $800 for this project.
- Make sure all tools are in good working order, saw blades are sharp, and drill bits are sharp. This is critical to having a clean cut edge. Dull tools may leave ragged edges, and pose potential danger to machine operator.
Materials & Tools
Materials:
- 1 sheet 4' X 8' X 3/4" Birch or Oak Plywood - Lowe's roughly $47/ea
- 1 2' x 4' x 3/4" Birch or Oak Plywood sheet (Match above choice) - Lowe's $18/ea
- 2 sheets 2' X 4' X 3/4" Medium Density Fiber Board (MDF) - OSH $9/ea
- Wood Glue (8 oz.) - Lowe's $6
- 1 lb 1 1/4" Gold or Drywall Screws - Lowe's $6
- 1 2" x 4" x 8' lumber or 15 5/8" X 3' square dowels - OSH $2/ea
- 40 (or more) Horizontal Push buttons w/ Microswitches - Groovy Game Gear $2.75/ea
- LED Wiz - Groovy Game Gear $44.95
- I-PAC 4 player interface - Ultimarc $65
- 4 Ultimate Joysticks - Happ Controls $11/ea
- 1 3" Trackball - Groovy Game Gear $117/ea
- Trackball mounting plate - Groovy Game Gear $14/ea
- LEDs & Resistors (use 1 per button) - Groovy Game Gear $0.49/ea
- Light Gun(s) - Ultimarc $44.95 electronics + $44.95 for gun body
- T-Molding (3/4" or 13/16" widths) - Groovy Game Gear $0.40/ft
- 1 quart polyurethane - Lowe's $12
- Mineral Spirits (if using oil based finish) - Lowe's $16
- 100' Black, Red, Yellow, Green 22 AWG wire - Fry's $4.99/spool
- .187" Quick disconnects (150 pcs.) - Jameco Electronics
- 220 grit sand paper - Lowe's
- 4" zip ties (1000 or so will do) - Fry's $9.99
- Adhesive Cable tie downs - Fry's $7.99
- Double sided tape - Lowe's $5
- Furniture slides - Harbor Freight Tools $5
Tools:
- Table Saw
- Circular Saw
- Jigsaw
- Router with 1/16" slot cutting bit
- Plywood blade
- Guides for circular saw
- Safety glasses
- Combination square
- Protractor
- Drill and/or Drill Press
- 1 1/8" Spade or Forstner bit
- 2" Paint Brush
- Sander
- Wire Stripper
- Diagonal cutting pliers (spring loaded works best)
- 3rd hand tool
- Soldering iron (soldering station with thermal control preferred)
- Solder (60/40 or 63/37 is ideal—ROSIN CORE ONLY!)
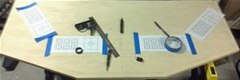
Step 3 Cut Out Control Panel
Use the 2' x 4' x 3/4" Birch or Oak plywood sheet to cut out the control panel.
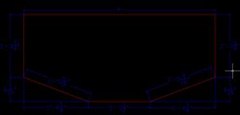
Click on image to see dimensions. Actual cuts are marked in red. Dimensions marked in blue.
Step 4 Determine Button & Joystick Layout

I utilized this template to set up my buttons and joystick. This has been modified from the template available here.
Print out 4 full-sized sheets of this template by clicking on the image and saving. Figure out how you want to lay this out on your panel. It is up to you where to install the buttons and their relative positions.
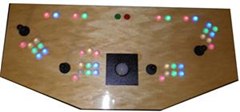 I approximated the angle of the two end players. The trackball is centered with respect to the 4' edge on top. I made all the pencil markings on the underside of the panel so as not to damage the top surface when it comes time to finish.
Use a 1 1/8" spade bit to drill button holes, 1 1/4" spade bit to make joystick holes. Use a jigsaw to cut out the square mounting hole for the trackball.
Sand the top side of the panel with 220 grit sand paper. Go with the grain, and the resultant surface should be smooth to the touch with no scratch marks. Use mineral spirits or a tack cloth to clean off the saw dust thoroughly.
 Here is the layout process: I did everything on the underside of the panel. This is so the pencil marks do not damage the thin birch veneer of the visible surface. I used a spring loaded center punch to mark the center of each hole. Drill part way through from the bottom, make sure to have a scrap piece of board underneath to prevent shredding of the top surface. Once all holes are drilled part way through, flip panel over and complete cut from the top side. Make sure your drill bit is cool to the touch and level. Allow tools to cool between drilling.
Tips
- Make sure to thoroughly clean the wood surfaces. Residual sawdust will result in an uneven finish.
- Apply light, thin coats of finish. Allow to dry per material instructions, and lightly sand with 220 or higher grit sandpaper.
- Apply another coat of finish. I utilized 8 layers for the panel top to get a nice and glossy durable finish. This will help, since this surface is going to be constantly used.
Step 5 Cut Out Box Assembly

Click on the image to the left for cut dimensions for the box. The two upper pieces are the left and right sides.
The center piece is the back board. The lower boards are front left, front center, and front right walls.
These pieces are cut from the 4' x 8' x 3/4" plywood. You will need to cut two 4 1/2" strips. The box walls should be 4 1/2" tall. This allows proper clearance for the buttons, and especially the trackball.
Sand the front faces of each piece of the box assembly, similar to the process above.
Turn drilled panel over, and assemble box into place. Boards should rest 1/4" away from outer edge. Use 5/8" square dowels with wood glue and brads to fasten walls to panel. I used a 18 gauge, 1 1/4" Air Brad Nailer to take accomplish this.
Step 6 Cut Out Panel Box Bottom
Measure the inside dimensions of the assembled box, and cut the corresponding shape out of one of the MDF boards. Utilize a piece of scrap board to measure the height you will need to set the square dowels on the inside perimeter of the box. This will support the box, and allow you to screw the panel shut. I did not provide the measurements for this step because the assembled box may not be perfectly symmetrical. In the end, it is barely noticeable, but you want to make sure you don't break the joints apart.
Step 7 Install Buttons, Joysticks & Trackball
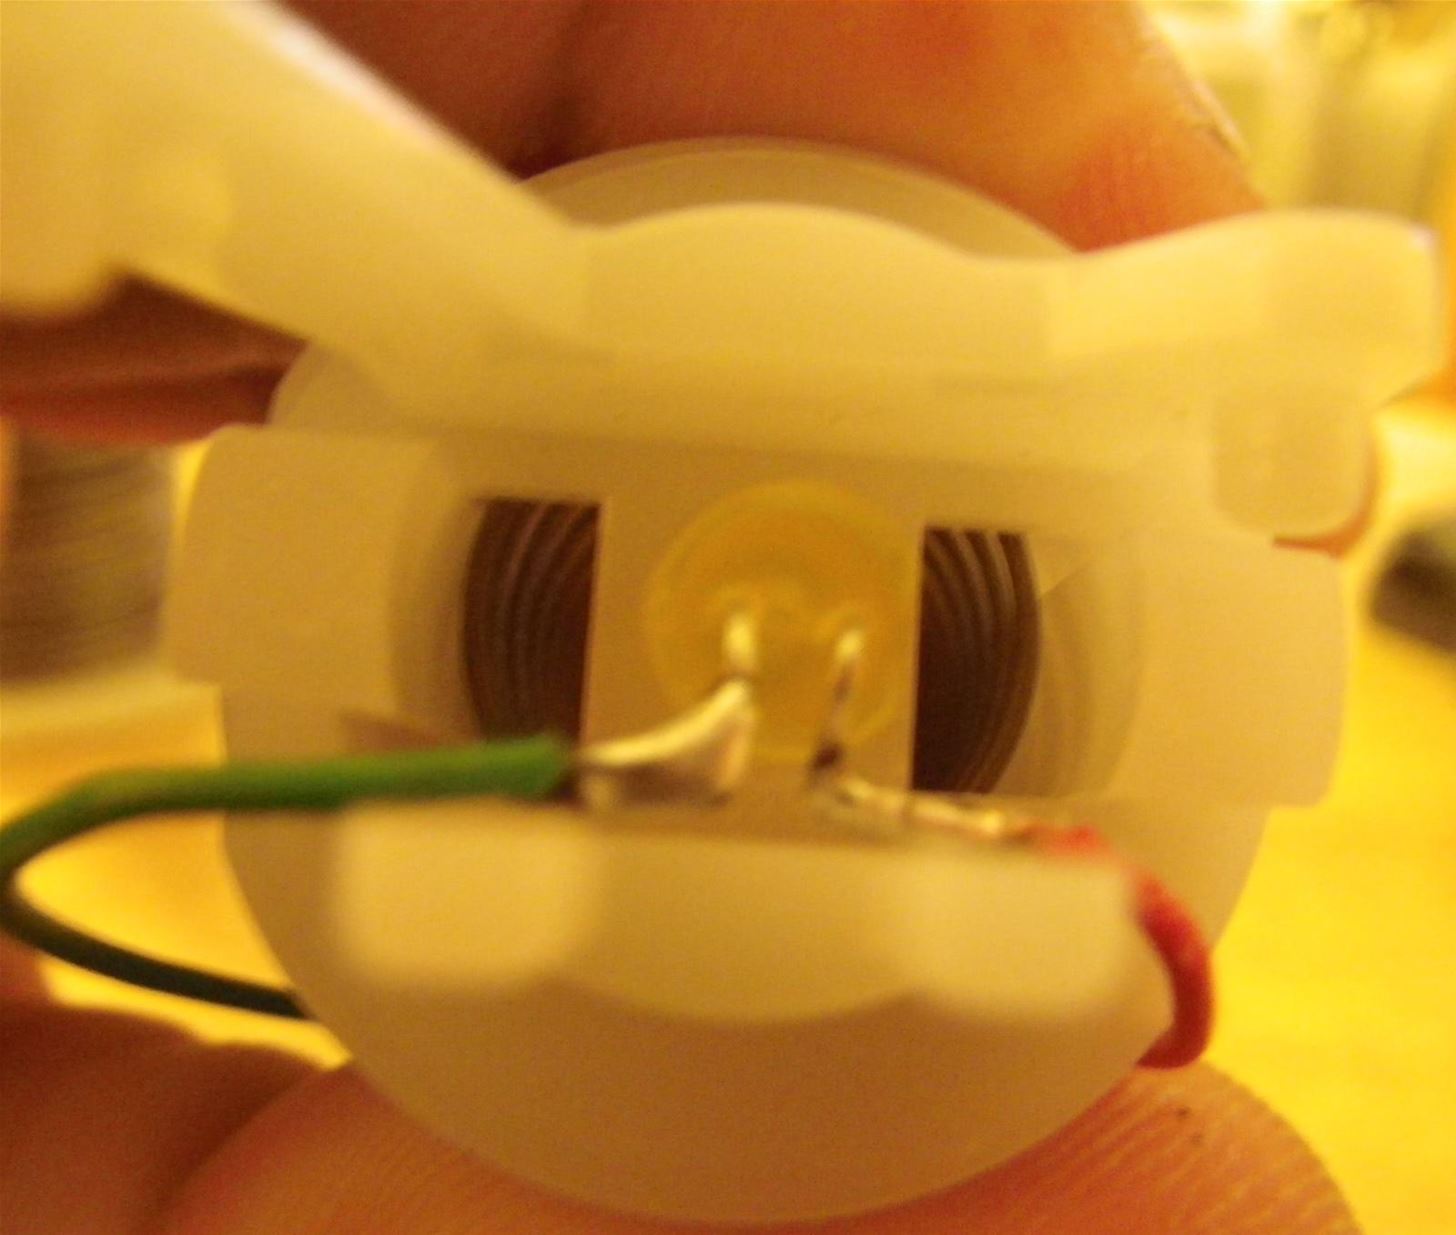
The new Electric Ice 2 Illuminated push buttons essentially come in four parts. There is the button itself, the nut, the switch holding assembly, and the switch itself. You will need to find an angle that best supports the switch retainers without interfering with each other. Tighten the nuts with a nut wrench. Verify that all the retainers will clip into place without crowding each other out.
The joysticks can be mounted either using carriage bolts with a through hole drilling the intersecting corners of the button template, or you can use a blind screw method which leaves a cleaner overall appearance. I used a 10-32 x 1/2" nut from Home Depot to drill a hole halfway through the panel from the bottom side of the panel. I used a 10-32 x 3/4" machine screw to screw the joystick base into the nuts.
Step 8 Install LEDs
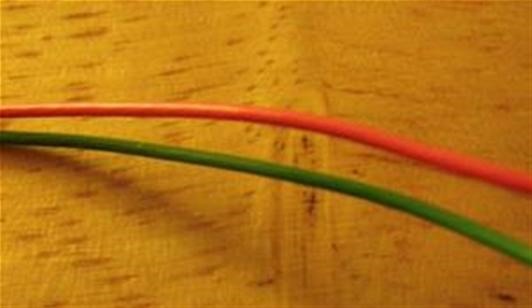
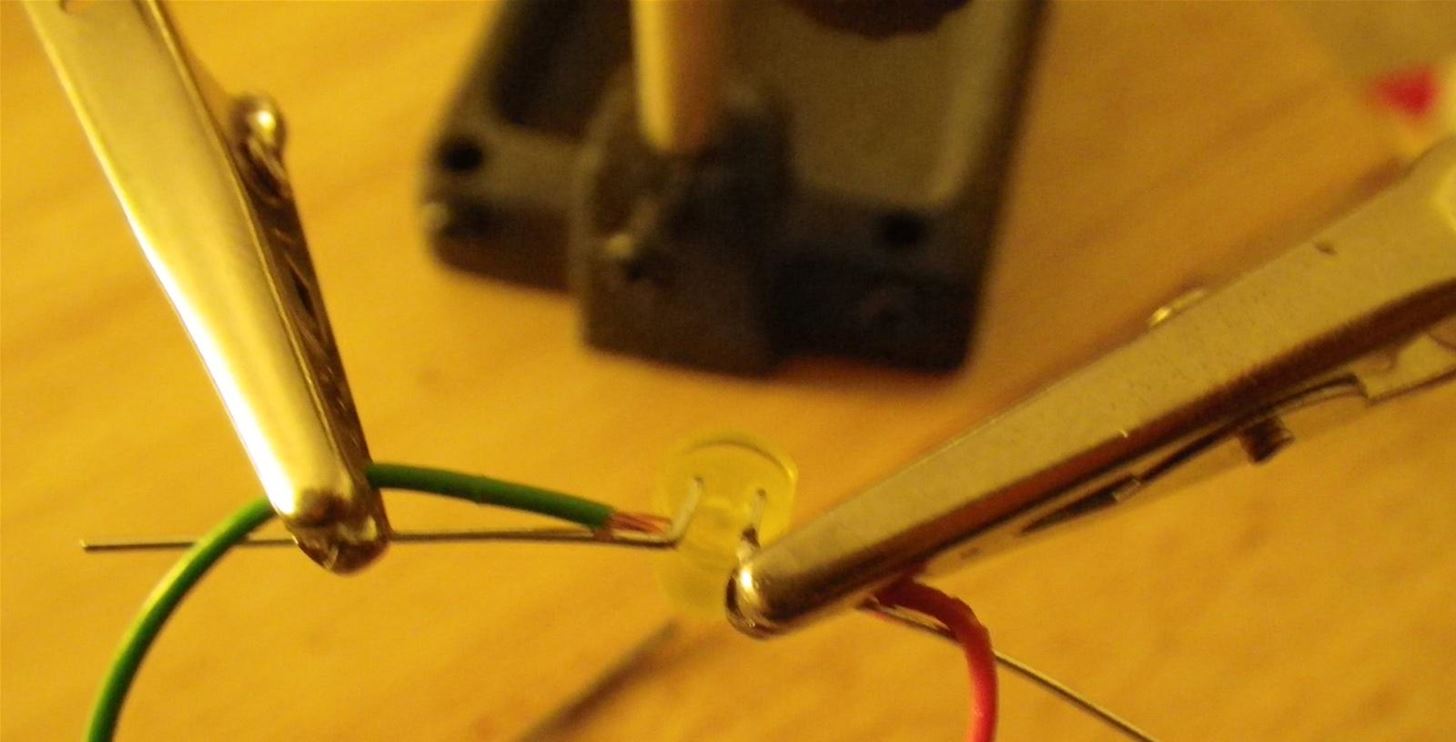
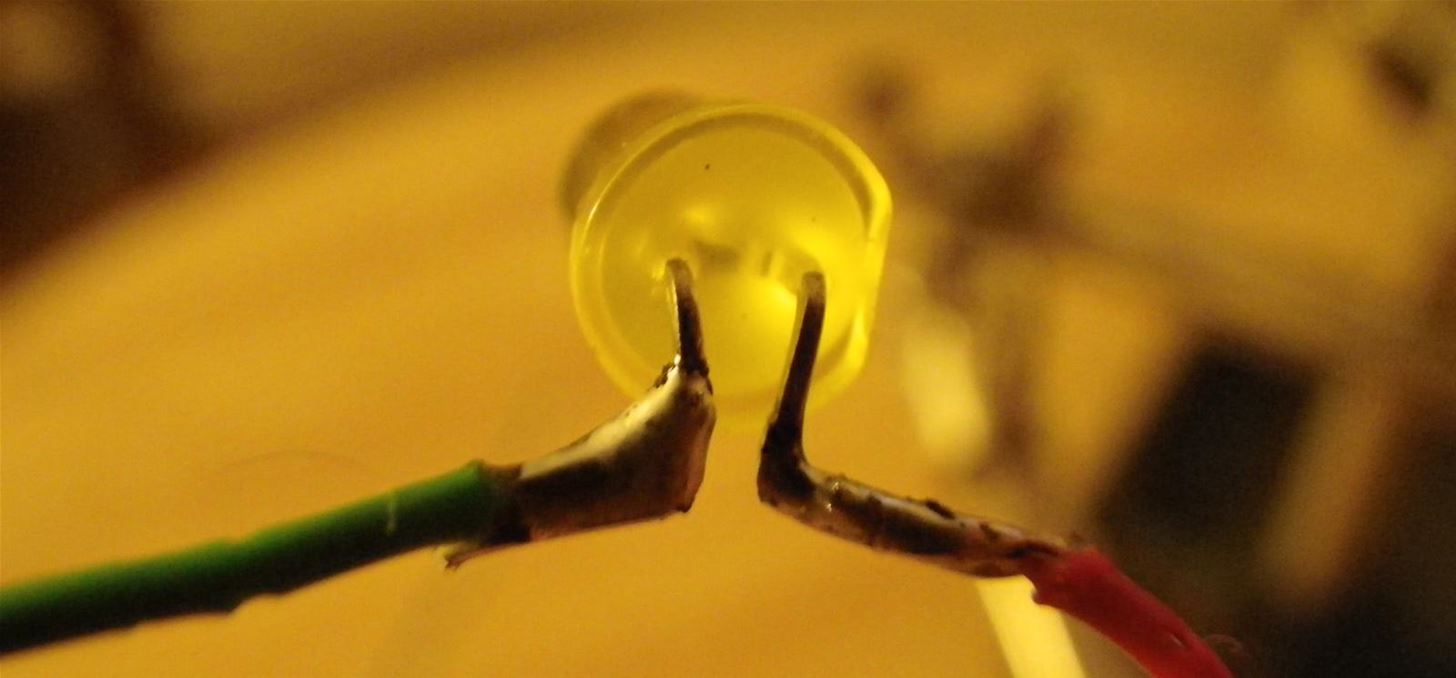
 There are several methods to install the LEDs. I found the simplest method was to bend the leads down, and then use needle nose pliers to bend 90 degree angles into the leads. The longer of the 2 leads is the positive (+). Solder a red wire to this. Repeat this for the shorter lead with a green wire. The color coding helps to keep the electrical connections in order. I soldered the resistor to the terminal end of the green wire so there is a solid lead to insert into the LED-Wiz.
Warnings
- Do not apply voltage to the LEDs without using the supplied resistor.
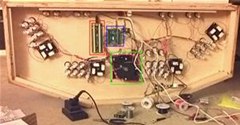
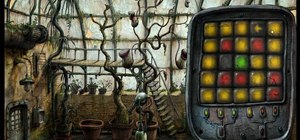
Here is an overview of the completed panel. Red highlight is the I-Pac4, Blue outline shows the LED-Wiz, and the Green shows the bottom of the trackball.
Also shown is the soldering station, solder, third hand tool, needle nose pliers, spools of wire and zip ties.
Note:
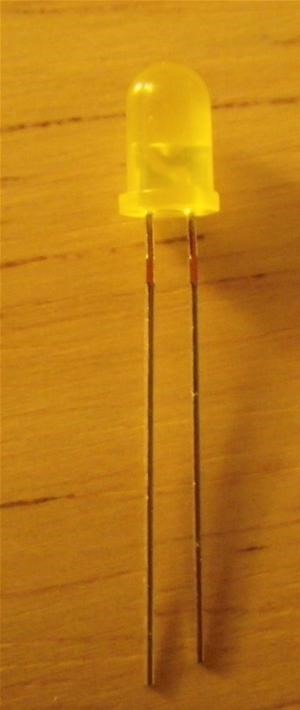
- There are two flattened sections on the leads. Also note that one lead is longer than the other. The longer lead will be the common positive (+) terminal. We will solder a red wire to the (+) lead.
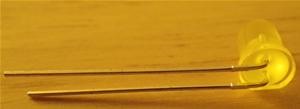
I have bent the leads at the base of the LED to 90 degrees.

Step 9 Solder Wires to LEDs
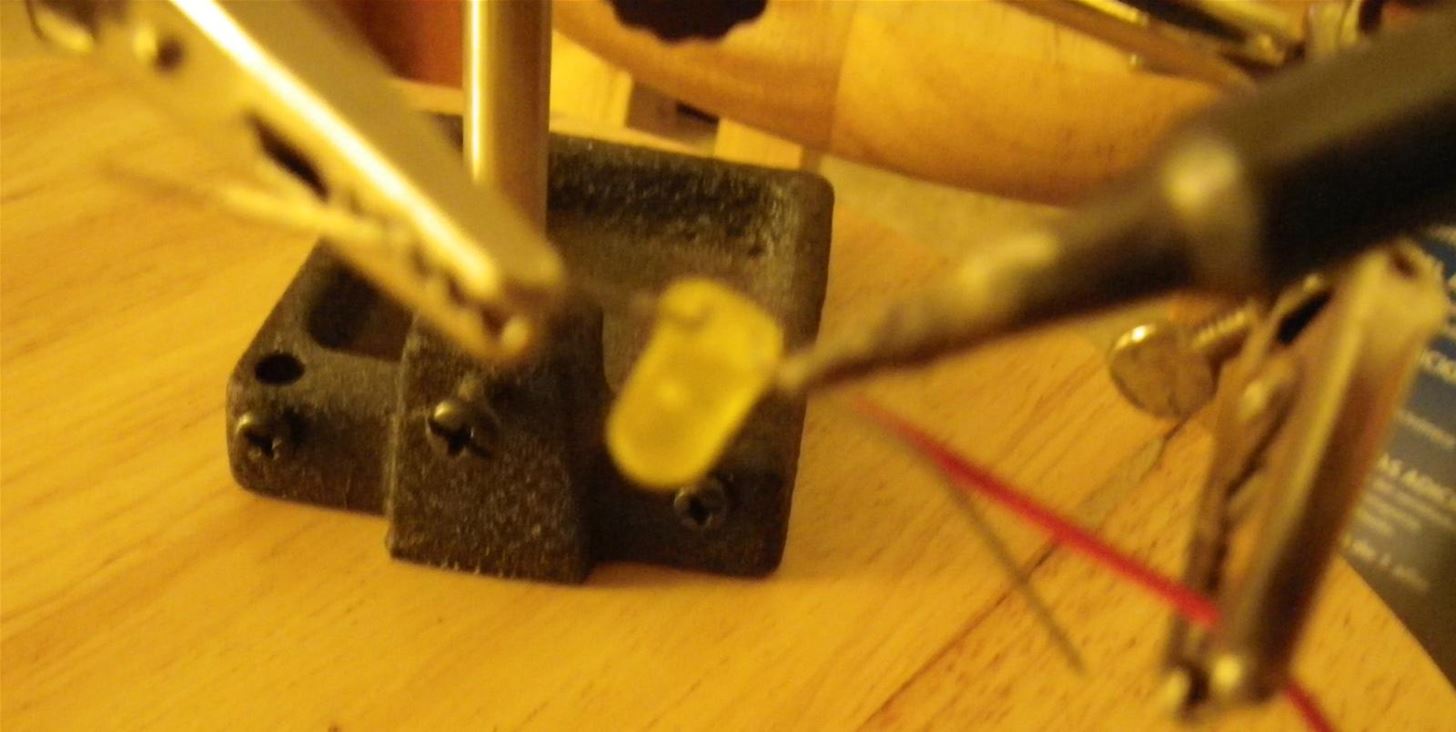
You can wrap the wire around the lead and solder. I use a third hand tool to keep the leads stable, freeing both hands to hold soldering iron and feed solder. This also prevents you from burning the living crap out of your finger tips.
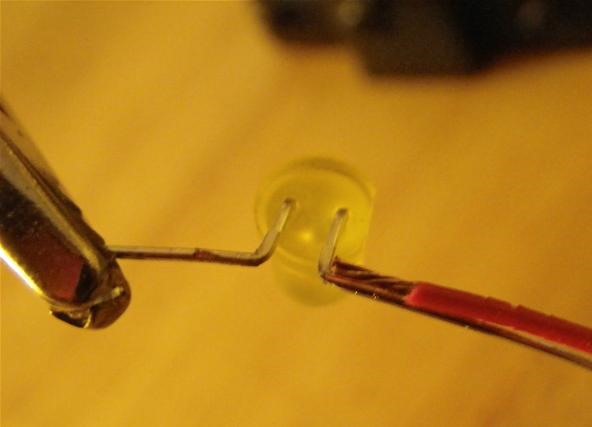
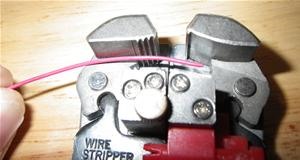
Alternate soldering method:
- If you have more than a few LEDs, this is the recommended way to solder: Strip 1/8" insulation, and use a third hand tool to hold the wire to the lead like the picture and solder. This results in a flatter and more consistent solder joint. The important thing is to use the third hand tool to establish a steady and good mechanical connection so you don't get a cold solder joint.
Step 10 IIInstall Resistor & Connect to LED Wiz
Solder accompanying resistor to the other end of the green wire, and connect to the appropriate terminal on the LED Wiz. I used the following Scheme: I placed player 1 and 2 in the center position because most games are 2 players. We use an alternate map for 4 player games.
P1 B1 = 1; P1 B2 = 2; P1 B3 = 3; P1 B4 = 4; P1 B5 = 5; P1 B6 = 6; P1 B7 = 7;
P2 B1 = 8; P2 B2 = 9; P2 B3 = 10; P2 B4 = 11; P2 B5 = 12; P2 B6 = 13; P2 B7 = 14;
Control panel layout:
__________________________________________________________
| |
| Player 3 Player 1 Player 2 Player 4 |
| |
\________________________________________________________/
Step 11 Install Microswitches
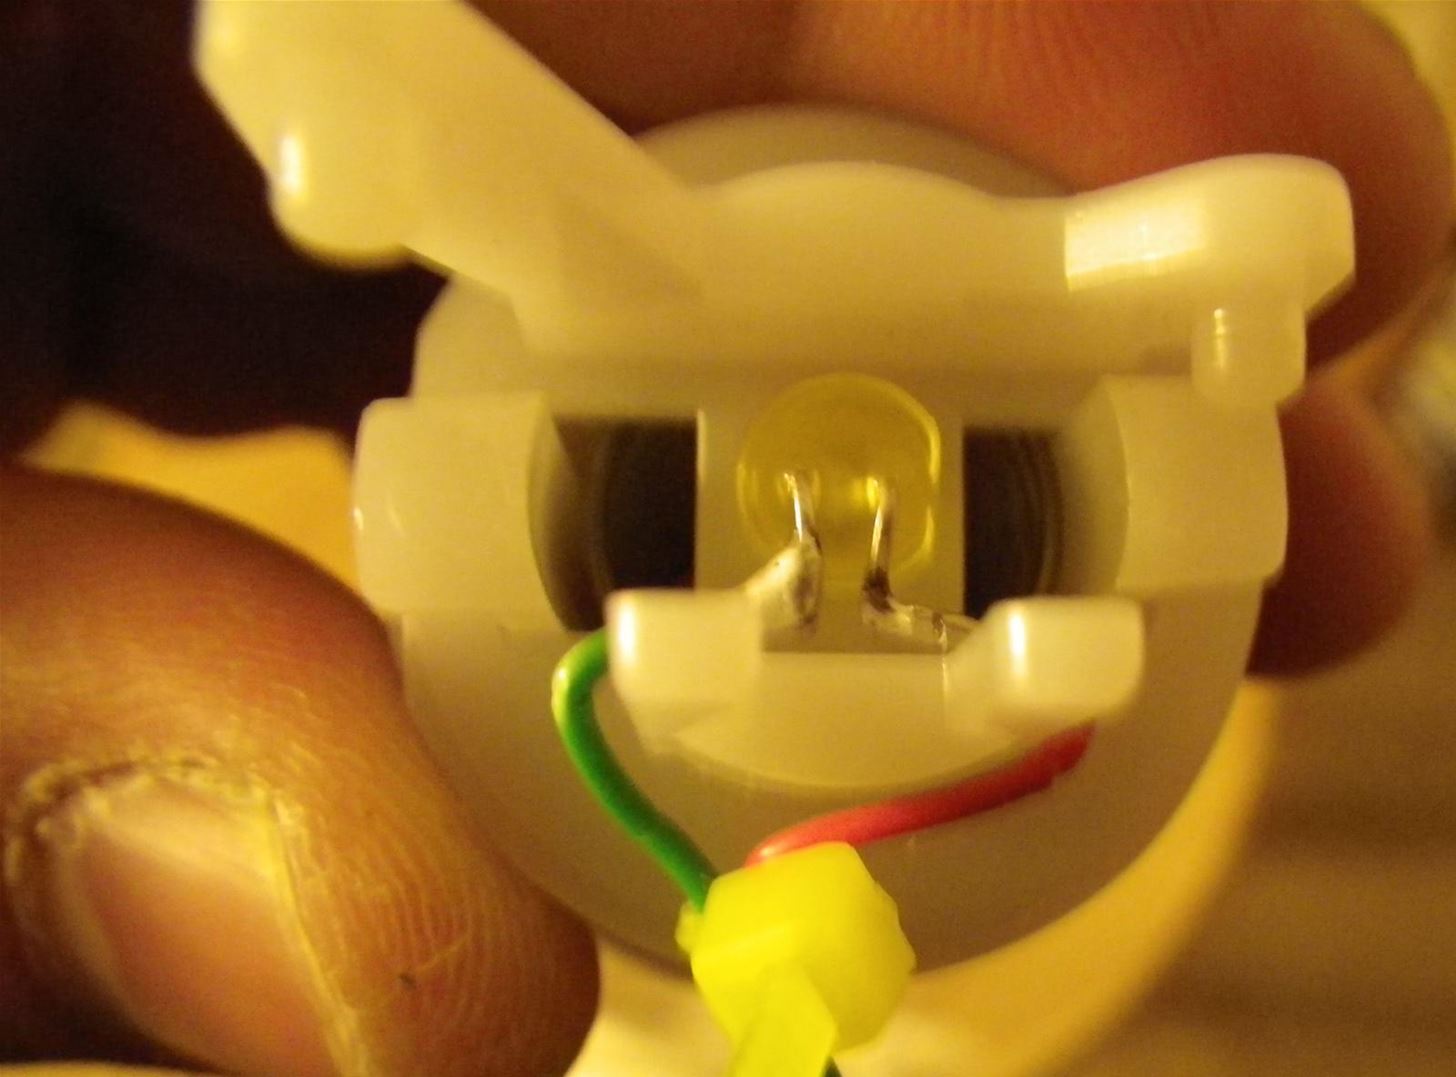
After all the LEDs are installed, we will install the microswitches into the buttons. We will wire all the COM terminals together. Crimp the 0.187" quick disconnects onto the wires and create a "chain." Connect the terminal end of this to the GND/COM terminal on the I-Pac4.
Wire each microswitch to the appropriate pin on the I-Pac4.
In the next how to, we will construct the pedestal.
Tips
- With the Electric Ice 2 buttons, I have noticed that the switches may wiggle a bit too much and fail to fire properly when pressed. I used a 4" zip tie to tie under the COM contact on the switch and under and around the stem on the button. This stabilizes the switch a great deal.
Tune in for Part II tomorrow!
Just updated your iPhone? You'll find new emoji, enhanced security, podcast transcripts, Apple Cash virtual numbers, and other useful features. There are even new additions hidden within Safari. Find out what's new and changed on your iPhone with the iOS 17.4 update.


8 Comments
I just started building a stand up arcade cabinet!
awesome—you should make a how-to as well. or send in pics when it's finished.
(@Walter—great tutorial! Thanks for sharing)
Looks very nice so far, look forward to seeing part 2!
wow this is awesome
I'm very confident that you could cut material costs if you didn't go with birch or oak wood...even if it is veneered. Other than cosmetic preferences for that look of wood, just purchase the cheaper plywood and paint it later. Heck, my personal preference would to paint on some retro designs!
I just research info like this so I could build my own arcade machine. This is A very good start. Thanks for writing this article.
I know this is a really old post so I might not get an answer but I've been looking everywhere for a tutorial like this but a few of the images are really, really dark so I cant see the dimensions. Am I doing something wrong that I cant see them? Thanks.
Share Your Thoughts